How to Grow Dill
This post may contain affiliate links, which means that I may receive a commission if you make a purchase using these links. As an Amazon Associate I earn from qualifying purchases.
Looking for a versatile herb that adds flavor to your meals and pickles? Our guide to growing dill has you covered! Learn how to grow dill and enjoy the fragrant leaves, flowers, and seeds.
In this article, we’ll cover everything you need to know to grow dill successfully, including selecting the right location, preparing the soil, sowing, caring for your plants, and harvesting both foliage and seeds. So let’s get started!
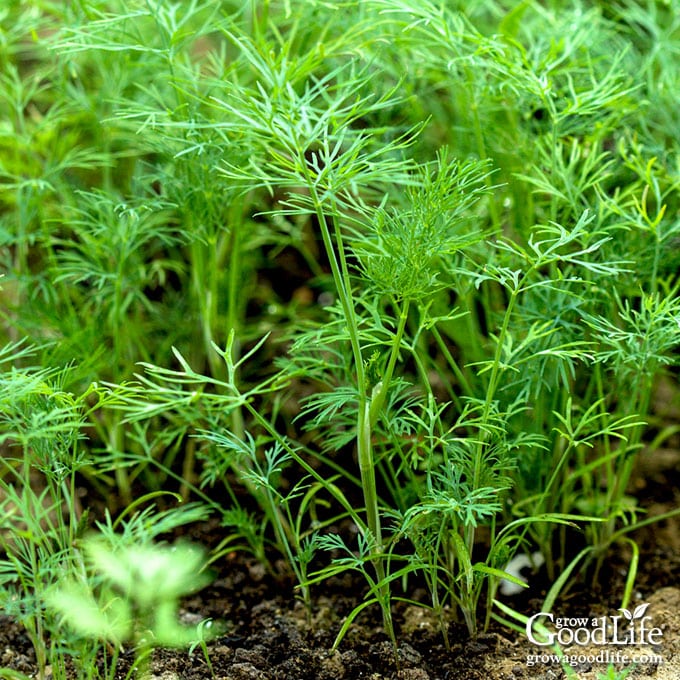
Dill is a versatile herb that can elevate your garden and cooking experiences. With its flavorful leaves, delicate blossoms, and distinct oval-shaped seeds, dill offers a range of culinary possibilities. The feathery dill weed, known for its fresh or dried form, adds a unique touch to dishes like fish, poultry, and soups, boasting a slightly sweet flavor with hints of anise and citrus.
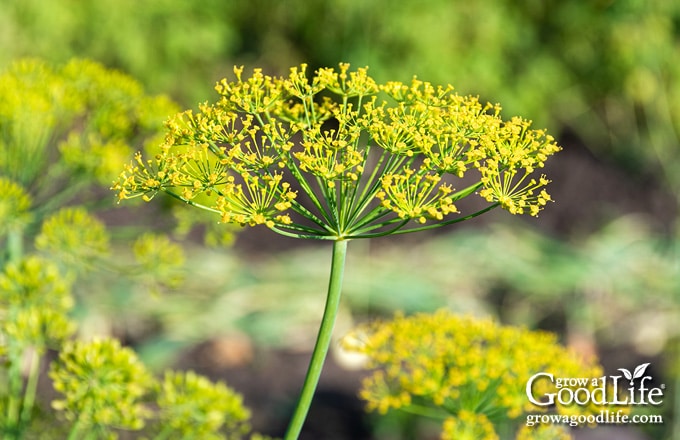
Beyond its leaves, dill flowers are visually captivating, attractive to pollinators, and serve as edible delicacies. These blossoms contribute a delicate sweetness, similar to the foliage but with a slightly stronger taste, making them perfect as garnishes or additions to salads and various culinary creations. Furthermore, dill flowers find their place in the cherished realm of dill pickles.
Delving into the dill plant, we encounter its small, oval-shaped seeds—a true culinary treasure. With a slightly bitter, tangy flavor and a robust aroma akin to caraway seeds, dill seeds take center stage in numerous cuisines, from Indian and Middle Eastern to European. In addition, they lend their distinct character to pickling spices, bread, potato dishes, soups, and beyond.
Not only does dill delight our taste buds and enhance our culinary adventures, but it also acts as a beacon for beneficial insects, fostering a thriving garden ecosystem.
This comprehensive guide shares tips for successfully growing dill in your home garden. Whether your interest lies in the leaves, blossoms, or seeds, we cover every aspect—from choosing the perfect location and soil to planting, nurturing, and ultimately harvesting your dill foliage, flowers, and seeds. We even explore preservation methods to ensure your dill can be enjoyed throughout the year. So, let’s dive in and discover the joys of growing your own dill!
About Dill
Dill (Anethum graveolens) is an annual herb belonging to the Apiaceae family, which also includes carrots, parsley, fennel, and celery. It is believed that dill originated in the eastern Mediterranean region and western Asia and was likely spread throughout the world via trade routes.
The ancient Egyptians, Greeks, and Romans used it for various purposes, including flavoring food, medicine, and perfumes. In medieval Europe, dill was considered a magical herb that could ward off evil spirits and protect against witchcraft. It was also used in cooking, particularly pickling, and as an herbal remedy to aid digestion and reduce bad breath.
During the 17th century, dill was brought to the United States by European settlers and was quickly adopted as a popular herb grown in kitchen gardens.
Common Dill Varieties
There are several common varieties of dill that are grown for their distinctive flavors and uses. Here are a few examples:
- Mammoth Dill is known for its large, flavorful leaves, flowers, and seeds. It is often used in pickling and canning.
- Greensleeves Dill is a compact variety of dill that is great for growing in containers. The plants are slow to bolt, and the leafy foliage has a delicate flavor that is perfect for fish and vegetable dishes.
- Bouquet Dill is ideal for gardeners who want to produce dill seeds. This variety bolts quickly, producing large flowers that attract pollinators before maturing into flavorful seeds commonly used in pickling and seasoning blends.
- Long Island Mammoth Dill is similar to Mammoth dill but produces larger plants with longer stems. It is often used for making dill pickles and flavoring soups and stews.
- Tetra Dill is a dwarf variety that is compact and bushy, and produces abundant foliage. The plants are slow to bolt or turn to seed, providing plenty of greenery.
These are just a few examples of the many different varieties of dill that are available. Each variety has its own unique flavor and aroma. Some are taller than others as well, so it’s worth experimenting with different types to find the ones you like best.
Tips for Growing Dill
Growing dill at home offers a range of benefits. For one, it’s a great way to have fresh dill whenever you need it for meals. It also allows you to avoid the pesticides and preservatives often found in store-bought herbs. Furthermore, including dill in your garden attracts beneficial insects to help with pollination and pests.
This section explores tips to help you grow dill, including when to grow, selecting the ideal garden location, how to sow seeds, care for the plants, and even how to grow dill in pots. These tips will set you on the path to growing healthy and thriving dill plants.
When to Grow Dill
Dill is a cool-season herb that prefers mild temperatures. Plan on growing dill in the cooler weather of spring and fall.
The ideal time to grow dill will vary based on your area’s last estimated frost date. You can determine your last frost date by reaching out to your local extension office (search for “extension office near me”) or by using online resources like PlantMaps.com, where you can enter your zip code to obtain this information. You can learn how to create a seed starting calendar in this article: How to Develop a Seed Starting and Planting Schedule.
You can plant dill in early spring after the danger of heavy frost is past and once the soil has drained and warmed to around 60˚F. The early start allows the plants to establish before the onset of hot summer temperatures.
Then succession sow seeds every 3 to 4 weeks for a continuous foliage harvest. The plants will bolt once the weather warms, sending up flower stems that will bloom and produce seeds. Start sowing again in late summer and early fall for a fall to winter crop.
Garden Selection
Selecting the right location for growing dill and preparing the soil before planting will ensure its healthy growth and abundant harvest. Consider the following factors when choosing the ideal spot for your dill plants:
- Sunlight: Dill thrives in full sun, so choose a location that receives at least 6 to 8 hours of direct sunlight daily. Adequate sunlight promotes vigorous growth and enhances the flavor and aroma of the foliage.
- Soil Quality: Dill prefers well-draining soil with a pH range of 5.5 to 6.5. While dill can tolerate a wide range of soil types, loamy soil enriched with organic matter yields the best results. Avoid heavy clay soil that tends to retain moisture, as it may lead to root rot.
- Space: Depending on the variety, dill plants can grow up to 2 to 4 feet in height, so ensure you have enough room for their vertical growth without overshadowing other nearby plants.
- Protection from Strong Winds: Dill plants have delicate stems that can be prone to breakage in strong winds. Consider planting dill near a fence, wall, or other structures that can offer some protection from gusty winds.
- Companion Planting: Dill is a beneficial companion plant for certain vegetables like cabbage, lettuce, and cucumbers, as it can help repel pests and attract beneficial insects. Consider the potential companion plants when choosing the location for your dill.
How to Plant Dill
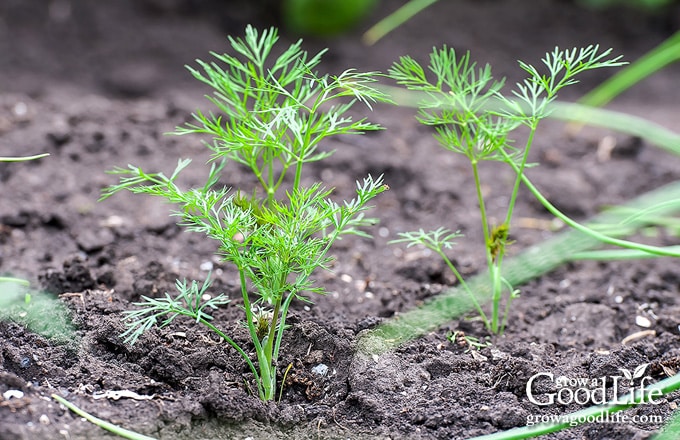
Dill is known to have a long taproot, which makes it somewhat challenging to transplant seedlings successfully. Purchased seedlings are often too developed to transplant without stressing the plants. Stressed plants will only end up bolting prematurely.
Therefore, I recommend sowing dill seeds directly into the garden or pot where they will grow to allow for undisturbed root establishment, resulting in healthier growth and development.
While it is a little more difficult, you can sow dill indoors and successfully transplant the plants into the garden. The trick is to minimize disturbance to the roots when transplanting.
Using soil blocks instead of seedling flats helps because the entire block is planted at transplant time. However, if you use flats, transplanting the seedlings when they are still young and have not developed extensive roots will help prevent stress on the plant.
In this section, we’ll cover two methods of planting dill: starting seeds indoors and transplanting seedlings and direct sowing seeds in the garden.
Starting Dill Seeds Indoors
Start dill seeds indoors about 4 weeks before your last frost date. By following these steps, you can successfully sow dill seeds indoors, ensuring healthy seedlings are ready for transplanting when outdoor conditions are favorable:
- Choose appropriate containers: Consider using soil blocks or newspaper pots to minimize transplant shock. If using regular seed starting flats, fill with damp seed starting mix, leaving about a half-inch of space from the top.
- Sow the seeds: Place several dill seeds on top of the soil, spacing them out evenly. Cover the seeds with approximately 1/8 inch of soil to ensure proper germination.
- Provide moisture: Mist the soil surface with water to keep it moist but not waterlogged. Cover the containers with a humidity dome to create a humid environment that retains moisture. Mist as needed to keep the soil damp.
- Optimal temperature: Dill seeds germinate best in temperatures ranging from 60 to 65˚ F. Find a warm location in your home or use a seedling heat mat to maintain the desired temperature for successful germination. Seeds should germinate in 10 to 14 days.
- Adequate lighting: Place the containers under grow lights once the dill seeds sprout and develop into seedlings. Adjust the lights so they are positioned about 2 to 3 inches above the tops of the plants. This will provide sufficient light for healthy growth.
- Thinning: As the dill seedlings grow, they will compete for space and resources. To ensure healthy growth, thin out the weaker seedlings, leaving the strongest and healthiest ones. To thin, snip the unwanted plants at the soil level. This allows the remaining seedlings to have sufficient room to develop and reduces overcrowding.
- Watering: Water the seedlings gently and regularly, keeping the soil consistently moist but not waterlogged. Avoid overwatering, as it can lead to root rot.
Transplanting Seedlings
Before transplanting the dill seedlings outdoors, gradually expose them to outdoor conditions. Start by placing them outdoors in a sheltered spot for a few hours each day, gradually increasing the time and exposure to direct sunlight over a period of 7 to 10 days. You can learn more about How to Harden Off Seedlings here.
Once your dill seedlings have been hardened off, it’s time to transplant them into their permanent location. Here’s how to ensure a successful transplant:
- Prepare the garden bed: Before transplanting, remove any weeds and work 2 to 3 inches of finished compost into the soil. If the soil is dry, water it thoroughly the day before planting to ensure adequate moisture for the seedlings.
- Choose the right timing: Late afternoon or evening is ideal, as it allows the seedlings to adjust to their new surroundings without the additional stress of direct sunlight. Transplanting during cooler hours also helps reduce water loss and supports better establishment.
- Dig planting holes: Dig holes deep and wide enough to accommodate the root system of the dill seedlings. Space the holes according to the recommended spacing for dill plants, typically around 3 to 6 inches apart.
- Transplant with care: Carefully remove the seedlings from their containers or seedling trays so you don’t damage the roots. Place each seedling into a planting hole, ensuring that the top of the root ball is level with the soil surface. Then fill with soil and gently tamp it down.
- Water thoroughly: After transplanting, water the seedlings well to settle the soil around the roots and provide moisture for their initial growth. This helps to minimize transplant shock and promote healthy establishment.
- Consider frost protection: Dill seedlings that have been properly hardened off can tolerate light frosts. However, if heavy frost is expected, you may want to provide temporary protection by covering the transplanted seedlings with row covers or a lightweight fabric to prevent damage.
Following these steps and providing proper care will give your transplanted dill seedlings the best chance of thriving in their new garden location.
Direct Sowing Seeds
Choose the appropriate time for sowing dill seeds based on your climate and the guidelines mentioned earlier. You can begin sowing dill seeds in the garden in early spring once the soil has drained and warmed to around 60˚F. Here are the steps for directly sowing dill seeds in your garden:
- Prepare the soil: Remove any weeds from the growing bed, and work in a 2 to 3-inch layer of finished compost into the soil. This enriches the soil with essential nutrients, promotes beneficial microbial activity, and enhances overall soil structure.
- Sow the seeds: Dill seeds are small and should be sown shallowly. Sow dill seeds 1/4 to 1/2 inch deep and 3 to 6 inches apart. Then cover with a thin layer of soil, and pat down the ground lightly to ensure good seed-to-soil contact. Space the rows about 12 to 18 inches apart to allow the dill plants room to grow and spread.
- Water: After planting, water the area gently but thoroughly, ensuring the soil is evenly moist. Keep the soil consistently moist during the germination period, which typically takes 10 to 14 days.
- Thin the seedlings: Thinning is usually unnecessary if you space your seeds 3 to 6 inches apart. However, if the plants are growing close together, thinning helps provide adequate room for growth and airflow. Use scissors to cut the unwanted seedlings at the soil level.
Growing Dill in Pots
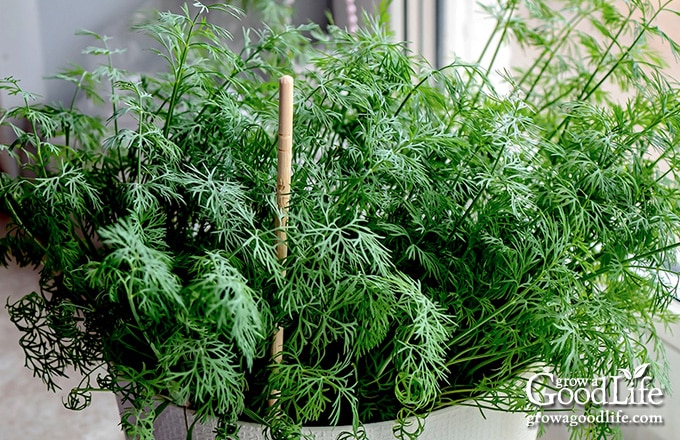
Dill can be successfully grown in pots, making it a versatile herb that can thrive even in small spaces such as balconies, patios, or windowsills. It can even grow indoors on a sunny windowsill.
When selecting a dill variety for container gardening, consider the available space, container size, and the height of the plant. Compact and dwarf varieties are generally better suited for smaller containers, while taller varieties can become top-heavy and will benefit from a larger container to keep them anchored. Tall dill can be staked to keep them upright.
Here are some tips to help you grow dill in containers:
- Selecting the right pot: Choose a pot with a diameter of at least 12 inches to allow enough space for dill’s deep root system. Make sure the pot has drainage holes to prevent waterlogging.
- Soil preparation: Use a well-draining potting mix rich in organic matter. Pre-moisten the soil and let it soak up enough water so it is damp before filling the pot.
- Planting dill: Sow dill seeds directly in the pot or start with small seedlings. If sowing seeds, scatter seeds about 3 to 6 inches apart. Then cover with a thin layer of soil, pat lightly to ensure good seed-to-soil contact, and mist the soil surface with water to keep it moist.
- Sunlight requirements: Place the pot in a location that receives full sun for at least 6 to 8 hours a day.
- Watering: Water the dill thoroughly after sowing, and keep the soil moist until the plants are established. Then let the top inch of soil dry out between watering sessions.
- Fertilization: Feed the container plants with an organic liquid fertilizer, such as fish emulsion once a month during the growing season to promote healthy growth. Follow the instructions on the fertilizer package for proper dosage.
How to Care for the Plants
Dill is a wonderfully low-maintenance herb that thrives in many garden settings. However, a little extra attention can go a long way in ensuring your dill grows healthy and vibrant. Here are tips for caring for your dill plants for optimal growth!
Watering
Dill is a resilient herb that prefers slightly drier conditions. After planting or sowing dill seeds, water as needed to keep the soil evenly moist until the plants become established. This helps encourage strong root development supporting healthy growth.
Once your dill plants are established, they thrive best when the soil is allowed to dry between waterings. To determine if it’s time to water, check the top inch of soil. If it feels dry to the touch, it indicates that your dill plants would benefit from watering.
Avoid overhead watering, as it can promote fungal diseases. Instead, direct the water at the base of the plant to minimize moisture on the foliage and let the moisture soak down into the roots. Overwatering may lead to poor growth or fungal diseases.
Weeding
Weeds can compete with dill plants for nutrients, water, and sunlight, inhibiting their growth. Therefore, regular weeding will help you maintain a weed-free environment around your dill plants. Remove weeds carefully by hand, being mindful not to disturb the dill’s shallow roots. You can learn more about controlling weeds in this article: Natural Weed Control in the Garden.
Mulching
Mulching benefits dill plants in many ways, including regulating soil temperature, conserving moisture, and suppressing weed growth. Apply a layer of organic mulch, such as straw, compost, or shredded leaves around the base of your dill plants, leaving a small gap around the stem to prevent rot. You can learn more about How Organic Mulch Helps Your Garden in this article.
Fertilizing
Dill plants are generally low-maintenance when it comes to fertilization. However, if your soil is poor, providing some nutrients can promote healthy growth and enhance the flavor of the foliage. You can apply a slow release organic fertilizer once or twice during the growing season. Follow the manufacturer’s instructions for application rates and timing, and avoid over-fertilization.
Pruning
Regular pruning helps maintain the plant’s shape, encourages bushier growth, and prolongs the harvest. Trim the dill plants regularly by snipping off the top portion of the stems. This practice, known as “pinching,” helps promote branching and a bushier habit. Use sharp, clean pruners or your fingers to gently pinch off the stem tips, just above a set of leaves or leaf nodes.
As dill plants mature, they develop tall flower stalks. While these flowers attract beneficial insects and can be harvested, allowing all the flower stalks to grow can divert energy away from leaf production.
To prolong the growth of flavorful leaves, remove the flower stalks before they fully develop. Simply use clean garden shears or scissors to cut the stalks close to the main stem. You can leave a few intact to enjoy the blossoms and to allow for seed production if desired.
Dealing with Pests and Diseases
Dill plants are relatively resistant to pests and diseases. However, they can occasionally encounter some common issues.
The most common pest you may encounter is the swallowtail caterpillar. Dill is a preferred host plant for swallowtail butterflies. While they may be considered pests to some gardeners due to their voracious appetite, they are actually beneficial insects in the larger ecosystem.
The caterpillars feed on the dill leaves and develop into butterflies that will continue to visit your garden and pollinate your plants. I always plant extra to share with the butterflies.
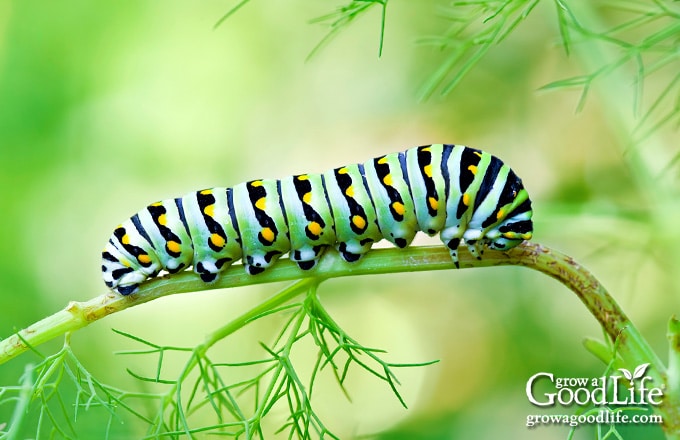
Regularly inspect your plants for signs of pests or diseases. Here are some common problems you may encounter and their organic solutions:
- Caterpillars: Apart from swallowtail caterpillars, a few other types of caterpillars may feed on dill plants, such as parsley worms and cabbage loopers. You can use row covers to prevent the butterflies from laying eggs and handpick the caterpillars off the plants.
- Slugs and Snails: These slimy creatures can munch on dill leaves, leaving behind holes and damage. To deter slugs and snails, create barriers around your plants using copper tape or diatomaceous earth. You can also handpick them in the evenings when they are most active or set up beer traps to attract and drown them.
- Powdery Mildew: Powdery mildew is a fungal disease that appears as a white, powdery coating on dill leaves. To prevent powdery mildew, provide adequate spacing between plants for good air circulation. If powdery mildew does appear, remove affected leaves or entire plants to avoid spreading the fungus.
- Downy Mildew: Downy mildew is a fungal disease that can affect dill plants, causing yellowing and wilting of leaves. To prevent downy mildew, ensure good air circulation around the plants by providing adequate spacing and avoiding overhead watering. If downy mildew does appear, remove and destroy affected plant parts to prevent further spread.
Preventing overcrowding and providing good air circulation can help reduce the risk of fungal diseases. While creating a diverse and balanced ecosystem in your garden by practicing crop rotation, attracting beneficial insects, and practicing good sanitation will also help keep pest populations in check.
Dill as a Companion Plant
Dill is not only a flavorful herb but also a beneficial companion plant in the garden. By strategically planting dill alongside other crops, you can enhance their growth, attract beneficial insects, and repel pests. Here are some benefits of using dill as a companion plant:
- Attract Beneficial Insects: Dill flowers attract bees, butterflies, lacewings, and predatory wasps, which aid in pollination and provide natural pest control.
- Enhance Flavor: Dill’s aromatic foliage enhances the taste of vegetables like cucumbers, tomatoes, and lettuce, creating delicious flavors in your garden.
- Repel Pests: Dill’s strong fragrance deters pests such as aphids, cucumber beetles, spider mites, squash bugs, and cabbage loopers, protecting neighboring plants.
- Provide Shade and Wind Protection: Dill’s tall and feathery foliage offers shade for delicate plants and acts as a natural windbreak for seedlings.
Here are some examples of crops that benefit from being planted with dill:
- Cucumbers: Improve growth, flavor, and deter cucumber beetles.
- Tomatoes: Enhance tomato flavor and attract pollinators.
- Lettuce: Provide shade and add a subtle flavor note to salads.
- Brassicas: Repel pests like cabbageworms and aphids, which commonly affect brassica crops like broccoli, cauliflower, cabbage, and kohlrabi.
- Zucchini and Squash: Deters pests such as beetles and squash bugs, and attracts pollinators.
- Carrots: Attract beneficial insects like ladybugs for pest control.
- Onions and Herbs: Complement growth without competition, attracting pollinators and aiding pest control.
You can create a more diverse and beneficial garden ecosystem by incorporating dill as a companion plant. It adds beauty and flavor and contributes to your garden’s overall health and productivity. So experiment with companion planting combinations to maximize the benefits in your garden.
Harvesting and Preserving Dill
Dill has many uses in the kitchen, including using fresh leaves in recipes or preserving the foliage and seeds for the spice cabinet.
In addition, dill foliage, flowers, and seeds are a key flavoring in many traditional pickling recipes. Fresh dill foliage and flowers can be used in many canning recipes, such as Dilly Beans and Dill Pickles. While dried dill seeds are the base of this Homemade Pickling Spice, along with infusing flavor in this Pickled Green Tomatoes recipe.
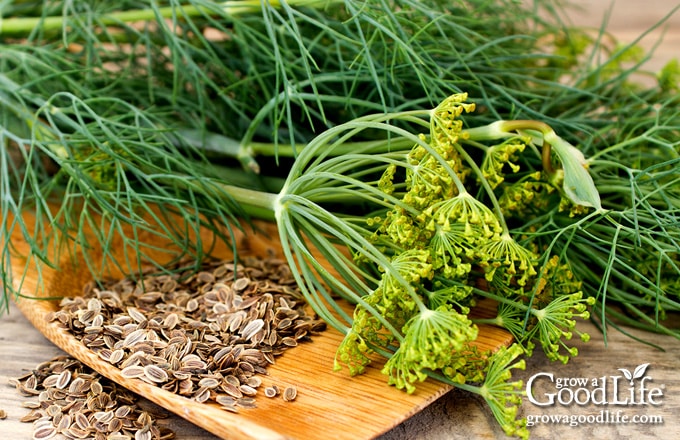
How to Harvest Dill Foliage
Dill foliage is ready to harvest anytime after it has developed lush foliage growth. This is typically around 8 to 12 weeks after planting, depending on the variety and growing conditions.
Harvest dill leaves before the plant blooms. The flavor of the foliage turns bitter after the plant flowers and begins to go to seed.
Plan your harvest on a dry and sunny morning when the essential oils in the leaves are at their peak concentration. Grab a pair of sharp garden scissors or shears to make clean cuts and avoid damaging the plant.
Choose sturdy stems with healthy foliage. Position your scissors or shears close to the base of the stem and make a clean cut. Avoid harvesting more than one-third of the plant at a time to ensure continuous growth.
After harvesting, gently rinse the dill foliage under cool running water to remove dirt or insects. Air dry on a clean kitchen towel.
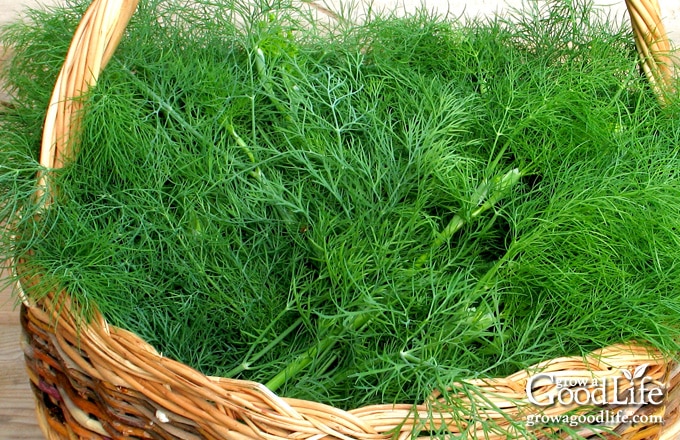
Keeping Dill Leaves Fresh
Dill foliage has the best flavor when used right away, but you can extend the freshness for a few days with these tips:
- Damp paper towel method: Wrap the harvested dill stems in a wet paper towel, place in a plastic bag, and store them in the refrigerator. This helps maintain moisture and keeps the leaves fresh for several days.
- Water storage: Treat dill stems like cut flowers by placing them in a container with water. Cover the leaves loosely with a plastic bag and store in the refrigerator. Change the water every few days to keep it fresh.
Using Fresh Dillweed in Recipes
Dill adds lots of flavor to a wide range of dishes. Here are some ideas for incorporating fresh dill into your recipes:
- Salads: Sprinkle chopped dill over green salads, potato salads, or pasta salads for a burst of freshness.
- Seafood: Pair dill with fish or seafood dishes. It complements the flavors of salmon, shrimp, and crab exceptionally well.
- Sauces: Add chopped dill to sauces, such as this Lemon Dill Béchamel Sauce in this Salmon Pie recipe.
- Salad Dressing: Fresh dill adds a bright, herby note to creamy or vinaigrette-based dressings and marinades.
- Pickling: Fresh dill leaves infuse a distinct and savory flavor into pickled foods, such as this Refrigerator Pickles recipe.
- Garnish: Sprigs of fresh dill make an attractive garnish for soups, roasted vegetables, or main dishes, adding visual appeal and a hint of herby flavor.
Ways to Preserve Dillweed
The flavor of dill foliage is best when used fresh, so try to incorporate it into your recipes as soon as possible after harvesting. However, if you have an abundance, you can preserve it for later by drying or freezing.
Freezing Dill Foliage
Freezing is a simple and effective method to preserve the fresh flavor of dillweed.
Start by washing and thoroughly and let it air dry. Next, chop it into desired sizes or leave it in sprigs. Then, place the dill in a freezer bag or container, removing as much air as possible. Finally, label the container with the date and store it in the freezer.
Frozen dill can be added directly to dishes during cooking, such as soups, stews, or sauces. Use within 6 months for the best flavor.
Drying Dillweed
Drying dill allows you to enjoy its flavor year-round. You can air dry or use a food dehydrator. Follow the tips in this article to preserve your dill: How to Harvest and Dry Herbs for Storage.
Once the dill is completely dry and brittle, remove the leaves from the stems. Store the dried leaves in an airtight container, away from heat and moisture. Dried dill can be crumbled and used as a seasoning in various dishes.
Harvesting Dill Seeds
Harvesting dill seeds lets you capture their distinct taste and aroma while ensuring a fresh supply for next year’s garden.
Dill seeds are ready for harvest when the flowers have faded and turned brown, indicating that they have matured and produced seeds. This usually occurs around 2 to 3 weeks after the plant has finished flowering. The seed heads will dry out and turn a light brown color, indicating that the seeds are fully developed.
Steps to Harvest Dill Seeds:
- Monitor the plants: Once the plants flower, watch the changes in the appearance of the seed heads and note when they start to dry out and turn brown.
- Prepare your tools: Gather a pair of sharp garden scissors or shears and a clean, dry container or paper bag to collect the seeds.
- Harvest the seed heads: When the seed heads have turned light brown and feel dry to the touch, it’s time to harvest. Cut the entire seed head, including the stem, using clean and precise cuts.
- Collect the seeds: Hold the seed head over the container and gently rub your fingers along the seed head or shake it to release the seeds. The mature seeds should easily detach and fall into the container.
- Remove debris: After collecting the seeds, carefully remove any remaining debris or chaff by gently blowing on the seeds or using a fine mesh sieve.
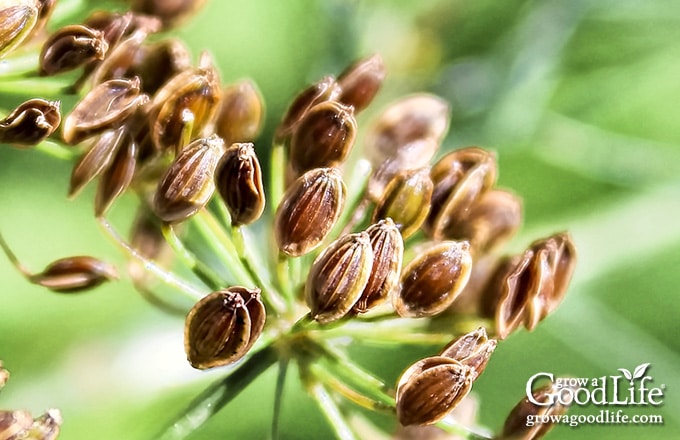
Storing and Using Dill Seeds:
To store dill seeds properly and ensure their freshness and flavor, follow these guidelines:
- Drying: Spread the harvested dill seeds in a single layer on a clean, dry surface, such as a paper towel or a baking sheet. Place them in a warm, well-ventilated area to dry completely for about 1 to 2 weeks. This step helps remove any residual moisture and prevents mold or spoilage.
- Storage containers: Once the seeds are thoroughly dried, transfer them to clean, dry, airtight containers such as glass jars.
- Cool and dark storage: Store the containers of dill seeds in a cool, dark place, such as a pantry or a cupboard. Avoid exposing them to direct sunlight, heat, or humidity, as these conditions can degrade the flavor and quality of the seeds.
- Culinary use: Dill seeds can be used in various recipes to enhance flavor. They are particularly popular in pickling, where their unique taste and aroma add a delightful tang.
By following these steps, you can successfully harvest dill seeds and enjoy their distinct taste and fragrance. In addition, proper storage ensures you have a ready supply of flavorful dill seeds for your culinary creations, pickling adventures, and growing next year’s crop.
—
With its feathery foliage, delicate flowers, and distinctly flavored seeds, dill adds beauty and culinary delight to gardens and kitchens alike. Furthermore, consider the benefits of companion planting with dill to improve neighboring plants’ growth, flavor, and pest resistance. Dill’s ability to attract beneficial insects, enhance flavor, and repel certain pests makes it a valuable addition to any garden.
Following the tips and guidelines in this article, you can cultivate healthy dill plants and enjoy a bountiful harvest of foliage, blossoms, and seeds.
So, roll up your sleeves, get your gardening tools ready, and embark on a dill-growing adventure. Soon, you’ll be rewarded with a thriving dill patch that adds flavor and beauty to your homegrown dishes.
Happy Gardening!
Good planning is key to a successful vegetable garden
Whether you are new to growing your own food or have been growing a vegetable garden for years, you will benefit from some planning each year. You will find everything you need to organize and plan your vegetable garden in my PDF eBook, Grow a Good Life Guide to Planning Your Vegetable Garden.

