How to Make Refrigerator Pickles with Any Vegetable
This post may contain affiliate links, which means that I may receive a commission if you make a purchase using these links. As an Amazon Associate I earn from qualifying purchases.
It is so easy to make your own pickles with this versatile refrigerator pickles recipe. Use whatever vegetables you have on hand to make these quick pickles. No canning necessary.
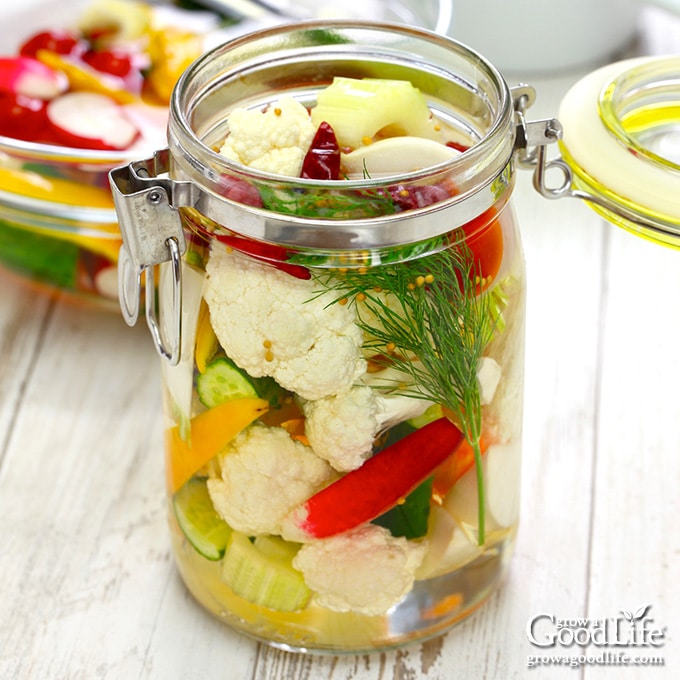
Refrigerator pickles take just about 15 minutes of prep time. Store the jars in the refrigerator for up to three months and you will have an easy condiment for your summer meals.
Crisp and tangy pickled vegetables are the perfect addition to any meal. They complement and balance rich flavors, making them a great side dish to grilled or roasted meats. A variety of pickled vegetables are a delicious addition to a cheese platter or charcuterie board. Pickles are a natural topping for sandwiches, burgers, and snacking anytime right out of the jar.
Advantages of Refrigerator Pickles
Quick pickled vegetables rely on vinegar and the cool temperature of the refrigerator to preserve them. Refrigerator pickles are not processed in a water bath canner, but they must be kept refrigerated at 40˚F or colder. The benefits of quick pickling include:
- No special canning gear needed: Unlike canning large harvests for long-term food storage, quick pickles only require a few jars and regular kitchen equipment.
- They are fast to prepare: Simply fill the jars with chopped vegetables, add hot brine, let cool, and refrigerate for at least 24 hours to let the flavor penetrate. The longer the jar sits in the refrigerator, the stronger the flavor.
- The vegetables stay crisper: Since you are not cooking the vegetables, they stay firmer than traditional water bath canned pickles.
- Small batches let you experiment with flavors: There are so many possibilities for flavoring your pickles. Making a few jars at a time lets you try different vinegar and spice combinations.
What Can be Pickled?
Refrigerator pickles are an ideal way to preserve small harvests that will be eaten in the next few months. Types of produce that can be quick pickled are endless.
While cucumbers are what most people think of when we talk about pickles, many other vegetables can be successfully pickled at home. Try pickling asparagus, beets, bell peppers, broccoli, carrots, cauliflower, cherry tomatoes, celery, chile peppers, pea pods, onions, radishes, string beans, summer squash, and zucchini.
Consider pickling fruits too including apples, blueberries, crabapples, grapes, melons, peaches, pears, and pineapple.
In addition, think about pickling things that would normally go to waste. The stems of broccoli can be sliced thinly, cubed watermelon rinds, trimmed Swiss chard stems can all be infused with a pickling brine and transformed into a delicious garnish for salads, or an acidic bite to grilled meats.
Basic Refrigerator Pickling Brine
The ingredients for a basic refrigerator pickling brine are 2 cups vinegar, 1 cup water, 2 tablespoons sugar, 1 tablespoon pickling salt, and 1 tablespoon pickling spice. This is enough brine for a for a 1 quart jar.
You can use apple cider vinegar, white vinegar, red wine vinegar, white wine vinegar, or a combination of any commercial vinegars with at least 5% acidity. Which vinegar to use depends on the desired taste and color of your pickles:
- Apple cider vinegar is made from fermented apples. It has a mild sweet tart flavor that blends well with vegetables. Its amber color will darken vegetables.
- White vinegar is clear vinegar made by distilling corn and rye. It tastes more sour and acidic than apple cider vinegar, but this may be just what you love about pickles.
- Red and white wine vinegars are made from fermented wines. They have a fruity flavor with a vibrant bite.
Simmer the brine briefly on the stove, and then kick up the flavor by adding extra flavorings to the jar with the vegetables.
Additional Flavorings
This is where you get creative! By mixing and matching fresh and dried herbs, spices, and alliums, you can infuse vegetables with lots of flavor. Mix and match from the following and add up to 2 tablespoons to each quart sized jar:
- Herbs: Fresh herbs, including dill flowers or foliage, sprigs of rosemary, thyme, lemon balm, or oregano.
- Spices: Dried spices such as bay leaves, celery seeds, coriander, cumin seeds, dill seeds, mustard seeds, peppercorns, red pepper flakes, and powdered turmeric. Sliced or shredded fresh ginger, turmeric, and grated horseradish also add lots of flavor.
- Alliums: Chopped green onions, crushed garlic cloves, sliced onions, pearl onions, shallots, and leeks.
Try These Flavor Combinations
- Dill Pickles: 2 bay leaves, 2 dill flower heads or sprigs of dill foliage, 2 cloves crushed garlic, 1 teaspoon mustard seeds, 1 teaspoon dill seeds, 1 teaspoon red pepper flakes.
- Bread and Butter Pickles: Dissolve an extra cup of sugar in the brine and add the following to the jar: 1 teaspoon mustard seeds, 1 teaspoon celery seeds, 1/2 teaspoon dried ginger, and 1/4 teaspoon turmeric.
- Hot and Spicy Pickles: 2 chopped jalapeño peppers, 2 cloves crushed garlic, 1 teaspoon prepared horseradish, and 1 teaspoon red pepper flakes.
- Sichuan Pickles: Use rice or white wine vinegar for the brine and add 2 cloves crushed garlic, 1 sliced green onion, 1 tablespoon diced fresh ginger, 1 teaspoon Sichuan peppercorns, and 1/2 teaspoon Chinese five spice power.
How to Make Refrigerator Pickles
A full, printable recipe can be found at the bottom of this article for a one-quart jar (or 2 pints) of mixed vegetables to get you started. Go ahead and mix and match whatever vegetables you have on hand. You’ll need about 2 pounds of vegetables to fill a quart sized jar depending on the size of the pieces.
You may want to pickle some vegetables in separately because they absorb flavors at different rates. For example, onions and zucchini will pickle much quicker than beans, radishes, and carrots. Also, dark colored vegetables such as beets, radishes and red onions bleed their color that will darken all the vegetables in the jar.
Here are the steps to make refrigerator pickles:
Step 1: Prepare the Jar
Use quart or pint sized canning jars or heatproof glass containers for your refrigerator pickles. Wash the jars and lids in warm soapy water and rinse well. Sterilize the jars by boiling them for 10 minutes.
Place the jars on a rack in a large pot. Be sure they don’t touch the bottom of the pot, or they might break. Fill the jars with water to stop them from floating, and then add enough water to cover the jars. Bring the pot to a boil over high heat, and boil the jars for 10 minutes to sterilize. Reduce the heat to low and keep the jars warm until you are ready to fill them. Adding hot brine to cold jars can cause them to break.
Many recipes for refrigerator pickles found online don’t call for sterilizing the jars first. This is just an extra step you can take to prevent your pickles from spoiling. Since the jars are not heat processed after filling, sterilizing helps kill microorganisms that may be present.
If you want to save time and dishwashing, you can sterilize the jars while you prepare your vegetables, and then remove the jars, empty the water and use the same pot to make your pickling brine.
Step 2: Prepare the Vegetables
Select freshly harvested, firm, high quality vegetables for pickling. Avoid overripe, insect damaged, moldy, and bruised produce. Skip the waxed vegetables from the supermarket because the brine will not be able to penetrate the coating.
Wash, trim, and cut your vegetables into whatever shapes you want, such as bite-sized pieces, slices, spears, or chunks. The vegetables will absorb the flavorful brine quicker when cut into pieces.
If you are canning cherry tomatoes, prick a few holes in each so the brine can penetrate. Cut chile peppers in half or chop into pieces for even more spicy flavor infusion. Be sure to wear gloves when cutting hot peppers to prevent your hands from burning.
Your vegetables will soften slightly from the hot brine, but they will remain crisp since you are not cooking them. For more dense veggies such as beets, carrots, and radishes, you can slice them very thin or pre-cook them until fork tender before cutting.
Step 3: Make the Pickling Brine
Combine 2 cups vinegar, 1 cup water, 2 tablespoons sugar, 1 tablespoon pickling salt, and 1 tablespoons pickling spice in a small pot. Bring to a boil, and then reduce the heat and simmer for just a few minutes until the sugar and salt dissolve.
Step 4: Pack the Jars
Remove the jars from the hot water, drain and place on a kitchen towel. Fill the jars with the prepared vegetables and additional flavorings. Go ahead and squeeze the vegetables in tightly. They will soften and shrink a bit when pickled.
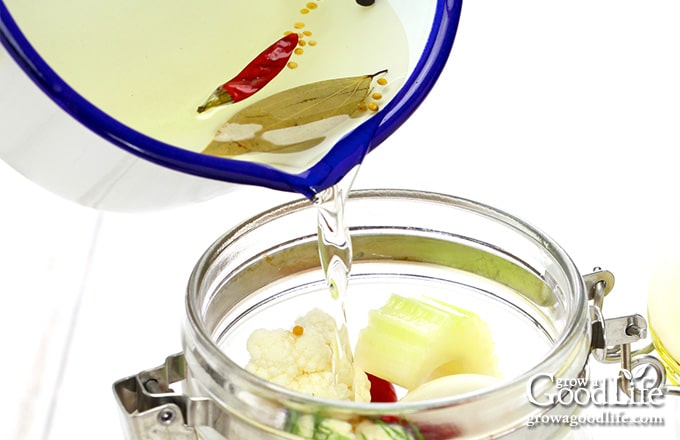
Pour the hot pickling brine into the jar making sure the vegetables are completely covered. Add the lid to the jar and let it cool to room temperature for about 1 hour, and then refrigerate for at least 24 hours to let the flavors infuse. I like to give the jar a shake to mix up the ingredients every now and then. Jot today’s date on the jar and consume within 3 months.
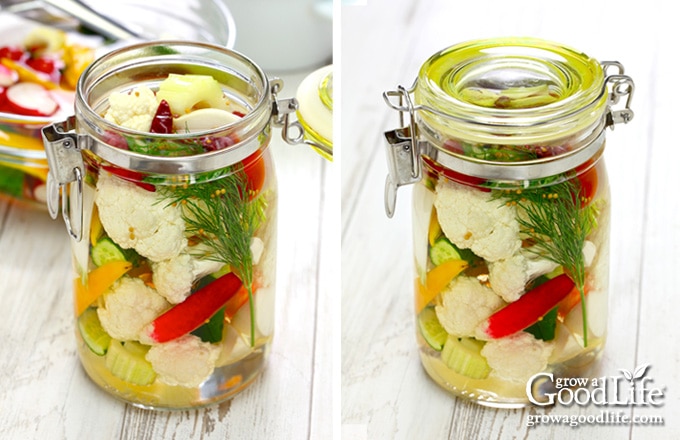
Mixed Vegetables Refrigerator Pickles
Ingredients
- 1 cup sliced pickling cucumbers
- 1 cup cauliflower florets
- 1/3 cup sliced peeled carrots
- 1/3 cup sliced celery
- 1/3 cup sliced onions
- 1 medium bell pepper seeded and cut into strips
Basic Pickling Brine:
- 2 cups white vinegar
- 1 cup water
- 2 tablespoons sugar
- 1 tablespoon pickling salt
- 1 tablespoon pickling spice
Additional Flavorings:
- 4 sprigs fresh dill
- 1 small dried chili pepper or 1/4 teaspoon red pepper flakes
- 2 teaspoons mustard seeds
- 1 teaspoon celery seeds
Instructions
- Wash one heatproof quart size jar or two pint sized jars in warm soapy water, and rinse well.
- Place the jars on a rack in a pot large and boil for 10 minutes to sterilize. Keep warm until you are ready to fill.
- Wash and cut your vegetables into desired shapes, such as bite-sized pieces, slices, spears, or chunks. Set aside while you make the brine.
- Make the pickling brine by combining the vinegar, water, sugar, pickling salt, and pickling spice in a saucepan. Heat until just boiling, reduce the heat, and simmer until the sugar and salt have dissolved, about 3 minutes.
- Remove the jars from the hot water, drain and place on a kitchen towel.
- Fill the jars with the prepared vegetables, dill, mustard seeds, and celery seeds.
- Pour the hot pickling brine into the jar and cover the vegetables.
- Add the lid and let the jar cool to room temperature for about 1 hour.
- Label, date, and store the jar in the refrigerator for at least 24 hours to let the flavors infuse. Use within 3 months. Yields about 1 quart or 2 pint sized jars.
Nutrition
You May Also Like:
- Kosher Dill Pickles Canning Recipe
- Bread and Butter Pickles Canning Recipe
- Zucchini Relish Canning Recipe
40+ Meals in a Jar Pressure Canning Recipes
In this eBook, you will find 50 pressure canning recipes, including 44 meals, along with homemade stocks and bone broths. Recipes include soups, stews, chilis, beans, beef, pork, and poultry. Explore the world of preserving delicious home-cooked meals for all seasons.

The ratio of vinegar to water seems backwards. The pickled vegetables come out way too sour. They aren’t edible.
Cindy, The brine ratio is not backwards in the recipe, but it does result in a sour-flavored pickle. Since this is a refrigerator pickle recipe and not a canning recipe, you can adjust the ratio of water to vinegar and the flavorings to suit your taste preferences. Additionally, you can add more sugar to balance the sourness. Taste the brine and adjust the flavorings to your preferences before adding it to the jar. Experimenting with the balance can help you find the perfect taste for your refrigerator pickles!
Just wonderful. I very much appreciate the sterilization steps just for safety sake. Thank you for posting, love the recipe.
Thanks, Penny. I am so happy you enjoy the recipe. 🙂
Thank’s for the great information of which I will be using soon.