Zesty Salsa Recipe for Canning
This post may contain affiliate links, which means that I may receive a commission if you make a purchase using these links. As an Amazon Associate I earn from qualifying purchases.
This zesty salsa is packed with tomatoes, peppers, onions, and just enough spicy tingle to tickle your taste buds. Preserve your garden harvest with this salsa canning recipe. Open a jar any time and enjoy with tortilla chips or with your favorite Mexican inspired meals.

Many of us begin a vegetable garden with dreams of preserving the harvest dancing in our heads. Tomatoes, peppers and onions are staples in most gardens and tend to ripen and ready to harvest around the same time. Canning salsa is a great way to preserve the abundant harvest to enjoy all year.
Even if you don’t grow a garden, the fresh ingredients for making salsa are plentiful at farmers’ markets and farm stands during the growing season. Stock up with enough to can a batch of homemade salsa and enjoy the delicious flavors of summer all winter long.

Helpful Tips for Canning Salsa
If you are canning salsa, is important to use recipes that are formulated and tested to assure the proportion of acidic ingredients is safe home canning. Salsa recipes that are preserved using a boiling-water canner must meet acidity-level requirements to prevent the growth of botulism bacteria.
This salsa recipe for canning is the “Zesty Salsa” recipe from both the Ball Complete Book of Home Canning and the Ball Blue Book Guide to Preserving.
If you’d like to adjust the flavors in your salsa, be sure to follow safe canning guidelines. This article explains what substitutions and changes can be made safely: Safe Adjustments for Canned Salsa Recipes.
Here are other tips for canning salsa:
About the Ingredients
This salsa recipe is made from fresh Roma tomatoes, onions, green bell peppers, jalapeño peppers, garlic, cilantro, salt, and vinegar to adjust the acid to make it safe for water bath canning.
- Tomatoes: Use plum, also called paste tomatoes for a thick salsa. Plum tomatoes, such as Roma, San Marzano, and Amish Paste, contain less moisture and have a firm flesh that will produce a thicker salsa. Slicing tomatoes can also be used, but they are more watery. Both paste and slicing tomatoes are safe to use for making salsa, but I recommend using paste tomatoes for a denser salsa that will scoop easily on tortilla chips.
- Onions: You can use any variety of bulb onion in this salsa recipe, including red, yellow, white, sweet or a mixture of onions. Maintain the total amount of onions called for in the recipe to keep the salsa safe for canning.
- Mild and Hot Peppers: Pepper varieties can be mixed and matched in this recipe, but do not change the total amount of peppers. The recipe as written produces a medium-hot salsa. Use more hot peppers and fewer mild peppers for a fierier salsa. Some examples of mild peppers include bell peppers or green peppers, banana, and long green chiles, such as Anaheim, Colorado, or New Mexican peppers. Hot peppers include habanero, jalapeño, and Serrano.
- Vinegar: The vinegar in this recipe is required in order to make the salsa safe for canning. Use vinegar with at least 5% acidity. Both apple cider and white vinegar can be used in this recipe. Apple cider vinegar is made from fermented apples, and has a slightly fruity flavor that adds a little sweetness, and blends well with the salsa. White vinegar is clear vinegar made by distilling corn and rye. Choose an organic brand to avoid genetically modified corn.
If you hate the taste of vinegar, follow this Tomato Jalapeño Salsa canning recipe instead. It uses fresh lime juice instead of vinegar. You can also make this Grilled Salsa or Fresh Salsa recipes freeze the salsa instead.
Measuring the Vegetables
This recipe calls for chopped vegetables. This means you will peel, seed, and chop your vegetables as described in the recipe before measuring using measuring cups.
Prepare the vegetables one at a time so you can measure or weigh each accurately before mixing. Dice the vegetables into uniform, 1/4-inch pieces and add to a measuring cup as you go until you reach the required amounts.
You can also weigh your vegetables using a kitchen scale. I have included both cup and weight measurements in the recipe below. Select one method, and stick with it throughout the recipe so the ratio of ingredients remains the same.
Tools to Save Time Chopping
I am not going to lie, chopping the vegetables is the most time-consuming part of preparing this salsa recipe. This is especially true if you are using a knife and cutting board. There are a few shortcuts that make it easier:
- Food Processor: A food processor chops quicker, particularly for peppers and onions. Be careful with tomatoes, you want uniform chunks, not a purée. Cut the vegetables into chunks, and then pulse in the food processor to break them up into smaller, 1/4-sized pieces. Measure each ingredient and chop more as needed to equal the amount required for the recipe.
- Vegetable Chopper: My favorite kitchen tool for making salsa is a vegetable chopper. It takes up very little storage space and comes in so handy for making fresh pico de gallo, dicing peppers and onions for the freezer, and for evenly dicing vegetables to make this salsa. Simply cut the pieces to fit, apply pressure, and the tool pushes the pieces through a mesh screen into 1/4-inch pieces quickly.
Steps for Making and Canning Salsa
If you’re new to water bath canning, it helps to review the basic process before getting started. My step-by-step guide walks you through everything you need to know: Water Bath Canning for Beginners.
To make canning day easier, I also created a free Home Canning Checklist you can print and keep nearby while you work. It includes safety reminders, preparation steps, and space to track your batches. Get your copy here:
Grab your Free copy
Home Canning Checklists
A more detailed and printable recipe can be found at the bottom of this article, but these are the general steps for making and canning salsa:
Step 1: Gather Your Kitchen Equipment
- Knife and cutting board
- Kitchen scale
- Measuring cups
- Gloves for handling hot peppers
- Water bath canner with canning rack
- 12 half pint canning jars or 6 pint sized canning jars
- Lids and bands (new lids for each jar, bands can be reused)
- Canning tools: jar lifter, canning ladle, funnel, and bubble popper
- Plus basic kitchen supplies such as large prep bowls, large pot, and plenty of clean kitchen towels.
Step 2: Prepare the canning equipment
Wash your jars, lids, bands, and canning tools in warm, soapy water. Rinse well, and set the lids, bands, and tools aside to air dry until you are ready to use them.
Jars must be heated before filling to prevent breakage due to thermal shock. Place the jar rack into the water bath canner, set the jars upright in the canner, and add water to cover the jars. Bring the canner to a simmer (180˚F) for 10 minutes, and keep the jars hot until you are ready to fill them.
Step 3: Prepare the Ingredients
Tomatoes
Wash the tomatoes well under running water. Blanch the tomatoes briefly in boiling water to crack the skin and make it easier to remove. To blanch tomatoes, bring a large saucepan of water to a boil over high heat. As the water is heating, fill a large bowl with ice water.
Once the water comes to a boil, dip your tomatoes into the boiling water until the skins crack and loosen, about 30-60 seconds. Remove the tomatoes and place in the bowl of ice water to cool. Repeat for all the tomatoes.
- See: How to Peel Tomatoes for a more detailed tutorial
Once the tomatoes are cool enough to handle, remove the peelings, cores, scoop out the seeds, and chop into 1/4 inch pieces. Measure or weigh the chopped tomatoes and add 10 cups to the pot.

Onions
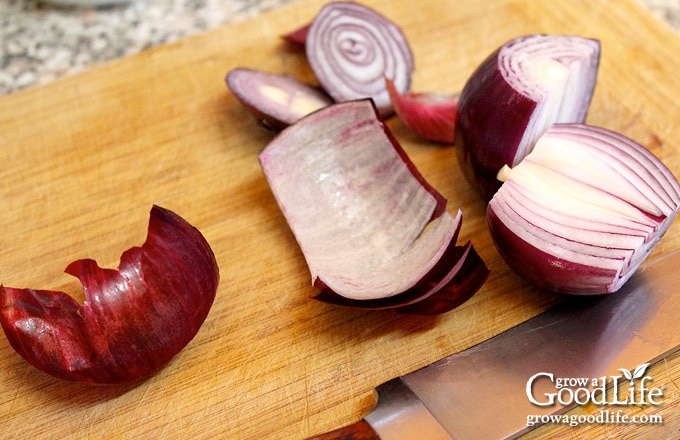
Use a sharp knife to cut the ends off the onions and slice them in half. Peel off the papery skins and discard. Cut the onions into 1/4-inch pieces. Measure the chopped onions and add 5 cups to the pot.
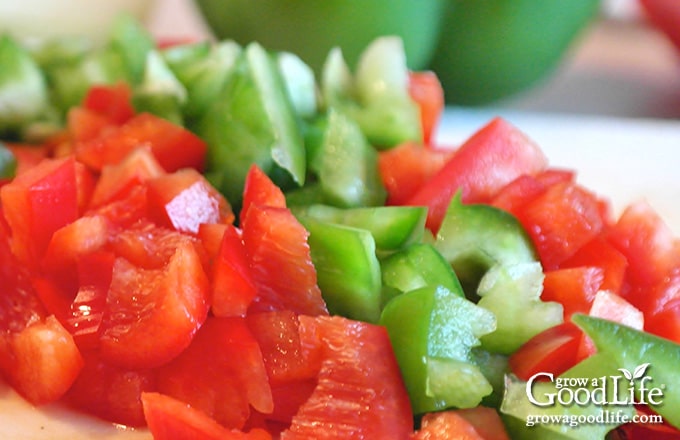
Peppers
Wash your peppers under running water. Wear gloves when handling hot peppers and avoid contact with your skin and eyes.
Roast and peel your peppers if you are using long chile type peppers such as Anaheim, Colorado, or New Mexican chiles. The tough skin can give an unpleasant texture to salsa. Thin-skinned peppers, such as bell peppers, banana, and jalapeños don’t need to be peeled.
Remove the stems, cut the peppers in half, and scrape out the seeds and membranes with a spoon for less heat. The Ball Complete Book of Home Canning states: “If you don’t mind heat you can leave the seeds and veins in the chilis.” Chop the peppers into 1/4-inch pieces. Measure or weigh the chopped peppers and add 5 cups mild and 2 1/2 cups hot peppers to the pot.
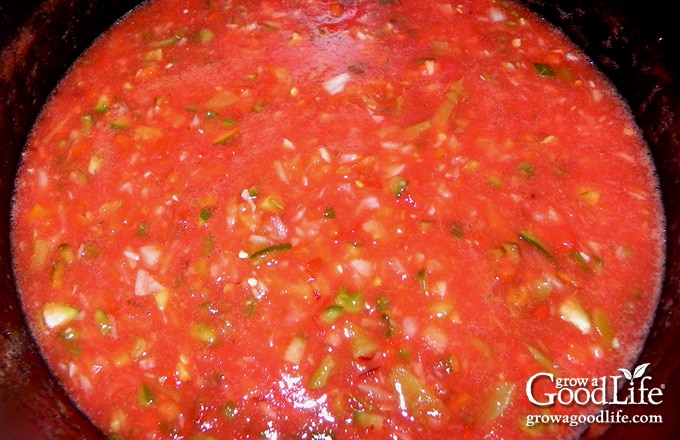
Step 4: Simmer the Salsa
Place the pot on the stove and add the minced garlic, vinegar, and cilantro. Add up to 1 tablespoon salt, stir to combine, and bring it to a boil over medium-high heat. Reduce the heat to a simmer (180˚F), and cook the salsa for about 10 minutes.
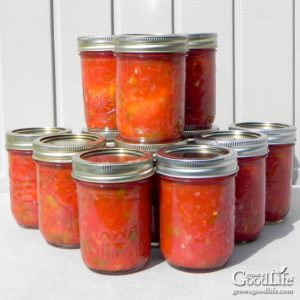
Step 5: Can your salsa
Spread a kitchen towel on the counter. Use the jar lifter to remove a hot jar from the canner, drain, and place on the towel. Keep the remaining jars in the canner, so they stay warm.
Place the canning funnel on the jar, and ladle hot salsa into the jar while leaving 1/2-inch headspace. Run the bubble popper through the jar to release any trapped air bubbles. Adjust the headspace again if needed.
Wipe the rim with a damp towel to remove residue. Center a lid on the jar, place the band over the lid, and screw it on until fingertip tight. Place the jar back into the canner, and repeat with the rest of the jars.
Adjust the water level so it is covering the jars by several inches, bring the pot to a boil, and process the jars for the times indicated in the recipe below. Let the jars cool, test the seals, label and date the jars, and store in a cool, dark location for 12 to 18 months. Wait several weeks for the salsa to develop its flavor before opening a jar.

Enjoy your home canned salsa with chips, or in your favorite Mexican inspired meals such as burritos, chicken enchiladas, chili-lime beef steak fajitas, or nachos.
Feel free to add other ingredients once you open the jar at serving time. I like to add a squeeze of lime juice, fresh cilantro, black pepper, and ground cumin. If you want more heat, chop up another chile pepper or add some hot sauce. If you find the salsa tart, stir in a little sugar to balance the flavor.
Zesty Salsa Canning Recipe
Ingredients
- 10 cups chopped peeled seeded cored paste tomatoes (1/4-inch pieces – about 6 pounds)
- 5 cups chopped onions (1/4-inch pieces – about 1 1/2 pounds)
- 5 cups chopped seeded bell peppers (1/4-inch pieces – about 2 pounds)
- 2 1/2 cups chopped hot peppers (1/4-inch pieces – about 1 pound)
- 3 cloves garlic minced
- 1 1/4 cup apple cider vinegar (5% acetic acid)
- 2 tablespoons finely chopped fresh cilantro (optional)
- 1 tablespoon canning salt (or to taste, optional)
- 1 teaspoon hot pepper sauce (optional)
Instructions
Prepare your canning equipment
- Wash your jars, lids, screw bands, and canning tools in hot soapy water. Rinse thoroughly to remove all suds. Set aside to air dry on a clean kitchen towel.
- Place the jar rack into water bath canner, place jars in the canner, and add water to cover. Bring the canner to a simmer (180˚F) for 10 minutes, and keep the jars hot until you are ready to fill them.
Make the salsa
- Add the prepared tomatoes, onions, peppers, garlic, vinegar, and cilantro to a large saucepot. Stir to combine. Add up to 1 tablespoon of salt and hot sauce, if using.
- Bring the mixture to a boil over medium-high heat, than reduce the heat to a simmer (180˚F), and cook the salsa about 10 minutes.
Can the salsa
- Spread a kitchen towel on the counter. Use your jar lifter to lift a jar from the canner. Drain the water back into the canner, and place on the towel. Keep the remaining jars in the canner so they stay hot.
- Use your canning funnel and ladle to fill the jar with hot salsa, leaving 1/2-inch headspace.
- Wipe the rim to remove any residue, center a lid on the jar, and screw on a band until it is fingertip tight. Use your jar lifter to place the jar back into the canner, and repeat with the remaining jars. Leave a little space in between the jars.
- Once all the jars are in canner, adjust the water level so it is two inches above the jar tops.
- Cover the canner and bring to boil over high heat. Once water boils vigorously, continue boiling both half-pint and pint jars for 15 minutes at altitudes of less than 1,000 feet. Adjust processing time for your altitude if necessary (See Notes).
- When processing time is complete, turn off heat, and allow the canner to cool down and settle for about 5 minutes.
- Spread a dry kitchen towel on the counter. Remove the cover by tilting lid away from you so that steam does not burn your face.
- Use the jar lifter to remove the jars from canner and place on the towel. Keep the jars upright, and don't tighten bands or check the seals yet. Let the jars sit undisturbed for 12 to 24-hours to cool.
- After 12 to 24-hours, check to be sure jar lids have sealed by pushing on the center of the lid. The lid should not pop up. If the lid flexes up and down, it did not seal. Refrigerate jar and use up within a week.
- Remove the screw on bands and wash the jars. Label, date, and store your jars in a cool, dark place for 12 to 18 months.
- Allow at least 3 to 4 weeks for the salsa to develop its flavor. Once the jar is open, refrigerate and use up within a week. Yields 12 half pints or 6 pints.
Notes
Nutrition
This article was originally published on September 17, 2014. It has been reviewed and updated with additional information.
Additional Canning Information:
- USDA Complete Guide to Home Canning
- Canning Guides at the Ball Website
- 6 Tips to Prepare for Canning Season
You May Also Like:
- Roasted Tomatillo Salsa Verde
- Tomato Jalapeño Salsa
- Marinated Roasted Red Peppers
- Other Ways to Preserve Peppers

can I use citric acid in place of the vinegar or lime juice?
Deanna, This recipe requires vinegar (5% acidity) and should not be altered as it has been scientifically tested for safe canning. At this time, there are no approved salsa canning recipes that utilize citric acid. I strongly recommend sticking to the specified ingredients and proportions in the recipe to ensure proper acidity levels for safe canning.