Tomato Jalapeño Salsa Canning Recipe
This post may contain affiliate links, which means that I may receive a commission if you make a purchase using these links. As an Amazon Associate I earn from qualifying purchases.
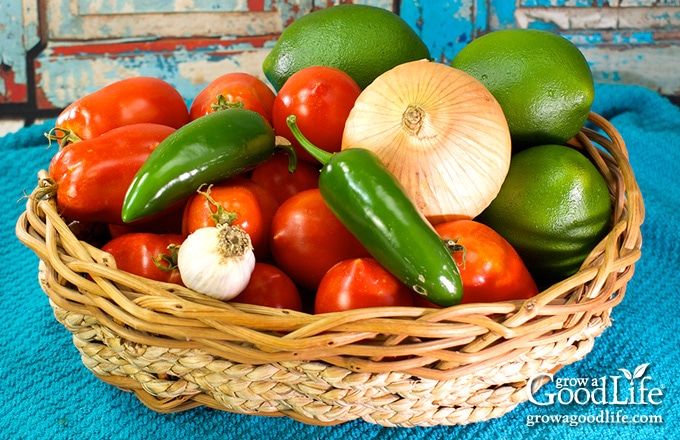
Canning homemade salsa is a delicious way to preserve the harvest. This tomato jalapeno salsa recipe is made from tomatoes, jalapeno peppers, onions, and cilantro from the garden. It also uses fresh lime juice instead of vinegar for a more authentic flavor.

We eat lots of salsa in this household. So when I plan the vegetable garden each year, I make sure to include plenty of tomatoes, peppers, onions, and herbs, specifically to preserve salsa to enjoy all year.
We love salsa spooned on our favorite Mexican meals, including fajitas, burritos, tacos, enchiladas, and as a dip for tortilla chips. Salsa is also delicious added to scrambled eggs, stirred into cooked rice, and layered on burgers and sandwiches.
This tomato jalapeño salsa has become my favorite canned salsa recipe. It is an easy, small batch canning recipe that doesn’t require hours and hours in the kitchen. It also uses fresh lime juice instead of vinegar, which adds a better taste to the salsa.
Tips for Making Jalapeño Salsa
As with any preserved product, select good quality vegetables at the peak of ripeness with no signs of rot or disease. Tomatoes should be evenly ripe with firm flesh that gives slightly when pressed. Jalapeno peppers should have no damage or soft spots. Fresh onions feel hard when you squeeze them and should have tight papery skins.
Use Paste Tomatoes for a Thick Salsa
The type of tomato affects the quality of salsas. Paste tomatoes, also called sauce, pear, or plum tomatoes, have firmer flesh, fewer seeds, and produces a thicker salsa. Slicing tomatoes usually yield a thinner, more watery salsa than paste tomatoes. Some examples of paste tomatoes include Amish Paste, Roma, Opalka, San Marzano, and Viva Italia.
Red or Green Jalapeños for Fiery Kick
Both red and green jalapenos come from the same plant. The difference between these two peppers is simply age. Jalapeno peppers start out green in color as they grow and eventually turn red if they are left on the vine to mature.
As jalapenos age, they get hotter and may develop white lines running the length of the pepper. Jalapenos with lines are usually hotter than smooth skinned peppers. Both colors are hot, but red jalapenos are hotter with a slightly sweeter flavor.
Wear gloves when working with hot peppers so you don’t burn your hands.
White, Yellow, Sweet or Red Onions for Flavor
Any type of onion will work for this recipe since the sharp onion flavor mellows a bit as we cook and process the salsa.
- White onions are often used in salsa because their pungent flavor blends well with tomatoes.
- Yellow onions are a great all-purpose onion that tastes sharp raw, but mellows after cooking.
- Sweet onions are also a good choice to balance the heat of the jalapeño pepper.
- Red onions have a milder flavor and are a great to use if you want a less oniony flavor.
Use Fresh Lime Juice
Yes, you read that correctly. This is a safe tested recipe that uses freshly squeezed lime juice!
Normally when we follow canning recipes, they require bottled juices because they are precise with the amount of acid in the juice. The acid ingredients used in canned salsa help preserve it so jars can be stored on the shelf.
Jarden Home Brands, the company behind the Ball canning books, have their own food labs for testing, and developed this recipe using fresh limes. They state, “… Be assured that any recipe that calls from fresh lemon or lime juice has been thoroughly verified safe…” If you don’t have limes, you can use bottled lime juice for this recipe.
Only use fresh lime or lemon juice if it is called for in a tested safe canning recipe. If you are using a canning recipe from another source, use bottled juice or vinegar as instructed.
Use Fresh Cilantro
Also differing from most canning recipes is the use of fresh cilantro. Most canning recipes require dried herbs because fresh can affect on the pH. This recipe has been tested and approved using fresh cilantro.
Not a fan of cilantro? Just leave it out. For a stronger cilantro flavor, add fresh cilantro just before serving the salsa.
You can make some small flavor adjustments to salsa recipes without affecting canning safety. For guidance on safe substitutions and ingredient changes, see my article: Safe Adjustments for Canned Salsa Recipes.
Steps for Making Canned Tomato Jalapeño Salsa
When canning, it is important to use a recipe that has been scientifically tested. This is a tested safe canning recipe from The All New Ball Book of Canning and Preserving.
New to water bath canning? Take a moment to review the process before beginning your salsa recipe. This guide explains each step clearly: Water Bath Canning for Beginners.
I also put together a free printable Home Canning Checklist to help you stay organized during canning day. It includes prep reminders, safety notes, and space to record your jars. Download it here:
Grab your Free copy
Home Canning Checklists
A more detailed and printable recipe can be found at the bottom of this article, but these are the general steps for making and preserving tomato jalapeño salsa in a water bath canner:
Step 1: Gather Your Canning Gear
- Water bath canner or large pot with canning rack
- 6 half-pint canning jars
- Canning lids and bands (new lids, bands can be reused)
- Canning tools: lid jar lifter, canning ladle, funnel, and bubble popper
- Plus basic kitchen supplies such as a large prep bowl, large pot, medium pot, knife, cutting board, and clean kitchen towels.
Step 2: Prepare the Canning Jars and Lids
Wash your canning jars, lids, bands, and canning tools in warm, soapy water. Rinse well, and set the lids, bands, and tools aside to air dry until you are ready to use them.
Jars must be warmed before filling with hot salsa to prevent breakage due to thermal shock. Place the canning rack into the water bath canner, set the jars upright in the canner, and add water to cover the jars. Bring the canner to a simmer (180˚F) for 10 minutes, and keep the jars hot until you are ready to fill them.
Follow the manufacturer’s directions for preparing the lids. Pre-heating lids is no longer necessary before using, but it is still safe to simmer (180°F) the lids if you want to. Just add them to the canner while you heat your jars.
Step 3: Prepare the Vegetables
Tomatoes: Wash the tomatoes well under running water. Remove the skins, seeds, core, and chop. You should have about 4 cups of chopped tomatoes depending on the size of the cores. Add the tomatoes to a medium sized pot. See this post on How to Peel Tomatoes for a detailed tutorial.

Onions: Remove the skins and use a sharp knife to cut the ends off the onions. Chop into 1/4-inch pieces and add to the pot.
Jalapeños: Wash the chiles under running water. Slip on a pair of gloves so you don’t burn your hands with the pepper juices. Cut off the stems, remove the seeds, and mince. Add the jalapeños to the medium sauce pot.
Cilantro: Remove the stems and finely chop the cilantro leaves. Measure 1/4 cup and add to the pot.
Instead of cutting by hand, you can use a food processor to chop your vegetables. Just add the vegetables to the bowl of the food processor and pulse several times until chopped. You want uniform chunks, not a purée.
My new favorite kitchen tool is this vegetable chopper. Just cut the pieces to fit, apply pressure, and the tool dices the vegetables into uniform 1/4-inch pieces.
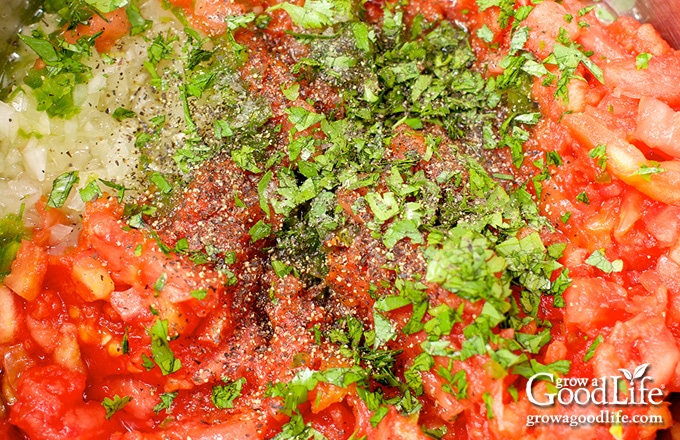
Step 4: Cook the Salsa
Add the remaining ingredients, stir to combine, and bring the salsa to a boil over medium-high heat. Reduce the heat to a simmer, and cook for 5 minutes.
Step 5: Can the Salsa
Spread a kitchen towel on the counter. Use the jar lifter to remove a hot jar from the canner, drain, and place on the towel. Keep the remaining jars in the canner, so they stay warm.
Place the canning funnel on the jar, and ladle hot salsa into the jar while leaving 1/2-inch headspace. Run the bubble popper through the jar to release any trapped air bubbles. Adjust the headspace again if needed.
Wipe the rim with a damp towel to remove residue. Center a lid on the jar, place the band over the lid, and screw it on until fingertip tight. Place the jar back into the canner, and repeat with the rest of the jars.
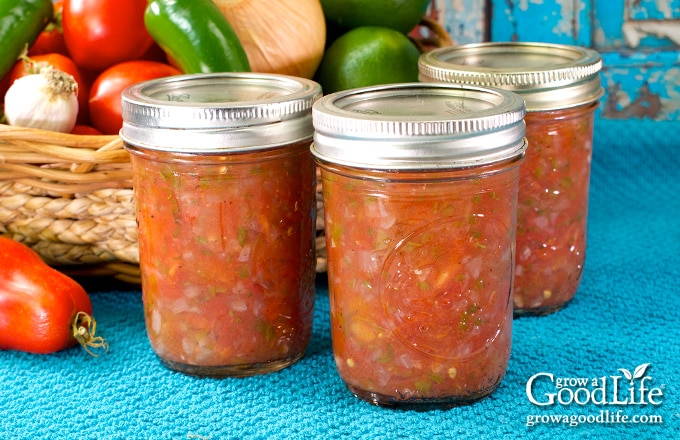
Adjust the water level so it is covering the jars by several inches, bring the pot to a boil, and process the jars for the times indicated in the recipe below. Let the jars cool, test the seals, label and date the jars, and store in a cool, dark location for 12 to 18 months. Wait several weeks for the salsa to develop its flavor before opening a jar.
Tomato Jalapeño Salsa Canning Recipe
Ingredients
- 2 pounds paste tomatoes chopped (about 4 cups after removing skins and seeds)
- 1 medium onion finely chopped (about 1/2 cup chopped)
- 2 jalapeño peppers seeded and minced
- 2 cloves garlic minced
- 1/2 cup lime juice
- 1/4 cup finely chopped fresh cilantro
- 1 teaspoon salt optional for flavor
- 1/2 teaspoon black pepper optional for flavor
Instructions
Prepare the canning equipment:
- Wash your jars, lids, bands, and canning tools in hot soapy water. Rinse thoroughly, and set aside to air dry on a clean kitchen towel.
- Place the jar rack into water bath canner, place jars in the canner, and add water to cover. Bring the canner to a simmer (180˚F) for 10 minutes, and keep the jars hot until you are ready to fill them.
Make the salsa:
- Combine all the ingredients in a medium pot. Bring the salsa to a boil over medium-high heat, reduce the heat to a simmer (180˚F), and cook for 5 minutes.
Can the salsa:
- Spread a kitchen towel on the counter. Use your jar lifter to lift a jar from the canner. Drain the water back into the canner, and place on the towel. Keep the remaining jars in the canner so they stay hot.
- Use your canning funnel and ladle to fill the jar with hot salsa, leaving 1/2-inch headspace.
- Wipe the rim to remove any residue, center a lid on the jar, and screw on a band until it is fingertip tight. Use your jar lifter to place the jar back into the canner, and repeat with the remaining jars. Try to leave a little space in between the jars.
- Once all the jars are in canner, adjust the water level so it is two inches above the jar tops.
- Cover the canner and bring to boil over high heat. Once water boils vigorously, continue boiling for 15 minutes at altitudes of less than 1,000 feet. Adjust processing time for your altitude if necessary (See Notes).
- When processing time is complete, turn off heat, remove the cover, and allow the canner to cool down and settle for about 5 minutes.
- Spread a dry kitchen towel on the counter. Remove the cover by tilting lid away from you so that steam does not burn your face.
- Use the jar lifter to remove the jars from canner and place on the towel. Keep the jars upright, and don't tighten bands or check the seals yet. Let the jars sit undisturbed for 12 to 24-hours to cool.
- After 12 to 24-hours, check to be sure jar lids have sealed by pushing on the center of the lid. The lid should not pop up. If the lid flexes up and down, it did not seal. Place the jar in the refrigerator and use up within a week.
- Remove the screw on bands and wash the jars. Label, date, and store your jars in a cool, dark place for up to 12 to 18 months.
- Allow at least 3 to 4 weeks for the salsa to develop its flavor. Once the jar is open, refrigerate and use up within a week. Yields about 6 half-pint jars of tomato jalapeno salsa.
Notes
Nutrition
You May Also Like:
- How to Grow a Salsa Garden
- Tomatillo Salsa Verde Canning Recipe
- Candied Jalapeños Canning Recipe
- Other Ways to Preserve the Harvest

Do I need to cook the salsa before canning? I’d like to preserve as much of the fresh flavor as possible.
Cheryle, Yes, for safe canning, the salsa does need to be cooked as the recipe directs. If you want a fresher flavor, you can make it uncooked and store it in the fridge or freezer instead.
How much canning salt do I use?
Sierra, 1 teaspoon.
I found you through the “Practical Self-Reliance” website, which I love! I’ve just started canning this year, and hadn’t grown the right tomatoes; perhaps next year I will. Just wondering about whether or not the cilantro could be subbed out for parsley. I love parsley and despise cilantro. I’m sure there are others out there with this same conundrum! Thanks.
Barb, I’m so glad you found me through Practical Self Reliance—I love Ashley’s website too! She’s actually an online friend of mine; we were in several blogging groups together back in the day.
As for your question, yes, you can absolutely substitute parsley for cilantro in this salsa verde recipe. I know cilantro isn’t everyone’s favorite! You can swap it out with an equal amount of parsley, another herb, or simply leave it out entirely. You can also season with fresh herbs at serving time if you prefer.
Can you add chopped garlic?
Susie, The recipe includes 2 cloves of minced garlic. If you want more, add it after opening the jar at serving time.
I was planning on making this recepie, however I just noticed that in my version of the book it only specifies 1/2 pint jars,which I don’t have available. However, here you mention “6 half-pint canning jars, or 3 pint sized jars”, do you know if it is safe to use pints instead of half pints for this recepie?
Karin, Thank you for pointing that out. You are correct. This recipe is for half-pint jars. It is generally safe to go down a jar size, but not up. This Salsa Ranchera from the Ball website can be canned in pint sized jars.
I have not made this recipe so I’m giving it any stars, but it sounds very good. Do I have to add the hot peppers? Or can I remove the seeds and membrane before adding it to make the salsa less spicy? My husband does not like hot spicy food.
Donna, You can remove the seeds and membrane from the jalapeños before adding them. Alternatively, you can leave the hot peppers out or exchange them for an equal amount of another type of pepper that isn’t as hot. One large jalapeno minced is about 2 tablespoons, so you can include up to 4 tablespoons of minced peppers to replace the jalapeños.
Can you use lemons instead of limes? We have ALOT of lemons and just wondering.
Jess, This is a tested safe canning recipe from The All New Ball Book of Canning and Preserving. Altering the recipe may make it unsafe for canning. If you make changes, freeze the salsa instead.
Can you add more jalapeños to kick it up a bit or would that change the acidity too much?
This is a tested safe canning recipe. Altering the recipe may make it unsafe for canning. If you make changes, freeze the salsa instead.
Do you have to “can” this recipe or can you make it the same way and chill and serve?
Lacey, Yes, you can chill the salsa in the refrigerator and eat it right away instead of canning it. It won’t stay fresh long, so be sure to eat it in a week. You can also freeze it for longer storage.