How to Store Potatoes for Winter
This post may contain affiliate links, which means that I may receive a commission if you make a purchase using these links. As an Amazon Associate I earn from qualifying purchases.
Potatoes can last for months in storage under the right conditions. Learn when to harvest potatoes, how to cure them properly, and how to store potatoes for winter with these tips.
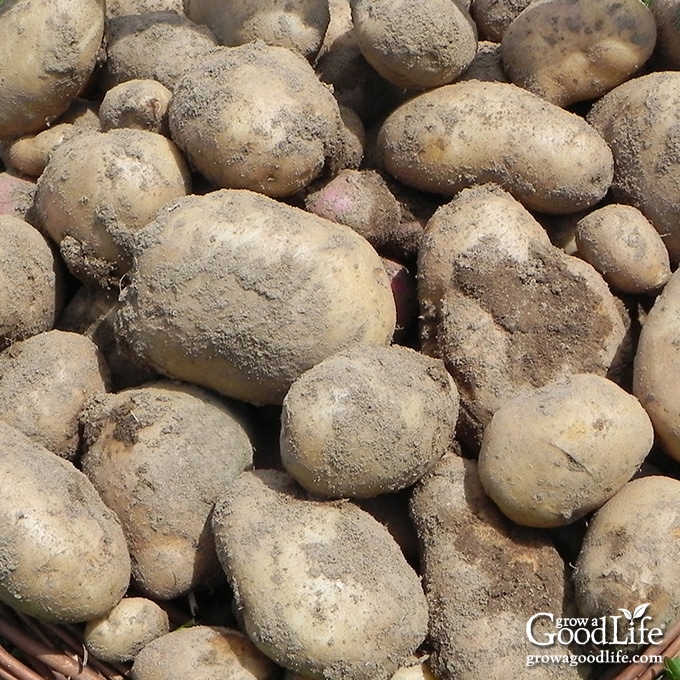
Potatoes are a staple food for many cultures around the world. Potatoes are a very versatile vegetable that can be used in everything from soups to side dishes. They are inexpensive to grow, packed with nutrition, and can be stored for a lengthy period of time.
Long before modern supermarkets, potatoes were traditionally grown or purchased in fall, and stored in root cellars for winter meals. A root cellar is an underground structure that is protected from freezing temperatures, but maintains cool and humid conditions ideal for holding foods for months after harvesting.
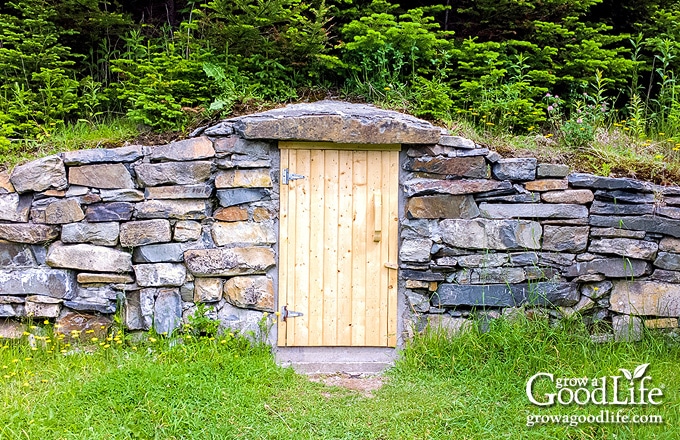
Most of us don’t have root cellars anymore, but we can still use the same principles to store crops in winter in our modern homes.
I have an unheated corner in my basement that is perfect. This corner stays dark, cool, and performs like a root cellar. I have added shelving where I store the foods preserved from the vegetable garden during the growing season. Once fall arrives, the shelves are filled with home canned goods and winter storage crops.
A basement keeps a steady temperature and is cooler than the rest of the house. If you don’t have a basement, consider any location that stays above freezing through the fall and winter, such as your crawlspace, garage, mud room, bulkhead, under the back porch, or even a closet.
How to Harvest Potatoes
If you are growing potatoes for winter food storage, let the tubers develop fully in the ground. Mature potatoes are less likely to bruise when harvesting than immature potatoes, and will last longer in storage. Here are tips for harvesting potatoes for winter food storage:
Let the Potatoes Mature Fully
Potatoes are finished growing when the foliage starts turning yellow. Stop watering at this point and let the foliage die back. During this time, the skins of the potatoes will thicken and toughen up. This will help protect the tubers from damage when they are harvested.
Check your crop by digging up a few potatoes from the edge of your potato patch. Rub the skin with your thumb. If the skin is paper-thin and rubs off easily, the potatoes are not ready yet. Give them a few more days under ground, and then check them again.
Dig Up the Potatoes
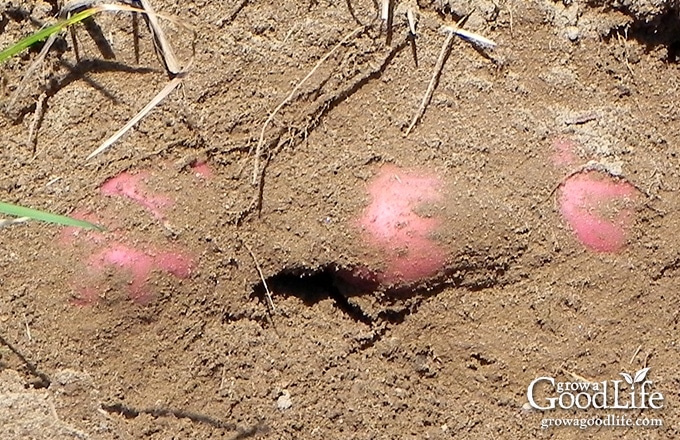
Your potatoes are ready for harvesting once the plants have died back, and the skins have firmed up and no longer rub off easily.
Harvest the potatoes on a warm, dry day after a period of little or no rain. Digging by hand is the best way to avoid damaging the potatoes.
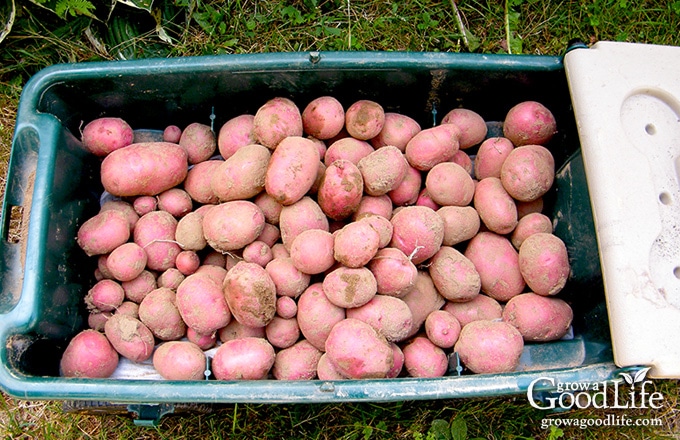
Use a digging fork to loosen the soil beneath the potatoes. Then sift through with your hands and pull out the tubers. Place your potatoes carefully in buckets or bins. Try not to bruise or damage the skin or the potatoes will not last long in storage.
If you are harvesting on a sunny day, place the buckets in the shade after filling because sunlight will turn the potato skins green. There is no need to wash the potatoes after harvesting, just keep them dry and out of direct light.
Separate Damaged Tubers
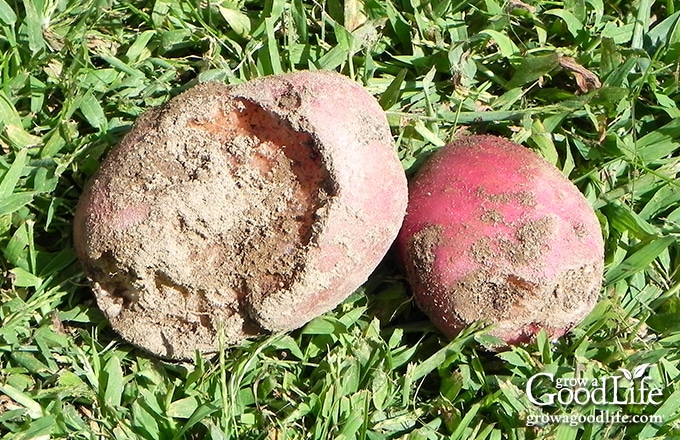
Occasionally, you will come across potatoes that were damaged by moles or voles underground, or you may accidentally stab one with the digging fork. Keep blemished potatoes separate from your storage potatoes because they are more likely to rot and possibly infect the rest of the tubers. Trim off the damaged areas and eat these first.
Tips for Storing Potatoes Long Term
Whether you grow your own, or stock up at your local farmers’ market, select varieties known for their long-term storage capabilities. The OSU Extension Service recommends the following varieties: Elba, Katahdin, Red Chieftain, Yukon Gold, Burbank Russet, German Butterball, Yukon Gem, Rose Finn Apple Fingerling, Russian Banana Fingerling, Red Pontiac, All Blue, and Kennebec.
If you are purchasing potatoes from a farmer’s market in fall or winter, ask the growers which varieties they recommend for storing. In addition, find out when they were harvested, and if they need to be cured before storing.
Don’t worry if your variety is not on the list. Other varieties may not last all winter, but most potatoes will last at least a month or two when stored under the proper conditions.
You may be wondering if you can store potatoes purchased at a grocery store all winter in the same way. The answer is…it depends.
Commercially grown potatoes are harvested, cured, and stored in special environment controlled refrigeration buildings until they are ready to ship. Then they are sorted, packaged, boxed, shipped to warehouses, and then finally trucked to your local grocery store.
During this time, the tubers experience temperature fluctuations and exposure to light. It is likely the potatoes already have broken dormancy before reaching the supermarket shelves. However, you can still store grocery keep potatoes fresh for at least a few months using this method. Be sure to remove them from their plastic bags before storing, and follow the storage steps below.
5 Steps to Storing Potatoes for Winter
Once you have harvested your potato crop, you will need to find a suitable storage area and prepare the tubers for storage. Follow the steps below to prepare and store potatoes:
Step 1: Sort the Potatoes
Sort your potatoes by variety. Since some types of potatoes will last longer in storage than others, sorting by variety will make it easy to find the ones that have a shorter storage life and use these first.
I grow two varieties of potatoes: Dark Red Norland and Kennebec. Kennebec lasts much longer in storage, up to 6 months. The Dark Red Norland often begin softening and sprouting after several months, so we consume the red potatoes first.
As you are sorting, look over the potatoes carefully and pull out any with bruises or signs of damage. Tubers with broken skin, cracks, or soft spots should be separated and used immediately because these will not store well.
Green potatoes should be tossed out because they will taste bitter, and if eaten in large quantities, may cause illness. Small spots can be trimmed off, but if there is significant greening, throw the potato out.
Step 2: Cure the Potatoes
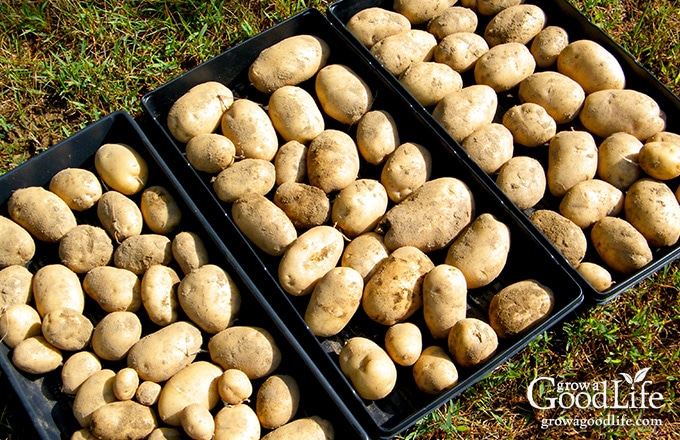
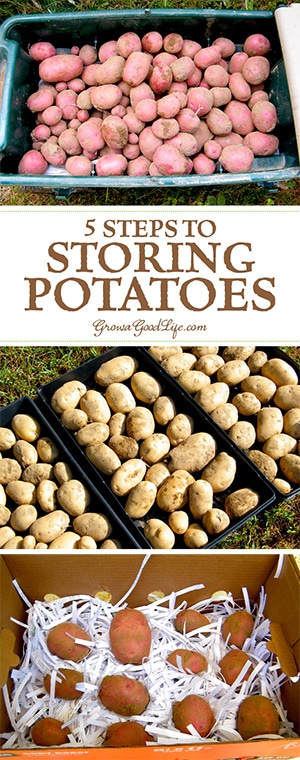
Curing your potatoes will help heal small wounds, and toughen up the skin to form a protective shell that extends the storage life. To cure your potatoes, simply spread out the unwashed tubers in a single layer in seedling trays or shallow boxes lined with newspapers.
Cover the trays with a dark towel to eliminate light, but allow air to circulate. Let the potatoes cure for several weeks in an area that is between 50 to 60˚F.
Step 3: Identify an Area Suitable for Storing Potatoes
While your potatoes are curing, locate an area in your home to store the potatoes. Ideally, potatoes should be stored in a dark, well-ventilated area at 45˚F to 50˚F (7˚C to 10˚C). The relative humidity should be around 95% to prevent the tubers from drying out. The ideal storage area for potatoes is one that is:
- Dark: Store potatoes in a dark place. Exposure to light will trigger chlorophyll to be pulled to the surface and form solanine. Chlorophyll will turn the tuber green, but solanine will give potatoes a bitter taste, and can cause illness if eaten in large quantities.
- Good Ventilation: Potatoes are still alive and continue breath after harvesting. They need to stored in an area with good airflow so they can use oxygen and give off carbon dioxide while in storage. A small fan will work for areas with no air movement.
- Cool: Keeping potatoes cool slows the growth of disease organisms that will cause the tubers to spoil. 45˚F to 50˚F (7˚C to 10˚C) is the sweet spot. If the temperature is too cold, the starch in the potatoes will convert to sugar and turn tubers dark. Warmer temperatures will also trigger the potatoes to sprout.
- Humid: Potatoes contain 80% water, and need to be stored in a damp area to prevent the potatoes from drying out. 95% is the ideal humidity level, but understand that this may not be achievable for most home environments. You can increase the humidity using a humidifier, or by placing large pans of water near your air source.
Suggested home storage locations include an unheated basement, spare closet, shed, crawlspace, or garage. Any area you choose should be insulated to protect the potatoes from freezing temperatures.
Don’t worry if your storage area is not perfect. Even if you don’t have the ideal storage conditions, as long as it is relatively cool and stays above freezing, you probably still can store your potatoes for a period of time. It is worth exploring to test it out to see how long your potatoes last in your unique storage conditions.
Step 4: Pack Up the Potatoes
After curing, store the potatoes in a dark area in covered boxes or bins with some holes for ventilation. Don’t wash the potatoes before packing because the moisture will encourage mold and reduce the storage life.
I store my potatoes in recycled paper boxes nestled in shredded paper recycled from bills and other paperwork. I cut a few holes in the sides of the boxes for air circulation, add a layer of shredded paper, and spread out the potatoes, cover with more shredded paper, and continue until the box is full.
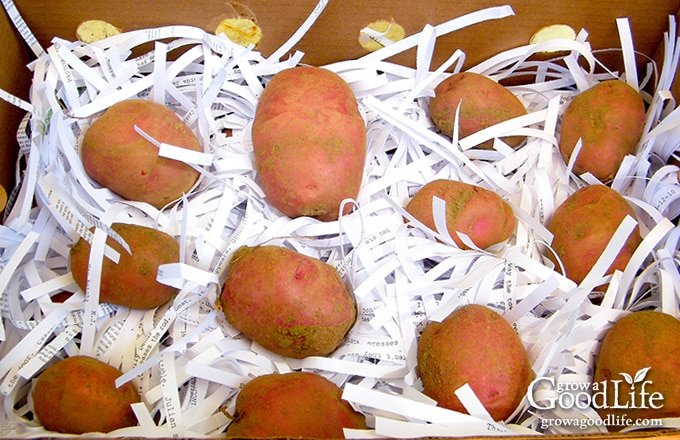
As you pack up your potatoes, lightly brush off excess dirt and inspect them once again. Small or damaged tubers should be separated and used immediately instead of stored.
Once the cardboard box is full, add the cover, label, and store in your cool, dark area. Again, ideal storage conditions for potatoes are at 45˚F to 50˚F (7˚C to 10˚C) and 80-90% relative humidity. Potatoes can last 4-9 months in storage depending on the variety.
Store potatoes separate from onions, bananas, and other fruits. These give off ethylene gas that can cause your potatoes to sprout prematurely.
Step 5: Check on the Stored Potatoes
Every few weeks, look through the boxes to remove any potatoes that may begin to rot. Usually you can tell by the scent if there is one in the box. If you notice a musky, sour dirt smell, you should look through the box to remove the rotten potato before it infects the others.
Keep a thermometer near the potatoes so you can note any changes in temperature. Keeping the potatoes cool will slow the sprouting process, but eventually small sprouts will appear. The potatoes are safe to eat if they are still firm, simply remove the sprouts before cooking.
Potatoes may develop a sweet taste if storage temperatures dip below 40˚F. The cold temperature triggers the starches to convert to sugars. While the sugar may help the potatoes brown well when roasted or fried, too much sweetness can change the flavor. Luckily, you can reverse this process by moving the tubers to a slightly warmer location for several weeks before using in your recipes.
Trim off potato skin that has turned green. If the green has penetrated into the potato, throw it away. It is not worth the risk of making your family sick.
Under the ideal storage conditions, potatoes can remain fresh for 3 to 6 months or longer. Ours often last until spring before they begin sprouting. Sprouted potatoes can be planted in spring, as long as they look healthy and the previous season was disease free.
—
So there you have it, your quick start guide to storing potatoes for winter. The most important things to remember, is potatoes store best in a well ventilated, cool, dark, and humid environment.
Other Ways to Preserve Potatoes
The easiest ways to preserve potatoes is to store them in a root cellar or cool area of your home. However, if your storage environment is not ideal, here are other ways to preserve your potato harvest:
Potato Recipes:
- How to Make Fluffy Mashed Potatoes
- Roasted Root Vegetable Medley
- Harvest Hearty Beef Stew
- New England Fish Chowder
- Tourtiere: French Canadian Meat Pie
You May Also Like:
Want to Learn How to Grow Potatoes?
You will find everything you need to start growing potatoes in my PDF eBook, Grow a Good Life Guide to Growing Potatoes. Whether you are striving for a few gourmet fingerling potatoes or a large crop for winter food storage, this guide will show how you can grow your own, organic, homegrown potatoes.

First time to post. I have a part of the basement that is a cellar, it is really dark and cool in my cellar, the problem is the potatoes still start to sprout way to early, we have already had to desprout them once already and it’s only December, what do you think could be the problem? We have bushels and bushels of potatoes, not just a few.
Diana, Light and temperature usually trigger sprouting. Did you follow the steps outlined in the article before placing the potatoes in storage? What kind of potatoes are they? Unfortunately, if they are already sprouting, there isn’t a way to stop them but you can slow it down by removing the sprouts. You can still eat sprouted potatoes as long as they are not too mushy or discolored. If you have a lot of potatoes in storage, I would look into other preservation methods such as canning and/or freezing.
I too was thinking about in the crawl space under my house but was concerned about drawing in rats or mice. Is this a problem?
Morgan, Yes, mice or rats could be a problem if you have them in your area. You could make a box out of hardware cloth to keep your storage item in. That way air could circulate but you will keep rodents out.
Great tips for storing potatoes. I am in the deep south and we don’t have basements here except for the rare exception of course. We store ours in a middle bedroom that is unheated. We use baskets and crates and they keep until January or February – when we actually have some that long. Thanks for the good tips.
I store mine under bed in spare bedroom laying on carboard . Started sprouting about a week ago. Would like to store in barn and apply lime to them , that’s what the old folks use to do
These are excellent tips! I just wish I had a cool, dark place to store mine – that’s difficult in South Texas! Thanks for linking up with Simple Lives Thursday!
Hi Rachel,
This takes me back to my grandparents’s stories about storing potatoes for the winter. Thank you so much for sharing this enlightening post “5 Steps to Storing Potatoes for Winter” with us at the Healthy, Happy, Green and Natural Party Blog Hop. I appreciate it!
These are great tips. I don’t have a root cellar but my garage should work well after winter sets in. I grew a small amount of potatoes for the first time this year. Next year, I hope to grow more and this will come in very handy.
Great post. Congrats on being chosen as a featured post on this week’s Wildcrafting Wednesdays! I hope you’ll join us again and share more of your awesome posts.
http://www.herbanmomma.com
This helpful post is being featured on my blog today as part of Tuesdays with a Twist blog hop: http://www.godsgrowinggarden.com/2014/10/time-to-link-up-tuesdays-with-twist.html
Thanks
Angie
Thanks for a very informative post!! I found you on craftgossip.com.
Nice harvest! Very interesting to see how the red potatoes are in the soil waiting to be picked!