Planting Potatoes the Grow Biointensive Way
This post may contain affiliate links, which means that I may receive a commission if you make a purchase using these links. As an Amazon Associate I earn from qualifying purchases.
Grow Biointensive is an organic agricultural system that focuses on attaining greatest yields from a small garden area. The process involves double-digging beds, feeding the soil with compost, and planting closely to conserve spacing and create a microclimate. This method uses less garden space and eliminates the labor of hilling your potatoes.
My first year of growing potatoes, I used the traditional trench method. This involves digging trenches two feet apart, mounding the soil in between the trenches, and using this soil to hill the potato plants as they grow. Although the crop was successful, I didn’t like the extra labor involved in hilling, the unkempt and messy appearance of the plot, and the wasted space in between the rows.
While I was growing my first batch of potatoes back in 2010, a fellow blogger, Laura was experimenting with John Jeavons’ Grow Biointensive potato planting method.
The Grow Biointensive program is made up of eight principles to grow healthy food naturally and care for the soil at the same time. The eight principles are: deep soil preparation, composting, intensive planting, companion planting, carbon farming, calorie farming, open-pollinated seeds, and whole system method. Learn more about Grow Biointensive.
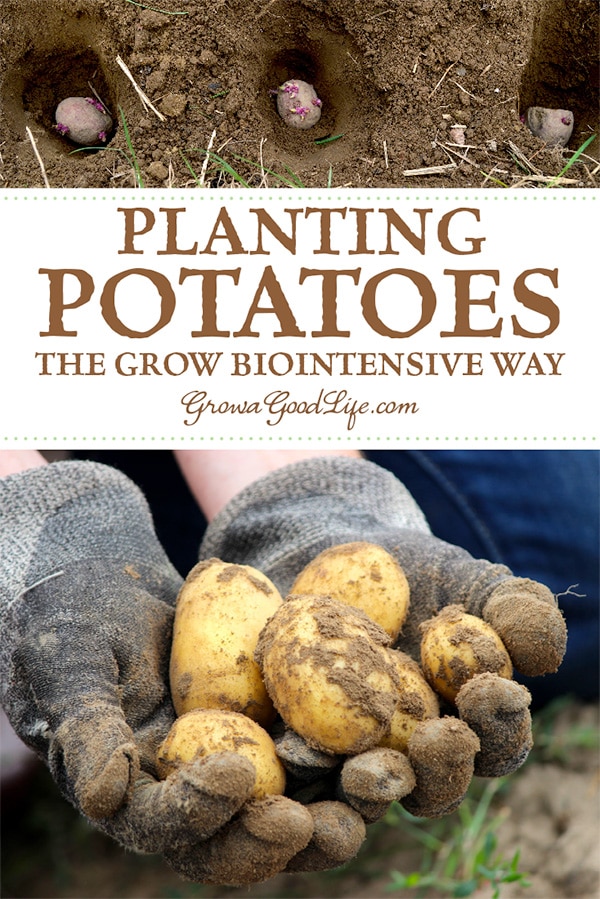
Planting potatoes the Grow Biointensive way involves double-dug beds, feeding the soil with compost, and planting closely to conserve spacing and create a microclimate. The potato seeds are planted on top of the fluffed up soil, 9-inches apart and about 9-inches deep from the soil surface. The rows are planted in an offset, or diamond spacing. The closer spacing helps maximize space and creates a microclimate that shades out weeds and reduces moisture loss. The deep, 9-inch planting eliminates the need to hill your potatoes.
I was intrigued by this method, especially since Laura’s experiment was such a success. I did some further research and decided to try it the following year. I was so thrilled that my experiment worked even though I didn’t follow the instructions exactly! I had an abundant potato harvest that year providing plenty of potatoes for winter food storage.
I have modified the method a little over the years. Since I don’t walk on my garden beds, there is no need to double dig each year. Once your soil is loose and healthy, adding some finished compost and organic amendments at planting time is all that you will need to do. The instructions below assume you have never double dug your gardening beds.
Also See: 8 Great Tips for Growing Potatoes
How to Plant Potatoes the Biointensive Way:
Step 1: Make a measuring board:
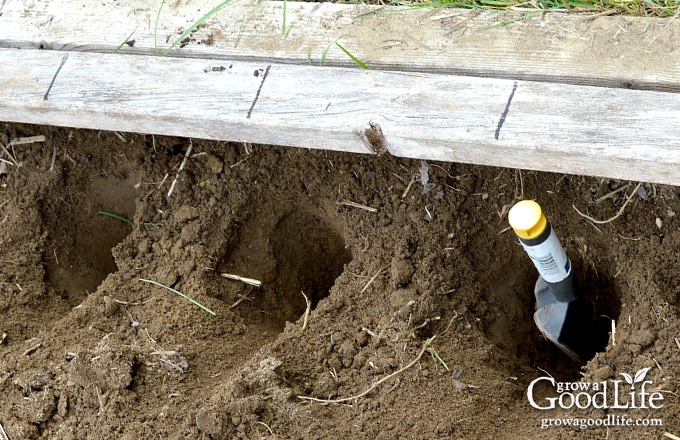
It is helpful to use a measuring board to place across your gardening bed to mark the spacing of your planting holes. I use a 2×4 scrap board and mark out 9-inch intervals on one side with a marker, then turn the board over and mark out 9-inch intervals on the other side but off set from the first side. So all I have to do is flip the board over to measure the next row creating a diamond pattern.
Step 2: Double dig and plant your potato bed:
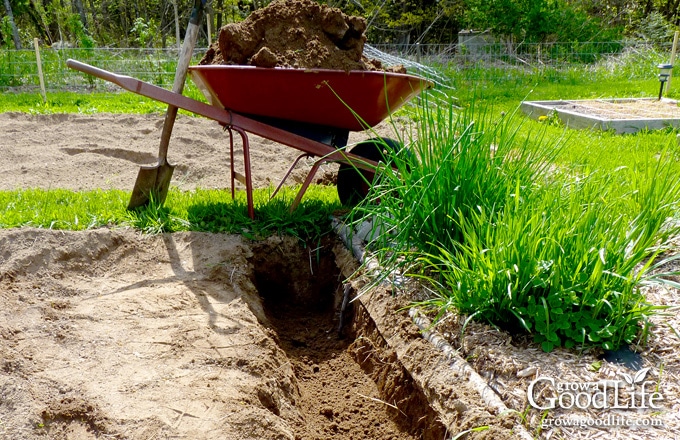
You will be double digging and planting your potato seeds at the same time. The first step is digging a row about 12-inches deep. The soil from this first row is placed into a wheelbarrow and set aside. Once the row is dug, add some finished compost and an organic fertilizer to the trench. Use a digging fork to mix in the amendments and loosen the soil in the trench to a depth of another 12 inches. This will allow oxygen into the soil and helps the roots to penetrate easier.
Step 3: Plant your seed potatoes:
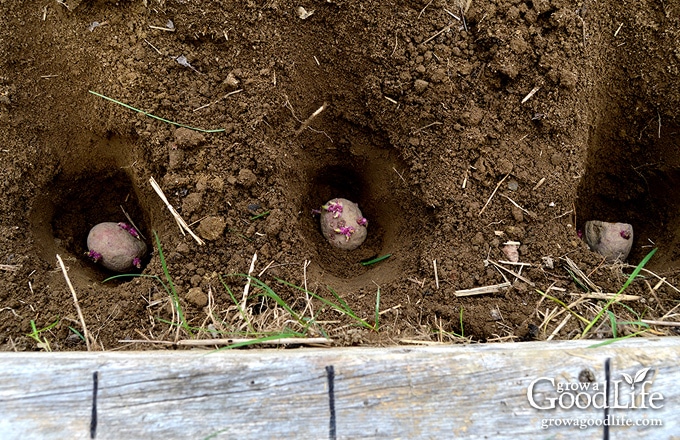
Place your measuring board across the bed and mark out your planting holes. You are aiming to plant your seed about 9-inches below the soil surface. Since the soil is fluffed up, you may need to dig down into the soil to be sure your planting holes are 9-inches deep. You can use a hand trowel or even a large bulb planter. Place your potato seeds into the holes along the trench with the sprouts facing up. Once the first row is planted, you will be covering it with the soil from the next row.
Step 4: Plant your next row:
Measure the next row 9-inches away from the first and begin digging your second row about 12-inches deep. As you dig, use the soil from the second row to cover the first. Add your amendments, mix in and loosen the soil another 12-inches with a digging fork. Flip your planting board over and plot out your planting holes. Remember, these should be spaced offset from the previous row. Continue in the same way until you have planted all your potato seed. Once you have reached the final row, cover the trench with the reserved soil from the wheelbarrow.
Step 5: Mulch the potato bed:
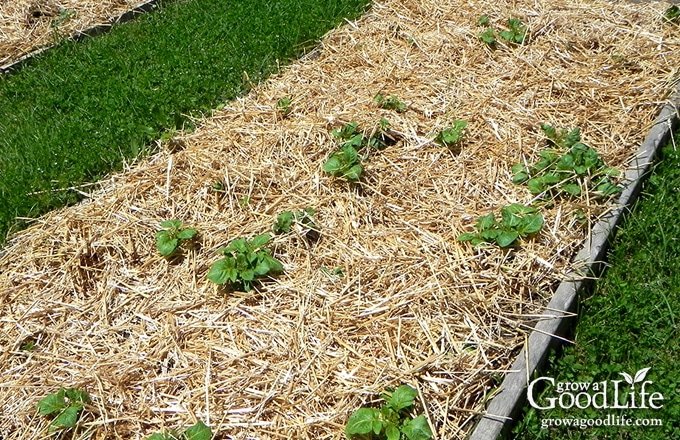
Once the bed is planted, string soaker hoses (if using) along the rows and water well. Mulch the bed heavily to help retain moisture, reduce weeds, and keep the light from reaching any potatoes that reach the soil surface. I like using straw as mulch, but also use shredded leaves if straw isn’t available. Your potato plants should emerge from the soil in about two weeks. It may take longer if the soil is still cold.
Step 6: Add poles and twine for support:
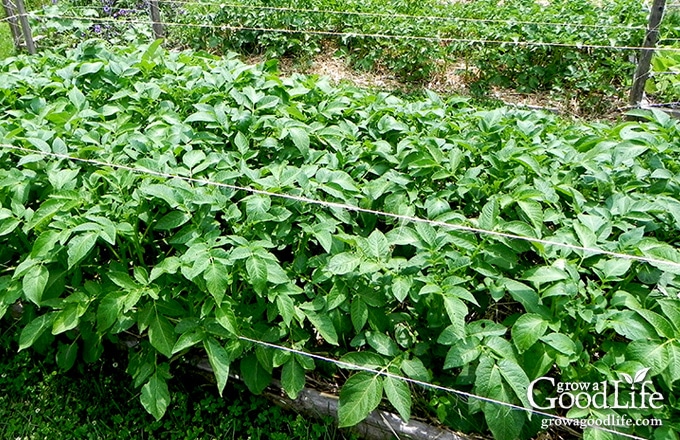
Add four poles to the corners of your potato bed and string some twine to provide support as the potato plants grow. In the book, The Sustainable Vegetable Garden, John Jeavons suggests that staking potatoes helps the plants to remain upright creating a microclimate to keep the plants and soil cooler. This will also keep the plants from flopping into the walking paths.
Step 7: Harvest your potatoes:
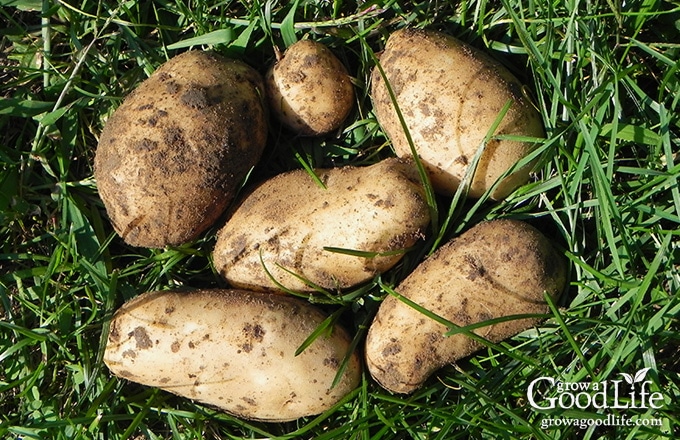
Baby potatoes are delicious. Once the potato plants bloom, you can begin harvesting potatoes as needed for meals. Dig carefully beneath the soil and pull out what you need. Try not to damage too many roots so the plant can continue growing. If you are growing potatoes for storage, allow the tubers to remain in the ground to mature fully.
Planting potatoes the Grow Biointensive way has served me well over the past few years so I haven’t tried too many different ways to grow potatoes, but thankfully many other bloggers have, and they allowed me to share their experiences. Check out 6 Ways to Grow Potatoes for more ideas on how to plant your potatoes.
References and Further Reading
- How to Grow More Vegetables Than You Ever Thought Possible
- The Sustainable Vegetable Garden: A Backyard Guide to Healthy Soil and Higher Yields
- Grow Biointensive Website
- A Farmer’s Mini Handbook: Grow Biointensive Sustainable Mini-Farming PDF
Want to Learn How to Grow Potatoes?
You will find everything you need to start growing potatoes in my PDF eBook, Grow a Good Life Guide to Growing Potatoes. Whether you are striving for a few gourmet fingerling potatoes or a large crop for winter food storage, this guide will show how you can grow your own, organic, homegrown potatoes.
You May Also Like:
- How to Grow Potatoes: Trench and Hill Method
- Sourcing Seed Potatoes for the Backyard Garden
- Chitting Potatoes Gives them a Head Start
- 5 Steps to Storing Potatoes for Winter
- Baked Seasoned French Fries Recipe
- Harvest Hearty Beef Stew Recipe
Good planning is key to a successful vegetable garden
Whether you are new to growing your own food or have been growing a vegetable garden for years, you will benefit from some planning each year. You will find everything you need to organize and plan your vegetable garden in my PDF eBook, Grow a Good Life Guide to Planning Your Vegetable Garden.


with my clay soil and not enough room for more raised beds I am using the grow bag method this year…I’ll let you know how it goes
great post! i’ve never grown potatoes before because i couldn’t part with the garden space they demanded. but, i inherited some French fingerlings and Yukon Golds this year, so i’m going to have to give it a whirl.
Organic Gardening’s last issue had a great story on the pros and cons of how to grow potatoes. after reading your post, i’m leaning towards your method. thanks!
Ribbit: I had a few seed potatoes left over that will be planted in pots. I’ve never grown them this way. It will be fun to experiment.
Robin: I had not heard of this method either until I read Laura’s success at The Modern Victory Garden. She used this method last year with great success. It was still a lot of work though.
Granny: No room for potatoes? They do take up a lot of room. I am considering digging another bed for next year to work into the crop rotation. I hope this method works for me. I will be anxious until I see a sprout above ground.
Tami: Luckily the garden was here when we purchase the property, and the soil has been amended through the years. I double dug the whole thing when we first purchased the property, but that was many years ago and I am just not that strong any more. We bought a Mantis cultivator three years ago and I don’t regret it one bit. It is so easy to use and lightweight that even I can use it. We till the in-ground vegetable gardens once a year.
Daphne: Laura also used a board with the spacing marked. I wish I had remembered this before. Ugh! Hopefully, I wasn’t too far off.
Meemsnyc: I think what I like the most is that there is no hilling with this method. The initial planting is the same amount of labor as the trenching method I used last year.
I have never heard of this method before. I use the straw mulching method with no hilling. It will be interesting to see how it works out for you.
Good luck with them! I’m still doing mine it pots this year. It worked okay last year. Not perfect, but okay.
Sounds like an awesome method to try out!
That is the method I’m using this year. I had a bamboo pole that I marked with the row spacing and the offset spacing. So I just had to remember if I was on the green marks or the orange. It worked pretty well.
Double digging IS hard. We had to break ground this year and since our soil is pretty much all clay, it was like trying to bust up rocks. After about a month of air rain and sun it loosened up but Hubby said “No more double digging” and went and rented a Mantis for the day. We really liked the good job that it did. Not sure we’ll buy one as I’m thinking of moving more towards the “lasagna method” of gardening, but we’ll see.
Plant a few for me, OK? I have no room left for potatoes, while I’m overwhelmed with cabbages and broccoli! I didn’t plan the new garden layout well, must do better next year. You are going to have a fantastic potato harvest. Nine inches is the optimum depth, according to our local farmers. Anything more actually decreases yields, so I pooh-pooh those who build their potato towers.