Apple Butter Canning Recipe
This post may contain affiliate links, which means that I may receive a commission if you make a purchase using these links. As an Amazon Associate I earn from qualifying purchases.
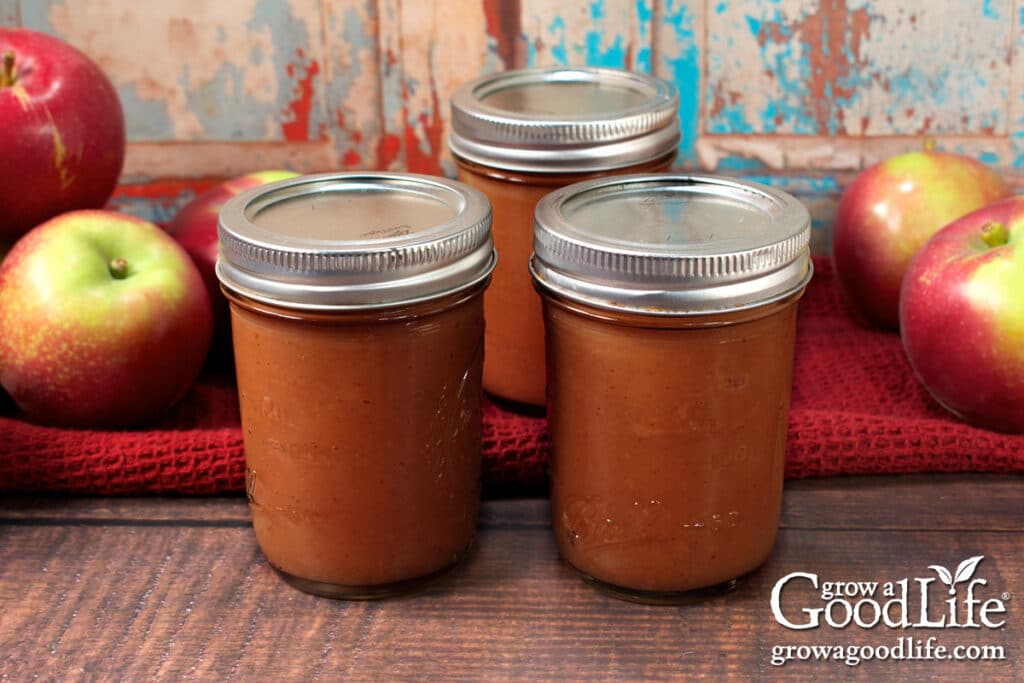
Preserve the essence of fall with our apple butter canning recipe. Capture the flavors of the season in jars of velvety apple butter, ready to enjoy on pancakes, oatmeal, or as a thoughtful homemade gift.
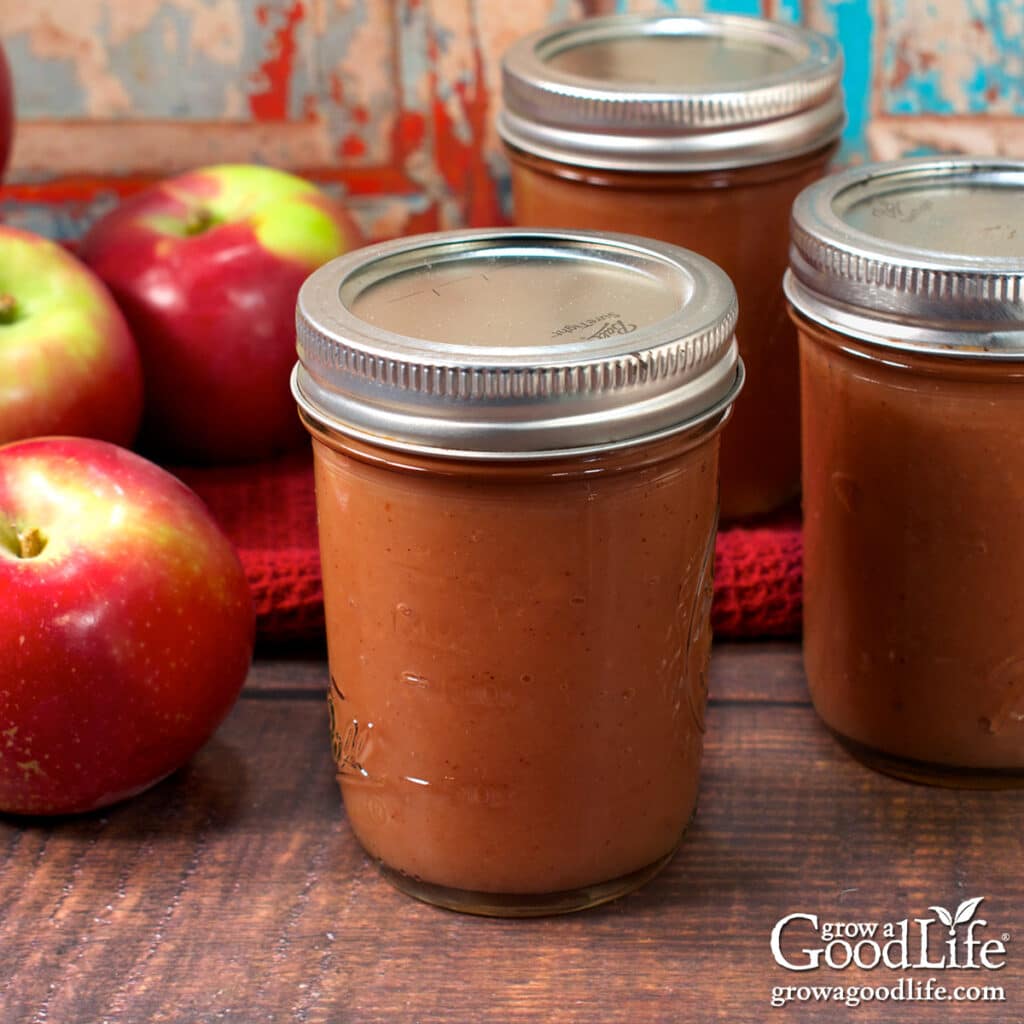
As the leaves change colors and fall from the trees, creating a picturesque carpet of reds, oranges, and yellows in your yard, it’s a sure sign that winter is coming. But before the snow blankets the landscape, a delightful autumn tradition beckons – apple picking!
Fall is the ideal season to visit your local apple orchard, where you can pluck the juiciest apples for immediate enjoyment and long-term preservation. This outdoor activity combines the best of the season: stunning foliage, fresh, crisp apples, and a unique way to savor the great outdoors.
Apple butter is a delicious way to preserve apples in season. Homemade apple butter is a versatile spread that can elevate your breakfasts and snacks, whether drizzled on yogurt, sprinkled over granola, swirled into ice cream, or generously slathered on biscuits, toast, or English muffins.
This article will guide you through making and home-canning your own apple butter. With this recipe and canning tutorial, you’ll soon be stocking your food storage shelves with the rich, velvety goodness of homemade apple butter.
Apple Butter vs. Applesauce: Unveiling the Difference
Fresh apples are at the heart of applesauce and apple butter, but these apple-based creations have distinct characteristics that set them apart. So, what exactly distinguishes apple butter from apple sauce?
- Texture: The most immediately noticeable distinction lies in their textures. Applesauce typically boasts a smoother, semi-liquid consistency, resembling a chunky puree. In comparison, apple butter has a thick, buttery texture that’s spreadable and velvety. It’s this luxurious texture that earned it the “butter” in its name.
- Cooking Time: Another key difference lies in the cooking process. Apple butter requires a longer stint on the stove or slow cooker than applesauce. This extended cooking time works wonders in transforming the apple puree. Much of the moisture evaporates as the apples simmer and reduce, resulting in a denser, more concentrated fruit spread.
- Sweetness and Flavor: While both apple butter and applesauce can be sweetened to taste, apple butter typically leans towards a richer sweetness. This is because apple butter often involves cooking the apples with sugar or sweeteners for an extended period, allowing the sugars to caramelize and intensify the flavor. In contrast, applesauce can be left with a more natural, subdued sweetness, making it a versatile ingredient for sweet and savory dishes.
- Use: Applesauce is a versatile kitchen staple, frequently used in baking as an oil or butter substitute, as a snack, and as a go-to side dish for many meals. Apple butter, with its concentrated flavor and thick consistency, is typically used as a spread. It’s a luxurious addition to breakfast and snack items, enhancing everything from toast to yogurt and even desserts like ice cream.
While both apple butter and apple sauce start with the same core ingredient—fresh apples—their unique textures, cooking times, and sweetness levels set them apart. If you want to make and can applesauce, follow this recipe: Canning Applesauce.
Helpful Tips for Making Apple Butter
Apples are naturally high in acid and contain ample sugar. But, you can safely enhance the flavor of your apple butter by adding sweeteners and spices such as allspice, cinnamon, ginger, nutmeg, apple pie spice, salt, and a touch of lemon juice for a hint of brightness. Here are some additional flavor variations to consider:
- Honey-Sweetened Apple Butter: Replace sugar with honey for a unique sweetness.
- Apple Cider Butter: Swap water for apple cider to infuse a richer apple flavor.
- Maple Apple Butter: Reduce water to 1/2 cup and substitute sugar with 1 cup of pure maple syrup. Enhance the flavor with 1 teaspoon of maple extract for an extra depth of taste.
- Vanilla Apple Butter: Experience the delightful fusion of rich vanilla and velvety apple butter by simmering with 1 split vanilla bean or adding 1 tablespoon of vanilla extract at the end of the cooking time.
Here are additional tips for making the best apple butter:
Choosing the Best Apples for Apple Butter
Many varieties of apples make excellent apple butter. Since apple butter needs a long cooking time, you want an apple that can take the heat and still taste good. Softer apple varieties cook down quickly and create smooth textured apple butter.
Aim for a sweet-tart variety, or try to use a combination of sweet and tart apples because it will help develop a more complex flavor and a thicker texture in the final product. You won’t need to add much sugar if you include naturally sweet apples.
- Sweet Apple Varieties: Some sweet apple varieties include Ambrosia, Cameo, Crispin, Fuji, Gala, Golden Delicious, Honeycrisp, Rome Beauty, and Sunrise.
- Tart Apple Varieties: For those who prefer a tart twist, explore options like Braeburn, Ginger Gold, Granny Smith, Gravenstein, Jazz, Jonathon, and Pink Lady.
Cortland, Empire, Jonathan, Macoun, and McIntosh are my favorite apples for making apple butter. However, feel free to explore regional apple varieties with unique flavor profiles.
You can use slightly overripe, minimally damaged, or just somewhat soft apples, as these are ideally suited for apple butter-making. As long as most of the fruit remains in good condition, you can trim away any bruises or damaged areas.
However, avoid rotten apples, severely damaged, or host to worms or pests. Likewise, steer clear of apples that have lingered on the ground for more than a day or have been nibbled on by wildlife. Windfall apples are best avoided, as they may harbor bacteria and mold spores that can affect the quality of your apple butter.
By carefully selecting the right apples, you’re setting the stage for a delectable apple butter creation that will delight your taste buds and those of anyone fortunate enough to savor your homemade spread.
Tips for Prepping Apples
After cooking the apples, you’ll need to blend them into apple puree and then cook this down further into thick apple butter. Blending your apple butter introduces air to the mixture, so it’s best to puree it as soon as the apples break down. Then, simmering the pureed apples over low heat drives out air, reduces moisture, and turns that apple puree into a thick, velvety, smooth, spreadable consistency.
Once the apples are soft, there are several ways to puree them with kitchen gadgets:
- Food Strainer
- Food Mill
- Handheld Immersion Blender
- Blender
- Food Processor
Whichever way you decide, the peels and seeds must be removed before canning. The way you prepare your apples depends on how you will be pureeing them:
Food Strainer or Food Mill:
A food strainer or food mill will remove the skins and seeds from cooked apples. I found taking the effort to core the apples before cooking makes it so much easier. Unlike tomato seeds, apple seeds are hard and clog up the strainer frequently. Coring the apples beforehand simplifies the process.
I use a knife to remove the cores and cut the apples into pieces. Once they are cooked until soft, I run them through a food strainer to remove the peels and puree the apples.
Blender or Food Processor:
If you are planning on pureeing your apples with an immersion blender, regular blender, or food processor, you should peel and core the apples before cooking.
An apple, peeler, corer, and slicer tool will make it easy to prepare a large amount of apples for making apple butter. Or you can use a vegetable peeler and knife. You can even repurpose the peels and cores to make apple scrap vinegar.
Steps for Making and Canning Apple Butter
This apple butter recipe for canning is from the Ball Canning Back to Basics book. I have doubled the recipe and adjusted the sugar and spices.
Before you begin, you may find it helpful to review this article on water bath canning at the National Center for Home Food Preservation website.
A detailed and printable recipe can be found at the bottom of this article, but these are the general steps for making and canning homemade apple butter:
Step 1: Gather Your Kitchen Equipment
You’ll need:
- Water bath canner with canning rack
- 6 pint sized canning jars, or 12 half-pint canning jars
- Canning lids and bands (new lids for each jar, bands can be reused)
- Kitchen scale
- Food strainer, blender, food processor, or stick blender to purée the sauce
- Canning tools: jar lifter, funnel, and bubble popper
- Basic kitchen supplies such as a large 10-quart pot, ladle, towels, knife, cutting board, and a large spoon.
Step 2: Make the Apple Butter
Weigh the apples, and then rinse them well under running water. If you are blending the apples with a food processor or stick blender, peel them before cooking. You can leave the skins on if you are using a food strainer, as it will separate the skins from the cooked apple pulp. Otherwise, remove the cores, trim off bad spots, and cut them into even-sized pieces.
You can cook your apple butter on the stove, but I like to use my slow cooker to make apple butter. It takes longer, but I don’t have to babysit the apple butter on the stove while it is cooking. I explain both methods below:
Stovetop Method
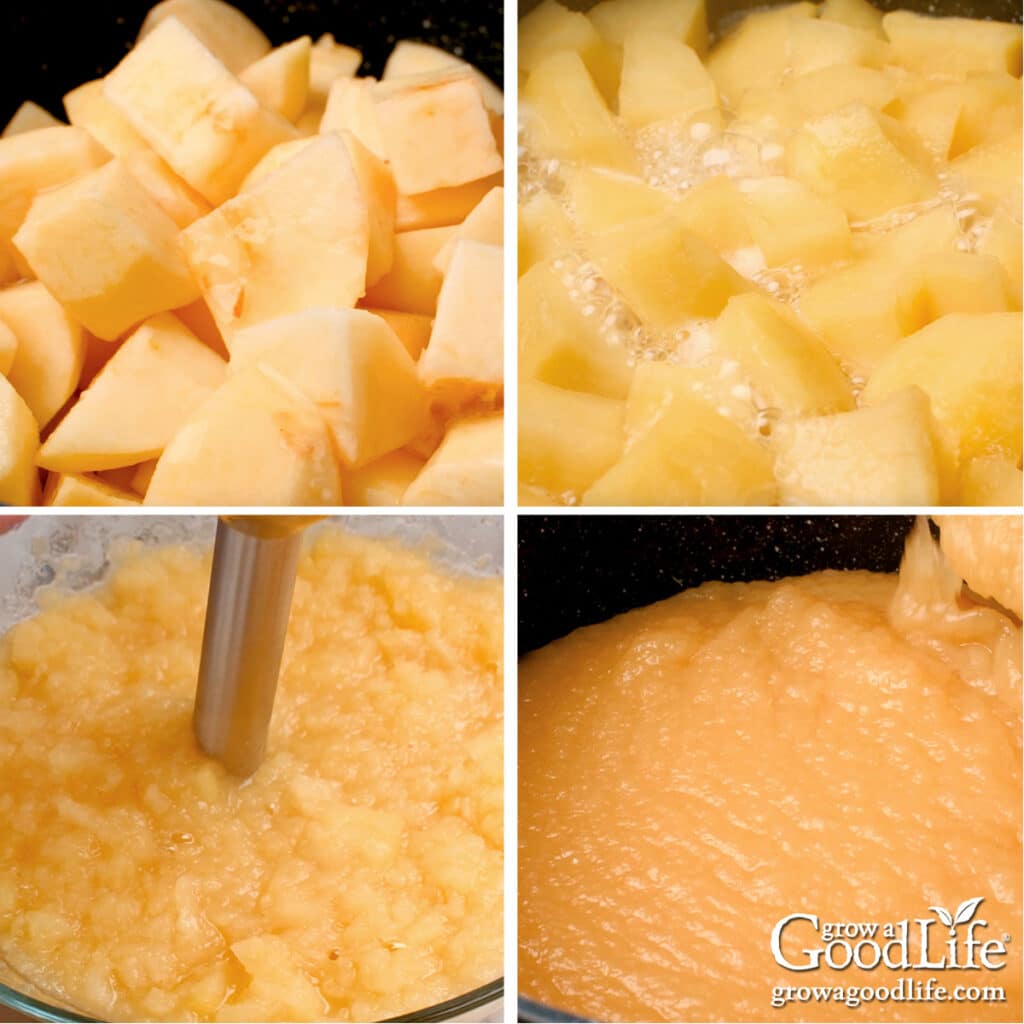
Place the prepared apples into your large pot, add the water, and cook the apples until they are soft.
Let the cooked apples cool slightly, then puree until smooth. Return the apple puree to the pot. Add the sugars, lemon juice, cinnamon, nutmeg, and ground cloves. Bring the pot to a boil over medium-high heat while stirring to dissolve the sugar.
Once the pot reaches a boil, reduce the heat to a simmer and continue cooking uncovered until the apple butter thickens to the desired consistency. Stir occasionally to prevent sticking. The total time will depend on the size of your pot and the moisture level of your apples, but plan on at least 30 to 60 minutes.
Slow Cooker Method
If you want to use a slow cooker, place the prepared apples in the slow cooker crock. Set it on low, vent the cover a bit to allow moisture to evaporate, and let it cook until the apples are soft.
Puree the apples, and return the puree to the slow cooker. Add the sugars, lemon juice, cinnamon, nutmeg, and ground cloves, and continue to cook until thickened to your desired consistency. Stir occasionally for even cooking. Overall, this can take 8 to 10 hours.
Determining the Perfect Apple Butter Consistency
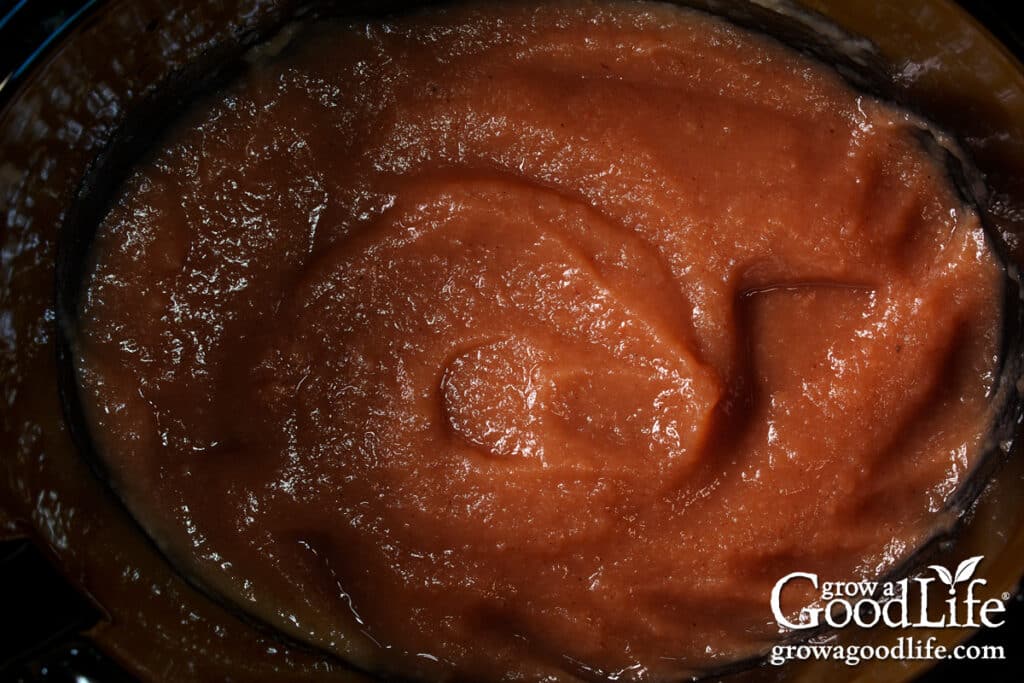
Observing its texture and thickness is the primary way to tell if your apple butter is ready. Apple butter should gradually transform from a loose, watery consistency to a thick, spreadable, and velvety texture as it cooks.
You can visually gauge this transformation by periodically lifting a spoonful of apple butter and letting it fall back into the pot. When it starts to mound or hold its shape on the spoon rather than running off quickly, it’s a sign that it’s thickening appropriately.
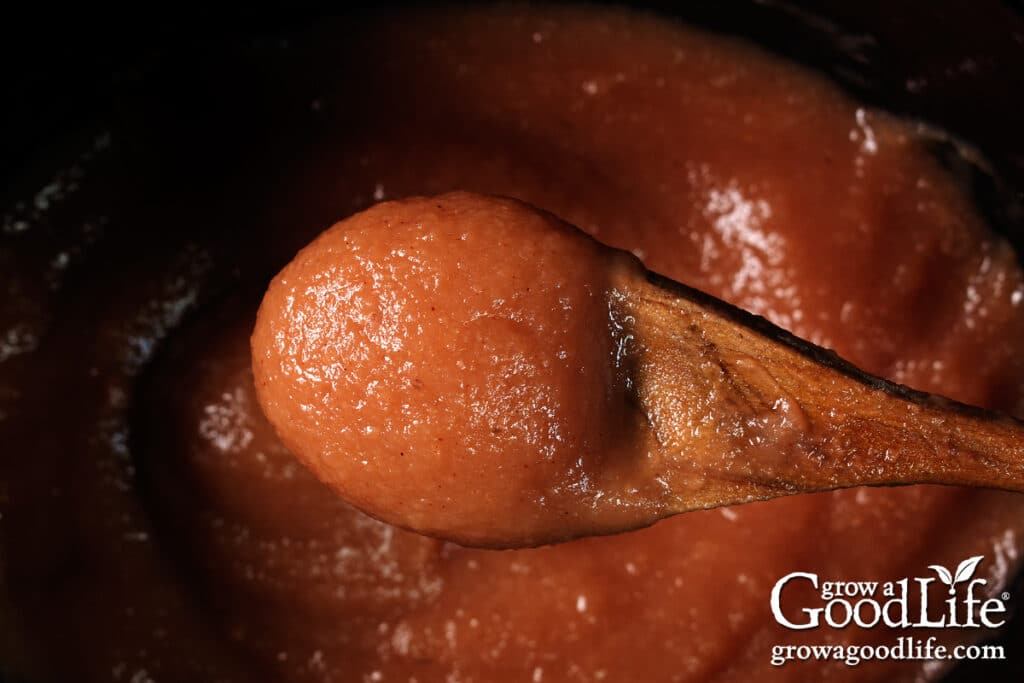
Here are several additional ways to help you recognize when your apple butter is finished cooking:
- Reduced Volume: Over time, your apple butter will reduce in volume as moisture evaporates. You may notice the level of the mixture in the pot decreasing. This reduction in volume is a good indication that the apple butter is concentrating and thickening.
- Color Change: Apple butter typically darkens as it cooks and caramelizes. It will shift from a lighter apple sauce-like color to a deeper, rich brown or reddish-brown hue. The darkening of color indicates the concentration of flavors and sugars, a sure sign that your apple butter is nearing completion.
- Fragrance: The aroma of your kitchen will change as the apple butter cooks. Initially, you’ll smell fresh apples, but as it nears completion, the scent will become richer, sweeter, and more caramel-like.
- Spoon Stand Test: Insert a spoon at an angle into the center of the apple butter. If it can stand up on its own without toppling over, it’s an indicator of the desired thickness and readiness.
- Plate Test: Spoon a small amount of hot apple butter onto a plate to further check for readiness. If it doesn’t separate into liquid and maintains its shape without spreading, it’s a sign that it has thickened sufficiently.
When your apple butter reaches your desired thickness and flavor, it is ready to can.
Step 3: Prepare the Canning Equipment
While the apples are cooking, wash your jars, lids, bands, and canning tools in warm, soapy water. Rinse well, and set aside to air dry until you are ready to use them.
When you are ready to can your apple butter, preheat your canner and warm the jars by placing the jar rack into the water bath canner, setting the jars upright in the canner, and adding enough water to cover. Bring the canner to a simmer (180˚F) for at least 10 minutes, and keep warm as you fill the jars.
Step 4: Fill the Jars
Lay a kitchen towel on the counter. Use the jar lifter to remove a hot jar from the canner, drain it, and place it on the towel. Keep the remaining jars in the canner so they stay warm.
Place the canning funnel on the jar, and ladle hot apple butter into the jar, leaving a 1/2 inch headspace. Run the bubble popper through to release air, then wipe the jar rim with a damp towel to remove residue. Add the lid and band, and screw it on until fingertip tight. Place the jar back into the canner, and repeat with the rest of the jars.
Step 5: Process the Apple Butter in a Water Bath Canner
Once the filled jars are in the canner, adjust the water level to cover the jars by two inches, bring the canner to a boil, and process for the times indicated in the recipe below. Remove the jars from the canner and cool completely. Test the seals, label, and date, and store them in a cool, dark location for 12 to 18 months. This recipe makes about 6 pints or 12 half-pint jars depending on the thickness of your apple butter.
Ways to Use Homemade Apple Butter
Beyond simply spreading it on toast, there are numerous ways to enjoy this flavorful treat:
- Pancakes and Waffles: Elevate your breakfast game by drizzling warm homemade apple butter over a stack of fluffy pancakes or crispy waffles. Its sweet, spiced notes complement the comforting flavors of your morning favorites.
- Oatmeal Enhancement: Stirring a spoonful of apple butter into your morning oatmeal is a surefire way to infuse it with a burst of fruity sweetness and autumnal spices. It transforms a simple bowl of oats into a hearty, comforting meal.
- Pork Chop Glaze: Take your savory dishes to the next level by using homemade apple butter as a glaze for pork chops. Brush it on during grilling or pan-searing to add a rich, caramelized flavor that perfectly complements the savory meat.
- Cheese Platter or Charcuterie Board: Create an impressive cheese platter or charcuterie board and include a small dish of apple butter as a condiment. Its sweet and spicy profile pairs wonderfully with various cheeses, cured meats, and crackers, offering a delightful contrast of flavors.
- Homemade Gift Baskets: Consider gifting jars of homemade apple butter along with a loaf of rustic, homemade bread, and homemade vanilla extract. This thoughtful combination makes for a unique and personalized present. Recipients can enjoy the apple butter on their favorite dishes while having the option to infuse their culinary creations with the aromatic essence of vanilla. Here are other homemade gift ideas: 30 Homemade Food Gifts for Christmas.
Whether you’re indulging in a cozy breakfast, enhancing savory dishes, or sharing with loved ones through thoughtful gifts, homemade apple butter adds a touch of warmth and flavor. Explore these creative ways to savor this homemade delight’s rich, spiced goodness.
Apple Butter Canning Recipe
Ingredients
- 8 pounds apples peeled, cored, and cut into pieces
- 2 cups water or apple juice or apple cider
- 1 cup granulated sugar or sweeten to taste
- 1 cup lightly packed brown sugar or sweeten to taste
- 1/2 cup bottled lemon juice
- 1 teaspoon cinnamon optional for flavor
- 1/2 teaspoon nutmeg optional for flavor
- 1/4 teaspoon ground cloves optional for flavor
Instructions
Make the Apple Butter:
- Add the prepared apples and water or apple juice to a large saucepot.
- Bring the pot to a simmer over medium-low heat until the apples are soft, about 20 to 30 minutes.
- Puree the mixture until smooth, and then return the apple pulp to the pot.
- Add the sugars, lemon juice, cinnamon, nutmeg, and ground cloves.
- Bring the pot to a boil over medium-high heat while stirring to dissolve the sugar.
- Once the pot reaches a boil, reduce the heat to a simmer and continue cooking until the apple butter thickens enough to hold its shape on a spoon, 30 to 60 minutes. Stir occasionally to prevent sticking.
Prepare the Canning Gear:
- Start by thoroughly washing your canning jars, lids, screw bands, and tools with warm, soapy water, and rinse them thoroughly.
- Set up your water bath canner by placing the canning rack inside and positioning it on a large burner on your stove.
- Place the jars in the canner on the canning rack, then fill with water until the jars are covered.
- Bring the canner to a simmer (180˚F) for 10 minutes, and keep the jars warm until you are ready to fill them.
Fill the Jars:
- Lay out a dry kitchen towel on the counter.
- Use the jar lifter to remove one jar from the canner, drain out the water, and set it on the towel. Keep the remaining jars in the canner so they stay warm.
- Use the canning funnel and ladle to fill the jar with hot apple butter, leaving 1/2-inch headspace.
- Run the bubble popper through slowly to release any air bubbles, then wipe the rim with a clean, damp towel to remove any residue.
- Add the lid and secure it with a screw band until it’s fingertip tight.
- Return the jar to the canner, and repeat with the rest of the jars.
Process in a Water Bath Canner:
- Once the filled jars are all in the canner, adjust the water level so it is at least 2 inches above the tops of the jars.
- Cover your canner and bring it to a boil over medium-high heat. Once the water boils vigorously, set a timer and process half-pints and pints for 10 minutes at altitudes of less than 1,000 ft. (adjust processing time for your altitude if necessary – See notes below).
- When the processing time is complete, turn off the heat, remove the cover, and let the canner cool and settle for about 5 minutes.
- Set up your jar cooling area by spreading a dry kitchen towel on your counter.
- If your jars are still briskly bubbling, let them sit in the canner a little longer to calm down. Then, use the jar lifter to remove the hot jars from the canner and place them on the towel.
- Allow the jars to sit undisturbed for 12 to 24 hours. Don’t tighten the bands or check the lids yet.
- After 12 to 24 hours, check to be sure the lids are sealed by pressing on the center of each cover. A well-sealed lid should remain firmly in place without flexing. If, however, you find any covers that flex up and down, this indicates a seal failure. In such cases, refrigerate the affected jar and consume it within a week.
- With the seals confirmed, remove the screw-on bands and wash your jars in warm, soapy water to remove any residue.
- Label, date, and store the jars in a cool, dark area and consume within 18 months for the best quality. Once opened, store leftovers in the refrigerator and enjoy within a week. Yields about 12 half-pint or 6 pint-size jars.
Notes
Nutrition
You May Also Like These Apple Preserving Recipes:
- Spiced Apple Jelly Recipe
- 3 Ways to Dehydrate Apples for Food Storage
- Canning Apple Slices
- Apple Juice Canning Recipe
If you love salsa, consider adding our eBook, Grow a Good Life Guide to 50 Salsa Canning Recipes, to your resource library. This 72-page eBook is packed with a variety of delicious salsa recipes, including classic tomato salsas to roasted and grilled salsas to tomatillo and delicious fruit blends, all safe for water bath canning. It’s the perfect guide to help you preserve your garden harvests.

