Spiced Apple Jelly Recipe (No Added Pectin)
This post may contain affiliate links, which means that I may receive a commission if you make a purchase using these links. As an Amazon Associate I earn from qualifying purchases.
This spiced apple jelly recipe livens up the plain apple flavor with some traditional pairings, including lemon juice, cinnamon, nutmeg and cloves.

After tasting the tart and sweet flavor combination of crab apple jelly, the jelly I made from regular apples tasted bland to me. The abundance of this year’s apple harvest allowed for a little experimenting with additional flavors and spices.
The unrefined, rich taste of pure cane sugar combines well with the spices turning a bland jelly into one that wakes up the taste buds when slathered on homemade biscuits or toast. We really enjoy this spiced apple jelly and I hope you will too.
Tips for Making Jelly without Added Pectin
Jellies are made by heating fruit juice with sugar, and require the right combination of fruit, pectin, acid, and sugar to form a gel.
Pectin is what causes the liquid to thicken and form a gel. Without it, your jams and jellies will remain watery. Apples contain enough natural pectin to gel with only added sugar.
Here are tips for making jelly without added pectin:
Don’t double the batch
Follow the recipe, and work in small batches when making apple jelly. Since you are counting on the natural pectin found in the fruit, you don’t want to overheat the mixture.
If you double the recipe, it will take longer to heat to the proper temperature. Too much heat will destroy the pectin, and it will break down and fail to gel.
Choose fresh organic apples
The best apples for making apple jelly are freshly picked fall apples. Fruit that is slightly under ripe contains more natural pectin and acid, so try to mix about three quarters ripe and one quarter under ripe fruit. Use organic apples that have not been sprayed with chemicals that penetrate the skin.
The pectin that turns the apple juice into jelly is concentrated in the apple’s skin and core. Apples found out of season have been in storage for a while, which may affect the amount of pectin in the fruit.
Do not use commercially canned or frozen fruit juice with this recipe. There isn’t enough natural pectin in fruit juices to gel.

Allow yourself plenty of time
Try to plan ahead when extracting juice from fruit and consider dividing the process over two days to allow time for the juice to strain completely. This is even more important with apple jelly because you want to extract as much of the natural pectin from the apples as you can so your jelly thickens up properly.
Don’t have a water bath canner?
If you don’t want to pull out a canner, you can use a large sauce pot to process the jars. Use a pot that will hold 6 half-pint sized jars, and tall enough to cover the tops of the jars by a few inches of water, plus two inches of space to prevent boiling water from splashing out of the pot. Place a rack in the bottom to elevate the jars up away from direct heat, and allow the water to circulate around the jars as they are processed.
How to test for jelly stage
If you are new to making jelly, the NCHFP website has a nice description of how to tell when the jelly point has been reached: Testing Jelly without Added Pectin:
- Temperature Test: Use a candy thermometer to monitor the temperature of the jelly. Jelly stage is when the temperature of the boiled juice is 220 degrees F. (Adjust for altitude if necessary. For each 1,000 feet of altitude above sea level, subtract 2 degrees F.)
- Spoon or Sheet Test: Plunge a cool metal spoon into the boiling jelly mixture and lift the spoon out sideways so the liquid drips across the surface. The jelly stage is reached once the liquid forms two drops that flow together into a sheet that hangs off the edge of the spoon.
- Freezer Test: Place several plates in the freezer before you begin making your jelly. To check for jelly stage, place a spoonful of hot jelly onto the cold plate and let it rest for 30 seconds. Tip the plate to one side. Jelly stage is reached when the mixture gels on the cool plate and doesn’t run down the plate when tipped.
Cooking time will vary with each batch because the natural pectin level is different in each apple. I use all three testing methods but rely on the freezer plate method for the final check.
How to Make Apple Jelly
To make jelly, we are going to extract the juice and natural pectin from the apples, combine it with sugar, and cook it to evaporate moisture and form a thick spreadable jelly.
The jelly will then be preserved into shelf-stable jars in a boiling water bath canner. If you are new to canning or haven’t canned in a while, it may be helpful to review this article on Water Bath Canning for Beginners.
To make your canning session easier, I also created a free Home Canning Checklist you can print and keep nearby while you work. It includes a check-list and space to track your canning batches. Get your copy here:
Grab your Free copy
Home Canning Checklists
A more detailed and printable recipe can be found at the bottom of this article, but these are the illustrated steps for making spiced apple jelly.
Step 1: Extract the apple juice
Wash the apples with plain water and chop them up into small pieces skins, cores and all. These will be strained out after cooking. You will need about 3 pounds of prepared fruit.
Extract the apple juice by combining the prepared fruit in a large saucepan with enough water so that the fruit is covered. Add the spices, and stir to combine. Bring the mixture to a boil, and then lower the heat and simmer until the juices are released.

Mash the apples with a potato masher and continue simmering over low heat until the apples are soft. Strain the cooked apples through a damp jelly bag or double layers of cheesecloth in a colander.
Allow the apple juice drip out for several hours, or overnight. Don’t squeeze the jelly bag if you want a clear jelly. When the jelly is finished straining, compost the solids.
Step 2: Prepare the Canning Equipment
Gather your canning equipment, prepare the jars, set up the canner, and organize your work area.
You will need:
- Water bath canner or large pot with a rack
- 6 half-pint canning jars
- Lids and bands (new lids for each jar, bands can be reused)
- Canning tools: jar lifter, canning ladle, funnel, and bubble popper
- Jelly strainer
- Candy thermometer
- Kitchen scale
- Plus basic kitchen supplies such as a large pot, towels, potato masher, measuring cup, knife, and a cutting board.
Wash your jars, lids, bands, and canning tools in warm, soapy water. Rinse well, and set the lids, bands, and tools aside to air dry until you are ready to use them. Check the jars for nicks and cracks. Eliminate any jars that are damaged as these will break in the canner.
Jars must be heated before filling to prevent breakage due to thermal shock. Place the jar rack into the water bath canner, set the jars upright in the canner, and add water to cover the jars. Bring the canner to a simmer (180˚F) for 10 minutes, and keep the jars hot until you are ready to fill them.
Step 3: Make the Jelly
Place several plates in the freezer before you begin making your jelly. These will be used to test the jelly.
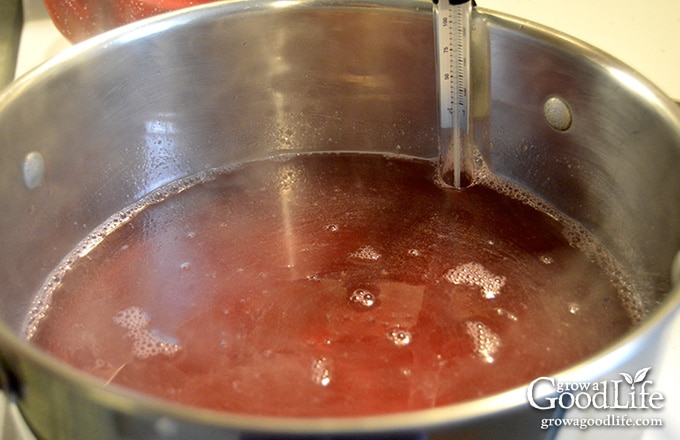
Attach the candy thermometer to a large saucepan, and pour 4 cups of apple juice into the pan. Add the sugar, lemon juice, and stir to dissolve. Bring juice to a boil over medium-high heat, stirring constantly, until jelly stage. Skim off any foam that forms.
Jelly stage is achieved once the temperature reaches 220 degrees F, when the liquid forms a sheet that hangs off the edge of the spoon, and when the mixture gels on a cool plate and doesn’t run when tipped.
Step 4: Can the Jelly
Spread a kitchen towel on the counter. Use the jar lifter to remove a hot jar from the canner, drain, and place on the towel. Keep the remaining jars in the canner, so they stay warm.
Place the canning funnel on the jar, and ladle hot jelly into the jar while leaving 1/4-inch headspace. Run the bubble popper through the jar to release any trapped air bubbles.
Wipe the rim with a damp towel to remove any residue. Center a lid on the jar, place the band over the lid, and screw it on until fingertip tight. Place the jar back into the canner, and repeat with the rest of the jars.
Adjust the water level so it is covering the jars by several inches, bring the pot to a boil, and process the jars for the times indicated in the recipe below. Let the jars cool, test the seals, label and date the jars, and store in a cool, dark location.

Spiced Apple Jelly Recipe (No Added Pectin)
Ingredients
- 3 pounds apples
- 3 cups water
- 3 cups sugar
- 2 tablespoons bottled lemon juice
- 1 teaspoon ground cinnamon or 2 whole sticks broken into pieces
- 1/2 teaspoon ground nutmeg
- 1/4 teaspoon ground cloves
Instructions
Extract the Apple Juice:
- Wash the apples with plain water, remove any bad spots, and roughly chop into pieces.
- Add the prepared fruit to a large saucepan, and cover with water, about 3 cups. Add the spices and stir to combine.
- Bring to a boil over medium-high heat then reduce to a simmer over low heat. Simmer until the skins are soft and the juices are released.
- Gently mash the apples with a potato masher and continue simmering over low heat for 30 minutes, stirring occasionally. Simmer low and slow because excess heat can destroy the natural pectin.
- Strain the juice through a damp jelly bag or double layers of cheesecloth. Allow the apples to strain for several hours, or overnight. If you want clear jelly, do not squeeze the bag. Discard solids.
Prepare the Canning Equipment:
- Wash your jars, lids, screw bands, and canning tools in hot soapy water. Rinse thoroughly to remove all suds. Set aside to air dry on a clean kitchen towel.
- Place the jar rack into water bath canner, place jars in the canner, and add water to cover.
- Bring the canner to a simmer (180˚F) for 10 minutes, and keep the jars warm until you are ready to fill them.
Make the Jelly:
- Measure out 4 cups of the apple juice and pour into a saucepan. Add the sugar and lemon juice and stir to dissolve.
- Bring to a boil over medium-high heat, stirring constantly, until jelly stage.
- Jelly stage is achieved once the temperature reaches 220˚F, when the liquid forms a sheet that hangs off the edge of the spoon, and when the mixture gels on a cool plate and doesn't run when tipped.
Can the Jelly:
- Spread a kitchen towel on the counter. Use your jar lifter to remove one jar from the canner, drain, and place on the towel. Keep the remaining jars in the canner so they stay warm.
- Use your canning ladle and funnel and add the hot jelly to the warm jar leaving 1/4-inch headspace. Swirl your bubble popper through the jars to release air bubbles. Wipe the rim of each jar with a damp towel.
- Center a lid on the jar, and screw on the band until it is fingertip tight. Use the jar lifter to place the jar back into the canner, and repeat with the remaining jars. Try to leave some space in between the jars.
- Once all the jars are in canner, adjust the water level to two inches above the jar tops.
- Cover the canner and bring to boil over high heat. Once water boils vigorously, continue boiling for 10 minutes at altitudes of less than 6,000 ft. (adjust processing time for your altitude if necessary – see notes below).
- When processing time is complete, turn off heat and allow the canner to cool down and settle for about 5 minutes.
- Spread a kitchen towel on the counter, and remove the cover by tilting lid away from you so that steam does not burn your face.
- Use the jar lifter to lift jars carefully from canner and place on the towel. Keep the jars upright, and don't tighten bands or check the seals yet. Let the jars sit undisturbed for 12 to 24-hours to cool.
- After the jars have cooled for at least 12 hours, check to be sure jar lids have sealed by pushing on the center of the lid. The lid should not pop up. If the lid flexes up and down, it did not seal. Refrigerate the jar and use up within a few weeks.
- Remove the screw on bands and wash the jars. Label, date, and store your jars in a cool, dark place. Use within 12 to 18 months. Refrigerate the jelly once opened and consume within 3 weeks. Yields about 6 half-pint jars.
Notes
Nutrition
This recipe was originally published November 2, 2015. It has been updated with additional information and new photos.
You May Also Like:
- Low-Sugar Cherry Jam
- Chokecherry Jelly Recipe
- Maple Vanilla Peach Jam
- Concord Grape Jelly
- Other Ways to Preserve Apples

Hello,
I only ended up with 2 cups of juice. Did I not boil my apples long enough? Could I cut the recipe in half with the juice I did get or should I try again?
Hi Brittany! With 3 pounds of apples and 3 cups of water, most people usually get more than 2 cups of juice, so a couple of things may have happened:
1) If the pot was boiling rather than gently simmering, some of the liquid may have boiled off, which reduces the final amount of juice.
2) Or, the apples may not have been strained long enough. Letting them drip slowly (without pressing) gives you quite a bit more juice.
The good news is that you can still make jelly! Just cut the sugar and lemon juice in half to match the juice you have. Smaller batches often set really nicely when using natural pectin. Let me know how it goes!
Thanks Rachel. I’ll admit this is my first time canning and making jelly so having a smaller batch was probably for the best! My jelly gelled which is all I wanted for my first go around. It tastes great but I will admit I may have over did cooking it and it’s a bit too gelantinous, I won’t try to save it this time! I’m going to make another batch this week and will update you on my second try 😊
That’s awesome, Brittany! Getting a good gel on your very first batch is a huge win! 😊 A lot of people end up over-boiling their juice the first time, so your smaller yield and extra-firm texture totally make sense. A gentle simmer instead of a full boil usually keeps more liquid from cooking off, so you’ll probably get closer to that 4 cups next round.
Can I still make the spiced apple jelly if my apple juice is already extracted ? My daughter wants me to try a spiced version of my regular jelly but all my juice is already done.
Carole, Yes, absolutely! Since your apple juice is already extracted, you can still make the spiced apple jelly. You’ll just need 4 cups of your prepared apple juice for this recipe. Go ahead and skip the “Extract the Apple Juice” step.
Hi there,
Thank you for sharing this recipe.
I’m about to start cooking the apples, and noticed that you call for bottled lemon juice. Is there a reason for that? Can I use fresh lemon juice?
Julia, I’m so glad you’re giving the recipe a try. Bottled lemon juice is recommended because it has a consistent and reliable acidity level, which is important for safe water bath canning. Fresh lemons can vary quite a bit in acidity, so using bottled ensures the finished product is safe for storing after canning. Hope your apples turn out delicious!
When do you add the spices – same time as the sugar and lemon juice?
Tura, Add the spices in step 2 under “Extract the Apple Juice”.
This sounds like the perfect recipe, is there any way to make this with half the sugar my Mom can’t have that much sugar?
Linda, I’m glad you’re interested in the recipe! Unfortunately, reducing the sugar may affect the jelly’s ability to set properly. Since there is no added pectin in this recipe, the sugar plays a crucial role in helping the liquid form a gel. If you are looking for a lower-sugar option, you might want to explore using Pomona’s Universal Pectin. This pectin is designed for low-sugar or no-sugar-added jams and jellies. I hope you find a recipe that suits your needs!
OMGOODNESS!
I do a LOT of canning, but it’s been quite some time since I’ve put up jelly. I hate commercial pectin, so with Google as my friend I found this recipe :-). Got a bit less than four half pints but who cares?! Best apple jelly I’ve ever tasted! And I can’t say that’s entirely because of my little homegrown apples 🙂
THANK YOU!!!!
Dawne, Thank you so much for your kind words! It’s wonderful to hear that you enjoyed the apple jelly, especially since you used your own homegrown apples. There’s nothing quite like the taste of homemade, is there? We’re thrilled that you found our recipe and that it worked well for you. Happy canning, and thanks for sharing your feedback!