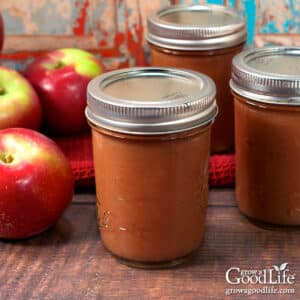
Apple Butter Canning Recipe
Learn how to make and preserve delicious apple butter with our step-by-step canning recipe. Perfect for fall, this homemade apple butter is a versatile and flavorful addition to your pantry.
Ingredients
- 8 pounds apples peeled, cored, and cut into pieces
- 2 cups water or apple juice or apple cider
- 1 cup granulated sugar or sweeten to taste
- 1 cup lightly packed brown sugar or sweeten to taste
- 1/2 cup bottled lemon juice
- 1 teaspoon cinnamon optional for flavor
- 1/2 teaspoon nutmeg optional for flavor
- 1/4 teaspoon ground cloves optional for flavor
Instructions
Make the Apple Butter:
- Add the prepared apples and water or apple juice to a large saucepot.
- Bring the pot to a simmer over medium-low heat until the apples are soft, about 20 to 30 minutes.
- Puree the mixture until smooth, and then return the apple pulp to the pot.
- Add the sugars, lemon juice, cinnamon, nutmeg, and ground cloves.
- Bring the pot to a boil over medium-high heat while stirring to dissolve the sugar.
- Once the pot reaches a boil, reduce the heat to a simmer and continue cooking until the apple butter thickens enough to hold its shape on a spoon, 30 to 60 minutes. Stir occasionally to prevent sticking.
Prepare the Canning Gear:
- Start by thoroughly washing your canning jars, lids, screw bands, and tools with warm, soapy water, and rinse them thoroughly.
- Set up your water bath canner by placing the canning rack inside and positioning it on a large burner on your stove.
- Place the jars in the canner on the canning rack, then fill with water until the jars are covered.
- Bring the canner to a simmer (180˚F) for 10 minutes, and keep the jars warm until you are ready to fill them.
Fill the Jars:
- Lay out a dry kitchen towel on the counter.
- Use the jar lifter to remove one jar from the canner, drain out the water, and set it on the towel. Keep the remaining jars in the canner so they stay warm.
- Use the canning funnel and ladle to fill the jar with hot apple butter, leaving 1/2-inch headspace.
- Run the bubble popper through slowly to release any air bubbles, then wipe the rim with a clean, damp towel to remove any residue.
- Add the lid and secure it with a screw band until it's fingertip tight.
- Return the jar to the canner, and repeat with the rest of the jars.
Process in a Water Bath Canner:
- Once the filled jars are all in the canner, adjust the water level so it is at least 2 inches above the tops of the jars.
- Cover your canner and bring it to a boil over medium-high heat. Once the water boils vigorously, set a timer and process half-pints and pints for 10 minutes at altitudes of less than 1,000 ft. (adjust processing time for your altitude if necessary - See notes below).
- When the processing time is complete, turn off the heat, remove the cover, and let the canner cool and settle for about 5 minutes.
- Set up your jar cooling area by spreading a dry kitchen towel on your counter.
- If your jars are still briskly bubbling, let them sit in the canner a little longer to calm down. Then, use the jar lifter to remove the hot jars from the canner and place them on the towel.
- Allow the jars to sit undisturbed for 12 to 24 hours. Don't tighten the bands or check the lids yet.
- After 12 to 24 hours, check to be sure the lids are sealed by pressing on the center of each cover. A well-sealed lid should remain firmly in place without flexing. If, however, you find any covers that flex up and down, this indicates a seal failure. In such cases, refrigerate the affected jar and consume it within a week.
- With the seals confirmed, remove the screw-on bands and wash your jars in warm, soapy water to remove any residue.
- Label, date, and store the jars in a cool, dark area and consume within 18 months for the best quality. Once opened, store leftovers in the refrigerator and enjoy within a week. Yields about 12 half-pint or 6 pint-size jars.
Notes
This is a tested, safe canning recipe from the Ball Canning Back to Basics book. Changing the recipe may make the product unsafe for canning.
All times are at altitudes of less than 1,000 ft. Visit whatsmyelevation.com to check your elevation and adjust the processing time if necessary. Processing time for half-pints and pints at altitudes of 1,001 - 3,000 ft. is 15 minutes, 3,001 - 6,000 ft. is 20 minutes, and above 6,000 feet is 25 minutes.
Nutrition
Serving: 0.5gCalories: 80kcalCarbohydrates: 21.2gProtein: 0.2gFat: 0.2gSodium: 4mgPotassium: 28mgFiber: 0.7gSugar: 13gCalcium: 7mg
Tried this recipe?Let us know how it was!