Canning Carrots for Easy Food Storage
This post may contain affiliate links, which means that I may receive a commission if you make a purchase using these links. As an Amazon Associate I earn from qualifying purchases.
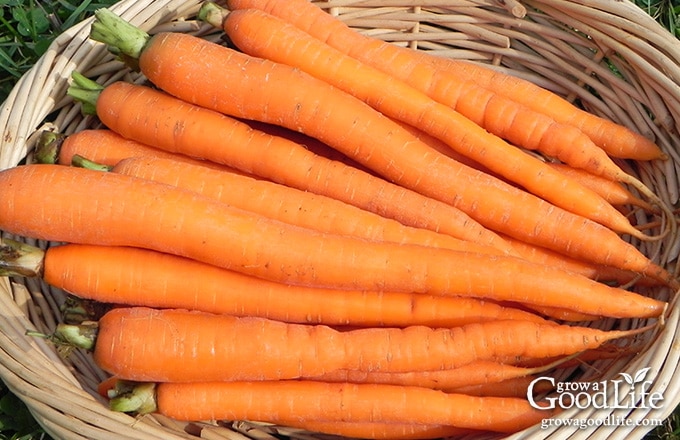
Canning carrots is a great way to preserve fresh carrots from the vegetable garden or farmers’ market. Learn how to can carrots safely with this step-by-step pressure canning tutorial.

When I started gardening, I remember struggling with growing spring carrots. Getting the seeds to germinate was a big problem for me. With some research and trial and error, I was able to troubleshoot and conquer my carrot growing problems.
That year, we enjoyed fresh carrots all summer with the final late summer harvest of 25 pounds! The fall-sown carrots also did well and added another 20 pounds to the tally.
With so many carrots harvested from the garden, and the freezer full, I had to find a way to preserve them. Learning how to can green beans and carrots were my first home canning projects using a pressure canner. It was nice to fill the pantry with ready to heat food that tasted much better than supermarket cans.
Tips for Canning Carrots
Select freshly harvested small to medium sized carrots around 1-inch in diameter. Larger carrots can be too stringy and fibrous when canned. If you don’t grow your own carrots, consider purchasing in bulk at a local farmer’s market when in season and preserve to enjoy all year.
You will need about 12 pounds of carrots for a full canner load of 9 pint-sized jars. If you would rather can carrots in quarts, you’ll need about 18 pounds before trimming and slicing. Here are other tips for canning carrots.
Use a Pressure Canner
Carrots and other low acid foods and can only be home canned safely using a pressure canner. A pressure canner heats the contents at a high temperature necessary to eliminating the risk of food borne bacteria. You cannot can carrots in a water bath canner unless you are using vinegar to make pickled carrots.
Peel the Carrots
You will need to peel the carrots before canning. I know this can be a pain, especially with small carrots. But, there are no safe tested recipes for canning carrots with the skins on. In order to reduce as much surface bacteria as possible, first wash the carrots well under clean running water, remove the skins with a vegetable peeler, and then rinse again before cutting.
Raw Pack vs. Hot Pack
Carrots can be packed into the jars using either the raw-pack or hot-pack method. Raw pack, also known as cold pack just means to fill the jars with raw carrots, and cover with boiling water. Raw packing is quicker because there is less cooking involved, but hot pack has its advantages.
In hot packing, the carrots are partially cooked first, then packed in jars, and covered with boiling water. Pre-cooking the carrots will make them softer allowing you to squeeze more in each jar. It also removes some air from the tissue, which will improve the quality and shelf life.
Prevent Liquid Loss
One of the most frequent issues I had in the beginning with canning carrots was a loss of liquid in the jars. If properly processed, loss of some liquid is ok, and won’t cause the food to spoil, but any carrots above the liquid may get rubbery and turn dark.
Siphoning is less likely to happen if you prevent rapid changes in temperature and pressure. In my situation, I was impatiently poking the weight, and releasing pressure too quickly after the processing time was complete. Instead, allow pressure to drop to zero naturally, remove the weight, and then wait for another 10 minutes before opening the canner lid.
Steps to Canning Carrots
Before you begin, you may find it helpful to review this article on Pressure Canning along with the instruction manual that came with your pressure canner. Make sure everything is clean and working properly. Double check that the steam vent is clear
I also offer a free printable Home Canning Checklist to help keep everything organized while you prepare and process your jars. Download it here:
Grab your Free copy
Home Canning Checklists
This is a safe caning recipe from the USDA Complete Book of Home Canning and the Ball Blue Book Guide to Preserving books. Scroll down for the full, printable recipe, but here are the steps for canning carrots:
Step 1: Prepare the Canning Equipment
Gather your canning gear, prepare the jars, set up the canner, and organize your work area.
You will need the following equipment:
- Pressure Canner with canning rack
- 9 pint sized canning jars, or 7 quart sized jars
- Lids and bands (new lids for each jar, bands can be reused)
- Canning tools: jar lifter, canning ladle, funnel, and bubble popper
- Plus basic kitchen supplies such as a large pot, large bowl, kitchen towels, vegetable brush, peeler, slotted spoon, knife, and a cutting board.
Wash the canning jars, lids, bands, and canning tools in hot soapy water, and rinse well. Set the lids and bands aside to air dry until you are ready to use them.
Place the pressure canner on the stove, and insert the canning rack. Add water per your pressure canner manufacturer’s instructions: Presto is 3 quarts, Mirro is 2 quarts, and All American is 2 to 3 inches.
Fill the clean jars halfway with hot water, and then place them on the rack in the canner. Bring the canner to a simmer for 10 minutes (180˚F). Keep hot until you are ready to fill them.
In addition, bring a large pot of water to a boil over high heat. If you are raw packing your carrots, this will be the water you’ll use to fill the jars. If you are hot packing, you will use this water to heat the carrots and fill your jars.
Step 2: Prepare the Carrots
Scrub the carrots with a vegetable brush under running water. Use a vegetable peeler and remove the peelings. Rinse the carrots again, remove the stem end, and slice or dice into pieces. Small carrots can be left whole.
If you are hot packing, add the prepared carrots to the large pot, bring it to a boil over high heat, reduce the heat and simmer (180˚F) the carrots for 5 minutes.

Step 3: Fill the Jars
Spread a kitchen towel on the counter. Use the jar lifter to remove a jar from the canner. Pour out the water (save it for washing dishes), and place the jar on the towel. Keep the remaining jars in the canner, so they stay hot.
Place the canning funnel on the jar and pack the carrots into the jar. If you are hot packing, use a slotted spoon to remove the carrots from the hot water and fill the jar. Leave a 1-inch headspace.
If you are using canning salt, add up to 1/2 teaspoon per pint jar, and up to 1 teaspoon of canning salt per quart jar. Ladle hot water into the jar over the carrots while maintaining 1-inch headspace. Remove air bubbles with the bubble popper, and wipe the rim with a damp towel.
Center a lid on the jar, place the band over the lid, and screw it on until fingertip tight. Immediately place the jar back into the rack in the canner, and repeat with the rest of the jars.
Step 4: Process the Jars
Place the lid on the canner, and lock it. Bring the canner to a boil over medium-high heat. Follow the directions for your pressure canner and process the jars for the times indicated in the recipe below.
When the processing time is complete, turn off the heat and let the canner cool naturally, remove the jars, and let them cool completely. Date, label, and store in a cool location for 12 to 18 months.

Ways to Use Canned Carrots
Pressure canned carrots are shelf stable, and can be prepared quickly for meals. Since the canning process cooks them, they only need 10 minutes on the stove to heat up. Canned carrots are a great addition to homemade soups and stews. Add the carrots at the end of the cooking time, and heat for about 10 minutes.
Canning Carrots
Ingredients
- 12 pounds carrots
- canning salt or pickling salt optional
Instructions
Prepare the Canning Equipment:
- Wash the jars, lids, and rings in hot soapy water and rinse thoroughly. Set the lids and rings aside until you are ready to use them.
- Place the jar rack into the pressure canner, and fill with water per your pressure canner manufacturer's instructions: Presto is 3 quarts, Mirro is 2 quarts, and All American is 2 to 3 inches.
- Fill the jars halfway with hot water, and then place them on the rack in the canner. Bring the canner to a simmer for 10 minutes (180˚F). Don't boil, but keep the jars hot until you are ready to fill them.
- If you are raw packing, fill a large pot with fresh, clean water and bring to a boil. Reduce the heat to a simmer (180˚F), and keep hot until you are ready to use it.
Prepare the Carrots:
- Scrub the carrots well under clean running water, peel carrots, and rinse again. Cut into slices, chunks, or large jar sized pieces.
- If you are hot packing, add the prepared carrots to a large pot. Fill the pot with water, bring to a boil over high heat, and then reduce the heat to a simmer (180˚F). Simmer the carrots for 5 minutes.
Can the Carrots:
- Spread a kitchen towel on the counter. Use your jar lifter to remove a jar from the canner. Pour out the water (save it for washing dishes), and place the jar on the towel. Keep the remaining jars in the canner, so they stay hot.
- Raw Pack: Place the canning funnel on the jar and fill with raw carrots. Try to pack them in tightly while leaving a 1-inch headspace.
- Hot Pack: If you are hot packing, place the canning funnel on the jar, use a slotted spoon to remove the carrots from the hot water, and fill the jar. Leave a 1-inch headspace at the top of the jar.
- If you are using canning salt, add up to 1/2 teaspoon per pint jar, and up to 1 teaspoon of canning salt per quart jar.
- Ladle hot water into the jar over the carrots while maintaining 1-inch headspace. Remove air bubbles with the bubble popper, and wipe rim with a damp towel.
- Center a lid on the jar, place the band over the lid, and screw it on until fingertip tight. Using the jar lifter to place the jar back on the rack in the canner, and repeat with the rest of the jars until the canner is filled, or you run out of carrots.
- Close the pressure canner and secure the lid. Leave the vent open, adjust the heat to medium-high, and bring the canner to a boil. Allow the pressure canner to vent for 10 minutes, then place weight on the vent.
- Once the canner has reached the correct pressure (10 pounds for weighted gauge, and 11 pounds for dial gauge canners.), set a timer, and process pints for 25 minutes, and quarts for 30 minutes at altitudes of less than 1,000 ft. Adjust for your altitude if necessary (see note below).
- Adjust the heat as needed to maintain a steady pressure. When processing time is complete, turn off heat, and allow pressure canner to cool down to 0 pressure.
- Once the canner is depressurized, let the canner cool 10 minutes before removing the lid.
- When the canner is cooled down, spread a kitchen towel on the counter, unlock cover, and remove it by tilting lid away from you so that steam does not burn your face. Allow another 10 minutes for the jars to adjust to the change in pressure.
- Use a jar lifter to lift jars carefully from canner and place on the towel. Keep the jars upright, and don't tighten bands or check the seals yet. Let the jars sit undisturbed for 12 to 24-hours to cool.
- After 12 to 24-hours, check to be sure jar lids have sealed by pushing on the center. The lid should not pop up. If the lid flexes up and down when the center is pressed, it did not seal. Refrigerate the jar and use up within a few days.
- Remove the ring bands, wash, label, date the jars, and store the jars in a cool, dark location (50 to 70 degrees F). Use within a year for the best quality. Yields 9 pints or 7 quarts.
Notes
- 1,001–2,000 ft. — 11 pounds
- 2,001–4,000 ft. — 12 pounds
- 4,001–6,000 ft. — 13 pounds
- 6,001–8,000 ft. — 14 pounds
- 1,001 ft. and above — 15 pounds
Nutrition
Pressure canning carrots is a great way to preserve them for food storage. With this easy step-by-step tutorial, you can learn how to can carrots safely and enjoy them all year long.
Resources and further learning:
- Safe Canning Resources: Trusted Guides for Home Food Preservation
- Evaluating Canning Recipes: How to Tell if a Canning Recipe is Safe
- Safe Tweaks for Pressure Canning Vegetables
You May Also Like:

So far it has been a good year for carrots here too. I am hoping the fall crop does well too. I usually store as many as I can in the frig, and freeze any extras. Canning sounds like a great way to handle a lot of carrots, and especially for those with larger families.
Dave, I still have a few pounds in the refrigerator from the September harvest to carry us through until the fall carrots are ready. I prefer fresh, but canned carrots are very handy when you need to prepare a side dish in a hurry.
Gee, I would like to have 50 pounds of beautiful carrots like that. Only 2 seeds out of 9 square feet planted to carrots germinated. Since I wanted some to dehydrate for my soup mix, I tried the local farm stand. They had none for sale since his entire field of carrots failed to germinate,so I don’t feel so bad for me (but awful for him).
Dave, It sound like the weather wasn’t very cooperative for germinating carrots in your area. I usually have a hard time growing Spring carrots. This post explains what I did to improve my carrot seed germination this year: https://growagoodlife.com/troubleshooting-carrot-growing-problems/
I don’t plant a lot of spring carrots but may try doing so next year, canning is a good idea.
My carrot crop didn’t happen this year, but I bought carrots and canned them. You’re right, they’re not mushy at all, and are so handy to add to soups and stews – which is how I usually serve them.
I had never tried to can carrots but sure does sound like a great idea. You have provided a lot of great information here.
I just can not grow Carrots in the spring so this year when I planted my greens i planted 3 packs of carrot seeds I have about 20 carrots. Please tell me how to grow carrots! I did find a 10 pound bag of carrots and I canned them.
Coni, I had the same problem growing carrots in Spring. Check out this post to see what I did to grow carrots successfully this year: https://growagoodlife.com/troubleshooting-carrot-growing-problems/
Your canned carrots are lovely – ready for stew or glazing! Enjoy them this winter! 🙂
Thanks Vickie!
We usually eat a lot of our carrots raw, so it never occurred to me to can them (not that I could right now as I don’t have a pressure canner – yet!). But your idea for using them in soups and stews is great! Once I get that canner and have a good haul of carrots, I will definitely consider doing this.
Margaret, I prefer fresh carrots and still have a lot in the refrigerator that we are eating up. The spring carrot bed provided over 25-pounds and the fall carrots will be ready soon. That left plenty of carrots to preserve for storage.
We didn’t have a great season where we live (In Australia) for our carrots but my husband swapped some home made cheddar cheese for a huge bag of carrots. This was great. I canned them they way you did and then I grated some as well. After I had finished and started using them I wished that I had grated more because they are great in soups and cakes and quiches. I’m looking forward to hopefully growing our own this season and canning like you did. Thank you for sharing this post. Blessings. Terri
Terry, I can think of a bunch of ways to use grated carrots. This is a great idea. Thanks for sharing.
It is my bast carrot year ever too. I haven’t harvested any of my fall storage carrots yet. I’m not going to can them though. I’ll probably freeze some and just store some in the fridge. I might even have enough to try to store some in the basement. We will see in November probably.
Daphne, I haven’t harvested any of the fall carrots yet either. I still have some in the refrigerator from the earlier harvests. I will probably can the fall carrot too because our freezer is full right now.