Canning Beets for Food Storage
This post may contain affiliate links, which means that I may receive a commission if you make a purchase using these links. As an Amazon Associate I earn from qualifying purchases.
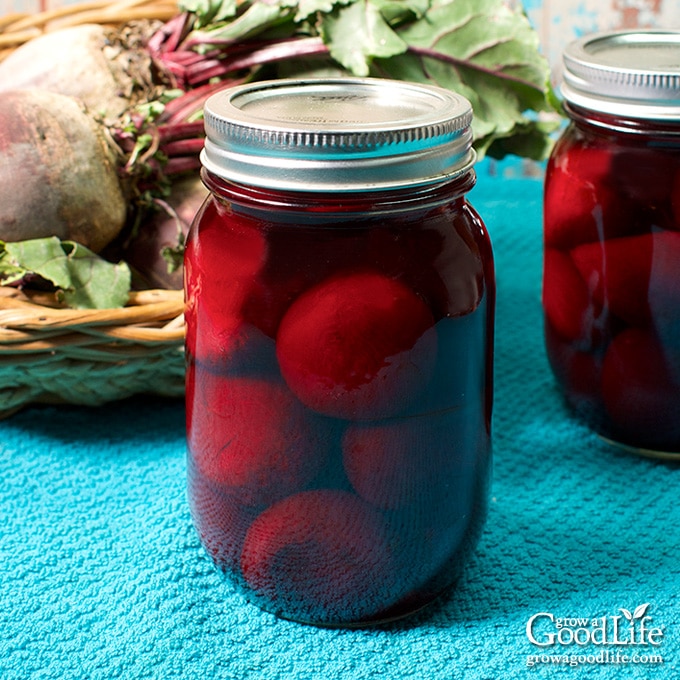
Canning beets is a great way to preserve them so that they last for a long time on your food storage shelves. You can either can them whole, sliced, or cubed. Learn how to can beets with this pressure canning tutorial.
Beets are a root vegetable that is easy to grow in the vegetable garden during the cool seasons of spring and fall. The plants don’t need special treatment and are rarely bothered by pests.
Beets are a healthy food to eat, and they taste good too! The roots can be eaten cooked or raw, and the greens are delicious sautéed, and a great addition to salads. Beetroots can also be canned for long-term food storage.
Canned beets are a handy shortcut in the kitchen because they are already peeled and cooked. This means they are ready to use and don’t require any extra preparation time.
Tips for Canning Beets
Harvest beets in the morning while the ground is still cool. To avoid damaging the greens, use a digging fork to loosen the soil under the roots, and then gently pull the beets out of the ground.
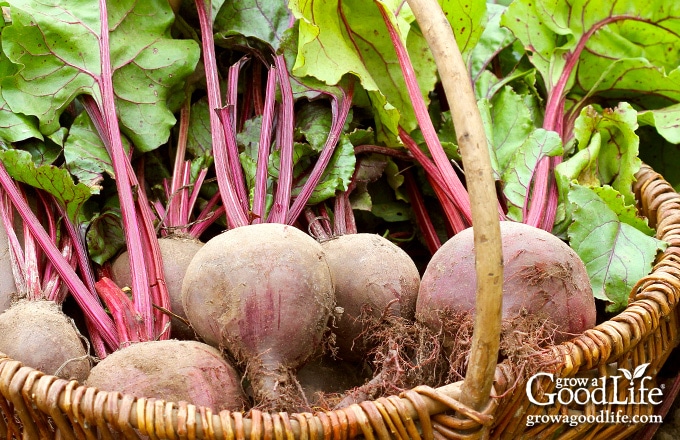
Give them a good rinse with a garden hose to remove as much dirt as you can from the roots and greens before bringing them inside. Here are other tips for canning beets:
Types of beets
Garden beets are a type of root vegetable that comes in different colors, including red, gold, and white. The classic ruby beets will ooze their scarlet liquid when cut and cooked. Gold and white beets don’t bleed like the red beets, making them easier to work with.
- Red beets are the most popular kind of beets. The classic red beets have a deep ruby-red color, and taste earthy with a strong beet flavor.
- Gold and yellow beets have a milder earthy taste than red beets, with a bit of sweet nutty flavor. The mellow intensity makes them more versatile because they won’t overpower a dish.
- White beets have a sweet, mild flavor without the strong earthy taste of red and gold beets. White beets also tend to maintain their firm texture even when they grow large.
Choose small beets for canning
If you are buying beets at the farmers’ market or grocery store, look for freshly harvested small roots that are firm, with smooth skin, rich color, and bright green leaves.
Select fresh beets, with a diameter of 3-inches or less for soft and tender canned beets. Larger roots can also be used, but they may be tough and woody. Cut the larger roots into smaller pieces after peeling so you can get more in a jar.
Avoid canning beets that are cracked, soft, bruised, shriveled, or have leaves that are wilted or very dry.
Use a pressure canner
Plain beets and other low acid foods can only be canned safely by using a pressure canner. A pressure canner heats food at a high temperature that kills bacteria that can cause botulism.
This Presto 16-quart pressure canner is what I use. It holds a canner load of 9-pint or 7-quart size jars. Plus it is light enough for me to lift a full canner off the stove without help.
You cannot can plain beets safely using a water bath canner unless you preserve them using vinegar. If you don’t have a pressure canner, you can pickle beets using a water bath canner with this recipe: Pickled Beets.
Prevent stains
Red and purple colored beets can tinge anything and everything it comes in contact with. Wear old clothing, use old towels, and wear gloves to prevent staining your hands. Wipe down any red liquid quickly to prevent a stain from setting.
Don’t toss the greens!
The greens are edible, so refrigerate them and use up over the next several days. You can use beet greens in any recipe where you’d use spinach, including salads, soups, smoothies, and pesto. Try this Sautéed Beet Greens Recipe.
Red beets will lose color
When you are canning red beets, don’t be surprised if they are not as colorful as when they were fresh. The pigment that gives beets their rich red hue will leach out when canned. While this discoloration won’t affect the taste or safety of your canned beets, but it can certainly make them less appealing to look at.
Ways to use canned beets
There are many ways to eat canned beets. Since they are already peeled, and cooked until tender, it is easy chop and add to salads, blend into a smoothie, or enjoy straight out of the jar. You can also puree canned beets into dips, soup, used to make a colorful homemade pasta, and as a natural color in baked goods. Here are some recipes to try:
- Quick Harvard Beets: Drain the beets reserving a 1/4 cup of the beet liquid. Place the liquid in a small pot along with 1/4 cup white vinegar, 2 tablespoons sugar, and 2 teaspoons flour. Whisk to combine, and then simmer over low heat until it thickens. Stir in beets, 1 teaspoon butter, dash of salt, and simmer until the beets are heated through, about 10 minutes. Serve warm.
- Beet Hummus Recipe: Skip the roasting, drain the canned beets, and blend into a creamy dip with this recipe from Minimalist Baker.
- Easy Borscht Recipe: Make this delicious beet soup with this simple borscht recipe from Cook the Story.
- Beet Pasta: Use pureed beets to make a deep red colored pasta with this fresh pasta recipe.
- Red Velvet Cupcakes: Use pureed beets as a natural color in this red velvet cupcakes recipe from The Viet Vegan.
How to Can Beets
If you are new to canning or need a refresher, it may be helpful to review this factsheet on Using Pressure Canners at the National Center for Home Food Preservation website, along with the instruction manual that came with your pressure canner. Make sure everything is clean and working properly. Double check that the air vent and steam vent pipe is clear.
This canned beets recipe is from the Ball Blue Book Guide to Preserving, but you can find the same recipe in the So Easy to Preserve, and USDA Complete Guide to Home Canning books, and on the NCHFP website for ” Beets – Whole, Cubed or Sliced.” The full recipe summary can be found at the bottom of this article, but here are the steps for canning beets.
Step 1: Gather Your Kitchen Equipment
Gather your kitchen tools, canning equipment, prepare the jars, set up the canner, and organize your work area.
You will need:
- Pressure canner with canning rack
- 8 pint sized canning jars, or 4 quart sized jars
- Lids and bands (new lids for each jar, bands can be reused)
- Rubber gloves to avoid staining your hands
- Canning tools: jar lifter, canning ladle, funnel, and bubble popper
- Plus basic kitchen supplies such as a colander, knife, cutting board, large stainless steel pot, large prep bowl, tongs, vegetable brush, and clean kitchen towels that you don’t mind getting stained.
Wash the canning jars, lids, bands, and canning tools in hot soapy water, and rinse well. Set the lids and bands aside to air dry until you are ready to use them.
Place the pressure canner on the stove, and insert the canning rack. Add water per your pressure canner manufacturer’s instructions: Presto is 3 quarts, Mirro is 2 quarts, and All American is 2 to 3 inches.
Warm the jars in the canner by filling them halfway with hot water, and then placing them on the rack in the canner. Bring the canner to a simmer for 10 minutes (180˚F). Keep the jars hot until you are ready to fill them.
Step 2: Prepare the Beets
Trim the beet greens leaving about one inch of stem to help prevent bleeding. Save the greens for other recipes. Scrub the beetroots well with a vegetable brush under running water to remove all soil.
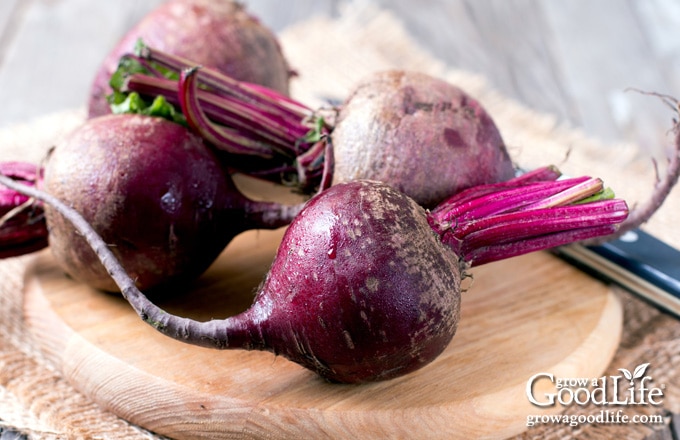
Add the beets to a large stainless steel saucepan, cover with water, and bring the pot to a boil over medium-high heat. Continue boiling until the skins slip off easily when scraped with tongs, about 20 minutes depending on the size of your beets.
You want the beets to remain firm. Pull out smaller beets once the skin easily scrapes off so they won’t over cook, and let the larger ones boil longer until they are ready.
Drain the beets in a colander discarding the beet cooking water. Let the beets cool a little until you can handle them.
While the beets are cooling, wash out the large pot, fill with fresh water, and bring to a boil over high heat. This will be the water you’ll use to fill the jars.
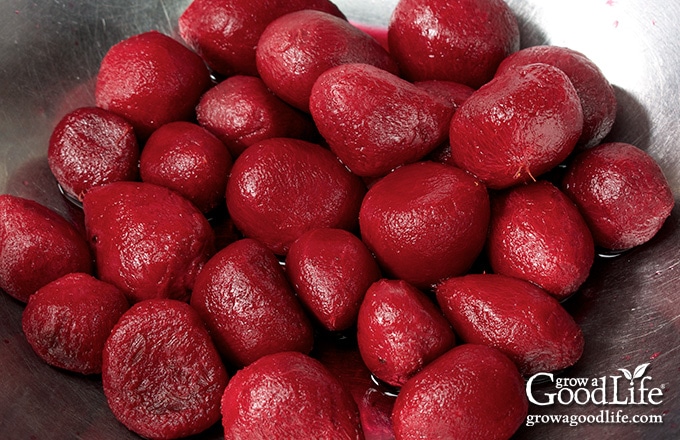
Once the beets are cool enough to handle, slip on a pair of gloves to prevent the beets from staining your hands. Remove the skins, and trim off the stems and roots.
Small beets that are under 2-inches can be left whole. Cut larger beets into 2-inch pieces, 1/2 inch cubes or slices. Add prepared beets to a large bowl as you work. Discard the stems, peeling, and roots.
Step 3: Can the Beets
Lay a dry towel on the counter. Use the jar lifter to remove a jar from the canner. Pour out the water (save it for washing dishes), and place the jar on the towel. Keep the remaining jars in the canner, so they stay hot.
Using tongs, pack the warm beets into the hot jar leaving 1-inch headspace. If you are using salt, add up to 1/2 teaspoon per pint jar, and 1 teaspoon per quart jar. Salt is used to add flavor and it is ok to skip.
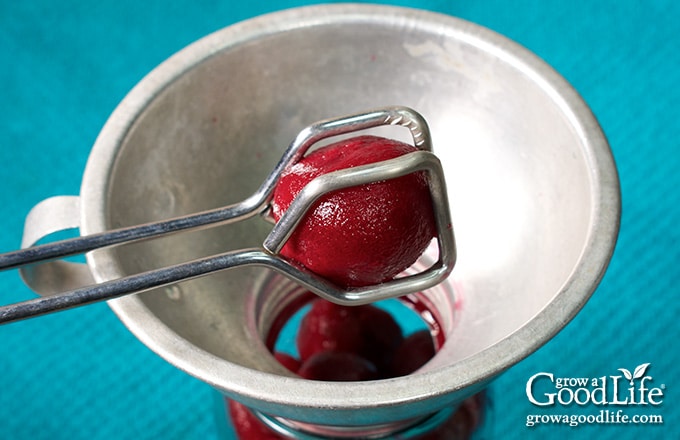
Use the canning ladle and funnel to fill the jar with boiling water, covering the beets while maintaining a 1-inch headspace. Remove air bubbles with the bubble popper, and wipe the rim of the jar with a damp towel.
Center a lid on the jar, place the band over the lid, and screw it on until fingertip tight. Immediately place the jar back into the rack in the canner, and repeat with the rest of the jars.
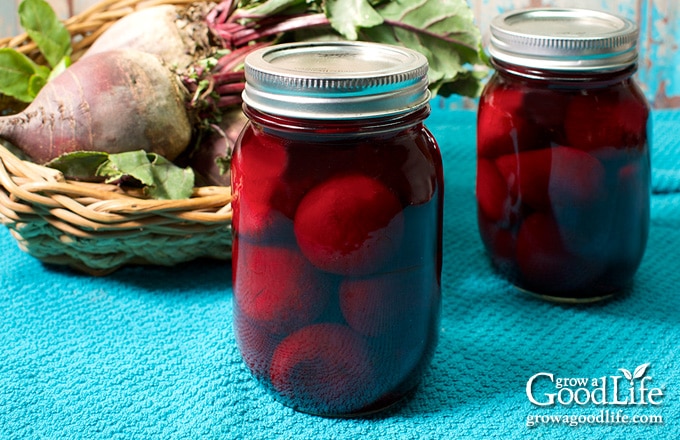
Once the canner is full, follow the directions for your pressure canner and process the jars for the times indicated in the recipe below. When the processing time is complete, turn off the heat and let the canner cool naturally, remove the jars, and let them cool completely. Date, label, and store in a cool location for 12 to 18 months.
Canning Beets for Food Storage
Ingredients
- 13 pounds small beets
- canning salt optional
Instructions
Prepare the Canning Equipment:
- Wash your jars and lids in hot soapy water and rinse thoroughly. Set aside until you are ready to use them.
- Place the jar rack into the pressure canner, and fill with water per your pressure canner manufacturer's instructions: Presto is 3 quarts, Mirro is 2 quarts, and All American is 2 to 3 inches.
- Fill the jars halfway with hot water, and then place them on the rack in the canner. Bring the canner to a simmer for 10 minutes (180˚F). Keep hot until you are ready to fill them.
Prepare your Beets:
- Scrub the beets and rinse well under running water. Trim the beet greens leaving about one inch of stem to help prevent bleeding.
- Add the beetroots to a large pot of water, bring to a boil, and cook until the skins slip off easily, about 20 minutes. Drain the beets in a colander discarding the cooking water. Let the beets cool until you can touch them without burning your hands.
- While the beets are cooling, wash out the large pot, fill with fresh water, and bring to a boil over high heat. This will be the water you’ll use to fill the jars.
- Once the beets are cool enough to handle, put on gloves, and remove the skins, trim off stems, roots. Slice, cube, or leave the smaller beets whole, and cut larger beets into 2-inch pieces, 1/2 inch cubes or slices. Add the prepared beets to a large prep bowl as you work. Discard the peelings.
Can your beets:
- Spread a kitchen towel on the counter. Use your jar lifter to remove a jar from the canner. Pour out the water (save it for washing dishes), and place the jar on the towel. Keep the remaining jars in the canner, so they stay hot.
- Place the canning funnel on the jar, and raw pack the beets into the jar while leaving a 1-inch headspace. If you are using canning salt, add up to 1/2 teaspoon per pint jar, and up to 1 teaspoon per quart jar.
- Ladle boiling water over the beets, and fill the jar while maintaining a 1-inch headspace.
- Remove air bubbles with the bubble popper and wipe the rim with a damp paper towel. Make sure all the beets are submerged, and adjust the headspace again if needed.
- Center a lid on the jar, place the band over the lid, and screw it on until fingertip tight. Using your jar lifter, immediately place the jar back on the rack in the canner, and repeat with the rest of the jars until the canner is filled, or you run out of beets.
- Place the lid on the canner and lock it. Leave the vent open, adjust the heat to medium-high, and bring the canner to a boil. Allow the pressure canner to vent steam for 10 minutes, then place the pressure regulator on top of the air vent, and watch the pressure rise.
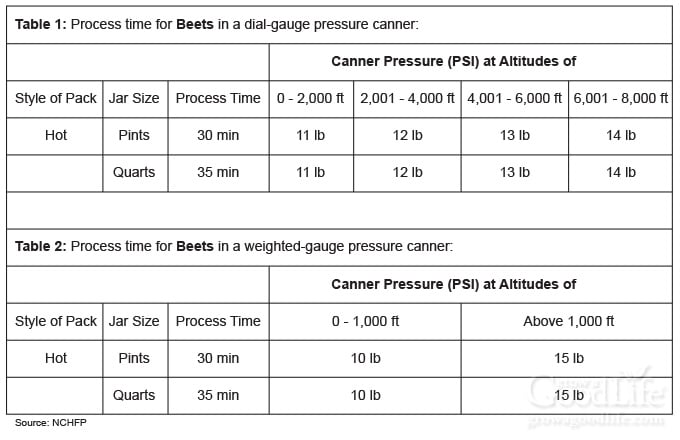
- Once the canner has reached the correct pressure (10 pounds for weighted gauge, and 11 pounds for dial gauge canners.), set a timer, and process pint jars for 30 minutes and quart jars for 35 minutes at altitudes of less than 1,000 ft.
- Regulate the heat as needed to maintain a steady pressure, and adjust altitude if necessary (see chart below).
- When processing time is complete, turn off the heat, and let the pressure canner cool down to 0 pressure on its own. Once the canner is depressurized, let the canner cool additional 10 minutes before removing the lid.
- Spread a kitchen towel on the counter, unlock the cover, and remove it by tilting the lid away from you so that steam does not burn your face.
- Allow another 10 minutes for the jars to adjust to the change in pressure. If jars are still boiling, let them sit in the canner for another 5 minutes, or until the boiling stops.
- Use the jar lifter to lift jars carefully from canner and place on the towel. Keep the jars upright, and don’t tighten bands or check the seals yet. Let the jars sit undisturbed for 12 to 24-hours to cool.
- After 12 to 24-hours, check to be sure jar lids have sealed by pushing on the center. The lid should not pop up. If the lid flexes up and down when the center is pressed, it did not seal. Refrigerate the jar and use up within a few days.
- Remove the ring bands, wash, label, date, and store in a cool, dark location (50 to 70 degrees F). Use within 18 months for the best quality. Yields about 8 pints or 4 quarts depending on the size of your beets.
Notes
Nutrition
Canning beets is a great way to preserve them for a long time on your food storage shelves. Not only are they a healthy snack, but they can also be added to a variety of dishes. So, if you’re looking for a way to stock up on this root vegetable, be sure to try canning beets.
You May Also Like:
40+ Meals in a Jar Pressure Canning Recipes
In this eBook, you will find 50 pressure canning recipes, including 44 meals, along with homemade stocks and bone broths. Recipes include soups, stews, chilis, beans, beef, pork, and poultry. Explore the world of preserving delicious home-cooked meals for all seasons.

