Dill Pickled Carrots Canning Recipe
This post may contain affiliate links, which means that I may receive a commission if you make a purchase using these links. As an Amazon Associate I earn from qualifying purchases.
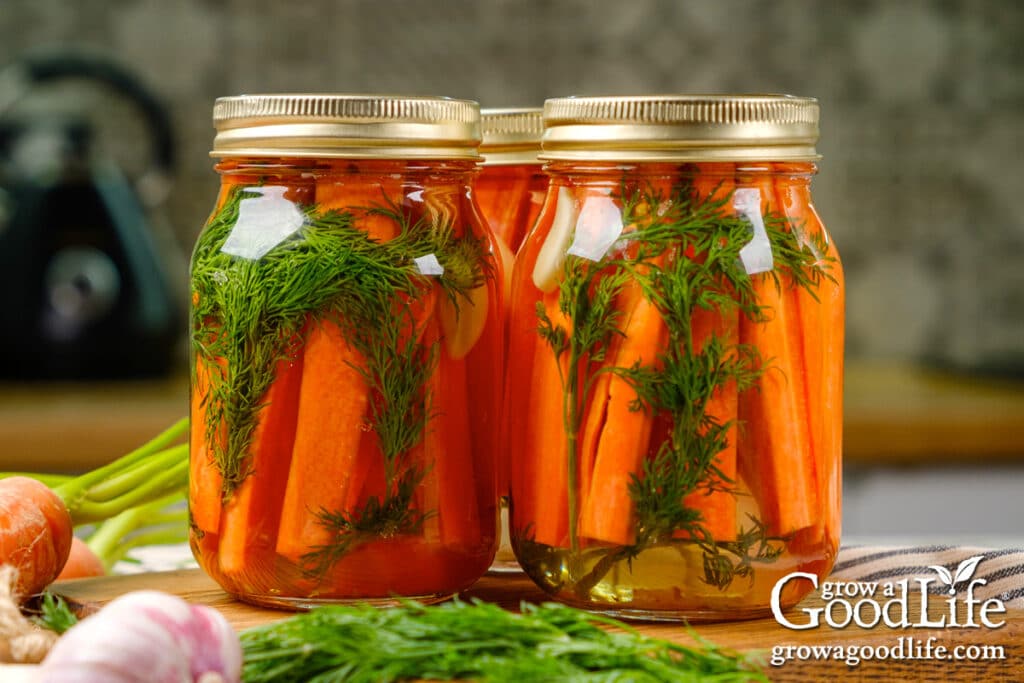
Looking for a simple and tasty way to preserve your carrots? If you’re a fan of classic dill pickles, get ready to fall in love with our dill pickled carrot canning recipe.
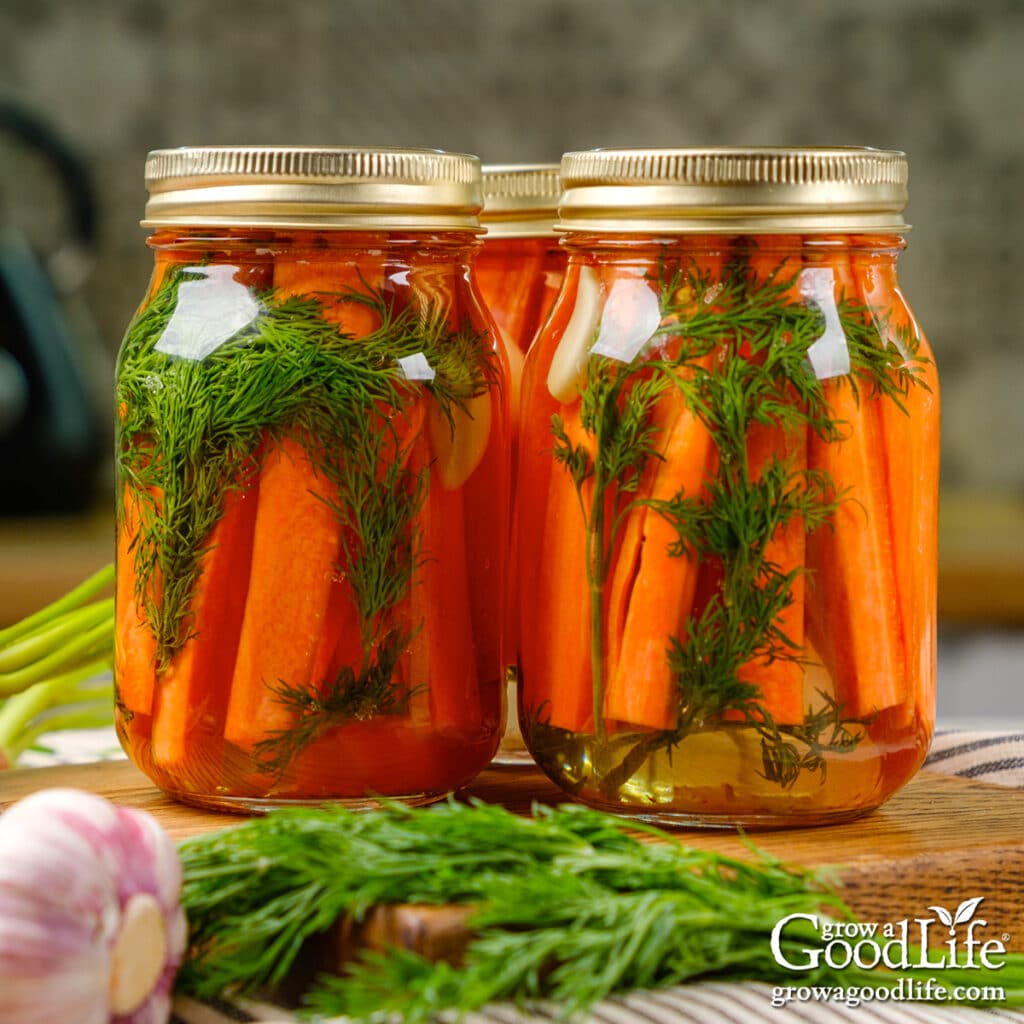
With just a handful of ingredients and a simple water bath canning process, you can transform ordinary carrots into dill-infused, tangy, crunchy delights. These jars of goodness not only enhance your snacking experience but also add a vibrant kick to your favorite dishes.
Whether you prefer to enjoy them straight from the jar or incorporate them into salads, sandwiches, and more, home-canned dill pickled carrots are a versatile addition to your culinary repertoire. They can complement a wide range of dishes, adding a unique twist to your meals.
In this article, we’ll guide you through the steps to create your own jars of dill-pickled carrots, ensuring that you can enjoy the flavor of peak-season carrots all year round. So, gather your carrots and get ready to preserve them with our irresistible dill-pickled carrot canning recipe.
About the Ingredients
First, let’s go over the ingredients for this recipe. Carrots are the star of the show, and the tangy pickling brine complements their natural sweetness. Fresh dill, garlic, dill seeds, and red pepper flakes add layers of flavor, while vinegar and pickling salt work their magic to preserve these crunchy delights. Here are tips for choosing ingredients for dill pickled carrots:
Fresh Carrots
By following these tips, you can select the best carrots for delicious and crunchy results every time:
- Consider Local or Homegrown Carrots: While you can use supermarket carrots for this recipe, if possible, use fresh carrots from your local farmers’ market or homegrown carrots from your garden for the most flavorful results. Freshly harvested carrots tend to have better flavor and texture compared to grocery store varieties, which are bred to withstand commercial harvesting, shipping, and storage.
- Select Fresh, Firm Carrots: Look for carrots that are firm to the touch and free from soft spots or blemishes. Fresh carrots will have a vibrant orange color and a crisp texture, transforming into better flavor and texture in your pickled carrots.
- Choose Young, Tender Carrots: Young carrots tend to be sweeter and more tender, making them ideal for pickling. They will also retain their crunchiness better during the pickling process.
- Look for Uniform Size: Choose carrots that are similar in size. This will ensure even cooking and pickling, resulting in consistent texture and flavor across all the jars.
- Avoid Overly Large Carrots: While large carrots can be used for pickling, they may have a tougher texture and larger cores, which can affect the overall quality of the pickled carrots. If using large carrots, consider slicing them into rounds for better pickling results.
Pickling Vinegar
When selecting vinegar for pickling, the acidity level impacts the safety, taste, and texture of your pickles. Use a commercially available vinegar with a 5% acidity level to ensure proper preservation.
- Apple cider vinegar is made from fermented apples and offers a mild fruity tartness that harmonizes with the sweetness of carrots. Though its amber-brown color may slightly darken your pickles, the rich flavor makes it a worthwhile choice.
- White vinegar is made from distilling corn and rye and has a sharper and more acidic taste than apple cider vinegar. If you love sour pickles, choose white vinegar for this recipe.
Canning Salt
Canning salt, also called pickling salt, plays a crucial role in the pickling process, contributing to both the flavor and safety of your pickled carrots. Unlike table salt, which often contains additives like iodine or anti-caking agents, canning salt is pure, fine-grained salt with no additives. This purity ensures your pickling brine remains clear and free from unwanted flavors or cloudiness.
Infusing Flavors
Adding the following herbs and spices to the jars ensures that your dill pickled carrots are infused with lots of flavor. Please feel free to skip any of these ingredients if you don’t like them or do not have them on hand:
- Fresh Dill: Adding fresh dill to your pickled carrots infuses them with a subtle hint of herby dill flavor and a burst of color.
- Garlic: A touch of garlic adds depth and complexity to the pickling brine, providing just the right amount of savory pungency to complement the sweetness of the carrots and the tanginess of the vinegar.
- Dill Seeds: Dill seeds offer a concentrated burst of dill flavor and aroma, enhancing the overall dill experience in your pickled carrots.
- Red Pepper Flakes: Crushed red pepper flakes adds a spicy kick to your pickled carrots.
Steps for Canning Pickled Carrots
As far as canning recipes go, this is an easy recipe with minimal ingredients and easy prep.
When canning, it is important to use a recipe that has been scientifically tested and is safe for home canning. This is the “Dilled Carrots” recipe from the Ball Complete Book of Home Preserving. While adjusting the dried spices in this recipe is safe, keep the proportion of vinegar, water, and salt the same for safe canning. We have added extra dill seeds for more flavor.
Before we begin, reviewing this factsheet on Using Boiling Water Bath Canners at the National Center for Home Food Preservation website may be helpful. You can find the complete and printable recipe at the bottom of this article, but here are the illustrated steps for making and canning dill picked carrot sticks:
Step 1: Gather and Prepare your Canning Equipment
You will need:
- Water bath canner and canning rack
- 6 pint-sized canning jars
- Canning lids and bands (Fresh lids for each jar, bands can be reused)
- Canning tools: jar lifter, canning funnel, and bubble popper
- Plus basic kitchen supplies such as a large saucepot, large prep bowl, vegetable peeler, knife, cutting board, large ladle, measuring cups and spoons, and kitchen towels.
Wash everything in hot, soapy water, rinse well, and set aside on clean kitchen towels. Look over the canning jars and eliminate any with nicks, cracks, or other defects.
Warm the jars in the canner by placing the jar rack into the water bath canner, setting the jars on the rack, and filling the pot with enough water to cover them. Bring the canner to a simmer, heat the jars for at least 10 minutes, and keep warm.
Step 2: Prepare the Ingredients
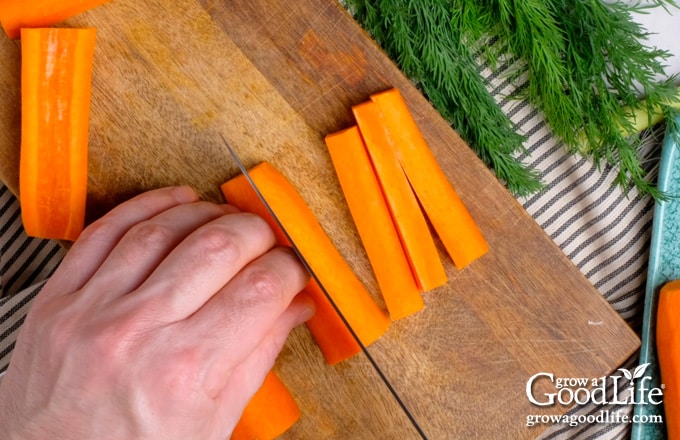
Carrots: Scrub the carrots well with a vegetable brush and rinse well under clean running water. Peel the carrots using a vegetable peeler, then rinse again. Trim off the ends and cut into sticks approximately 4 inches long and 3/4 inch wide. Set aside in a large prep bowl as you work.
Dill: If you are using fresh dill, trim off healthy dill heads or sprigs of dill foliage and set them aside.
Garlic: Peel the garlic, trim off the root ends, and cut the cloves in half.
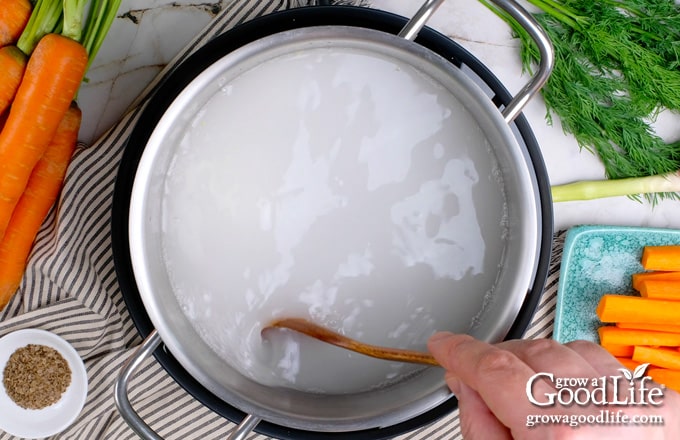
Pickling Brine: Add the vinegar, water, and salt in a large pot. Bring to a boil over medium-high heat while stirring to dissolve the salt. Keep hot as you fill your jars.
Step 3: Fill the Jars
Get ready to fill your jars by organizing your work area. Spread a dry kitchen towel on the counter, and set the ingredients, canning tools, lids, and bands within reach. Also, have a damp paper towel ready for wiping the jar rims.
Work with one jar at a time so they stay warm, which helps prevent breakage due to quick temperature changes. Use your jar lifter to lift a warm jar out of the canner. Tilt it to empty the water into the canner and place it on the towel.
Add 2 sprigs of fresh dill, 1/2 a clove of garlic, 1/2 teaspoon dried dill seeds, and 1/2 teaspoon red pepper flakes to the jar.
Pack the carrot sticks into the jar, leaving a 1/2-inch headspace, then ladle hot brine into the jar and fill to 1/2-inch headspace.
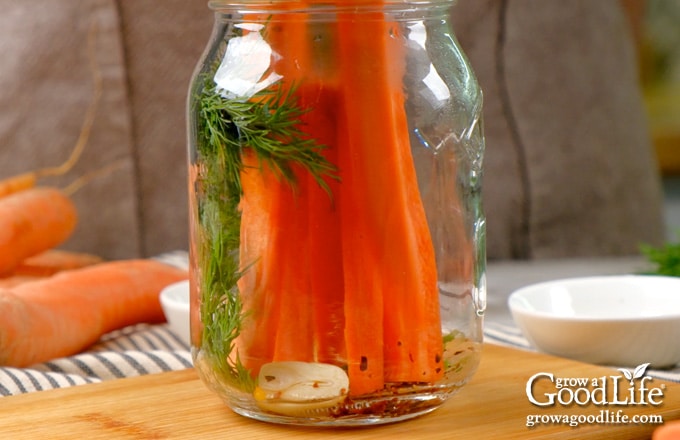
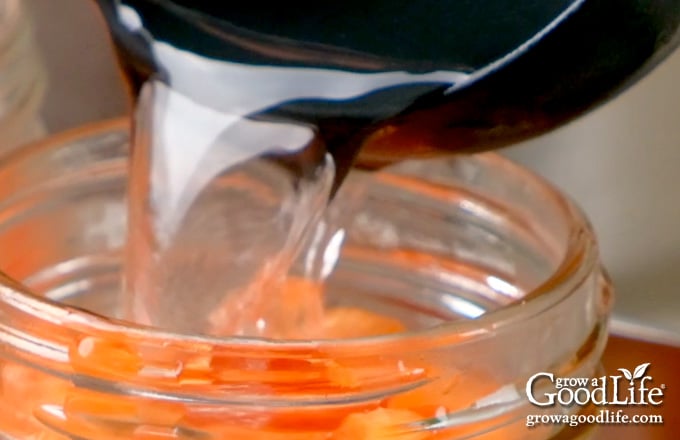
Run the bubble popper through the jar to release air bubbles. Adjust the liquid level with additional brine if needed to maintain 1/2-inch headspace.
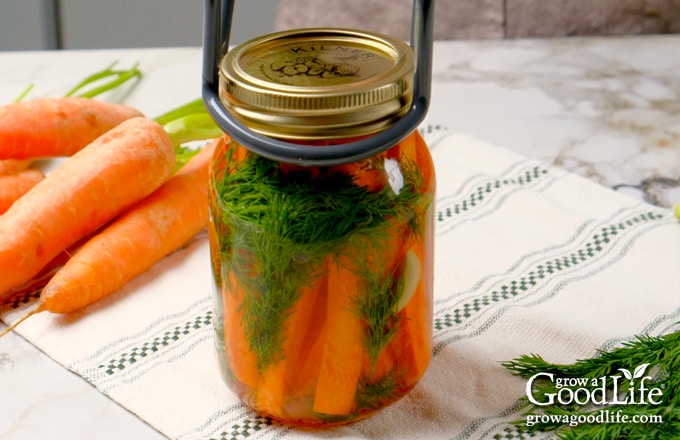
Wipe the rim with a damp paper towel to remove any residue. Add the lid, band, and screw until it is just fingertip tight.
Use the jar lifter to place the filled jar in the canner. Then, repeat with the remaining jars, filling them one at a time so they stay warm.
Step 4: Process the Jars in a Water Bath Canner
Once the filled jars are in the canner, adjust the water level to cover the tops of the jars by 2 inches. Cover the canner and bring it to a roaring boil. Once boiling, set a timer and process the jars in the boiling water bath canner for the times indicated in the recipe below.
Once the processing time is complete, remove the jars, and let them cool completely. Then, test the seals, remove the rings, wash the jars well to remove any residue, label them, and store them in a cool, dark location. Wait at least 4 weeks before opening a jar to let the carrots infuse with the flavorful pickling brine.
Ways to Enjoy Dill Pickled Carrot Sticks
Get creative and experiment with different ways to enjoy your dill pickled carrot sticks. Whether you incorporate them into recipes or savor them on their own, these tangy delights will surely add flavor to any meal or snack time. Here are some delicious ways to enjoy your homemade dill pickled carrot sticks:
- Snack Time: Enjoy pickled carrot sticks straight from the jar as a satisfying and flavorful snack. Their crisp texture and tangy flavor make them the perfect healthy alternative to chips or pretzels.
- Charcuterie Board: Arrange pickled carrot sticks on a charcuterie board alongside cheeses, cured meats, olives, and crackers. Their vibrant color and zesty taste add a refreshing contrast to the other savory components, creating a visually appealing and palate-pleasing spread.
- Salads: Add pickled carrot sticks to salads for a burst of flavor and crunch. They pair well with mixed greens, cherry tomatoes, cucumbers, and creamy dressings, adding a tangy twist to your favorite salad combinations.
- Sandwiches and Wraps: Layer pickled carrot sticks onto sandwiches and wraps for an extra kick of flavor and texture. They complement a variety of fillings, such as roasted turkey, ham, grilled chicken, or hummus, adding a pop of color and tanginess to every bite.
- Burgers and Hot Dogs: Elevate your burgers and hot dogs by topping them with pickled carrot sticks along with your favorite condiments. The acidity of the pickled carrots cuts through the richness of the meat and adds a refreshing contrast to the savory flavors.
- Stir-Fries and Noodle Dishes: Incorporate pickled carrot sticks into stir-fries and noodle dishes for a tangy and crunchy element. Simply toss them in during the last few minutes of cooking to preserve their texture and flavor.
- Garnish: Use pickled carrot sticks as a colorful and edible garnish for appetizers, such as deviled eggs, cheese platters, or crostini. Their vibrant appearance and zesty taste add an eye-catching finishing touch to any dish.
Dill Pickled Carrots Canning Recipe
Ingredients
- 5 pounds carrots
- 6 cups white vinegar (5% Acidity)
- 2 cups water
- 1/2 cup pickling salt
- 12 heads or sprigs fresh dill 2 per jar (optional)
- 3 cloves garlic cut in half (1/2 clove per jar) (optional)
- 3 teaspoons dried dill seeds ½ teaspoon seeds per jar (optional)
- 3 teaspoons red pepper flakes ½ teaspoon per jar (optional)
Instructions
Prepare the Canning Equipment:
- Wash the canning jars, lids, screw bands, and tools in hot soapy water. Rinse thoroughly and set aside to air dry on a clean kitchen towel.
- Place the jar rack into the water bath canner, place the jars in the canner, and add water to cover. Bring the canner to a simmer (180˚F) for 10 minutes and keep the jars hot.
Prepare the Ingredients:
- Scrub the carrots and rinse well under running water. Trim off the ends and cut into sticks approximately 4 inches (10 cm) long and ¾ inch (2 cm) wide.
- Trim off healthy dill heads or sprigs of dill foliage and set them aside.
- Peel the garlic, trim off the root ends, and cut the cloves in half.
- Make the pickling brine by combining vinegar, water, and salt in a large pot. Bring to a boil over medium-high heat, stirring to dissolve the salt. Keep hot as you fill your jars.
Fill the Jars:
- Spread a kitchen towel on the counter. Use your jar lifter to remove one warm jar from the canner. Empty the water and place it on the towel. Keep the remaining jars in the canner so they stay warm.
- Add 2 sprigs of fresh dill, ½ a clove of garlic, ½ teaspoon dried dill seeds, and ½ teaspoon red pepper flakes to the jar.
- Pack carrot sticks into the jar, leaving a 1/2-inch headspace.
- Ladle hot pickling brine over the carrots and fill the jar. Leave 1/2-inch headspace at the top of the jar.
- Run the bubble popper through the jars to release air bubbles and wipe the rims. Adjust the headspace again if needed.
- Center a lid on the jar, and screw on the band until it is fingertip tight.
- Use the jar lifter to place the jar back into the canner and repeat with the remaining jars.
Process the Jars in a Boiling Water Bath Canner:
- Once all the jars are in the canner, adjust the water level so it is 2 inches above the tops of the jars.
- Cover the canner with the lid and bring it to a boil over high heat. Once the water boils vigorously, continue boiling and process pints for 10 minutes at altitudes less than 1,000 feet. Adjust processing time for your altitude if necessary. (See notes below)
- When the processing time is complete, turn off the heat, remove the cover, and let the canner cool down and settle for about 5 minutes.
- Spread a dry kitchen towel on the counter. Use the jar lifter to remove the jars from the canner and place them on the towel. Keep the jars upright, and don’t tighten bands or check the seals yet. Let the jars sit undisturbed for 12 to 24 hours to cool.
- After 12 to 24 hours, check to be sure jar lids have sealed by pushing on the center of the cover. The top should not pop up. If the lid flexes up and down, it did not seal. Refrigerate the jar and use up within a month.
- Remove the screw-on bands, rinse the jars, label, date, and store in a cool, dark location. Allow at least 4 weeks for the pickled carrots to develop flavor. Use home-canned jars within 12 to 18 months for the best quality—yields about 6 pint jars.
Notes
Nutrition
You May Also Like:
If you love salsa, consider adding our eBook, Grow a Good Life Guide to 50 Salsa Canning Recipes, to your resource library. This 72-page eBook is packed with a variety of delicious salsa recipes, including classic tomato salsas to roasted and grilled salsas to tomatillo and delicious fruit blends, all safe for water bath canning. It’s the perfect guide to help you preserve your garden harvests.

