Granny’s Bread and Butter Pickles Recipe
This post may contain affiliate links, which means that I may receive a commission if you make a purchase using these links. As an Amazon Associate I earn from qualifying purchases.
These old-fashioned bread and butter pickles have a crisp texture and a balanced sweet and sour flavor. The slightly sweet tangy flavor makes them perfect for topping your favorite burgers and sandwiches.

“I love pickles!” my husband said as I planned the garden soon after moving to our property.
With that in mind, I planted a generous amount of pickling cucumbers. I was never much of a pickle fan myself, so I usually grew only a few cucumber plants for fresh eating and salads. But that year was different. I had recently acquired a lot of canning jars, and I was determined to fill every one with garden-grown goodness.
The cucumbers ended up being my most prolific crop that season. I could barely keep up with turning them into batch after batch of pickles. I made bread and butter pickles, kosher dill pickle spears, and sweet pickle relish.
Before long, my shelves were packed with jars of pickles and relish. We had so many that I started asking my husband if he wanted pickles with almost every meal. I gave jars away to friends and family and still had plenty left years later.
Thankfully, I learned my lesson and now plant only a few cucumber plants. Just enough for fresh eating and a few batches of canned pickles and relish.
I had never been a big fan of pickles until I tried this recipe from a dear friend who was like a Granny to many. I call this recipe Granny’s Bread and Butter Pickles in her honor.
If you are looking for an old-fashioned bread and butter pickles recipe for canning, this one is sweet, tangy, crisp, and easy to make with fresh pickling cucumbers, onions, vinegar, and classic pickling spices.
If you prefer a quick version that doesn’t require canning, try my Refrigerator Bread and Butter Pickles recipe. It uses the same classic ingredients and stays crisp and fresh in the refrigerator.
Tips for Making and Canning Bread and Butter Pickles
These old-fashioned bread and butter pickles are made from cucumbers, onions, and pickling spices. They are tangy, sweet, and crunchy. A perfect addition to sandwiches, hamburgers, or hot dogs. Here are a few tips for making and canning bread and butter pickles at home:
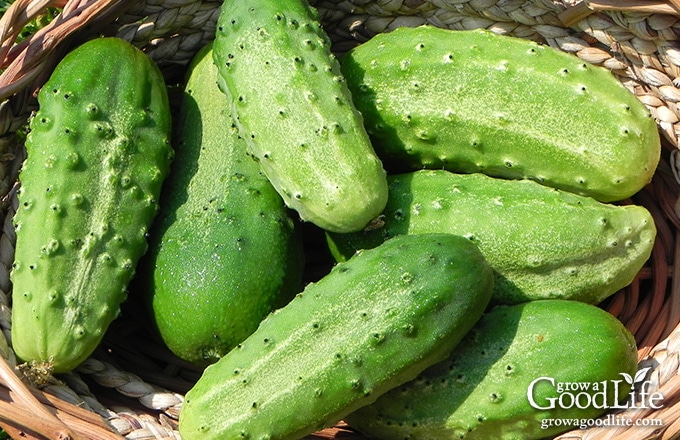
Select crisp, freshly harvested pickling cucumbers
Pickling cucumbers are short, thin-skinned cucumbers that are primarily used for processing or pickling. For the best texture, choose freshly harvested cucumbers that are firm and free of soft spots.
Skip waxed cucumbers from the grocery store. The wax coating prevents the pickling brine from penetrating the cucumber slices properly.
Use pickling salt
Table salt often contains iodine and anti-caking agents that can darken pickles and make the brine cloudy. Instead, use pickling salt, which is also called canning salt. It dissolves easily and helps produce clear, crisp pickles.
Use commercial vinegar with at least 5% acidity
For safe home canning, always use commercial vinegar with at least 5% acidity:
- Apple cider vinegar is made from fermented apples. It may darken the pickles slightly, but it adds a pleasant flavor.
- White vinegar is clear vinegar made by distilling corn and rye. It keeps the pickles lighter in color. If you prefer, choose an organic brand made from non-GMO corn.
Some small ingredient changes are safe when canning pickles and relishes, but others can affect acidity and make the recipe unsafe for canning. To learn what adjustments are safe and which ones should be avoided, read: How to Safely Modify Pickle and Relish Canning Recipes.
How to Make and Can Bread and Butter Pickles
Before you begin, make sure you’re familiar with the water bath canning process. If you need a refresher, see my complete guide: Water Bath Canning for Beginners.
If you like having a quick reference while you work, my free Home Canning Checklist can help. It includes helpful reminders, preparation steps, and a place to record your batches. Get it here:
Grab your Free copy
Home Canning Checklists
A more detailed and printable recipe can be found at the bottom of this article, but these are the general steps for making and canning bread and butter pickles:
Step 1: Gather your canning equipment
- Water bath canner with canning rack
- 5 pint sized canning jars
- Lids and bands (new lids for each jar, bands can be reused)
- Canning tools: jar lifter, canning ladle, funnel, and bubble popper
- You will also need basic kitchen supplies such as a large sauce pot, large bowl, small pot, towels, knife, and cutting board.
Step 2: Prepare your cucumbers and onions
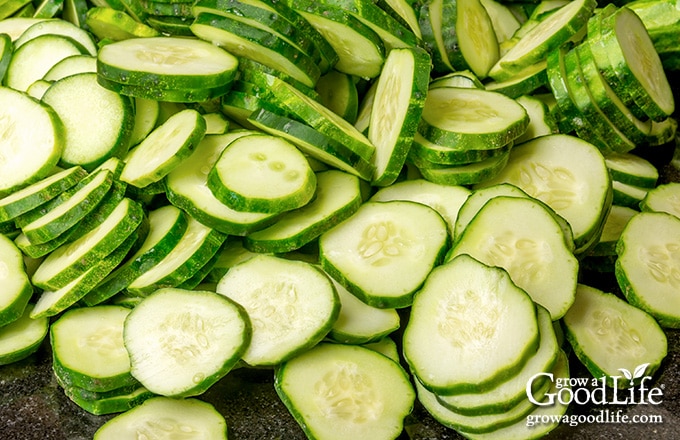
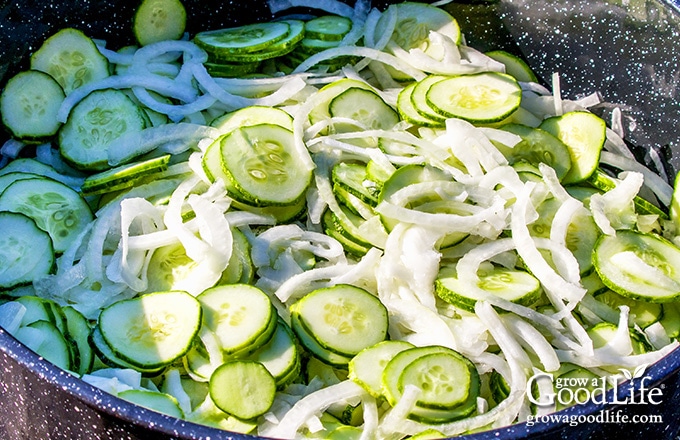
Wash the cucumbers well under running water. Cut them into 1/4-inch slices and discard the ends. Peel the onion and slice it thinly.
Combine the cucumbers and onions in a large bowl. Sprinkle the canning salt over the top, then cover with ice and water. Let the mixture stand for about 3 hours.
Step 3: Prepare your canning equipment
Wash your jars, lids, bands, and canning tools in warm, soapy water. Rinse well and set the lids, bands, and tools aside to air dry until ready to use.
Place the canning rack in the water bath canner and set the jars upright inside. Add enough water to cover the jars. Bring the canner to a simmer (about 180°F) for 10 minutes and keep the jars hot until you are ready to fill them.
Step 4: Make the pickling brine
In a large pot, combine the sugar, mustard seed, celery seed, ground turmeric, peppercorns, and vinegar. Heat the mixture just to a boil, then turn the heat to low, and keep warm until you fill your jars.
Drain and rinse the cucumbers and onions under fresh water. Add the drained cucumber and onion slices to the pot of pickling brine and return to a boil. Reduce the heat and keep the mixture warm while you fill the jars.
Step 5: Can the pickles
Lay a kitchen towel on the counter. Use the jar lifter to remove a hot jar from the canner, drain it, and place it on the towel. Keep the remaining jars in the canner so they stay warm.
Place a canning funnel on the jar and fill it with the warm pickles and brine, leaving 1/2-inch headspace. Run the bubble remover through the jar to release trapped air bubbles.
Make sure all the pickle slices are submerged in the brine. Remove any that stick out and adjust the headspace again if needed.
Wipe the rim with a damp towel to remove any residue. Center a lid on the jar, place the band over the lid, and screw it on until fingertip tight.
Return the jar to the canner and repeat with the remaining jars.
Once all the jars are in the canner, adjust the water level so the jars are covered by several inches of water. Bring the water to a boil and process the jars for the time indicated in the recipe below.
When the processing time is complete, remove the jars and allow them to cool. Check the seals, label and date the jars, and store them in a cool, dark location.
For the best flavor, let the pickles sit for about 4 weeks before opening.

Granny’s Bread and Butter Pickles Recipe
Ingredients
- 3 pounds pickling cucumbers
- 1 pound onions
- 1/4 cup canning or pickling salt
- 2 quarts crushed ice or ice cubes and water
- 1 cup sugar
- 1 tablespoon yellow mustard seed
- 1 teaspoon celery seed
- 1 teaspoon ground turmeric
- 1/2 teaspoon black peppercorn
- 3 cups apple cider vinegar 5% acidity (or white vinegar)
Instructions
Prepare your cucumbers and onions:
- Wash cucumbers, cut into 1/4-inch slices discarding ends. Peel and thinly slice onions. Combine sliced cucumber and onions a large bowl.
- Sprinkle canning salt over the top of the cucumbers and onions, cover with ice and water, and let stand for 3 hours.
Prepare your canning equipment:
- Wash your jars, lids, screw bands, and canning tools in hot soapy water. Rinse thoroughly to remove all suds. Set aside to air dry on a clean kitchen towel.
- Place the jar rack into water bath canner, place jars in the canner, and add water to cover. Bring the canner to a simmer (180˚F) for 10 minutes, and keep the jars hot.
Make your bread and butter pickles
- In a large pot, combine sugar, mustard seed, celery seed, ground turmeric, peppercorns, and vinegar. Heat just to a boil.
- Drain and rinse the cucumber and onions under fresh water. Add the drained cucumber and onion slices to the large pot and return to boil. Reduce heat and keep warm as you fill your jars.
Can your bread and butter pickles
- Spread a kitchen towel on the counter. Use the jar lifter to remove a hot jar from the canner, drain, and place on the towel. Keep the remaining jars in the canner, so they stay warm.
- Use your canning funnel and ladle to pack the hot cucumbers and onions loosely into the jar. Ladle the hot brine over the pickles, and maintaining a 1/2 inch headspace.
- Run the bubble popper through the jar to release any trapped air bubbles. Make sure all the pickles are submerged under the brine. Remove any that stick out, and adjust the headspace again if needed.
- Wipe the rim to remove any residue, center a lid on the jar, and screw on a band until it is fingertip tight. Use your jar lifter to place the jar back into the canner, and repeat with the remaining jars.
- Once all the jars are in canner, adjust the water level so it is 2 inches above the jar tops.
- Cover the canner and bring to boil over high heat. Once water boils vigorously, continue boiling and process pints for 10 minutes at altitudes of less than 1,000 feet. Adjust processing time for your altitude if necessary (See Note).
- When processing time is complete, turn off heat, remove the cover, and allow the canner to cool down and settle for about 5 minutes.
Cool and store the jars:
- Spread a dry kitchen towel on the counter. Remove the cover by tilting lid away from you so that steam does not burn your face.
- Use the jar lifter to remove the jars from canner and place on the towel. Keep the jars upright, and don't tighten bands or check the seals yet. Let the jars sit undisturbed for 12 to 24-hours to cool.
- After 12 to 24-hours, check to be sure jar lids have sealed by pushing on the center of the lid. The lid should not pop up. If the lid flexes up and down, it did not seal. Refrigerate jar and use up within a week.
- Remove the screw on bands and wash the jars. Label and date the jars. Store in a cool, dark location. Allow 4-5 weeks for the pickles to develop their flavor. Use within a year.
- Yield: About 5 pints depending on the size of your cucumbers.
Notes
- 1,001–3,000 ft: 15 minutes
- 3,001–6,000 ft: 20 minutes
- 6,001–8,000 ft: 25 minutes
- 8,001–10,000 ft: 30 minutes
Nutrition
Frequently Asked Questions About Bread and Butter Pickles
This recipe was originally published in July 2015 and has been made by many readers over the years. Through their questions and helpful feedback, I’ve added tips and clarifications to make the process easier.
Here are answers to some of the most common questions about making and canning bread and butter pickles.
What if I run out of pickling brine while filling the jars?
It’s fairly common to run short on brine when making pickles, even when the ingredients are measured carefully. Cucumbers vary in size and shape, and depending on how tightly they pack into the jars, how much liquid they release during the salting step, and how long the vinegar mixture is heated, the final amount of brine can vary slightly from batch to batch.
If you find yourself short on liquid, quickly make a small amount of additional hot brine using the same vinegar-to-sugar ratio used in the recipe. For example, combine 1/2 cup vinegar and 2 tablespoons sugar, heat until the sugar dissolves, and use it to top off the jars before processing.
To help prevent this problem, I adjusted the ratio of the ingredients compared to the original version of this recipe so there is usually a little extra brine available.
For more details and troubleshooting tips, see my guide: What to Do If You Run Out of Pickling Brine.
Why do you soak the cucumbers and onions in salted ice water?
Soaking the sliced cucumbers and onions in salted ice water helps draw out excess moisture and improves the texture of the finished pickles. This step helps the cucumber slices stay crisp after processing instead of becoming soft.
Can I soak the cucumbers overnight?
Yes. If it’s more convenient, you can cover the bowl and place it in the refrigerator to soak overnight. Keeping the vegetables cold helps maintain their crisp texture.
How can I make my pickles crunchier?
For the crispest pickles, start with very fresh pickling cucumbers and process them soon after harvesting. The salted ice-water soak also helps improve texture.
If you prefer an even crisper pickle, you may enjoy my refrigerator bread and butter pickles, which are not heat processed and retain a firmer crunch.
How long should bread and butter pickles sit before eating?
For the best flavor, let the jars sit for about 4 to 5 weeks after canning. This resting time allows the cucumber slices to absorb the sweet and tangy brine and develop their full flavor.
Why are they called bread and butter pickles?
Bread and butter pickles are an old-fashioned sweet pickle that was often served with simple meals, including bread and butter sandwiches. The name reflects their reputation as an everyday staple that paired well with basic pantry foods.
Are bread and butter pickles sweet?
Yes. Bread and butter pickles are known for their sweet and tangy flavor. Unlike dill pickles, which are savory and sour, bread and butter pickles are made with sugar, vinegar, and warm spices such as mustard seed, celery seed, and turmeric. The result is a balanced sweet-and-sour pickle that pairs especially well with sandwiches, burgers, and picnic foods.
Can this bread and butter pickle recipe be canned in quart jars?
Yes. This recipe can be safely canned in quart jars instead of pint jars. The batch will yield about 3 quart jars when tightly packed.
Use the same headspace and increase the processing time to 15 minutes (Altitude Adjustment: Increase processing time: 20 minutes for 1,001 to 3,000 ft; 25 minutes for 3,001 to 6,000 ft; 30 minutes for 6,001 to 8,000 ft; 35 minutes for 8,001 to 10,000 ft.).
Can I make bread and butter pickles without canning?
Yes. If you prefer not to use a water bath canner, you can make a quick version stored in the refrigerator. See my Refrigerator Bread and Butter Pickles recipe for step-by-step instructions.
Enjoy Your Homemade Bread and Butter Pickles
If you know someone who claims they don’t like pickles, let them try these. Granny’s Bread and Butter Pickles are sweet, tangy, and full of old-fashioned flavor. Just the kind of homemade pickle that can turn a skeptic into a pickle lover.
Once the jars have had a few weeks to rest, these crisp cucumber slices are perfect piled onto burgers, layered in sandwiches, or served alongside your favorite summer meals.
If you enjoyed this recipe, you may also like these other homemade pickle recipes and canning guides:
- Kosher Dill Pickle Spears
- Sweet Pickle Relish
- How to Safely Modify Pickle and Relish Canning Recipes
- Water Bath Canning for Beginners
Canning your own pickles is a simple and satisfying way to preserve fresh cucumbers from the garden so you can enjoy their flavor all year long.
If you’d rather skip the canning process but still enjoy the classic sweet-and-tangy flavor, try my Refrigerator Bread and Butter Pickles, a quick version that stores in the fridge and stays wonderfully crisp.
If you love salsa, consider adding our eBook, Grow a Good Life Guide to 50 Salsa Canning Recipes, to your resource library. This 72-page eBook is packed with a variety of delicious salsa recipes, including classic tomato salsas to roasted and grilled salsas to tomatillo and delicious fruit blends, all safe for water bath canning. It’s the perfect guide to help you preserve your garden harvests.

Hi,
Over the years, I’ve made and preserved relish and jams. This was my first time making pickles. I didn’t have enough brine to top off my last two jars. So, I heated up a 3 to 1 vinegar/sugar solution to top them off. Was that the correct thing to do? If so, it might be a nice idea for us newbies if you could suggest what to do if you run short of liquid.
Thanks for the recipe.
Hi David, I’m so glad you gave the recipe a try, and congratulations on your first batch of pickles! It’s actually pretty common to run short on brine, even when you measure carefully. To help with this issue, I actually increased the brine amount in this recipe compared to the original, but it can still happen. The cucumbers can vary in how tightly they pack into jars, and depending on how much liquid they give off during the salting step, the final volume of brine needed can shift a bit from batch to batch.
You did the right thing by quickly making up more hot brine with the same vinegar-to-sugar ratio. That keeps the flavor and the acidity safe for canning. I love your suggestion about adding a note for what to do if you come up short. I’ll add that tip so other first-time pickle makers won’t be caught off guard. Thanks so much for the feedback, and I hope you enjoy every crunchy bite of your pickles!
Hi! I printed your recipe for Granny’s Bread and Butter Pickles several years ago. I was just comparing it to the one that is posted now and the old one that I printed calls for 2 cups apple cider vinegar and the one currently on your post calls for 3 cups apple cider vinegar. Could you please inform me which is the correct amount so that I make a safe and approved product?
Hi Heather, You’re absolutely right! The original version of the recipe called for 2 cups of apple cider vinegar. However, over time I received quite a few messages from readers saying they didn’t have enough brine to fully cover the pickles, which can happen depending on the size of the cucumbers and how they are packed.
To make the recipe more foolproof and ensure everyone has enough brine, I adjusted the recipe to be sure there was extra brine. It’s always better to have a little extra than not enough! Rest assured, both versions are safe. The change just gives a more reliable result for a variety of packing styles.
Great recipe with lots of detail. Weighed my cucumbers first, so was surprised that with 3 cups of apple cider vinegar I didn’t have enough brine to cover all of the jars. I haven’t tasted them yet but they look good.
LuAnn, I’m glad you found the recipe helpful. The amount of brine can sometimes vary depending on the size and shape of the cucumbers, so it’s always a good idea to have a bit extra just in case. I hope they turn out delicious when you taste them!
I used tongs to lightly push the pickles down in the brine. I had about 1 cup left over at the end.
What happens uf I leave the cucumbers in the cold brinen8 hours instead of 3?
Brenda, Soaking the cucumbers in the salted ice water helps draw out excess moisture and keeps them crisp during the canning process. If you leave them in the brine for 8 hours instead of 3, it won’t ruin the recipe, but the cucumbers may end up a bit saltier and slightly softer, depending on how thick they are sliced. Some recipes even soak overnight, so you’re still within a safe range.
Can I add red pepper to add spice to these pickles? I love wickles
Carol, Yes, you can add up to 1 dried pepper or up to 1 teaspoon of dried chile pepper flakes to each jar to add spiciness. If you’re interested in safely customizing your pickles, check out my post on how to safely modify pickle and relish canning recipes.
For this recite, can you heat the brine without adding the cucumbers and onions and place cucumbers and onions in the jars and pour the brine mixture over them?
Hi Sherry, This bread and butter pickle recipe calls for hot packing, which means heating the cucumbers and onions in the hot brine before packing them into warm jars. For best results and food safety, I recommend following the recipe as written, heating the brine with the cucumbers and onions together before packing into jars.
Great recipe 👍.
I’m just a wee bit curious, You said previously “avoid genetically modified corn”. My only question is why?
Brian, Thank you for your comment, and I’m glad you enjoyed the recipe! When I mention avoiding genetically modified (GM) corn, it’s because most of my readers prefer to stick with organic or non-GMO products. That said, it’s completely up to you and your comfort level!
Thanks so much for the detailed advice on canning! The most informative I’ve seen, I learned a lot and my jars sealed with no problems this time (I’ve had problems in the past) so that’s great.
FYI, I used regular cucumbers from my neighbours garden, not pickling cucumbers, but I weighed them to equal 3 pounds, which were 4 medium cukes. I ended up being short about 1/2 cup of brine. It might be just me, but just a heads up to maybe make a little more brine to cover the last jar (it made 4 3/4 pint-sized jars).
Nancy, Thank you so much for your kind words, and I’m so glad the detailed advice helped you get those perfect seals this time—great job! 😊
It’s not uncommon for yields to vary, especially when it comes to pickling vegetables like cucumbers. The size, shape, and how tightly they’re packed into the jars can all affect how much brine is needed. It’s a good idea to have a little extra brine on hand just in case. You can scale up the brine recipe by a small amount to ensure everything is covered in future batches. I’m thrilled to hear that your pickles turned out well! Thank you for the lovely feedback!
Is it safe to double this recipe for canning?
Kim, Yes, it is safe to double this recipe for canning.