Pickled Garlic Canning Recipe
This post may contain affiliate links, which means that I may receive a commission if you make a purchase using these links. As an Amazon Associate I earn from qualifying purchases.
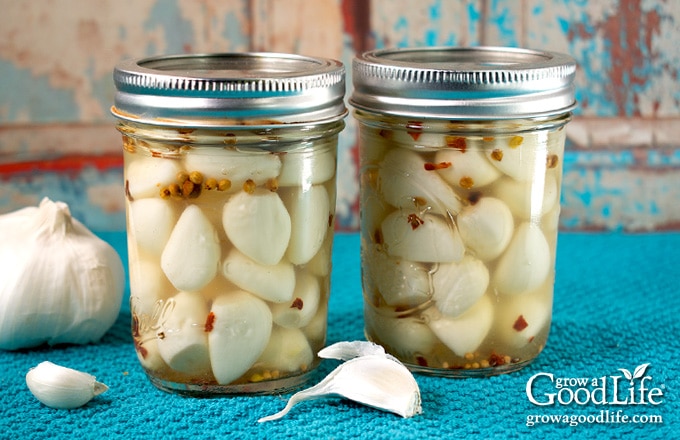
Pickled garlic is perfect for adding a kick of flavor to dishes and a great way to preserve garlic cloves for long-term food storage. Learn how to make pickled garlic and can it using a water bath canner.
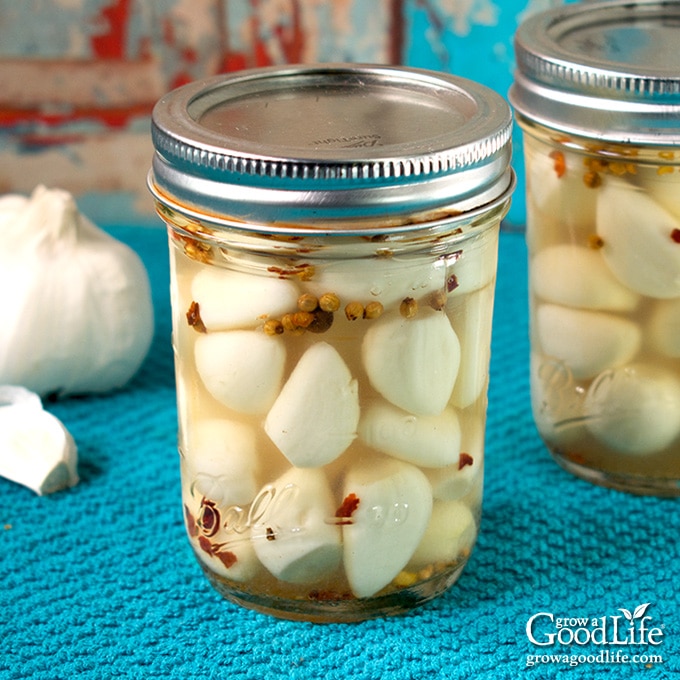
If you find yourself digging through the jar of dilly beans or cucumber pickles searching for the garlic cloves, you may want to go ahead and pickle garlic on its own.
Pickling garlic is a way to preserve fresh garlic cloves in a vinegar brine infused with spices. Pickling mellows the intense flavor of garlic and gives it a sweet, tangy, and spicy flavor. Using a boiling water bath canner to can the jars makes the pickled garlic shelf-stable for long-term food storage.
Pickled garlic is perfect for layering on sandwiches or wraps, an antipasto platter, pickle plate, charcuterie board, and as a cocktail garnish. It can also be used in any recipe the same way as fresh, including chopped and sautéed with greens, pureed into dips, or added to soups and stews. Of course, you can also enjoy pickled garlic straight out of the jar as a snack.
Use the garlic-infused vinegar brine in any recipe that calls for vinegar, such as salad dressings, meat marinades, or drizzle on steamed or roasted vegetables.
Tips for Making Pickled Garlic
Use the freshest garlic possible for pickling. You want the cloves to be firm with no sprouts or soft spots. Depending on the size of your cloves, you’ll need about 1 1/4 to 1 1/2 pounds of garlic to get 4 cups of peeled garlic cloves. Here are other tips for making and preserving pickled garlic.
Use Vinegar with 5% Acidity
You can safely swap the white vinegar with another commercial vinegar as long as it has at least 5% acidity. Feel free to use apple cider vinegar, white distilled vinegar, red wine vinegar, white wine vinegar, or a combination of any commercial vinegar with at least 5% acidity:
- Apple cider vinegar is made from fermented apples. It has a mellow sweet tart flavor. Its amber color will darken your garlic.
- White vinegar is clear vinegar made by distilling rye and corn. It tastes more acidic and sour than apple cider vinegar, but this may be just what you love about pickles.
- Wine vinegar is made from fermented red or white wine. They have a fruity flavor with a vibrant bite.
Adjust the Dried Seasonings to Your Liking
This simple recipe uses pickling spice and red pepper flakes to flavor the brine. If you pickle many vegetables, you may want to mix a batch of homemade pickling spice.
However, you can safely adjust the dried seasonings to craft your own garlic pickle recipe by replacing the pickling spices with other dried herbs and spices. Below are some spice combinations to try. Keep in mind that powdered spices will change the color and make the brine cloudy.
- Dill Pickled Garlic: 1 bay leaf, 1/2 teaspoon mustard seeds, 1/2 teaspoon dill seeds, and 1/2 teaspoon red pepper flakes.
- Bread and Butter Pickled Garlic: 1/2 teaspoon mustard seeds, 1/4 teaspoon celery seeds, 1/4 teaspoon dried ginger, 1/4 teaspoon turmeric, and 1/4 teaspoon red pepper flakes.
- Hot and Spicy Pickled Garlic: 1 teaspoon chili powder, 1/4 teaspoon dried thyme, and 1/4 teaspoon red pepper flakes.
- Ranch Pickled Garlic: 1/2 teaspoon dried parsley, 1/4 teaspoon mustard seeds, 1/4 teaspoon dried onion flakes, 1/4 teaspoon dried dill, 1/4 dried chives, 1/4 teaspoon dried tarragon, 1/4 teaspoon black peppercorns.
Include the Sugar
The sugar helps mellow the sharp vinegar flavor. Therefore, I wouldn’t eliminate it completely. However, you can reduce it without compromising the safety of this canning recipe. If you do reduce the sugar, you can expect the brine to taste more tart.
Tips for Peeling the Garlic
The most time-consuming part of this recipe is peeling the garlic. Fresh garlic that is not cured is especially difficult. The only way to peel fresh garlic is with a pairing knife and patients. If you grow your own, curing the garlic will dry out the skins and make it easier to peel later.
The easiest way to get the peelings off is to soak the garlic cloves in hot water briefly. Another way to peel garlic is to place the cloves in a jar and give it a good shake. I have tried the jar shaking method with mixed results. Plus, I don’t like how it can bruise the garlic cloves.
Don’t Have a Water Bath Canner?
Since this is a small batch recipe, pulling out the water bath canner may be overkill. Instead, you can use a large pot to process the jars of pickled garlic. I use an 8-quart tall pot for small-batch canning with an 8-inch canning rack.
Your pot will need to be tall enough to cover the tops of the jars by a few inches of water, plus several inches of space to prevent boiling water from splashing out of the pot. Place a rack in the bottom to elevate the jars up away from direct heat, and allow the water to circulate the jars as they boil.
If you don’t want to process the jars, you can store the pickled garlic in the fridge for up to 4 months. Since these are not heat processed to kill organisms, the jars must stay refrigerated.
Why Does Garlic Turn Blue?
Don’t be alarmed if your garlic turns a greenish-blue in the jar after pickling. Garlic can turn a blue or green color when combined with acidic ingredients. The color change is a reaction between enzymes and sulfur-containing amino acids in the garlic and minerals or acids in the brine. However, blue garlic is perfectly safe to eat, and the flavor is the same.
How to Make Pickled Garlic
If you are new to canning, it may be helpful to review this factsheet on water bath canning on the National Center for Home Food Preservation website.
This pickled garlic recipe comes from the OSU Extension website. We have reduced the amount of sugar and salt slightly and adjusted the recipe to fill 4 half-pint jars or 2 pint-sized jars.
Other safe adjustments you can make include exchanging the white vinegar with another commercial vinegar with at least 5% acidity, and swapping the types of dried herbs and spices.
You can find a more detailed and printable recipe at the bottom of this article, but here are the steps for making pickled garlic and canning it using a water bath canner.
Step 1: Prepare the Canning Equipment
Gather your kitchen and canning equipment, prepare the jars, set up the canner, and organize your work area.
You will need:
- Water bath canner or a large pot (8 quarts tall) with a rack
- 4 half-pint sized canning jars, or 2 pint sized jars
- Canning lids and bands (new lids for each jar, bands can be reused)
- Canning tools: jar lifter, canning ladle, funnel, and bubble popper
- Plus basic kitchen supplies such as a large prep bowl, knife, cutting board, large saucepan, slotted spoon, and several clean kitchen towels
Wash your jars, lids, bands, and canning tools in warm, soapy water and rinse well. Set the lids, bands, and tools aside to air dry on a towel until you are ready to use them.
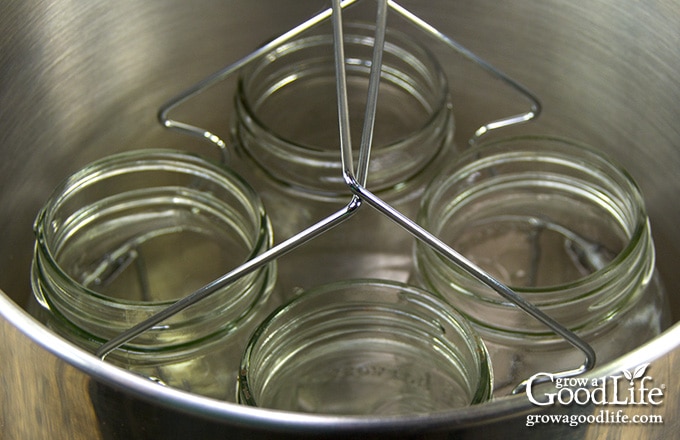
Jars must be warm before filling to prevent a fluctuation in temperature that may cause the jars to break. Place the jar rack into the canner, set the jars upright on the rack, and add water to cover the jars. Bring the canner to a simmer (180˚F) for 10 minutes, and keep the jars hot until you are ready to fill them.
Follow the manufacturer’s directions for preparing the lids. Pre-heating the lids is no longer necessary before using them, but it is still safe to simmer (180°F) the lids if you want to. Just add them to the canner when you heat your jars.
Step 2: Prepare the Garlic
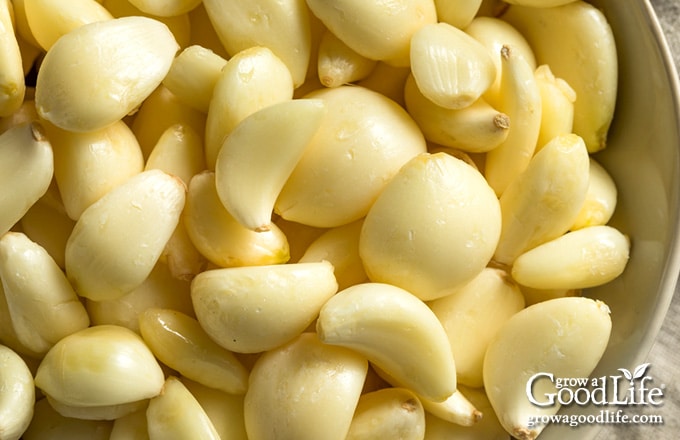
To peel your garlic, bring a pot of water to a simmer, separate your garlic heads into individual cloves, trim off the root end, and place them in a heatproof bowl. Pour the warm water over the cloves, and let soak for about 30 seconds.
Stir gently, and the skins will begin to loosen. Peel the garlic and rinse to remove the papery skins. Set aside on a kitchen towel while you work through the rest of the garlic. Measure 4 cups of peeled garlic.
Step 3: Make the Pickling Brine
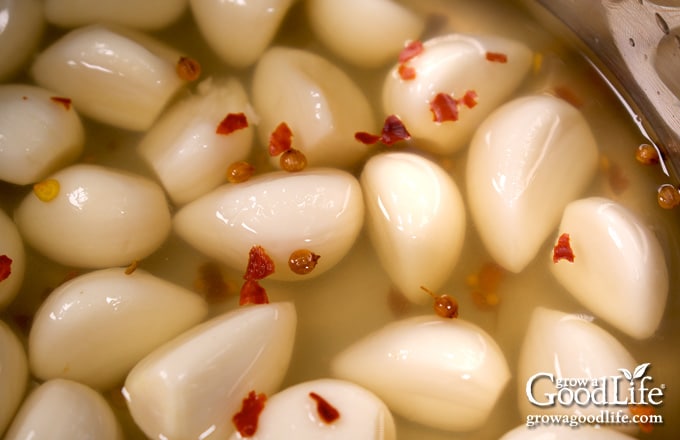
Combine the vinegar, sugar, salt, and spices in a medium pot. Cover and bring to a boil over medium-high heat. Stir to dissolve the sugar, and boil for 1 minute. Add the prepared garlic and continue to boil for another minute. Keep hot as you fill the jars.
Step 4: Fill the Jars
Spread a kitchen towel on the counter. Use your jar lifter to remove a hot jar from the canner, pour the water back into the pot, and place it on the towel. Keep the remaining jars in the canner so they stay warm.
Place the canning funnel on the jar. Use a slotted spoon to scoop out the garlic, fill the jar, and then ladle the pickling liquid over the garlic, leaving 1/2-inch headspace.
Run the bubble popper through the jar to release air bubbles, and then adjust the headspace again if needed. You want to be sure the brine covers all the garlic.
Wipe the rim with a damp towel to remove residue. Center a lid on the jar, place the band over the cover, and screw it on until fingertip tight. Place the jar back into the canner, and repeat with the rest of the jars.
Step 5: Process the Jars
Once the jars are in the canner, adjust the water level to cover the tops of the jars by two inches. Cover, bring to a boil, set the timer, and process the jars for the times indicated in the recipe below.
Once the processing time is complete, turn off the heat, remove the cover, and let the canner cool for 5 minutes. Use the jar lifter to remove the jars, place them on a dry towel, and let them cool completely for 12 to 24 hours. Test the seals, label, and date the jars, and store them in a cool, dark location for 12 to 18 months. Allow about 4 weeks for the flavor to develop before opening a jar. Refrigerate the jar after opening.
Pickled Garlic Canning Recipe
Ingredients
- 4 cups peeled garlic cloves
- 2 cups white vinegar 5% acidity
- 1/2 cup cane sugar
- 1/2 teaspoon canning salt
- 1 teaspoon pickling spices optional for flavor
- 1/2 teaspoon red pepper flakes optional for flavor
Instructions
Prepare the Canning Equipment:
- Wash your jars, lids, screw bands, and canning tools in hot soapy water. Rinse thoroughly to remove all suds. Set aside to air dry on a clean kitchen towel.
- Place the canning rack into the water bath canner, place the jars in the canner, and add water to cover. Bring the canner to a simmer (180˚F) for 10 minutes, and keep the jars warm until you are ready to fill them.
Prepare the Garlic:
- Remove the garlic cloves from the bulb, trim off the root end, peel, and measure 4 cups of peeled garlic.
Make the Pickling Brine:
- Add the vinegar, sugar, salt, and spices to a medium pot. While stirring, bring to a boil over medium-high heat, and boil for 1 minute.
- Add the prepared garlic and boil for an additional 1 minute. Keep hot as you fill the jars.
Can the Pickled Garlic:
- Spread a dry towel on the counter. Use the jar lifter to remove a jar from the canner, drain it, and place it on the towel. Keep the remaining jars in the canner so they stay warm.
- Use a slotted spoon to pack the garlic into the jar. Ladle the hot brine over the garlic, leaving 1/2 inch of headspace.
- Run the bubble popper through the jar to release any trapped air. Add more brine to adjust the headspace again if needed to maintain a 1/2 inch. You want to be sure all the cloves are beneath the brine.
- Wipe the rim with a damp towel, center a lid on the jar, place the band over it, and screw it on until fingertip tight.
- Place the jar back into your canner, and repeat with the rest of the jars.
- Once the jars are in the canner, adjust the water level to be 2-inches above the tops of the jars.
- Cover the canner, and bring it to a boil over high heat. Once the water boils vigorously, set a timer, and continue boiling for 10 minutes at altitudes of less than 6,000 feet. Adjust processing time for your altitude if necessary (See Notes).
- When the processing time is complete, turn off the heat, remove the cover, and let the canner cool down and settle for about 5 minutes.
- Spread a dry kitchen towel on the counter, and use the jar lifter to remove the jars from the canner and place them on the towel. Keep upright, and don’t tighten bands or check the seals yet. Let the jars sit undisturbed for 12 to 24-hours to cool.
- After 12 to 24-hours, check that the lids have sealed by pushing on the center. The cover should not pop up. If the lid flexes up and down, it did not seal. Refrigerate and use up within 3 months.
- Remove the screw-on bands and wash the jars. Label, date, and store your jars in a cool, dark place for 12 to 18 months. Allow 4 weeks for the pickled garlic to develop flavor. Once the jar is open, store in the refrigerator for up to 3 months. The recipe makes about 4 half-pints or 2 pints.
Notes
Nutrition
You May Also Like:
- How to Grow Garlic
- Dilly Beans Canning Recipe
- Bread and Butter Cucumber Pickles
- Pickled Garlic Scapes
40+ Meals in a Jar Pressure Canning Recipes
In this eBook, you will find 50 pressure canning recipes, including 44 meals, along with homemade stocks and bone broths. Recipes include soups, stews, chilis, beans, beef, pork, and poultry. Explore the world of preserving delicious home-cooked meals for all seasons.

my garlic has such a STRONG garlic taste. anything I can do to mellow without softening?
Nancy, The garlic flavor does mellow over time. You can try storing the pickled garlic jars in a cool, dark place for a few weeks.
I read that to get rid of the vinegar flavor, rinse with water before you use the garlic. Haven’t tried it yet, but will soon.
Diane, Absolutely, you can try rinsing the pickled garlic with water if you’d like to reduce the vinegar flavor. However, please keep in mind that the mild vinegar taste in pickled garlic can complement and enhance the flavors of various dishes, especially when used in cooking. It might not be necessary to rinse, but it ultimately depends on your personal preference and how you plan to use the garlic. Feel free to experiment and see what works best for your taste buds.
Would raw unfiltered honey work okay instead of sugar ?
Amy, Yes, you can substitute raw unfiltered honey for sugar in this recipe. The sugar is for flavor, and heat processing in a water bath canner will kill any spores.
I really want to try this but I have a question. Just to confirm–even though this garlic has been brined in vinegar I can still use it in recipes like fresh garlic? The vinegar won’t tamper with the flavors in my recipes?Thanks!
Lisa, You can certainly use the pickled garlic in recipes just like fresh garlic. However, it’s important to note that the flavor profile of pickled garlic is slightly different compared to raw garlic. The brining process gives the garlic a tangy and slightly milder flavor, which can add a unique twist to your dishes. While the vinegar does impart its own taste, it can complement and enhance the overall flavors in your recipes. Also, processing the jars in a water bath canner cooks the garlic, softening the cloves and mellowing the flavor.
Hi, not a comment but a question. Is the sugar a required ingredient for food safety, or is it just for flavor?
Thanks
Carolyn, Sugar is to balance the flavor in this recipe. Leaving it out will not compromise the safety.
This is how I did my garlic, so I’m happy. After reading thru your page where you commented on water bath canning via tall pot, I wanted to share that a really cool thing to keep with your canning gear is an inexpensive asparagus steamer. Fits a single quart or a stack of three 4oz jars without time and hassle to bring gallons of water to a rolling boil. And the steamer comes with a perfect lifting rack. I think they can be had for $25. Does well with single ears of corn when in that mood.
Do the cloves need to be whole or could you mince them?
Gage, This is a tested safe canning recipe that uses whole cloves. Currently, there are no lab-tested safe canning recipes for minced garlic. It is unknown if mincing would create a density issue causing the heat to penetrate evenly or a quality issue causing the garlic to melt from overheating.
Love the flavour of the brine but processing in the boiling water bath leaves the garlic soft. Is it okay to use the boiling brine, seal and store on the shelf? Everything would be sterile except the garlic.
May, The pickled garlic must be heat processed in a water bath canner for shelf-stable jars. However, you could store the jars in the refrigerator for up to 3 months if you don’t want to can them. First, go through the steps of preparing the garlic, jars, and brine, and then skip the canning process. Instead, let the jars cool, and place them in the refrigerator. Since these are not heat processed, they will need to remain in the fridge for safety.