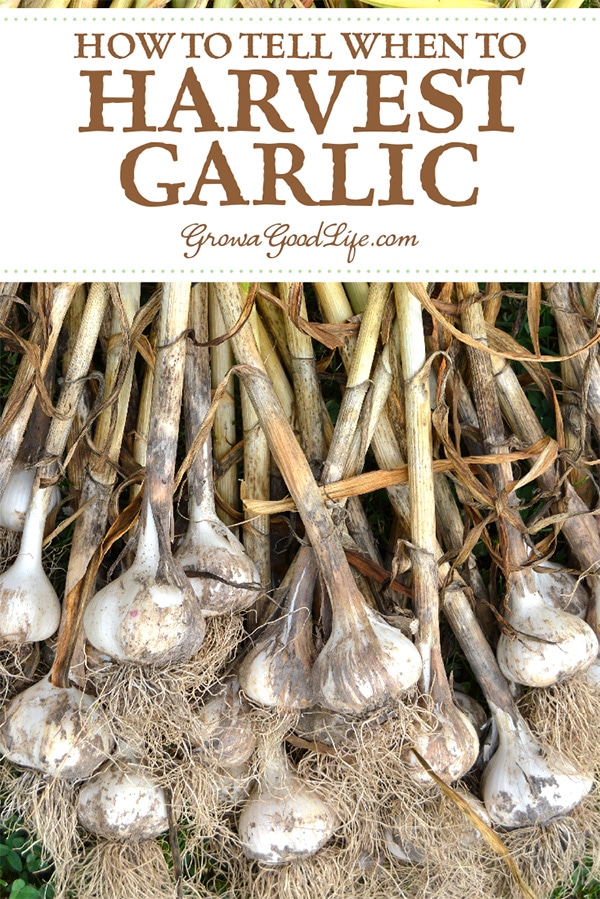
How to Harvest, Cure, and Store Garlic
This post may contain affiliate links, which means that I may receive a commission if you make a purchase using these links. As an Amazon Associate I earn from qualifying purchases.
Knowing when to harvest garlic can be tricky. Here are tips to help you decide when the time is right to harvest garlic, plus learn how to cure and store garlic for winter.
Garlic is planted in the fall to allow the roots to begin growing before winter arrives, and the plants go dormant. Once the soil warms up in the spring, the garlic begins growing again right where it left off.
Since the bulbs are under ground, it is difficult to see when the garlic is ready to harvest. Lifting the bulbs too early will give you undeveloped, small bulbs. Harvesting too late and the cloves could split through their skins. Either situation will affect the garlic’s long-term storage potential.
How to Harvest Garlic for Winter Storing
If you are growing a garlic crop with plans on storing the bulbs for winter meals, you need to allow the garlic to mature fully before harvesting. The garlic bulbs should be allowed to grow as long as possible to reach the maximum size, but not so long that the cloves separate because these bulbs store poorly.
When is garlic ready to harvest?
It is always a delicate balance between allowing the garlic to mature to its fullest and going too far. Harvesting garlic too early will result in undersized bulbs that won’t last long in storage. If you harvest garlic too late, you risk the bulbs splitting through their skins leaving them unprotected and unable to withstand long-term storage. Here are tips to help you harvest garlic at the right time.
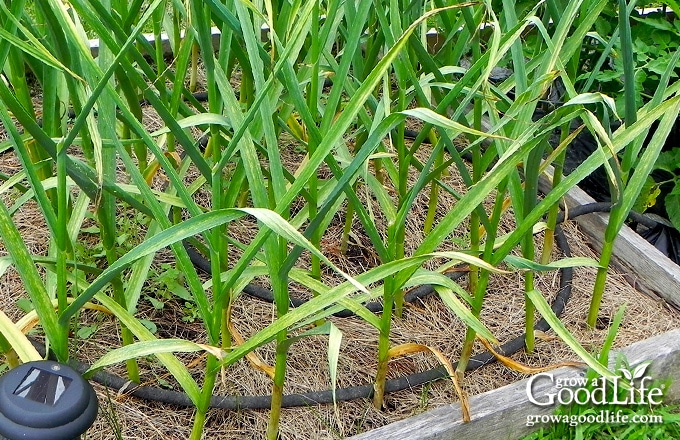
Watch the garlic plant’s leaves for signs
The leaves on the garlic plant will begin to yellow and turn brown when the garlic is finished growing. Each leaf on the garlic plant extends down the stem and wraps around the bulb, forming a layer of protective paper wrapped around the cloves. For example, a garlic plant with 8 leaves will have 8 layers of bulb wrappers.
The leaves grow from the bottom of the plant up, so the ones at the bottom are older and begin to brown first as the bulb reaches maturity. This happens because the garlic plants reduce the moisture and nutrients from leaf growth and focus on developing the bulb.
As the leaves on the bottom of the plant begin to brown, the remaining leaves will also start to look a bit ragged with yellow or brown tips. The foliage will die from the bottom upward indicating the end of the plant’s growth cycle. Once the lower three leaves whither and turn brown, the garlic bulbs are ready to harvest. This happens around mid-July in my zone 5, New England garden.
Some like to wait until at least half the plants are brown. This may be too late for some varieties of garlic. The way you know for sure is to dig up a garlic bulb and evaluate the growth.
Dig up a garlic bulb and check the growth
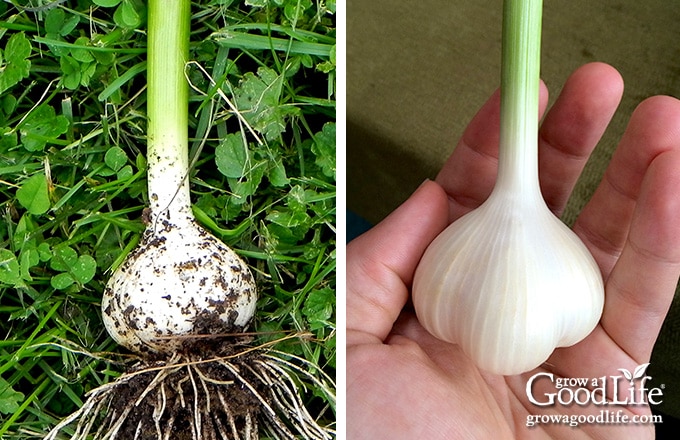
Before you harvest the entire crop, dig up a test plant to see if the bulb is fully developed. Select a thick-stemmed garlic plant with at least three brown leaves for your test.
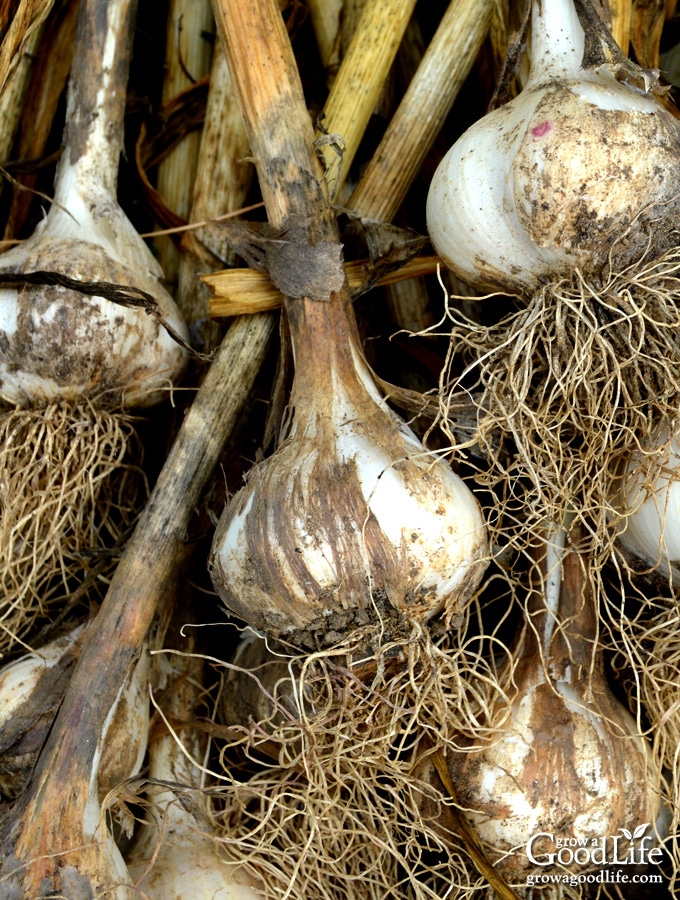
Carefully dig up the garlic without disturbing the other plants, brush off the loose soil, and examine the bulb. Look to see if the bulb is filled out and the skins are slightly dry and papery. As the green leaves on the stem of the garlic plant turn yellow and brown, they begin to dry out and tighten around the garlic cloves under the soil, forming the protective layers.
If the garlic is ready to harvest, the bulb will be good sized, with well-formed cloves, and tight wrappers.
How to Harvest Garlic
Once the lower three leaves have turned brown, you have about two weeks to harvest your garlic. If you wait too long, the cloves of garlic may break out of the outer wrapper.
Step 1: Let the garlic bed dry out
Once you have determined that your garlic is ready for harvesting, stop watering the garlic bed, and wait for a dry period to dig up the bulbs. This will help reduce moisture on the bulbs that may lead to fungus.
Step 2: Dig carefully to avoid damaging the garlic bulbs
Use a digging fork to loosen the soil beneath the bulbs, then carefully pull the garlic up by their stalks, and shake off the soil.
If you grow hardneck garlic, you will find the stalks are pretty solid. If you grow softneck varieties, you want to dig the bulbs out carefully with your hands because pulling from the stalks may tear them. Try not to bruise the bulbs as you dig. Damaged bulbs won’t last very long in storage.
Step 3: Place the garlic the shade to dry
After harvesting, spread the garlic out in the shade to dry a bit before curing. This allows some of the soil to dry and fall off naturally without damaging the skin. A few hours or overnight should be sufficient.

How to Cure Garlic for Storage
To prepare the garlic for long-term storage, it will need to be cured.
To cure garlic simply means to allow it to dry out properly. As the garlic dries, the skins and paper wrappers surrounding the cloves shrink and tighten around the bulb, essentially sealing it up in its own natural wrapper.
Step 1: Identify a good place to cure garlic
Garlic cures best in an area that is warm, dry, and has good air movement. Avoid very hot places, such as an attic, closed greenhouse, or in direct sunlight.
We run a dehumidifier in the basement in the summer to eliminate excess humidity. I discovered that this is the perfect environment for curing garlic since it is dark and dry.
Alternatively, garlic can be cured in a ventilated shed or barn, as long as there is good airflow and protection from direct sunlight.
Step 2: Ways to cure garlic
The best way to cure garlic is in a single layer with good air circulation on all sides.
Since I cure garlic in our basement while running a dehumidifier, I spread out the garlic on wire shelving and let it cure. A small fan can provide good air movement.
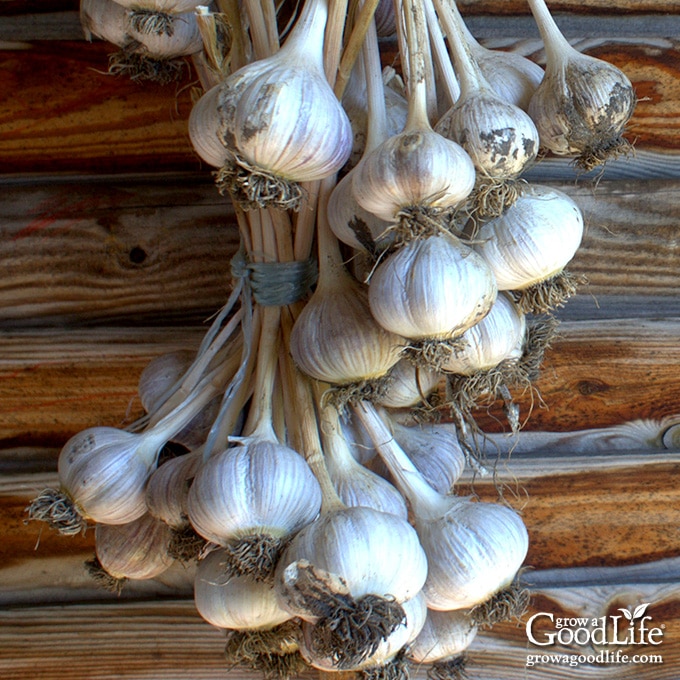
You can also bundle the garlic in bunches and hang it to cure in a shady, dry, cool and well-ventilated location. Curing can take a month or more, depending on the humidity level.
Step 3: Check to see if the garlic is cured
When the garlic is fully cured, the skins will be very papery and the foliage dry and crunchy.
Test one stalk to see if the garlic is finished curing. Cut the stem cleanly an inch or two from the bulb. Inspect the cut area to be sure the garlic has cured completely. There should be no green at the center. If there is green, allow the garlic to cure one week later and check it again.
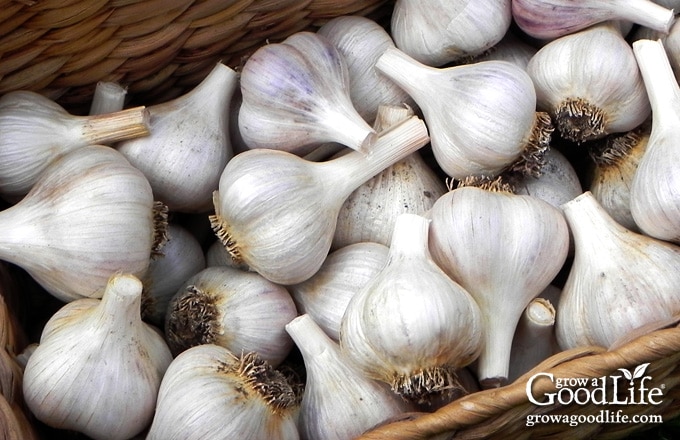
How to Store Garlic
Once the garlic is cured properly, it is ready to clean up for storing.
Step 1: Clean and trim the garlic
It can be a bit of a messy job, so take the bundles outside for trimming and cleaning.
Use a strong pair of scissors and cut the stems an inch or two from the bulb. Trim the roots and brush the garlic bulbs with your fingers to release any additional soil still clinging to the papery skin. Sometimes, the outer wrapper flakes off. This is ok, but try not to damage the protective wrappers any further than the first layer.
Step 2: Sort the garlic bulbs
As you trim the garlic, examine the bulbs and remove any that are damaged, soft, or show signs of mold. Trim and use these first in cooking because they won’t last long in storage without the protective layer.
Pull out the largest bulbs with the fullest cloves to reserve for fall planting to grow garlic for the following year.
Step 3: Store the garlic
Ideal storage conditions for garlic are at a temperature of 32-50˚F in a dry area with a relative humidity of 50-60%. Garlic can last up to 6 months in storage.
Store the trimmed bulbs loosely in a basket in a cool, dark, and dry location. Sort through the garlic every now and then and pull out any bulbs that feel soft or have sprouted. Some varieties of garlic last longer in storage than others. Our garlic usually lasts until April before it begins to sprout.
What to do if your garlic sprouts?
If your storage conditions are not ideal, or if you have garlic in storage come spring, there is good chance that it may begin to sprout if the storage area warms.
Here are several ways you can put it to good use before it spoils:
- Plant Sprouted Garlic: Let the garlic cloves grow and enjoy green garlic shoots, or let the cloves mature to small green garlic. You can plant sprouted garlic cloves in the garden, or in pots. See How to Plant Garlic in Spring.
- Make Garlic Powder: Make your own, shelf stable garlic powder by dehydrating and grinding garlic cloves. See Homemade Garlic Powder.
- Roast and Freeze Garlic: Roasted garlic can be substituted in any recipe that calls for garlic. See How to Roast Garlic.
This article was originally published on July 15, 2014. It has been updated with additional information and photos.
You May Also Like:
- How to Plant Spring Garlic
- 10 Garlic Scape Recipes
- 7 Tips for Growing Great Garlic
- How to Plant Garlic in Fall
I planted in fall. It’s currently June 1st. I live in Seattle area. My hard and soft neck are beautiful with many leaves. My soft neck garlics are falling over. Leaves are green. Any suggestions?
Heidi, It sounds like your soft neck garlic may be ready to harvest. Dig up one and see how it looks. You can leave the garlic for another week or so and the foliage will begin to die back.
For various reasons this year I didn’t get around to picking the scapes. They are now huge and splitting showing a lot of garlic seed inside. Have you got any advice on what I should do with these? I figure the mistake is made so I might as well make the best of it in whatever way I can.
Janice, You could harvest the little bulbils (garlic seed) and use them to flavor stocks and stews. Keep them in the freezer, and then add a handful or two to your pot to simmer. You could also plant the bulbils. It takes about 3 years to form regular sized heads of garlic. It may be a fun experiment 🙂
I just harvested my first garlic. I was a little nervous about the whole planting, growing, harvesting process but I am so pleased with my results! I wish I had read this first – I damaged some of my softneck garlics pulling on the stems. Thanks for sharing your experience and process!
Michelle, Yay, for a great harvest:) Next year you won’t be so nervous about growing garlic. Don’t worry too much about the damaged ones. Just be sure to use up the damaged heads first. You can always peel and freeze the cloves too. These can be added to stews and roasts.
I recently harvested our garlic. It was embarrassingly small, a bad combo of too much shade, and too much clay, I believe. I was disappointed. The seed garlic were planted in a bed I hadn’t used before last October. I had worked in a good 4 inches of compost to a bed whose first 2-3 inches were already beautiful, but it just wasn’t enough. Oh well, next season! Beauty of a garden, right? Still got dozens of scapes that were delicious in stir fry (:
Great post! So glad you shared it on Our Simple Homestead Blog Hop. As one of the co-hosts I will be featuring your post tomorrow! Hope you come back and share again!
– Nancy
Nancy On The Home Front
Your posts are always so helpful! Pinning for later, I need to try growing garlic this fall. Thanks for sharing on the Homestead Blog Hop!
Great info! Thanks!
Thanks for sharing this great and helpful information with us at Good Morning Mondays. Blessings
My dad always grew wonderful garlic…I am not sure why I have not added it to my garden. I have made a note and am going to add it next year! Thanks for the great tips!
I would love it you shared it on the new Our Simple Homestead Blog Hop!
http://oursimplelife-sc.com/our-simple-homestead-blog-hop-2/
Love this! Thank you for the tips. Ive been growing my garlic inside all winter in a window and it’s doing great 🙂 Almost ready to be harvested and I can’t wait to see how big they have gotten.