How to Grow Thyme
This post may contain affiliate links, which means that I may receive a commission if you make a purchase using these links. As an Amazon Associate I earn from qualifying purchases.
Thyme is a low-growing, woody perennial herb grown for garden beauty and culinary uses. Use these tips to grow thyme in your garden to enjoy this beautiful and versatile herb.

Thyme (Thymus vulgaris) is a perennial shrub belonging to the Labiatae, or mint, family. It is native to southern Europe, from the western Mediterranean to southern Italy. This highly aromatic Mediterranean herb performs exceptionally well in somewhat dry, sunny conditions.
Thyme has a subtle, dry aroma and a slightly minty flavor that pairs well with meat, summer soups, and vegetable recipes. It holds its flavor in cooking and blends well with other flavors of its native region, such as garlic, olive oil, and tomatoes.
Common Types of Thyme
There are well over 300 varieties of thyme that range from small evergreen perennials, and all are easy to grow. Some are ornamental plants only, and some serve double-duty as edible and ornamental plants. Whatever use you have for thyme, there is a variety suitable for your garden.
French, English, and German thyme are the most well-known culinary varieties you will find at your local nursery. Each type bears leaves of slightly different shapes, colors, and flavors.
- English thyme is a low-growing plant with flat, pointy, green, fragrant foliage. English thyme is also referred to as garden thyme or common thyme.
- French thyme has upright stems with small, narrow gray-green leaves. French thyme is also called summer thyme and offers a slightly subtler flavor than English thyme.
- German thyme has smaller, slightly rounded leaves than the other varieties, but the foliage packs lots of flavor. German thyme is also called winter thyme because it is very cold hardy.
Other thyme varieties you may discover at your local garden nursery include:
- Archer’s Gold forms a dense, low-growing mat of yellowish-green leaves. The leaves have a light lemon fragrance and flavor, making this thyme variety ideal for fish or chicken recipes.
- Variegata is a low-growing plant that has variegated leaves and a lemon fragrance. This thyme variety also produces pink leaves and is grown for appearance instead of culinary uses.
- Bertram Anderson will create small mounds of yellow-leafed herb plants with a mild flavor. It is an ideal plant for edging or garden borders.
- Lemon Thyme, also called citrus thyme is similar to English thyme, but the leaves have a citrusy, fruity aroma and flavor, making it an ideal herb to brighten the taste of a dish.
- Silver Queen creates a large evergreen shrub with silvery leaves that are edible. The leaves have a mild lemon flavor and are used for soups and stews.
Tips for Growing Thyme
Thyme is relatively drought-tolerant and trouble-free once established. Most varieties of thyme are hearty perennials that come back every year when grown in plant hardiness zones 4 to 9. You can start thyme from seeds, cuttings, divisions, or purchased seedlings. Here are tips for growing thyme:
How to Select and Prepare Your Growing Area
Thyme prefers growing in well-drained soil in full sun but can also tolerate partial shade. For the best results, grow thyme in an area that receives morning sun and an additional 4 to 6 hours of sunlight during the day. While thyme can grow in partly shady locations, growth will be slow, and the stems will have less foliage.
Select an area with sandy, dry soil that receives 4 to 6 hours of sunlight per day. Thyme is not a heavy feeder, so amend with compost and a moderate amount of organic fertilizer at planting time to help the plant settle in.
How to Start Thyme from Seeds
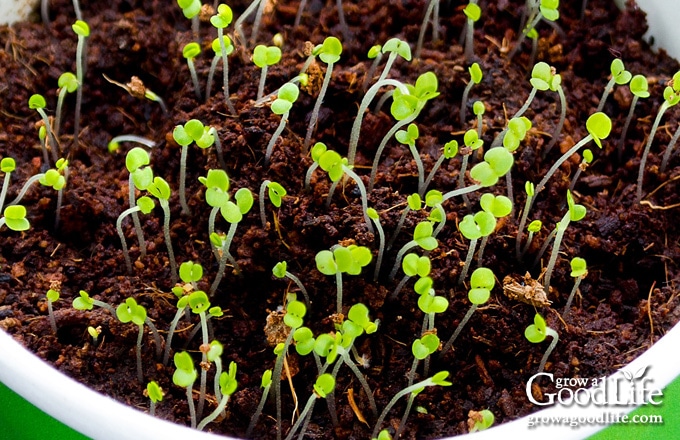
Thyme seeds are tiny, temperamental, and take a long time to sprout, so patience is needed when growing thyme from seeds. They are also tricky to germinate, so plant double the number of seeds you want to sprout. The seeds will sprout at different times, so give them time.
Start thyme seeds indoors 10 weeks before your average last frost date. Seeds can take anywhere from 1 to 4 weeks to germinate.
Use fresh, sterile seed starting mix. Soak the soil for several hours to hydrate, and then fill your seed starting containers. Sprinkle seeds over the top of the soil. Thyme needs light to germinate, so do not cover seeds. Mist the soil surface thoroughly with warm water from a squirt bottle.
Tightly cover the entire container with a humidity dome and place the tray in a warm location under lights. When sprouts are visible, remove the humidity dome from the tray, water the seedlings, and adjust the lights to 3-inches above the plants.
Once the seedlings are about 4 inches tall, harden off the plants, and transplant them into their permanent home after all danger of frost has passed. Plant your thyme seedlings about 8 to 10 inches apart. Water new plants until they show signs of growth, and then water only when experiencing extremely dry conditions. Limit harvesting in the first year to allow the plants to grow healthy and become established.
How to Root Thyme Cuttings
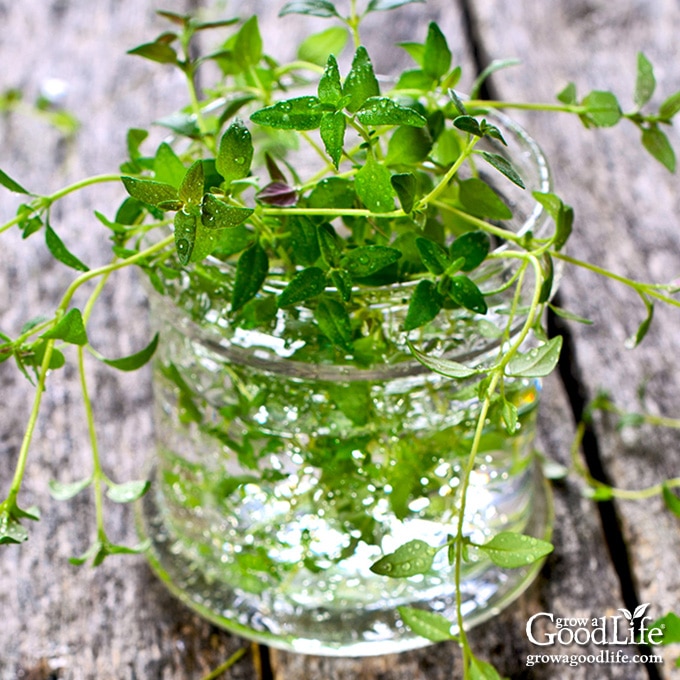
You can also propagate thyme by cutting stems and rooting them in water. The best time to take cuttings is in early spring when the plant grows new shoots. Avoid taking cuttings after the plant begins blooming because buds and flowers will slow or prevent rooting.
Select soft shoots from new, green growth and avoid woody, brown stems. Snip 4 to 5-inch stems, remove the lower leaves and place the cut end of the stem immediately into a jar of water.
Place the jar in a warm area out of direct sunlight. Change the water every few days to increase oxygen and prevent bacteria and algae growth. You should see roots begin growing within 4 to 8 weeks.
Once the roots develop, plant the stem cuttings into containers. Fill a 4-inch pot with a slightly damp sandy potting mix for each cutting. Use a pencil to make a 3 to 4-inch hole into the soil. Place the rooted stem carefully into the hole without damaging the roots. Cover gently and water thoroughly.
Place the newly potted thyme plants in indirect light or filtered sunlight until roots become established, then move to direct light for at least 6 to 8 hours per day.
Keep the potting soil moist until you see new growth. Once the plants become established and show new growth, you can harden them off and transplant them to the garden after all danger of frost is past.
How to Divide Mature Thyme Plants
You can divide thyme plants that are healthy and at least 2 years old. Spring or early fall are the best times to dig up and separate plants.
Dig up the entire thyme plant with a shovel. Then cut through the root ball with a spade or knife to create two or more clumps. Re-plant each section into the garden or transplant it into containers. Keep the plants well-watered until they begin to show new growth.
Growing Thyme in Containers
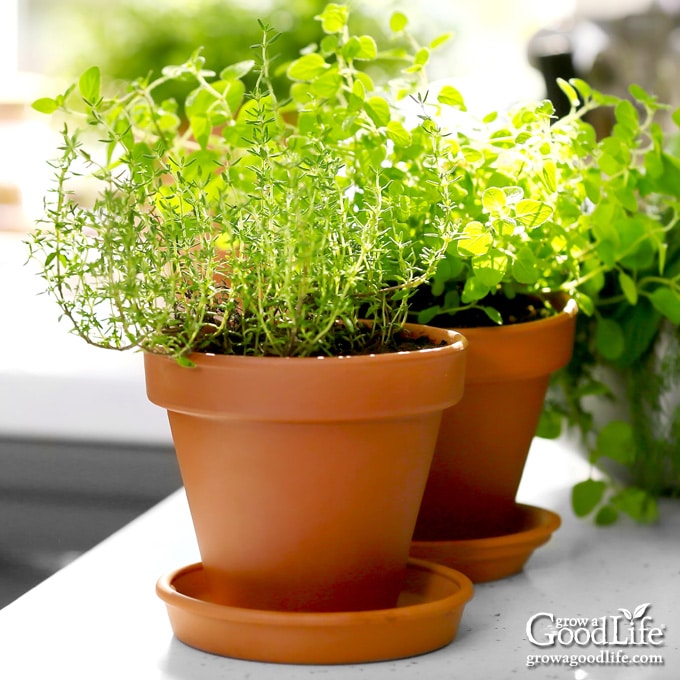
A terra-cotta pot is an excellent container for growing thyme. The plant needs to dry out between watering, and the porous nature of terra cotta containers will promote that needed drying stage. Other containers will work to grow thyme, but a terra cotta clay pot will produce a healthier herb plant. Ensure the container has plenty of holes in the bottom for extra water to drain.
Use a well-draining, sandy potting mix to grow thyme in containers. Mix your own by combining equal parts of all-purpose potting mix and sharp sand, or use a commercial cactus-potting soil.
Soak the soil for several hours to hydrate, and then fill a 4-inch pot with a slightly damp sandy potting mix for each cutting. Transplant your thyme plants to the container, firm gently to remove air pockets, and water well. Keep the potting soil moist until you see new growth.
Place the pots in the shade or filtered sunlight for several days, then move them to a sunny location where they will receive at least 6 hours of sun daily. Feed with a water-soluble plant food, such as fish emulsion, mixed at one-half the recommended rate every other week during the growing season.
Growing Indoors
The key to successfully growing thyme indoors is to find the perfect balance of sunlight and well-drained soil. Thyme grows best in a warm area that receives at least 6 hours of full sun each day. You can learn more about indoor herb gardens in this article: Tips for Growing Herbs Indoors.
Grow thyme in 8 to 10-inch containers filled with loose, well-draining potting soil. Blend equal parts all-purpose potting mix and sharp sand or perlite, or use a cactus-potting mix. Pot up into larger containers once you see roots coming out of the drain holes at the bottom of the container.
Thyme prefers relatively dry soil. Be careful not to overwater thyme plants, as this can cause root rot. Instead, water thyme once or twice weekly when the soil feels dry. Thoroughly soak the soil and let the extra water drain. Let the soil dry before watering again.
Feed indoor thyme plants every 2 to 4 weeks with a weak liquid fertilizer, such as fish emulsion, mixed at half the recommended rate for indoor plants.
Thyme as a Companion Plant
Thyme makes a great companion plant for broccoli, cabbage, eggplant, potatoes, strawberries, and tomatoes.
For container gardens, consider planting thyme with rosemary since they both have the same soil, sun, food, and moisture needs.
Watch for Pests and Diseases
Thyme is a hardy herb that rarely experiences pest infestations or diseases. When the herb plant shows signs of distress, the problem is often due to improper watering or insufficient sunlight. Overwatering can encourage fungal leaf diseases and cause roots and stems to rot. Instead, allow the soil to dry out between watering.
Aphids and spider mites can be a problem, especially with indoor thyme plants. However, rinsing them off with a strong stream of water or using insecticidal soap can control these.
How to Harvest Thyme
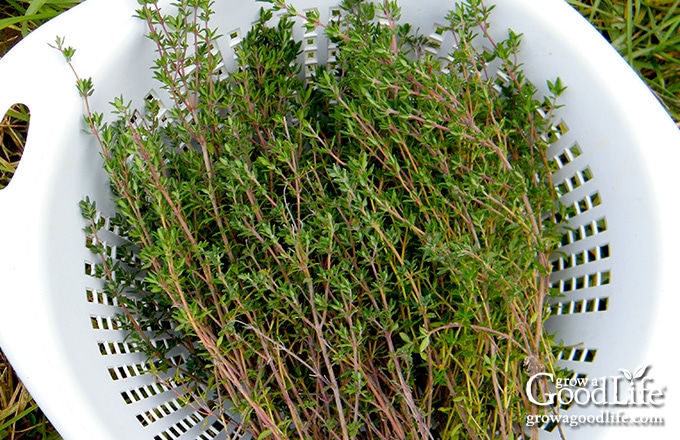
Thyme is an evergreen perennial that you can harvest fresh all year round. The best flavor is early summer before the plant flowers or late summer after the blossoms fade.
Harvest thyme by cutting off the top 6 inches of growth with scissors. The plants can be heavily harvested 2 to 3 times per year or as needed for meals throughout the growing season. Harvest in the morning just after the dew has dried off the plants.
Use thyme sprigs whole in sauces, stews, crockpot meals, and roasted chicken. Or strip the leaves by sliding your thumb and finger down the stem from tip to cut end.
Light pruning after flowering will keep the plants looking neat and promote new growth to provide harvests well into fall.
Ways to Preserve Thyme
Freshly harvested thyme stems can be wrapped in a damp paper towel and refrigerated for up to two weeks.
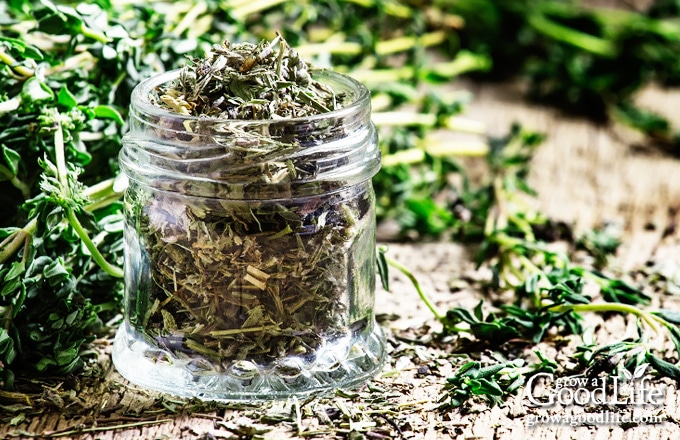
To dry a large harvest, tie the stems into small bundles and hang them in an airy place out of direct sunlight to dry. Alternatively, you can spread thyme sprigs on a drying screen to dry naturally or use a food dehydrator.
Once the thyme is completely dry and brittle, remove the leaves from the stems and store them loosely in glass jars with airtight lids in a cool, dark place, away from heat, humidity, and temperature fluctuations. Learn more about drying herbs in this article: How to Harvest and Dry Herbs for the Pantry.
Thyme is easy to care herb that doesn’t need much attention once it becomes established. It spreads slowly and won’t take over your garden like other perennial herbs. Once the plant is established, simply cut foliage as needed for meals, and prune woody stems to keep the plant healthy and compact.
Thyme may be small in stature, but it is big in flavor. Use thyme in your favorite recipes, soups, stocks, stews, and roasts. Fresh thyme also pairs exceptionally well with Italian dishes such as tomato sauce, zucchini garlic bites, Italian salsa cruda, and homemade breakfast sausage.
You May Also Like These Herb Articles

Great information I loving growing herb but sometimes they died
Claudette, I am sorry to hear that. I hope these tips help.