Canning Turkey Meat
This post may contain affiliate links, which means that I may receive a commission if you make a purchase using these links. As an Amazon Associate I earn from qualifying purchases.
Turkey is easy to can and will last for months on the shelf, so it’s always available when you need a quick meal. Learn how to pressure can turkey with this tutorial.
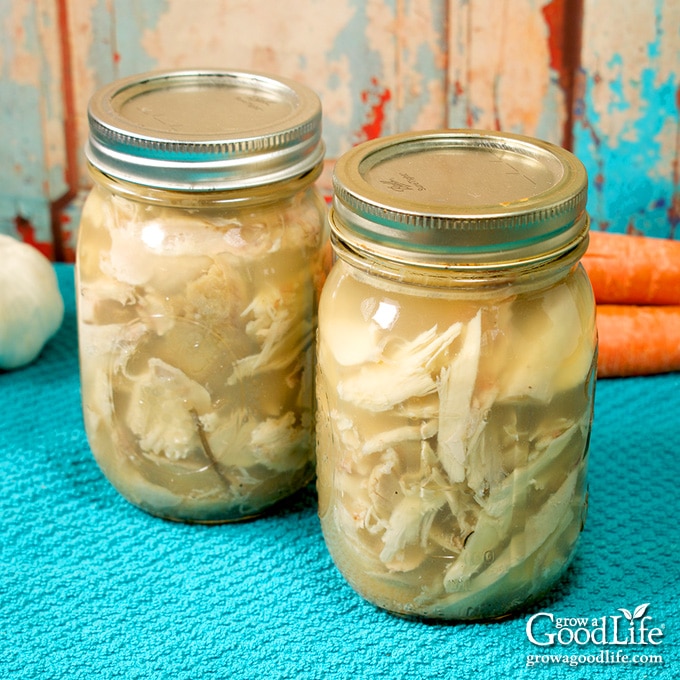
Around the holidays, turkeys can be purchased at reduced prices from stores and butcher shops. I like to grab an extra bird or two with the purpose of preserving it for later meals. Since freezer space is an issue this time of the year, I can it so it can be stored on the shelf.
Home canned turkey is a convenient option for those days when you need quick meal option. You can use it in chili and soups, tacos, enchiladas, sandwiches, and casseroles.
Tips for Canning Turkey
Whether you are taking advantage of holiday sales, raise your own poultry, hunt, or just want to preserve Thanksgiving leftovers, this article will show you how to can turkey meat for your food storage shelves. Before we get into it, here are some tips:
Use a Pressure Canner
Meat can only be canned safely by with a pressure canner to achieve the high temperature necessary to kill organisms that can cause food borne illness. There are no safe recipes for canning meat in a water bath canner. If you don’t have a pressure canner, freeze the meat instead.
Allow for Plenty of Time
Canning turkey is a pretty big project. It does take some time to prepare, cook, debone and separate the meat, make the stock, prepare the jars, and process in a pressure canner.
I like to break the project up over two days. On day one, I cook the bird, let it cool, remove the meat from the bones, turn the bones into stock, and pop everything into the refrigerator.
The following day, I get my canning equipment set up, skim the fat off the broth, heat the meat and stock, fill the jars, and process the jars in the pressure canner.
Preparing to Cook a Turkey
Roasting a turkey is pretty straightforward, but it is important to be aware of the proper handling guidelines in order to prevent the growth of harmful bacteria. If your bird is frozen, you will need to defrost it first before cooking. Depending on the weight, it can take 3 to 5 days to defrost in the refrigerator.
We are roasting a whole bird in the oven to cook it for this recipe, but you can use cut up pieces and cook it any way you prefer, including in a slow cooker, convection oven, an Instant Pot, or air fryer. Feel free to season with salt pepper and herbs of choice, but avoid using sage. For some reason, the flavor of sage gets really strong and bitter when canned.
Check out this article for tips to preparing to cook a turkey, including how to defrost it, and other safe handling recommendations: How to Roast a Turkey.
Canning Leftover Turkey
The recipe below starts with a whole bird, but you can also can leftovers from your Thanksgiving meal. Since the meat is already fully cooked, canning it may make it a bit dry. This may not be an issue if you are using the canned meat in a soup, or mixing with a sauce or gravy. Dark meat holds up better during the canning process than white meat from turkey breasts.
Make Stock Ahead of Time
The liquid used to fill the jars can be plain water or stock. I have canned turkey both ways, and using stock helps the meat retain flavor. You can use any type of poultry or meat stock without any added fillers. If you are using homemade stock, be sure to remove the extra fat with a fat separator, or refrigerate overnight and scoop off the fat layer that forms on top.
You can cut down on prep time if you already have stock on hand before canning. Follow this recipe to make stock, and store overnight in the refrigerator, or preserve it by freezing or canning: Turkey Stock Recipe.
Steps to Canning Turkey
If you are new to canning or need a refresher, it may be helpful to review this document on pressure canning at the National Center for Home Food Preservation website.
This is a safe caning recipe for canning Chicken, Duck, Goose, Turkey, or Game Birds from the Ball Blue Book Guide to Preserving book. You will find the full, detailed recipe below, but here are the steps:
Step 1: Prepare the Turkey
If you are preparing a whole bird for canning, you don’t have to cook it completely. The pressure canning process will finish cooking the meat and kill any bacteria that may be present. Both Ball and the National Center for Home Food Preservation say to cook until about two-thirds done.
Roast the unstuffed bird in an oven until the internal temperature is at least 115˚F. If you are more comfortable dealing with a fully cooked bird, continue roasting until the internal temperature is 165˚F.

Let the turkey rest until it is cool enough to handle, then remove the meat from the bones. Cut the meat into chunks, cubes, or strips. Do not shred the meat because it may compress in the jar and prevent the heat from penetrating properly.
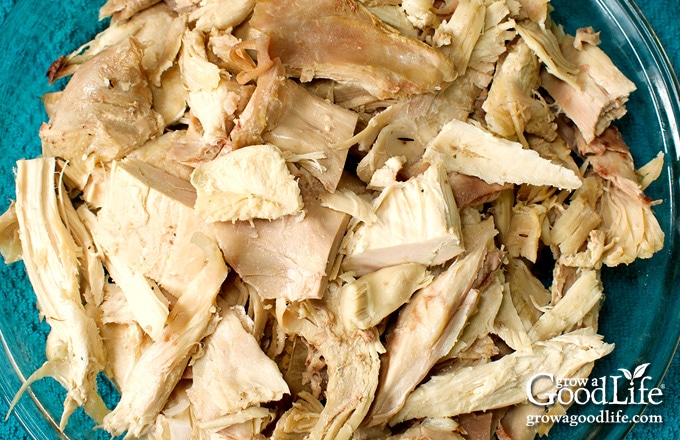
Save the carcass, skin, and pan drippings to make stock. I like to do this right away since the roasting pan is already out.
If you have stock made and ready to use, continue to the canning process. If you need to make the stock first, place the meat into the refrigerator, make your stock, chill it over night in the refrigerator so the fat can be removed easily, and proceed with canning the following day.
Step 2: Prepare the Canning Equipment
When you are ready to can the turkey, gather your canning gear, prepare the jars, set up the pressure canner, and organize your work area.
You will need:
- Pressure canner with canning rack
- 8 pint sized canning jars, or 4 quart sized jars
- Canning lids and bands (new lids for each jar, bands can be reused)
- Canning tools: jar lifter, canning ladle, funnel, and bubble popper
- Plus basic kitchen supplies such as a large pot, slotted spoon, and clean kitchen towels.
Wash the canning jars, lids, bands, and canning tools in hot soapy water, and rinse well. Set the lids and bands aside to air dry until you are ready to use them.
Place the pressure canner on the stove, and insert the canning rack. Fill the canner with water according to the manufacturer’s instructions: Presto is 3 quarts, Mirro is 2 quarts, and All American is 2 to 3 inches.
Fill the jars halfway with hot water, and then place them in the canner. Bring the canner to a simmer for 10 minutes (180˚F). Don’t boil, but keep hot until you are ready to fill them.
Step 3: Heat the Stock
Add the stock to a large stockpot. Cover pot, and bring it to a boil over medium-high heat, and then reduce the heat to a simmer (180˚F). If you made fresh stock, remove and discard excess fat before heating.
If you refrigerated the meat, you will need to heat it up before placing it in your jars. Simply add it to your pot of stock and heat everything together. Use tongs or a slotted spoon to scoop out the meat to fill the jars, and then top off with stock.
Step 4: Can the Turkey Meat
Lay a kitchen towel on the counter. Use the jar lifter to remove a jar from the canner. Pour out the water (save it for washing dishes), and place the jar on the towel. Keep the remaining jars in the canner, so they stay hot.
Hot pack the jar with loosely with hot meat. Don’t pack tightly, but do use the bubble popper to push down the pieces to eliminate large pockets.
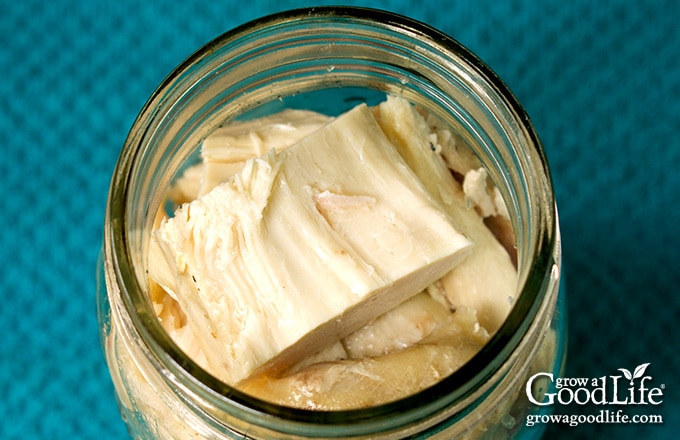
Place the canning funnel on the jar, use the ladle, and cover the meat with stock while maintaining a 1-inch headspace. Run the bubble popper through the jar to release trapped air bubbles.
Wipe the rim of the jar with a damp towel to remove any residue. Center a lid on the jar, place the band over the lid, and screw it on until fingertip tight. Immediately place the jar back into the canner, and repeat with the rest of the jars.
Bring the canner to a boil over medium-high heat. Follow the directions for your pressure canner and process the jars for the times indicated in the recipe below.
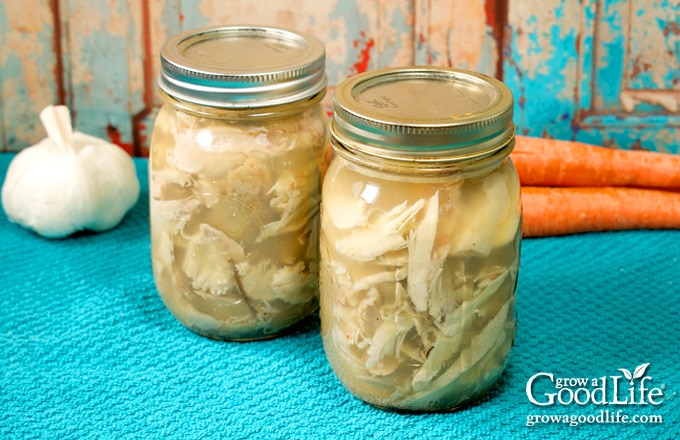
When the processing time is complete, turn off the heat and let the canner cool naturally, remove the jars, and let them cool completely. Date, label, and store in a cool location for 12 to 18 months.
Ways to Use Canned Turkey
You can use canned turkey in so many ways in soups, sandwiches, and casseroles. Since it is already cooked and ready to go, it will save you time in the kitchen. You can add it to your favorite pasta for extra protein, toss in salads, or try one of these recipes:
- Turkey Soup: Make a quick comforting meal by heating a jar of turkey meat, broth, frozen vegetables, and cooked noodles or rice. Season to taste and serve warm.
- Turkey Enchiladas: Replace the shredded chicken with turkey in this recipe and make enchiladas.
- Turkey Chili: Use turkey instead of chicken in this slow cooker white bean chili recipe.
- Turkey Fried Rice: Use canned turkey, along with leftover rice, and vegetables in this recipe for fried rice for an easy one-pot meal.
- Turkey Fajitas: Replace the chicken with drained turkey in this chicken fajitas recipe. Flavor with taco seasoning and add it to the end of the cooking time after the peppers and onions are soft.
- Turkey Salad Sandwiches: Combine drained meat with mayo, salt, pepper, and seasonings of choice. Layer in a sandwich or tortilla wrap with lettuce, and sliced tomato for a quick lunch.
How to Can Turkey
Ingredients
- 18 pound turkey thawed
- 4 quarts turkey stock fat removed
- canning salt optional for flavor
Instructions
Pre-Cook the Bird:
- Preheat the oven to 350°F.
- Place a roasting rack into the bottom of a roasting pan, and then place the bird directly into the roasting pan, breast side up.
- Remove the neck and giblets from the neck and main cavity. Place these into the bottom of the roasting pan around the bird.
- Add 2 cups of water to the pan, cover, and roast until it is two-thirds done, and registers about 120°F on an instant read thermometer, about 3 hours. If you are more comfortable dealing with a fully cooked turkey, continue roasting until the internal temperature is 165°F.
- Let the bird cool until it is easy to handle. Then remove the meat from the bones. Cut the meat into chunks, cubes, or strips.
Can the Turkey:
- Wash the jars, lids, bands, and canning tools in hot soapy water and rinse thoroughly. Set the lids and bands aside until you are ready to use them.
- Place the jar rack into the pressure canner, and fill with water per your pressure canner manufacturer's instructions: Presto is 3 quarts, Mirro is 2 quarts, and All American is 2 to 3 inches.
- Fill the jars halfway with hot water, and then place them on the rack in the canner. Bring the canner to a simmer for 10 minutes (180°F). Keep hot until you are ready to fill them.
- Add the stock to a large pot, and bring to a boil over medium-high heat. Once the stock boils, reduce the heat to a simmer (180°F), and keep hot. (see note 2 below)
- Spread a kitchen towel on the counter. Use your jar lifter to remove a jar from the canner. Pour out the water (save it for washing dishes), and place the jar on the towel. Keep the remaining jars in the canner, so they stay hot.
- Use the canning funnel and fill the jar with meat, leaving a 1-inch headspace at the top of the jar. If you are using salt, add up to 1/2 teaspoon salt for pints, and 1 teaspoon of salt for quarts. Ladle hot stock to cover and fill the jar while maintaining a 1-inch headspace.
- Run the bubble popper through the jar to remove air bubbles, and wipe the rim with a damp paper towel. Center a lid on the jar, place the band over the lid, and screw it on until fingertip tight.
- Place the jar back into the canner with the jar lifter, and repeat with the rest of the jars until the canner is filled, or you run out of meat.
- Place the lid on the canner and lock it. Leave the vent open, adjust the heat to medium-high, and bring the canner to a boil. Allow the pressure canner to vent steam for 10 minutes, then add the pressure weight.
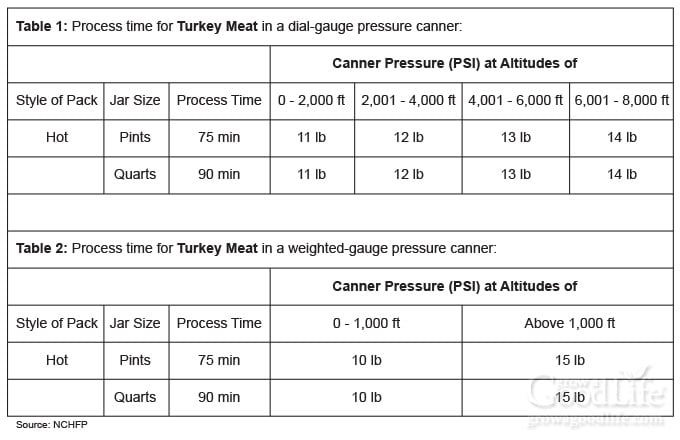
- Once the canner has reached the correct pressure (10 pounds for weighted gauge, and 11 pounds for dial gauge canners.), set a timer, and process pints for 75 minutes, and process quarts for 90 minutes at altitudes of less than 1,000 ft.
- Adjust the heat as needed to maintain a steady pressure, and adjust altitude if necessary (see chart below).
- When processing time is complete, turn off the heat, and let the pressure canner cool down to 0 pressure on its own.
- Once the canner is depressurized, let the canner cool additional 10 minutes before removing the lid.
- When the canner has cooled down, spread a kitchen towel on the counter, unlock the cover, and remove it by tilting the lid away from you so that steam does not burn your face.
- Allow another 10 minutes for the jars to adjust to the change in pressure. If jars are still boiling, let them sit in the canner for another 5 minutes, or until the boiling stops.
- Use the jar lifter to remove the jars from canner and place on the towel. Keep the jars upright, and don’t tighten bands or check the seals yet. Let the jars sit undisturbed for 12 to 24-hours to cool.
- After 12 to 24-hours, check to be sure jar lids have sealed by pushing on the center. The lid should not pop up. If the lid flexes up and down when the center is pressed, it did not seal. Refrigerate the jar and use up within a few days, or transfer to a freezer container and freeze for up to 6 months.
- Remove the ring bands, wash, label, date the jars, and store the jars in a cool, dark location (50 to 70°F). Use within a year for the best quality. Yields about 8 pint jars or 4 quarts.
Notes
- Note 1: If you don’t have stock or broth ready to go, you can stop here to make a stock. Just cover and pop the meat into the refrigerator, and follow this recipe to make stock: How to Make Stock
- Note 2: If you refrigerated the meat, you will need to heat it up before placing it in your jars. Simply add it to your pot of stock and heat everything together. Use a slotted spoon to scoop out the pieces to fill the jars.
- This is a tested safe canning recipe from the USDA Complete Guide to Home Canning and the Ball Blue Book Guide to Preserving. Changing the recipe may make the product unsafe for canning.
- All times are at altitudes of less than 1,000 ft. Adjustments must be made for altitudes greater than 1,000 ft. See chart below.
Nutrition
You May Also Like:
40+ Meals in a Jar Pressure Canning Recipes
In this eBook, you will find 50 pressure canning recipes, including 44 meals, along with homemade stocks and bone broths. Recipes include soups, stews, chilis, beans, beef, pork, and poultry. Explore the world of preserving delicious home-cooked meals for all seasons.

