Turkey Soup Canning Recipe
This post may contain affiliate links, which means that I may receive a commission if you make a purchase using these links. As an Amazon Associate I earn from qualifying purchases.
Preserve the warmth of homemade comfort with our guide to canning turkey soup! Stock your pantry and savor the convenience of homemade soup anytime with this safe canning recipe.
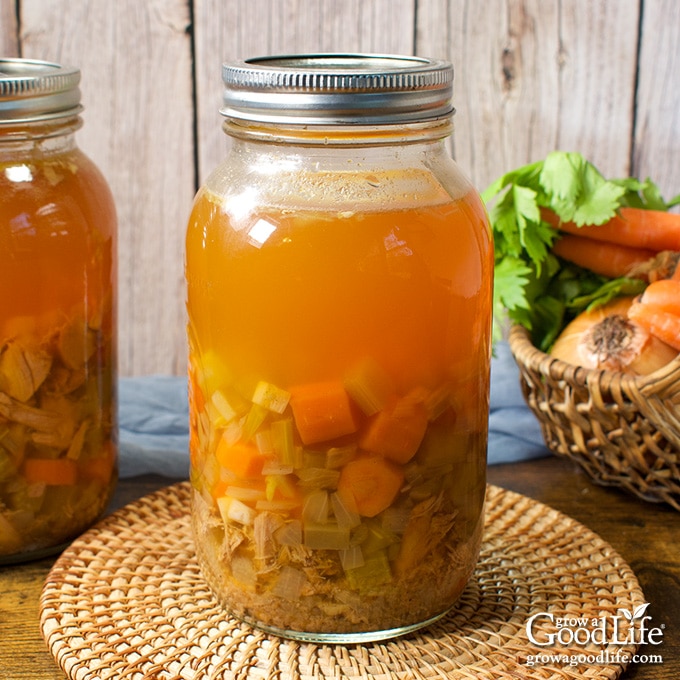
There’s something comforting about a steaming bowl of homemade soup, especially when it’s made with care and preserved to be enjoyed when the craving strikes. In this recipe, you’ll learn how to safely pressure can a wholesome and hearty staple for your pantry—Turkey Soup.
Leftover turkey is one of the best parts of the Thanksgiving meal, but one of my favorite ways to use up leftovers is to turn them into home-canned turkey soup that we can enjoy all winter. In fact, I get an extra turkey so I can roast it up and use the meat for canning plain turkey meat, preserving turkey soup, and turning the bones into a delicious, rich turkey stock.
Canning your own turkey soup not only provides a convenient and timesaving solution at mealtime, but also guarantees a flavor-packed soup that surpasses store-bought alternatives with no additives or mystery ingredients.
Steps to Canning Turkey Soup
You’ll need a pressure canner to can turkey soup safely. It’s the only way to get the high temperatures required to kill harmful bacteria that cause foodborne illnesses. If you don’t have a pressure canner, you can still follow this recipe. Just freeze the soup instead.
Before you start, familiarize yourself with the Using Pressure Canners guide on the National Center for Home Food Preservation website. Also, please review the instructions for your pressure canner and ensure it’s all clean and working fine.
About the Ingredients
This recipe is developed based on the basic Soup recipe from the USDA Complete Guide to Home Canning, So Easy to Preserve, and the National Center for Home Food Preservation. These guidelines call for packing the jars half full with the solid ingredients, then filling them with liquid and leaving a 1-inch headspace. It may seem like a lot of liquid, but it is the perfect amount for heating and ladling over noodles or rice at serving time.
- Turkey Meat: This recipe calls for cooked turkey. If you start with raw turkey, precook it by cutting it into cubes and simmering it in a skillet with some turkey broth or water. As a rough estimate, you will need around 3 to 3 1/2 pounds of raw boneless turkey meat to yield 6 cups of diced cooked turkey.
- Vegetables: This recipe uses the classic trio of mirepoix veggies—celery, onions, and carrots. Yet, feel free to swap these out for an equal amount of alternatives like asparagus, green beans, corn, mushrooms, thawed frozen peas, peppers, tomatoes, or turnips.
- Seasonings: This recipe uses the classic Bells poultry seasoning. However, you can use dried herbs like thyme, rosemary, oregano, or basil, but keep in mind that sage turns bitter when canned.
- Broth Liquid: I like using homemade turkey stock to add flavor to the soup, but you can use vegetable broth, chicken bone broth, or simply water – your choice. If you don’t have turkey broth or stock on hand, you can make it from the turkey carcass and roasting pan juices the day before by following this Turkey Stock Recipe. Once the stock cools in the refrigerator, the fat will rise to the top and can be easily removed before using it to make your soup.
- Caution: Do not include noodles, pasta, rice, flour, cream, milk, or other thickening agents to home-canned soups. Instead, add these when you open the jar and heat the soup at serving time.
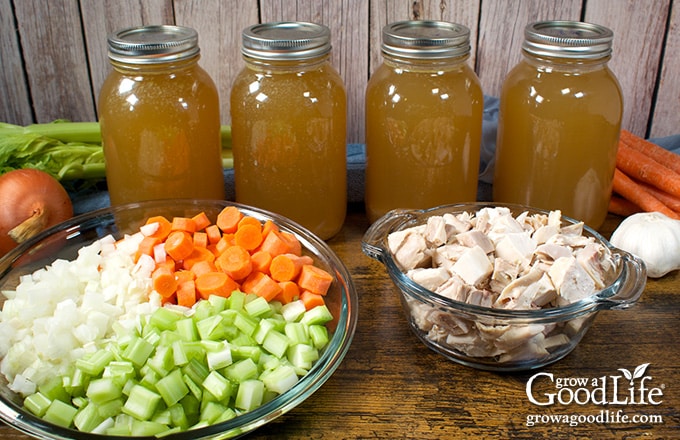
Step 1: Gather and Prepare Your Canning Equipment
Before you begin, make sure you have the necessary kitchen tools and canning equipment ready to go. Here’s a list of what you’ll need:
- Pressure Canner with canning rack
- Canning Jars: 12 pint-sized canning jars, or if you prefer larger portions, 6 quart-sized jars.
- Lids and Bands: You will need new lids for each jar, while the bands can be reused.
- Canning Tools: A jar lifter for secure handling, a canning ladle for jar filling, a funnel for spill-free pouring, and a bubble popper to eliminate any trapped air and measure headspace.
- Basic Equipment: A large stainless steel saucepan, a reliable knife and cutting board, measuring cups, a slotted spoon, and a supply of clean kitchen towels.
Wash your canning jars, lids, bands, tools, and equipment in hot, soapy water, followed by a thorough rinse. Then, set everything aside on clean kitchen towels to air dry.
Add the jar rack to the pressure canner, place it on a large burner of your stove, and fill it with water. Refer to your canner manufacturer’s guidelines for the correct water amount. For instance, if you’re using a Presto canner, you’ll need 3 quarts of water, while Mirro specifies 2 quarts, and All American recommends filling it 2 to 3 inches deep.
Preheat the jars by filling them halfway with water and arranging them upright in the canner. Cover the canner, bring it to a simmer (180°F), and allow it to simmer for at least 10 minutes. Keep the jars warm until you are ready to fill them. You can get the soup ingredients ready while the canner is warming.
Step 2: Prepare the Ingredients
This recipe calls for cooked turkey and raw vegetables. Before starting the canning process, get all your ingredients prepared by following these steps:
- Turkey: Begin by removing the skin, trimming the fat, and cutting the turkey into approximately 1-inch cubes. Then, measure out 6 cups of diced, cooked turkey and add it to your large saucepot.
- Carrots: You will need 2 to 3 medium carrots to get 3 cups of sliced carrots. Wash the carrots well under clean running water, peel, then rinse again and cut into 1/2 inch slices. Measure 3 cups of sliced carrots and add them to the pot.
- Celery: You will need about 6 celery stalks for 3 cups of diced celery. After a thorough rinse under running water, trim off the leafy tops and ends, then chop the celery into bite-sized pieces. Measure 3 cups of diced celery for your pot.
- Onions: You will need about 2 medium onions. Peel and dice the onions, then measure 2 cups of diced onions and add them to the pot.
- Garlic: Peel and mince 4 garlic cloves and add to the pot.
Then, add the poultry seasoning, salt, pepper, and turkey stock to your saucepot. Cover the pot, bring it to a boil over medium-high heat, and boil for 5 minutes. Keep the soup piping hot as you fill your jars.
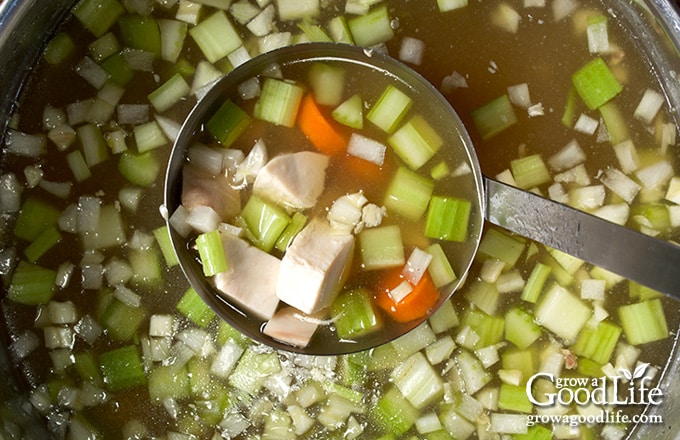
Step 3: Fill the Jars
Lay a dry kitchen towel on the counter. Use the jar lifter to take a jar from the canner. Empty the water into the sink (save it for dishwashing) and place the jar on the towel. Keep the other jars inside the canner to maintain their warmth.
Position the canning funnel onto the jar. Use the slotted spoon to fill the jar halfway with solid ingredients, then ladle in the hot stock, leaving 1-inch headspace. Pass the bubble popper through the jar to release any trapped air bubbles, and adjust the headspace if needed to maintain 1 inch.
Wipe off any residue from the jar rim using a damp towel. Place a lid on the jar’s top, set the band over it, and screw it on until fingertip tight. Return the jar to the canner and repeat the process for the remaining jars.
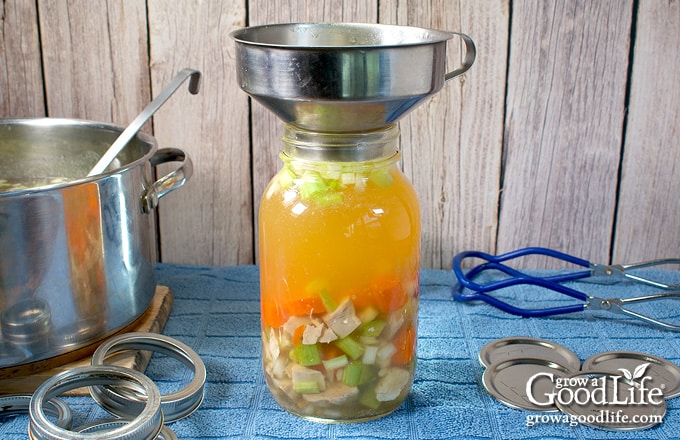
Step 4: Process the Jars in a Pressure Canner
Consult your pressure canner’s guidelines for sealing, venting, and heating, and process the jars for the times indicated in the recipe below.
Once the processing time completes, turn off the heat and allow the pressure to return to zero. Remove the jars and place them on a dry towel to cool, ensuring they remain upright. Avoid adjusting the rings or testing the seals at this point; the jars require an undisturbed cooling period to seal effectively. Let them cool completely for 12 to 24 hours.
After the cooling phase, test the seals. Refrigerate any jars that didn’t seal properly and consume them within a few days. Before storing the sealed jars, remove the rings and wash them thoroughly with soapy water to eliminate any residue. Then label, date, and find a cool spot to store the canned turkey soup. For optimal flavor, consume within 12 to 18 months.
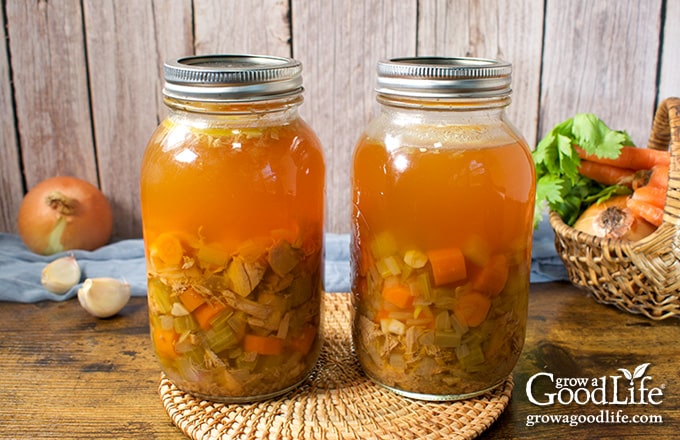
Enjoy Your Homemade Turkey Soup!
Congratulations on your freshly canned turkey soup! Now, enjoy the convenience of a quick, hearty meal whenever you crave the comforting warmth of homemade soup. Here’s how to make the most of your culinary creation:
Reheating Instructions
When hunger strikes, open a jar of your home-canned turkey soup and add it to a medium saucepan. Heat it on the stove for approximately 10 minutes. Don’t hesitate to customize it by adding extra veggies, fresh herbs, or a dash of your favorite spices. I enjoy tossing in a handful of fresh spinach, frozen broccoli, or any leftover veggies from the fridge.
Additional Serving Suggestions
Explore various ways to elevate your turkey soup after opening the jar:
- Turkey Noodle Soup: Elevate your meal by turning your canned turkey soup into turkey noodle soup. Cook the noodles separately in a pot, drain them, and add the noodles to your bowl. Then, generously ladle the piping-hot soup over the noodles. Cooking the noodles separately prevents them from absorbing all the delicious chicken stock. Prepare about 1/2 cup to 3/4 cup of dried noodles per quart.
- Turkey and Rice Soup: If you prefer a heartier base, try turkey and rice soup. Cook your rice separately, and add the cooked rice to your bowl at serving time. Ladle the hot turkey soup over the rice and stir to combine the flavors. This variation adds a satisfying depth and texture to your soup, creating a wholesome meal in a bowl. Prepare approximately 1/4 to 1/3 cup of uncooked rice per quart jar.
- Additional Serving Ideas: Feel free to experiment with other additions to suit your taste. Consider tossing in a handful of cooked quinoa, barley, or even orzo at serving time for added texture. Garnish your soup with a sprinkle of fresh parsley, a drizzle of olive oil, or a squeeze of lemon juice to enhance the overall flavor.
The versatility of your home canned turkey soup allows for endless creativity and personalization at serving time. Whether enjoyed on its own or with these suggested variations, your soup will become a staple in your home, offering a quick meal, comfort, and nourishment with every spoonful.
Turkey Soup Canning Recipe
Ingredients
- 6 cups diced cooked turkey
- 3 cups peeled sliced carrots
- 3 cups diced celery
- 2 cup diced onions
- 4 cloves garlic minced
- 2 teaspoons poultry seasoning optional for flavor
- 2 teaspoons salt optional for flavor
- 2 teaspoons ground black pepper optional for flavor
- 4 quarts turkey stock chicken broth, or water
Instructions
Prepare the Canning Equipment:
- Place the jar rack into the pressure canner and fill it with water per your canner manufacturer’s instructions: Presto is 3 quarts, Mirro is 2 quarts, and All American is 2 to 3 inches.
- Fill the jars halfway with hot water, then place them on the rack in the canner.
- Bring the canner to a simmer for 10 minutes (180˚F). Keep them warm until you are ready to fill them.
Make the Soup:
- Add all the prepared ingredients to a large saucepot, cover, and bring it to a boil over medium-high heat, and boil for 5 minutes. Reduce the heat and keep warm as you fill your jars.
Fill the Jars:
- Cover your counter with a towel. Use the jar lifter to take one jar out of the canner. Empty the water (save it for washing dishes) and set the jar on the towel. Keep the rest of the jars inside the canner so they stay warm.
- Position the canning funnel on the jar, use the slotted spoon to fill the jar halfway with solid ingredients, and then ladle hot stock, leaving 1-inch headspace.
- Remove the funnel and run the bubble popper through the jar to release any trapped air bubbles. Adjust the headspace again if necessary to maintain 1-inch.
- Wipe off any residue from the jar rim with a damp paper towel. Place a lid on top of the jar, position the band over it, and gently screw it on until fingertip tight. Place the filled jar back into the canner and repeat the process for the remaining jars.
Process the Jars in the Pressure Canner:
- Place the lid on the canner and lock it. Leave the vent open, adjust the heat to medium-high, and bring the canner to a boil. Allow the pressure canner to vent steam for 10 minutes, place the pressure regulator on top of the air vent, and let the pressure rise.
- When the canner has reached the correct pressure (10 pounds for weighted gauge or 11 pounds for dial gauge pressure canner), set a timer and process pint jars for 60 minutes and quart jars for 75 minutes at altitudes less than 1,000 ft.
- Adjust the pressure for your altitude if necessary (see chart below), and regulate the heat as needed to maintain a steady pressure.
- When the processing time is complete, turn off the heat and allow the canner to stand undisturbed until pressure drops to 0. Once the canner is depressurized, let the canner cool for an additional 10 minutes before removing the lid.
- Spread a dry towel on the counter, unlock the cover, and remove it by tilting the lid away from you so that steam does not burn your face.
- Allow another 10 minutes for the jars to adjust to the change in pressure. If the jars are still boiling vigorously, let them sit in the canner for another 5 minutes or until the boiling slows.
- Use the jar lifter to lift jars carefully from the canner and place them on the towel. Keep the jars upright, and don’t tighten bands or check the seals yet. Let the jars sit undisturbed for 12 to 24 hours to cool.
- After 12 to 24 hours, check to be sure the jar lids have sealed by pushing on the center. The cover should not pop up. The jar failed to seal if the top flexes up and down. Refrigerate it and use it within a few days.
- Remove the screw-on bands and wash the jars in warm soapy water. Label, date, and store the jars in a cool, dark place for 12 to 18 months. Once the jar is open, store leftovers in the refrigerator, and use it within a few days. The recipe yields about 12 pints or 6 quarts.
- To Serve: Open the jar and pour the soup into a saucepan. Warm over medium-high heat, add fresh herbs, season to taste, and enjoy hot as is or with cooked rice, pasta, or noodles.
Notes
- Dial Gauge Pints and Quarts at altitudes of 2,001 – 4,000 ft. increase pressure to 12 pounds, 4,001 – 6,000 ft. is 13 pounds, and 6,001 – 8,000 ft. is 14 pounds.
- Weighted Gauge Pints and Quarts at altitudes of 1,001 ft. and above, increase pressure to 15 pounds.
Nutrition
40+ Meals in a Jar Pressure Canning Recipes
In this eBook, you will find 50 pressure canning recipes, including 44 meals, along with homemade stocks and bone broths. Recipes include soups, stews, chilis, beans, beef, pork, and poultry. Explore the world of preserving delicious home-cooked meals for all seasons.

