Bourbon Cherries Canning Recipe
This post may contain affiliate links, which means that I may receive a commission if you make a purchase using these links. As an Amazon Associate I earn from qualifying purchases.
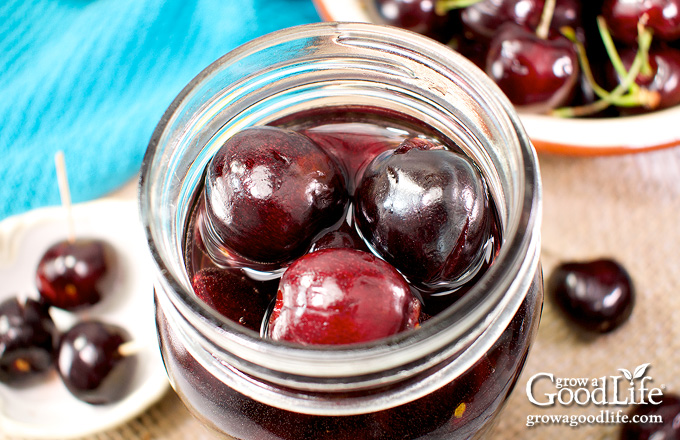
Infusing fresh cherries with a sweetened lemon and bourbon syrup makes these bourbon cherries pop with flavor. Add these boozy cherries to your favorite cocktails, spoon over ice cream for a decadent treat, or give to friends as gifts.

My longtime readers know that I love cherry season. When I see cherries appear in my local grocery store or farmers’ market, I simply can’t resist picking up yet another bag or carton.
Sweet cherries have found their way into several recipes on this website, including Cherry BBQ Sauce, Asian style Sweet and Sour Sauce, and Cherry Jam. Here, I am sharing how to preserve the cherry goodness into jars of bourbon cherries!
These boozy bourbon cherries are a great substitute for the artificially dyed maraschino cherries. Use the sweet bourbon cherry syrup to flavor drinks and garnish with the cherries. They are delicious in baked goods, and are delicious on top of a hot fudge sundae. A jar of homemade bourbon cherries makes a great hostess gift too!
Tips for Making Bourbon Cherries
Bourbon cherries are made by combining fresh cherries with a sweetened bourbon syrup, packing into canning jars, and processing in a water bath canner. Let the fruit infuse with flavor for at least a month before opening the jar. Here are some tips for making bourbon cherries:
Any cherry variety can be used for this recipe
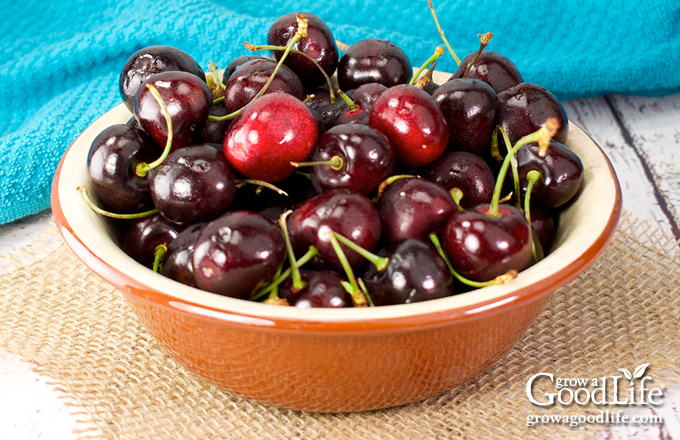
My favorites are the sweet dark cherries, but tart cherries will also sweeten slightly when infused in the flavored syrup. Select firm and ripe cherries without bruises or blemishes. You will need about 6 pounds of cherries for this recipe.
Preparing the cherries is the most time consuming part of this recipe. Get yourself a cherry pitter to make it easier.
Use inexpensive bourbon
You can use any brand of bourbon for this recipe, but I don’t recommend using an expensive one because it is just a small element of flavor.
Let the flavors infuse
After making, allow at least 4-weeks for the flavor to infuse into the cherries.
How to Make and Can Bourbon Cherries
If you are new to canning or haven’t canned in a while, it may be helpful to review this article on water bath canning at the National Center for Home Food Preservation website.
This recipe is adapted from the “Brandied Cherries” recipe in the Ball Blue Book Guide to Preserving. We have swapped bourbon for the brandy. A more detailed and printable recipe can be found at the bottom of this article, but these are the general steps to make and preserve bourbon cherries.
Be careful! Cherry juice stains. Be sure to wear old clothing and wipe up any messes quickly so it doesn’t set.
Step 1: Gather your kitchen equipment
Collect the following canning and kitchen equipment:
- Water bath canner and canning rack
- 6 pint sized canning jars
- Canning lids and bands (new lids for each jar, bands can be reused)
- Canning tools: jar lifter, canning ladle, funnel, and bubble popper
- Kitchen scale
- Cherry pitter.
- Plus basic kitchen supplies such as a medium pot, large prep bowl, slotted spoon, kitchen towels (that you don’t mind getting stained).
Step 2: Prepare the cherries
Weigh your cherries with the kitchen scale. You will need about 6 pounds to fill 6 half-pint jars. Wash the cherries well under clean running water. Pull out the stems, and pit the cherries with a cherry pitter. Place the pitted cherries in a large bowl, and set aside while you prepare the canning equipment.
Step 3: Prepare the canning gear
Wash the jars, lids, bands and canning tools in warm, soapy water and rinse well. Set the lids, bands, and tools aside to air-dry until you are ready to use them.
Place the canning rack into the water bath canner, set the jars upright in the canner, and add water to cover the jars. Bring the canner to a simmer (180˚F) for 10 minutes, and keep hot until you are ready to fill them.
Follow the manufacturer’s directions for preparing the lids. Pre-heating lids is no longer necessary before using, but it is still safe to warm the lids if you want to. Just add them to the canner when you heat your jars.
Step 4: Make the bourbon cherry syrup
Combine the sugar, water, and lemon juice in a large pot. Bring to a boil over medium-high heat while stirring to dissolve the sugar.
Add the cherries, reduce the heat to a simmer (180˚F), and cook about 5 minutes, or until the cherries soften slightly and begin to release liquid.
Remove the pot from the heat and stir in the bourbon.
Step 5: Can the cherries
Spread a kitchen towel on the counter. Use the jar lifter to remove a hot jar from the canner, drain, and place on the towel. Keep the remaining jars in the canner, so they stay warm.
Use your canning funnel and slotted spoon to fill the jar with cherries. Don’t squish the cherries, but you can pack them in firmly. They will soften and shrink slightly as they infuse into the bourbon syrup. Leave enough wiggle room to allow your bubble popper to run through the jar to release air bubbles.
Ladle hot syrup over the cherries maintaining a 1/2-inch headspace. Make sure all the cherries are submerged beneath the liquid. Run the bubble popper through the jar to release air bubbles, adjusting headspace again if necessary.
Wipe the rim of the jar with a damp towel to remove residue. Center a lid on the top, place the band over the lid, and screw it on until fingertip tight. Place the jar back into the canner, and repeat with the rest of the jars.
Adjust the water level so it is covering the jars by two inches, bring the canner to a boil, and process in a boiling water canner for the times indicated in the recipe below. Let the jars cool completely, and then test the seals, label, date, and store in a cool, dark location. Yields about 6 pint jars depending on the size of your cherries.
These cherries get better with age. Let the flavor infuse into the cherries for at least 4 weeks before opening a jar, and then store the jar in the refrigerator.
Bourbon Cherries Canning Recipe
Ingredients
- 6 pounds sweet cherries
- 1 cup sugar
- 1 cup water
- 1/2 cup bottled lemon juice
- 1 1/4 cups bourbon
Instructions
Prepare the Cherries
- Rinse, stem, and pit the cherries. Set them aside while you prepare the canning equipment and make the bourbon syrup.
Prepare the Canning Equipment
- Wash your jars, lids, screw bands, and canning tools in hot soapy water. Rinse thoroughly to remove all suds. Set aside to air dry on a clean kitchen towel.
- Place the canning rack into water bath canner, place jars in the canner, and add water to cover. Bring the canner to a simmer (180˚F) for 10 minutes, and keep hot until you are ready to fill them.
Make the Syrup
- Add the sugar, water, and lemon juice to a medium pot. Bring the pot to a boil over medium-high heat while stirring to dissolve the sugar.
- Add the cherries, reduce the heat to a simmer (180˚F), and cook until the cherries are warm, about 5 minutes.
- Turn off the heat and remove the pot from the stove. Add the bourbon, stir to combine, and cover to pot to keep it warm.
Can the Bourbon Cherries
- Spread a towel on the counter. Use your jar lifter to remove a warm jar from canner, drain the water into the canner, and place on the towel. Keep the rest of the jars in the canner so they stay hot.
- Using the canning ladle and funnel to fill the jars with the cherries and syrup. Maintain a 1/2-inch headspace.
- Run the bubble popper through the jar to release air bubbles, and clean the rims of the jars with a damp towel.
- Place a lid on the jar, gasket side down, and screw on the metal band until fingertip tight.
- Place the jar back into the canner with the jar lifter, and repeat with the remaining jars.
- Once all the jars are in canner, adjust the water level to two inches above the tops. If adding water, pour the water in between the jars and not directly onto them.
- Cover the canner and bring to boil over high heat. Once water boils vigorously, process pints for 10 minutes at altitudes of less than 1,000 ft. Adjust processing time for your altitude if necessary (see notes below).
- When processing time is complete, turn off the heat and allow the canner to cool down and settle for about 5 minutes.
- Lay a dry towel on the counter. Remove the cover by tilting lid away from you so that steam does not burn your face.
- Use the jar lifter to remove the jars from canner and place on the towel. Keep upright, and don't tighten bands or check the seals yet. Let the jars sit undisturbed for 12 to 24-hours to cool.
- After the jars have cooled for at least 12 hours, check to be sure lids have sealed by pushing on the center of the lid. The lid should not pop up. If the lid flexes up and down, it did not seal. Refrigerate and use within several months.
- Let the flavor infuse into the cherries for at least 4 weeks before opening a jar. Once opened, store the jar in the refrigerator, and use within a year. Yields about 6 pint jars.
Notes
Nutrition
You May Also Like:
40+ Meals in a Jar Pressure Canning Recipes
In this eBook, you will find 50 pressure canning recipes, including 44 meals, along with homemade stocks and bone broths. Recipes include soups, stews, chilis, beans, beef, pork, and poultry. Explore the world of preserving delicious home-cooked meals for all seasons.

I had two of 12 not seal. No biggie. Since I doubled the recipe I tripled the syrup and had just enough to fill them. I didn’t want to run out. The cherries seem a bit soft. I was hoping to get a cherry with a little more body to it like a maraschino cherry. (But nicer of course). Any tips to keep them a little crunchy?
Jim, Achieving the same texture of maraschino cherries can be challenging without using the preservatives and processing methods typical in commercial production. However, these tips may help you improve the texture of your canned cherries:
1. Choose Firm Cherries: Opt for firm and slightly underripe cherries when selecting fruit for canning, as overripe cherries may result in a softer texture after processing.
2. Consider Sour Cherries: Sour or tart cherries are naturally firmer than sweet cherries. If available, use sour cherries for canning to retain more texture.
3. Avoid Overcooking: Be careful not to overcook the cherries in the liquid. Simmer them for only 5 minutes before filling the jars.
4. Experiment with Calcium Chloride: Food-grade calcium chloride, commonly sold as “Fruit Fresh,” can be added to the canning syrup to improve fruit firmness. I haven’t tried this, but follow the instructions provided on the product packaging.
I tightened the rings to finger tight and processed to the correct time and did the 5 minute settle. While pulling them out of the canner, they fizzed out of under the rings and sprayed cherry juice all over the canner and towel. It was my first time and I followed the directions exactly. Is this normal?
Shaun, Oh, dear! While a little bubbling when removing the jars is not uncommon, spilling hot cherry liquid can be quite a surprise. The fizzing is likely due to the heat and pressure inside the jars, causing the liquid to expand and push air out.
Just to help troubleshoot, did you ensure to leave the recommended headspace when filling the jars? Maintaining the correct headspace is crucial to allow for proper expansion and prevent issues like excess pressure during processing. To prevent this next time, you can try letting the jars settle in the canner for an additional 10 to 15 minutes after removing the cover. This extra settling time can help release any trapped air and reduce the likelihood of fizzing when you remove the jars.
Yes to the head space with the 1/2″. The jars were all sealed as of this morning. I know alcohol reduces the boiling point, so it’s my guess the 10 minute processing plus the 5 minute settling gave enough time for that point to be hit. I have canned a lot and follow either Ball or NHFCP to the letter, but have never canned with alcohol in the liquid, so that may have been the factor. I had a little liquid left, so it gave me the opportunity to taste test and it was delicious. This batch was bourbon and I’m going to try the next with spiced rum.
Shaun, I’m glad to hear that your jars sealed successfully! It’s great that you followed the headspace instructions correctly and could taste the delicious outcome! You are correct that alcohol can affect the boiling point, and it’s possible that the combination of processing time and alcohol content contributed to the fizzing. However, this canning recipe is a safe and tested one from Ball, and we merely changed the type of alcohol used from brandy to bourbon. Therefore, you can rest assured that your jars are safe even after experiencing fizzing. In the future, letting the jars settle for a longer period in the canner may help prevent the fizzing from happening again.
I made these today. After the water process, I removed them from the bath. They both pinged but they have quite a few bubbles around the top. Is that from the bourbon??
Linda, It’s great to hear that your jars pinged, indicating they sealed properly. The bubbles around the top are most likely from the release of air in the fruit during the canning process. As long as the jars sealed and you followed the canning instructions correctly, the bubbles are not a concern for the safety of the bourbon cherries. Remember to let the jars cool undisturbed for 12 to 24 hours to allow the seals to form completely. Enjoy your delicious homemade treat!
Hi, I made these today and ended up with 4 cups of leftover cherries. I filled 12 1/2 pints as full as I could. I had zero juice left. I weighed the cherries before pitting (and ate a few during that process) and followed the instructions to a T. They look beautiful! Popping as I type!
Tracy, Thank you for trying out the recipe and sharing your feedback. I’m glad to hear that the cherries turned out beautifully! Regarding the excess cherries, it seems like there may have been a misstep somewhere along the way. The recipe is designed to yield 6 pint jars. While it is normal for canning recipes to vary a little due to the size of the product or personal preferences in packing them, having 4 cups of leftover cherries seems quite excessive. I’d like to help troubleshoot the issue. Did you simmer the cherries in the syrup for the specified 5 minutes as mentioned in the instructions? When you filled the jar, did you fill it with cherries, and then top off with the syrup? I appreciate your input, and I’m here to assist further if you have any other questions or concerns.
How long do they last
Joann, Use within a year for the best flavor.
Hi
This sounds delicious. Can you use frozen cherries?
Monique, You could use frozen cherries, but the quality won’t be very good. The cherries won’t hold their shape because freezing breaks down the cell structure. However, if you spoon it over ice cream or another dessert, the softened cherries will still taste delicious.