How to Grow Celery
This post may contain affiliate links, which means that I may receive a commission if you make a purchase using these links. As an Amazon Associate I earn from qualifying purchases.
Growing celery requires a little bit of extra effort, but with the right knowledge, you can harvest your own homegrown celery. This article provides useful tips and tricks for successfully growing your own celery in a garden or container.
Celery is easy to grow in most climates, but it does require some extra attention to produce the best stalks. This article provides tips on how to grow celery successfully. From starting seeds and planting through harvesting, this guide will help you achieve the most delicious celery possible. Read on for more information about growing your own celery at home!

Celery is a popular vegetable that you can use in many different dishes. What can beat a warm soup with homemade veggie broth made with celery from your garden? This crunchy and versatile vegetable is perfect for growing your gardening skills and adding healthy, homegrown greens to your diet.
Did you know that celery is one of the most pesticide-contaminated produce items in the US? The Environmental Working Group classified celery in their Dirty Dozen worst produce tainted with pesticide residue for the last five years. When tested, 95% of conventionally grown celery had pesticide residue.
In addition, there have been dozens of reports of listeria, E. coli, and salmonella contamination of greens over the years. These facts worried me to the point that I stopped purchasing celery from the grocery store and now grow my own.
Celery isn’t the easiest vegetable to grow, but it’s a fun challenge. This post is a step-by-step guide on how to grow celery, including how to start from seed, when to grow it, and tips for keeping it healthy. So keep reading to learn everything you need to grow celery in your garden. Let’s get started!
About Celery
Celery (Apium graveolens) is a member of the Umbelliferae family, which also includes carrots, parsley, and dill. It is a long, thin, upright plant with fleshy green leaves. The celery we eat is actually the plant’s stems, which are filled with water and have a crunchy texture. It is often used as a base for soups and stews or as a crunchy addition to salads. It can also be juiced or blended into smoothies.
Celery is a good source of vitamins A and C, potassium, and folic acid. It also contains phytochemicals, which are plant-based compounds that may offer health benefits. For example, some studies have shown that celery’s phytochemicals may help reduce inflammation and lower blood pressure.
How Does Celery Grow?
Celery is a cool weather crop with a long growing season of between 90 to 120 days, depending on the variety. It is a biennial plant but is mostly grown as an annual.
The plants grow in a rosette producing 12 to 18-inch tall stalks from the center of the plant topped with leaves. If overwintered, the plant produces a flower stalk with light green flowers in the second year.
You can collect celery seeds once the flower heads dry. Celery seeds are also edible and can be used to add flavor to foods such as potato salads, spice rubs for grilled meats, and an ingredient in homemade pickling spice.
Celery Varieties for Your Garden
If you’re growing celery for the very first time, you may come across two types of celery in the seed catalogs: Self-blanching and trenching celery varieties:
- Trenching celery is the type usually found in grocery stores. It needs blanching to produce the crisp, sweet celery stems you’re used to eating from the grocery store. Blanching celery involves shading the stalks from sunlight several weeks before harvesting. Commercial growers plant celery in a trench and mound the soil to cover the stems for several weeks before harvesting. Varieties of trenching celery include Golden Pascal, Kelvin, Tall Utah 52-70R, and Ventura.
- Self-blanching celery varieties work best for home growers. Most seed catalogs that cater to backyard gardeners now sell mostly self-blanching celery varieties, which grow sweeter and tender stalks that do not need shading. Self-blanching varieties include: Golden Self-Blanching Celery, Merengo, and Tango Green Celery.
Tips for Growing Celery
Growing celery can be relatively difficult because it requires a lot of moisture and doesn’t do well in overly hot or cold weather conditions. Celery grows best in cool weather when nighttime temperatures are around 55˚F, and average daytime temperatures are between 60 and 70˚F.
If celery is exposed to too hot or cold temperatures, it will start to bolt, which is quite a common issue when growing it. Bolting is when the plant sends up a flower stalk that blooms and forms seeds. Once celery bolts, the stalks turn bitter. However, once the flowers die and the seed heads dry, you can collect the seeds, so it is not a total loss.
Here in Maine, with our cooler weather, we start seeds indoors and plant our celery outside in early spring. In warmer areas, celery can be planted as a fall or winter crop. Planting in partial shade or beneath shade cloth will help if you live in an arid climate.
You can start celery from seeds indoors under grow lights, purchase transplants at your local garden center, or even regrow celery from scraps.
How to Start Celery from Seed
Celery has a long growing season and takes a while to develop from seed. Sowing from seed under grow lights in January or February and then transplanting in early spring is the only way I can grow celery from seed and have them mature in my Zone 5 garden. Here are some tips on how to start celery plants from seed.
Start celery seeds indoors 10 to 16 weeks before your last frost date in spring (look up yours here). I use soil blocks for growing seedlings, but you can start celery in regular seedling trays. You can learn more about starting seeds indoors with this article: 10 Steps to Starting Seedlings Indoors.
To sow your celery seeds, fill your growing containers with a pre-moistened seed starting mix, sprinkle a few small seeds on top of the soil, and mist with water. Celery seeds need light to germinate, so leave them uncovered or cover them lightly with seed starting mix and press down gently to be sure the seeds are in contact with the moist soil.
Label your containers, and cover them with a humidity dome to retain moisture. Place the tray under lights in a warm area, between 60 to 70˚F to encourage the seeds to sprout quicker. Check frequently and keep the soil evenly moist. Expect to wait a while for germination. Celery seeds can take up to 2 to 3 weeks to sprout.
Once the seeds sprout, remove the humidity dome, turn off the heat mat, and position the lights about 2 inches from the tops of the plants. Set a timer and give your plants 16 hours of light and 8 hours of dark each day. Adjust the lights as the celery grows to keep them about 2 inches above the plants.

Celery is a heavy feeder, so begin watering with half-strength fish emulsion or compost tea as soon as several true leaves appear. Then continue feeding every two weeks. Keep soil evenly moist in between fertilizing. When the seedlings are 2 to 3 inches tall, thin to the strongest plant by snipping the others with scissors.
When the celery seedlings are 5 to 6 inches tall, pot them up into larger containers. I use recycled plastic cups with drainage holes poked in the bottom. Continue to fertilize and water as needed to keep the soil evenly moist.

Choose an Ideal Growing Location
Grow celery in an area that receives full sun, 6 to 8 hours of direct sunlight per day, and good quality soil rich in organic matter to help hold moisture. Established celery plants will also grow with some shade, but the stalks will be thinner.
Being close to a water source will also be best – celery is a thirsty plant! Since celery requires a lot of moisture to thrive, you’ll make growing it much easier if your soil absorbs and retains moisture but doesn’t remain soggy.
Once you have selected an area that receives full sun, prepare the bed for planting by removing weeds and amending the bed with finished compost to enrich your garden soil and help with soil structure and drainage.
Transplanting Celery Seedlings
If you grew seedlings or purchased transplants from a warm greenhouse, you will need to harden them off before transplanting, so they adjust to outdoor conditions. Hardening off is the process of adapting plants to the outside to help them adjust to sunlight, cooler nights, and less frequent watering. Don’t rush it. Young celery plants will be triggered to bolt if exposed to temperatures below 55°F for 10 days or more. More on how to harden off seedlings here.
Start hardening off your celery transplants about 3-weeks before your last expected frost date. Begin hardening off in a sheltered location for a few hours on the first day, increase a little each day, and then extend overnight if temperatures are around 55˚F.
If you still need to prepare the garden, get the growing beds ready while the seedlings are hardening off.
After your celery seedlings are hardened off, transplant them to their permanent growing area after the danger of heavy frost is past and the night temperature is at least 55˚F.
Space the seedlings about 6 to 8 inches apart for gardens with lots of available space. For raised bed gardens and container gardening, you can plant celery seedlings as close together as 4 inches without restricting their growth too much.
Gently remove the seedlings from their growing trays or pots, dig a small hole for each of them, and bury the roots in the soil. Avoid covering any of the stems with soil. Water your celery seedlings deeply after planting them to help prevent transplant shock. Keep the plants evenly moist until they show new growth, and then water them as needed.

How to Care for Celery Plants
So, you’ve sowed the seeds, managed to germinate them, and now you’ve transplanted your celery into your garden. Congratulations! Here’s how to care for your celery plants as they grow.
Protect Seedlings from Cold
Newly planted celery seedlings are vulnerable to cold temperatures and unexpected frosts, so be sure to cover them if the nighttime temperatures are expected to dip below 50˚F. You can learn more here: How to Protect Plants from Frost.
Water Frequently
Because celery is mostly water by weight, it needs more water than most other vegetables. In addition, celery originates from marshes and prefers to have moist soil at all times. Therefore, you will need to water your celery plants nearly every day when the temperature outside is above 70˚F and every other day when the temperature averages below 70˚F.
Watering once a week usually is only sufficient if there is dew or rainfall nearly every night condensing in your garden.
Keep Up with the Weeds
Weeding will ultimately help your celery plants thrive. Like any other plant, weeds compete with celery for water and nutrients. Be careful while weeding celery since the plant’s roots are shallow and can be damaged easily.
Don’t feel you must be out there every day, checking for weeds. But try to weed your celery plot at least once per week thoroughly. You can learn tips on managing weeds in this article: Natural Weed Control in the Garden.
Mulch the Soil
Adding a layer of mulch around your celery plants can help retain moisture in the soil and prevent weeds from germinating. You can use straw, hay, grass clippings, woodchips, or shredded leaves as mulch. Learn more about how organic mulch helps your garden here.
Make sure the mulch is spread evenly around the plants and about 3 inches deep. If you live in a hot, dry climate, add a thicker layer of mulch to help keep the soil cool and retain moisture. Keep the mulch several inches away from the base of the plants.
Fertilize Regularly
After transplanting your celery seedlings outdoors, water them every two weeks or as needed with a water-soluble fertilizer, like fish emulsion. Additionally, side-dress your celery plants with finished compost about halfway through the growing season.
Blanching the Celery Stalks
Most celery varieties are self-blanching, which means that stalks will remain tender without the need to blanch them. However, if you are growing a trenching celery variety, the stalks will taste better and be less stringy if they are blanched 2 to 3 weeks before harvesting.
The purpose of blanching is to prevent sunlight from reaching the stalks. The easiest way to blanch celery is to wrap the stalks of the plant with newspaper and tie it with twine. You can also mound up soil around the plants to cover the stalks. Cover just the stalks and let the leaves continue to receive light.
Watch for Pests and Diseases
The main pests include animals like deer, groundhogs, and rabbits. Fencing can help protect your plants from being eaten. Common insects include aphids, cabbage loopers, cutworms, slugs, tarnished plant bugs, and whiteflies. You can prevent most of these by covering the plants with insect netting after transplanting and using collars if cutworms are present.
While celery diseases are rarely a problem in home gardens, some that may affect celery include celery mosaic, leaf blight, and black heart. If you discover your celery plants infected by fungus, pull the plants, and place them in the trash so as not to spread spores. In addition, you can prevent most fungal infections by planting in nutrient-rich, well-drained soil, watering at the soil level, and giving plants plenty of space for good air circulation.
Growing Celery in Self-Watering Containers
I quickly discovered that celery is not the easiest plant to grow in the garden. It has a shallow root system and requires consistent moisture conditions. I failed my first few attempts at growing celery in a regular garden bed. Even though I mulched and tried to water often, the plants soon showed signs of stress by yellowing and wilting. Eventually, the stalks became hollow, tough, and stringy. Yuck.
Then I tried growing celery in self-watering planters. Ta-da!! Success! I enjoyed a very nice harvest of celery that first year and continue growing celery in self-watering containers yearly.
Growing celery in self-watering planters is so much easier than growing it in the garden. Once the seedlings are transplanted, the only maintenance is to keep the water reservoir topped off. The fertilizer strip delivers consistent nutrients, and the wicking action of the self-watering container provides all the water the plants need.
- How to Build a Self-Watering Planter: Follow this tutorial on how to make your own inexpensive self-watering containers out of a storage tote, or consider purchasing a self-watering planter such as an Earthbox or Self Watering Vegetable Planter Box. Follow the instructions in our tutorial for filling the planter, adding fertilizer, and covering it with solar mulch.
After your celery seedlings are hardened off, transplant them to your self-watering planter. I plant four celery seedlings in each 18-gallon self-watering container, so I cut an X into the solar mulch in all four corners, avoiding the fertilizer strip, and transplant my seedlings. Then fill the water reservoir compartment until water comes out of the overfill hole. Keep the water reservoir full by topping it off every several days in the summer heat.

If you are growing celery in a regular pot or container, choose a medium-sized container that is at least 12 inches deep and holds 5 to 10 gallons of potting mix. You will need to water the container frequently to keep the soil moist, sometimes twice a day during hot weather. You can learn more about growing vegetables in containers here: How to Grow a Container Vegetable Garden.
Growing Celery Indoors
I love growing celery indoors like an herb and harvesting the small stalks and green leaves as needed to flavor foods. However, since celery grows very slowly from seed, you may have better luck regrowing celery from scraps.
How to Regrow Celery from Scraps:
- After cutting the stalks off to use for meals, save about 2 to 3 inches of the bottom root end.
- Then, fill a container with several inches of water and place the celery root end down in the container so that it stands up.
- Put the container where it will get 6 to 8 hours of light, either on a sunny windowsill or under grow lights and make sure to change out the water every few days.
- After about a week, you should see small roots growing from the bottom and leafy green growth from the center.
- After about two weeks, you can transplant your celery into containers and keep it on a windowsill or transplant it to the garden and watch it grow.
How to Harvest Celery
Celery takes a while to mature fully, but you can begin harvesting individual stalks while the plant is still young. I grow eight plants in all. Two are harvested young, and the rest of the plants are allowed to mature fully. These provide plenty of fresh celery for snacking, salads, and stir-fries during the growing season.
Celery can tolerate some early fall frosts, but be sure to harvest before your first freeze. When the end of the season arrives, the plants are harvested by cutting each bunch of celery at the soil surface. Most of the final harvest is sliced and frozen to add to winter soups and stews. The greens are added to scrap vegetable bags I collect in the freezer to make stocks and broths.

To harvest as needed for meals, cut several outside stalks from each plant, allowing the plants to continue to grow new stalks from the center. This cut-and-come-again method works best when you just need a small amount of celery for a recipe. The stalks will be smaller and thinner because they have less time to grow, but these small stalks have the same flavor. With this cut-and-come-again harvest technique, your plants can continue to produce new growth all season.
To harvest whole celery heads, cut the mature celery just below the soil line with a sharp knife. Keeping the roots of your plants in the soil after harvesting will allow them to break down and add nutrients back into your garden.
Ways to Preserve Celery
Freshly harvested celery can last up to two weeks in the refrigerator, or you can preserve it to last longer with one of the methods below.
Storing Celery
To store celery in the refrigerator, trim off the leaves, and rinse well under cool running water. Then wrap the celery in a damp paper towel, and place it in a plastic bag. Seal the bag, but keep several inches unsealed so gases can escape. Finally, place the celery in the crisper drawer of your refrigerator and use it up in the next couple of weeks.
If you discover your celery has wilted, trim the ends and place the stalks in cold water to rehydrate for a couple of hours before using.
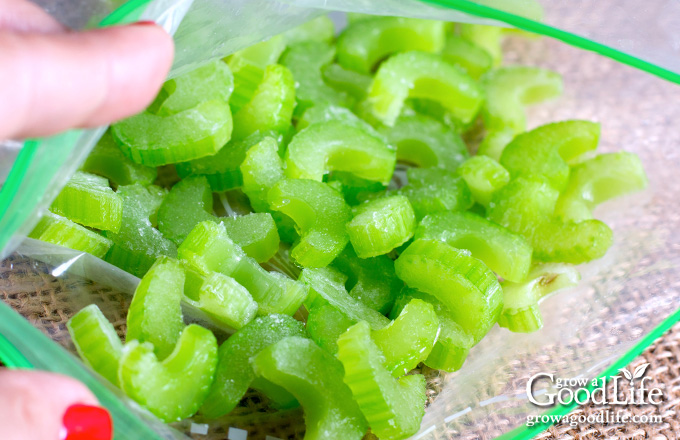
Freezing Celery
My favorite way to preserve celery is to freeze it. Having sliced celery in the freezer makes it so easy to add it to cooked recipes because the prep work is already done. Simply add the frozen celery and sauté, simmer, or stir-fry. Learn how to blanch and freeze celery with this easy step-by-step tutorial: How to Freeze Celery
Dehydrating Celery
The second way I like to preserve celery is by using a food dehydrator. I love drying both the leaves and stalks.
Dried sliced or diced celery takes up very little room stored in jars in your pantry. Use dried celery as a substitute for fresh in liquid-based recipes such as sauces, soups, and stews. The dried celery will absorb moisture and reconstitute as the dish simmers.
Using a coffee grinder, you can make dried celery powder by grinding up dehydrated celery into a powder. To make celery salt, combine equal parts of dried celery powder and salt. Dried celery leaves can be used like any other herb to add flavor.
To dehydrate celery ribs:
- Preheat the food dehydrator to 125˚F.
- Wash the celery well under clean running water, and pull off the celery stalks.
- Trim the tops and ends of the celery and cut the ribs into diced or sliced pieces.
- Spread the pieces in a single layer on a dehydrator tray, and dry at 125˚F for 4 to 8 hours or until the celery is completely dry.
- Store the dehydrated celery in clean glass jars or containers with airtight lids in a cool and dark area. Use within one year for the best flavor.
To dry celery leaves:
- Preheat the dehydrator to 100˚F.
- Wash the celery well and remove the leaves from the stems.
- Place the leaves in a single layer on a dehydrator tray.
- Dry for 1 to 4 hours or until the leaves crumble.
- Pack the dried celery leaves in containers with airtight lids and store them in a cool, dark area to maintain flavor and color.
Canning Celery
Celery can’t be canned on its own, but it is an ingredient used to add flavor to many canning recipes, such as:
- Spaghetti Sauce
- Beef Stew
- Vegetable Juice
- Giardiniera Pickled Vegetables
- Chicken Stock
- Beef Stock
- Chicken Soup
—
Celery is a wonderful vegetable to grow in your garden if you can provide the moisture needed for its succulent stalks. Plus, the flavor of homegrown celery is so much better than the supermarket.
Please keep trying with celery even if you don’t grow it perfectly the first time. With a little bit of patience and practice, you’ll get the hang of it. And once you do, you can grow your own celery at home from there on out.
Good planning is key to a successful vegetable garden
Whether you are new to growing your own food or have been growing a vegetable garden for years, you will benefit from some planning each year. You will find everything you need to organize and plan your vegetable garden in my PDF eBook, Grow a Good Life Guide to Planning Your Vegetable Garden.

I blanched some diced celery and freeze dried it. It kept it’s color. Trying for the second time to grow in the garden this year, so far it is looking great! Thanks for the tips. I look forward to freezing some as well. They look great so far!
Sandy, Thank you for sharing your experience with preserving celery. I have yet to explore freeze-drying. It’s great to hear that the tips we provided were helpful to you, and we’re thrilled to hear that your celery is growing well. It sounds like you’re on your way to having a successful harvest this year.