Tomato Vegetable Juice Canning Recipe
This post may contain affiliate links, which means that I may receive a commission if you make a purchase using these links. As an Amazon Associate I earn from qualifying purchases.
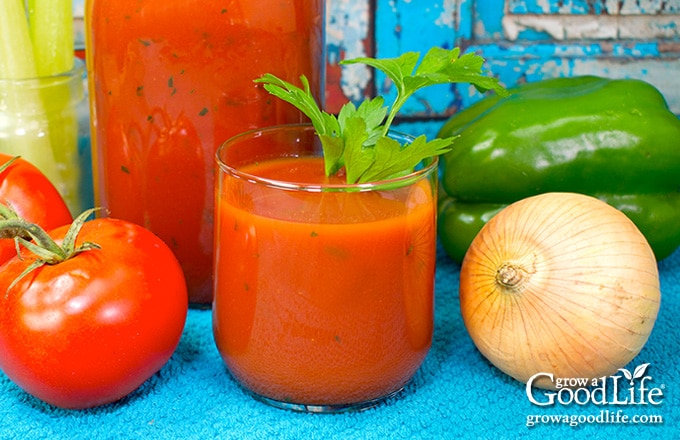
This V8-style tomato vegetable juice is a great way to preserve your garden harvest. It is a blend of tomatoes, carrots, celery, peppers, onion, and parsley. Salt is optional for flavor. You can leave it out for a lower sodium beverage.

I have always loved the idea of drinking a glass of vegetable juice as an easy way to get more vegetables in my diet. However, the typical store bought bottles contain lots of sodium and questionable ingredients.
Luckily, there is a V8-style tomato-vegetable juice blend recipe using freshly harvested garden ingredients that is safe for water bath canning. Make this homemade vegetable juice knowing exactly what goes in it. No artificial colors, preservatives, mystery flavorings, or lots of sodium like you’ll find in the commercial brand.
Helpful Tips for Canning Vegetable Juice
If you are canning tomatoes and vegetables, is important to follow a recipe that has been tested for safe home canning. This recipe is in both the Ball Blue Book Guide to Preserving and the So Easy to Preserve books. Ball’s recipe includes fresh parsley, which adds nice flavor to the vegetable juice.
According to the So Easy to Preserve recipe, you can adjust the amounts of carrots, celery, peppers, and onions, but do not go over 3 cups of any combination total chopped vegetables for 22 pounds of tomatoes.
Skinning and Seeding the Tomatoes
After simmering, use a vegetable strainer or food mill to strain out the tomato skins and seeds and squeeze the cooked vegetables into juice.
If you don’t have a vegetable strainer, or an easy way to remove the skins and seeds, you can peel and seed the tomatoes before cooking. See How to Peel Tomatoes for an easy, step-by-step tutorial.
To peel the tomatoes, bring a large saucepan of water to a boil and fill a large bowl with ice water. Cut an “X” on the ends, and dip the tomatoes into the boiling water until the skins loosen – about 30-60 seconds.
Remove the tomatoes from the pot and place in the bowl of ice water to cool. Discard the water and peel your tomatoes once they are cool enough to handle. Cut the tomatoes into quarters, and scoop out the seeds. Simmer the tomatoes with the remaining vegetables in a large stockpot, let it cool slightly, and then blend the mixture in a food processor.
Measuring the Vegetables
Peel, seed, dice or chop your vegetables as described in the recipe before measuring using a measuring cup. You can also weigh your vegetables using a kitchen scale. If you are measuring by weight, you won’t have to worry about the size of the pieces because they get juiced after cooking. I have included both cup and weight measurements in the recipe below.
Make a Spicy Hot Tomato Vegetable Juice Variation
Do you ever wonder what makes V8 Spicy Hot taste spicy? There is nothing spicy in the ingredient list. With this canning recipe, you can replace the sweet bell pepper with any type of pepper as long as the amount used is the same. Try using habanero, jalapeño, cayenne, or your favorite hot chile pepper for added kick.
You can also add your favorite dried spices, such as black pepper, red pepper flakes, garlic powder, oregano, cayenne, or other dried chile powder.
Some small ingredient changes are safe when canning tomato recipes. Learn more in my guide: How to Safely Modify Tomato Canning Recipes.
Don’t Skip the Acid
When canning tomatoes, an acid must be added to your jars before filling to prevent the growth of botulism bacteria. Add bottled lemon juice or citric acid to each jar before filling as directed in the recipe.
Steps for Making and Canning Tomato Vegetable Juice
If you’re new to home canning, take a moment to review the basics before starting your recipe. This Water Bath Canning for Beginners guide covers the equipment, preparation, and safe processing steps for water bath canning.
For extra help staying organized, you can download my free Home Canning Checklist. It includes helpful reminders, prep steps, and space to track each batch you process. Get it here:
Grab your Free copy
Home Canning Checklists
A more detailed and printable recipe can be found at the bottom of this article, but these are the general steps for making and canning homemade vegetable juice cocktail:
Step 1: Prepare the canning equipment
Gather your canning equipment. You’ll need:
- Water bath canner and canning rack
- 7 quart sized canning jars (or 14 pint sized jars)
- Canning lids and bands (new lids for each jar, bands can be reused)
- Canning tools: jar lifter, canning ladle, and funnel
- Kitchen scale
- Plus basic kitchen supplies such as a large sauce pot, towels, knife, large spoon, and a cutting board.
Wash your jars, lids, bands, and canning tools in warm, soapy water. Rinse well, and set the lids, bands, and tools aside to air dry until you are ready to use them.
Jars must be heated before filling to prevent breakage due to thermal shock. Place the jar rack into the water bath canner, set the jars upright in the canner, and add enough water to cover the jars. Bring the canner to a simmer (180˚F) for 10 minutes, and keep the jars hot until you are ready to fill them.
Follow the manufacturer’s directions for preparing the lids. Pre-heating lids is no longer necessary before using, but it is still safe to warm the lids if you want to. Just add them to the canner when you heat your jars.
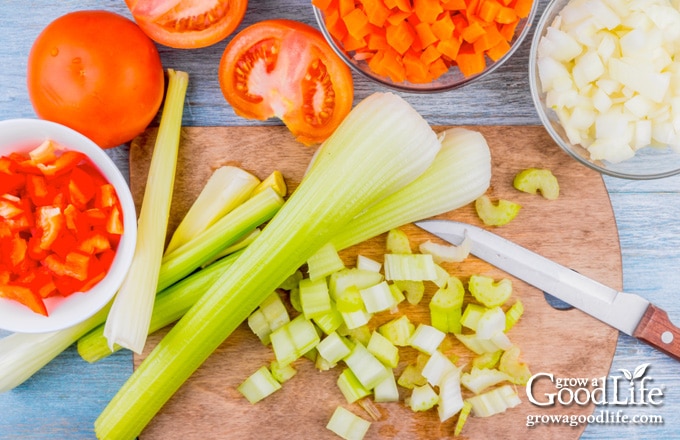
Step 2: Prepare the vegetables
Wash tomatoes well under running water, trim out the core and any bruises or bad spots. Cut into quarters and add to a large saucepan.
Scrub the carrots, peel, rinse again and dice. Weigh out 3 ounces using a kitchen scale, or measure out 3/4 cup and add to the pot.
Wash the celery, trim off the ends and chop into small pieces. Measure 3/4 cup, or 3 ounces and toss into the pot.
Rinse the pepper, cut in half, remove the stem, seeds and membrane, and chop into small pieces. Weigh out 3 ounces or measure 3/4 cup and add to the pot.
Peel and chop the onion, measure 3/4 cup or 3 ounces and add to the pot.
Wash the parsley well under clean running water, separate the foliage from the stems, and chop. Add 1/4 cup of the foliage to the pot.
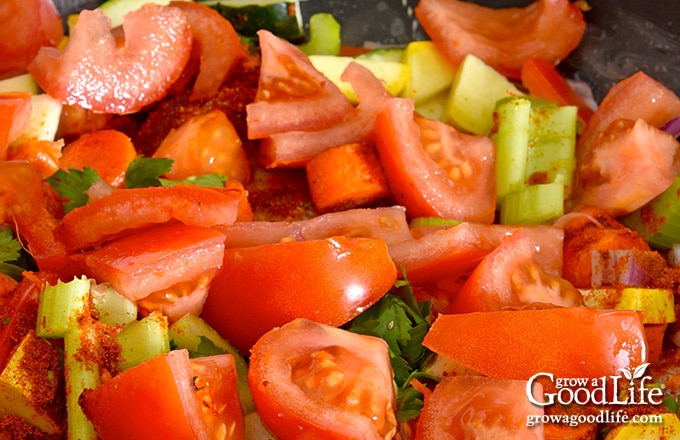
Step 3: Simmer the Vegetables until Soft
Stir to combine the vegetables, and bring the pot to a slow simmer over medium heat. It can take a while for the pot to achieve a simmer, while it is heating, stir the vegetables frequently and squish the tomatoes to help release liquid.
The pot has reached a simmer when you see some movement in the liquid and gentle bubbling activity. Once the pot is simmering, continue to cook until the vegetables are soft, about 20 minutes. Stir occasionally to prevent scorching.
Step 4: Strain the Vegetable Mixture
Once the vegetables are soft, turn off the heat and allow the mixture to cool. Run the cooled vegetables through a food strainer or food mill to remove skins, seeds, and to smooth out the juice.
Return the juice to the saucepan, add salt (if using), and heat the juice to a simmer over medium-low heat. Do not boil. High heat will cause the juice to separate.
Step 5: Can the tomato vegetable juice
Lay a kitchen towel on the counter, and place the citric acid or lemon juice nearby along with the measuring spoons.
Use the jar lifter to remove a hot jar from the canner, drain, and place on the towel. Keep the remaining jars in the canner, so they stay warm.
Add citric acid or lemon juice to the jar. For pints, add 1/4 teaspoon of citric acid, or 1 tablespoon of bottled lemon juice to each jar. For quarts, add 1/2 teaspoon citric acid or 2 tablespoons of bottled lemon juice to each jar.
Place the canning funnel on the jar, and ladle hot juice into the jar while leaving 1/2-inch headspace.
Wipe the rim with a damp towel to remove residue. Center a lid on the jar, place the band over the lid, and screw it on until fingertip tight. Place the jar back into the canner, and repeat with the rest of the jars.
Adjust the water level so it is covering the jars by several inches, bring the pot to a boil, and process the jars for the times indicated in the recipe below. Let the jars cool, test the seals, label and date the jars, and store in a cool, dark location for 12 to 18 months.
Tomato Vegetable Juice Canning Recipe
Ingredients
- 22 pounds tomatoes
- 3/4 cup diced carrots 3 oz. – peeled and diced
- 3/4 cup chopped celery 2.5 oz. diced
- 3/4 cup chopped bell pepper 3 oz. – seeded and diced
- 1/2 cup chopped onion 3 oz. – peeled and diced
- 1/4 cup chopped fresh parsley leaves or 2 tablespoons dried parsley
- 1 tablespoon kosher salt optional for flavor
- Bottled lemon juice or citric acid
Instructions
Prepare the canning equipment:
- Wash your jars, lids, screw bands, and canning tools in hot soapy water. Rinse well to remove all suds. Set aside to air dry on a clean kitchen towel.
- Place the jar rack into water bath canner, place jars in the canner, and add water to cover. Bring the canner to a simmer (180˚F) for 10 minutes, and keep the jars hot until you are ready to fill them.
Prepare the vegetables:
- Rinse the tomatoes, carrots, celery, bell pepper, and parsley under running water and air dry on a kitchen towel.
- Tomatoes: Cut the tomatoes in half and remove the core, cut into quarters, and add to a large saucepan.
- Carrots: Remove ends, peel, and dice the carrots. Measure 3/4 cups (3 ounces) and add to the pot.
- Celery: Trim off the ends and chop into small pieces. Measure 3/4 cups (2.5 ounces) and add to the pot.
- Pepper: Remove the stem, seeds, and membrane from the pepper. Chop into small pieces. Measure 3/4 cups (3 ounces) and add to the pot.
- Onion: Peel and chop the onion. Measure 3/4 cups (3 ounces) and add to the pot.
- Parsley: Separate the foliage from the stems, discard the stems, and chop the parsley. Measure 1/4 cup of chopped parsley and add to the pot.
Simmer the vegetables:
- Stir to combine the vegetables, and bring the pot to a slow simmer (180˚F) over medium heat. Stir the vegetables frequently and squish the tomatoes to help release liquid.
- Once the pot is simmering, continue cooking until the vegetables are soft, about 20 minutes. Stir occasionally to prevent scorching. Turn off the heat and let the juice cool.
Juice the vegetables:
- Run the mixture through a food strainer or food mill to juice and remove seeds and peel.
- Return the juice to the saucepan, add salt (if using), and heat the juice to a simmer (180˚F) over medium-low heat. Do not boil.
Can the vegetable juice:
- Spread a kitchen towel on the counter. Use your jar lifter to remove a jar from canner, drain, and place on the towel. Keep the remaining jars in the canner so they stay hot.
- Add citric acid or lemon juice to the jar. For pints, add 1/4 teaspoon of citric acid, or 1 tablespoon of bottled lemon juice to each jar. For quarts, add 1/2 teaspoon citric acid or 2 tablespoons of bottled lemon juice to each jar.
- Use your canning funnel and ladle to add hot juice into the jar leaving 1/2-inch headspace.
- Wipe the rims of the jars with a clean, damp towel. Center a lid on the jar, and screw on the band until it is fingertip tight.
- Use the jar lifter to place the jar back into the canner, and repeat with the remaining jars. Try to leave some space in between the jars.
- Once the jars are all in canner, adjust the water level so it is at least two inches above the jar tops.
- Cover the canner and bring to boil over medium-high heat. Once water boils vigorously, process pints for 35 minutes, and quarts for 40 minutes at altitudes of less than 1,000 ft. Adjust processing time for your altitude if necessary (see notes below).
- When processing time is complete, turn off the heat and let the canner cool down and settle for about 5 minutes.
- Spread a kitchen towel on the counter. Remove the cover by tilting lid away from you so that steam does not burn your face.
- Use the jar lifter to lift jars carefully from canner and place on the towel. Keep the jars upright, and don't tighten bands or check the seals yet. Let the jars sit undisturbed for 12 to 24-hours to cool.
- After the jars have cooled for at least 12 hours, check to be sure jar lids have sealed by pushing on the center of the lid. The lid should not pop up. If the lid flexes up and down, it did not seal. Refrigerate the jar and use within a few days.
- Remove the screw on bands and wash the jars. Label, date, and store your jars in a cool, dark place, between 50 to 70 degrees F. Use within 12 to 18 months. Refrigerate the juice once opened and consume within a few days. Yields about 7 quarts, or 14 pint sized jars.
Notes
- Pints at altitudes of 1,001 – 3,000 ft. is 40 minutes, 3,001 – 6,000 ft. is 45 minutes, and above 6,000 feet is 50 minutes.
- Quarts at altitudes of 1,001 – 3,000 ft. is 45 minutes, 3,001 – 6,000 ft. is 50 minutes, and above 6,000 feet is 55 minutes.
Nutrition
You May Also Like:
- Seasoned Tomato Sauce Canning Recipe
- Tomato Salsa Canning Recipe
- How to Make Sun Dried Tomatoes
- Other Ways to Preserve the Harvest

I like to take the leftover skins & seed mash from the food mill and dehydrate it. Then powder it in the blender and you’ve got a great seasoning powder.
Kathy, That’s such a great idea! Dehydrating the leftover skins and seeds to make a seasoning powder is a fantastic way to reduce waste and get even more out of your tomatoes. It must add a wonderful, concentrated flavor to dishes. Thanks for sharing this tip—I’m sure others will find it helpful, too!
What is the best tomato to use for tomato jiice?
Joann, Any type of tomato works for juice.
This looks like a great recipe but I am looking for a recipe that has beets and spinach in it also. Last year I took the chance and canned it with beets and spinach and it turned out awesome but I would like a recipe.
Sharon, Altering the recipe may make it unsafe for canning. You can freeze the juice if you do make changes. The All New Ball Canning and Preserving published in 2016 has a tomato juice recipe on page 202 that includes a beet. You can also find it here on the Ball website: Tomato Juice. However, I am unable to find a safe canning recipe that also uses spinach.
Hi! I was wanting to make this for my husband. I have a ton of tomato juice left over from salsa and spaghetti recipes that I canned. Can I use the juice part instead of the tomatoes and if so what ratio would I use to make it safe to can? Thanks for sharing the recipe.
Kristy, Are you using safe, tested recipes for salsa and sauce from Ball or the USDA? Unless the recipe requires draining, you should include the juice.
When safe canning recipes were developed, the whole tomato including the liquid was used in the acidification and heat penetration studies. If you drained off the liquid, your salsa and sauce may not contain enough acid and may be too thick for the heat to penetrate properly when processed. Also, the amount of acidity is unknown in drained tomato juice and is unsafe to can.
I love this recipe! A friend of mine uses this recipe but adds 2-3 cloves of garlic, a tsp of basil and 2 Tablespoons of brown sugar. Is this safe?
Jody, This is a tested safe canning recipe. Altering the recipe may make it unsafe for canning. If you do make changes, you can freeze the vegetable juice instead. Also consider adding the extra ingredients when you open the jar at serving time.
I am thinking of trying this recipe, you don’t state clearly how much citric acid or lemon juice to add. Also I would probably be using pint jars, can you help me adjust the recipe to that size, the time as well. Thanks so much!
Pam, The answers to your questions are in the recipe. Citric acid amounts are stated in #2 under “Can the vegetable juice” and adjustments for pint jars are in the “Notes” section.