Soil Blocks to Grow Seedlings
This post may contain affiliate links, which means that I may receive a commission if you make a purchase using these links. As an Amazon Associate I earn from qualifying purchases.
A soil block is a cube of lightly compressed soil and nutrients that will grow one seedling. When the plant is ready to be transplanted, the entire block is planted into the soil. No root mangling will reduce transplant shock.
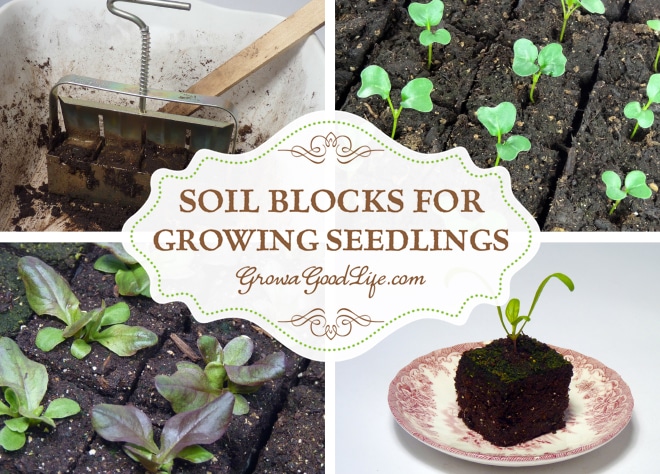
When I first began gardening, I purchased transplants from a local nursery and had a difficult time getting the seedlings out of their individual cells. Often times the plants were root bound and suffered from transplant shock because of my mangling.
Once I decided to grow my own transplants from seed and assembled a Grow Light System, using soil blocks for growing seedlings appealed to me. Since the soil block serves as the container and the soil, it is easy to transplant without injuring the roots.
I learned about soil blocks from reading Eliot Coleman’s book, The New Organic Grower. Part of the charm was that the soil blocker was an investment that would be used for many years to come. No need to invest in plastic cell packs that crack and break over time or peat pots that constrict the roots from growing. I also liked that transplanting soil blocks allows the seedlings establish quickly into the surrounding soil with no root damage.
What is a Soil Block?
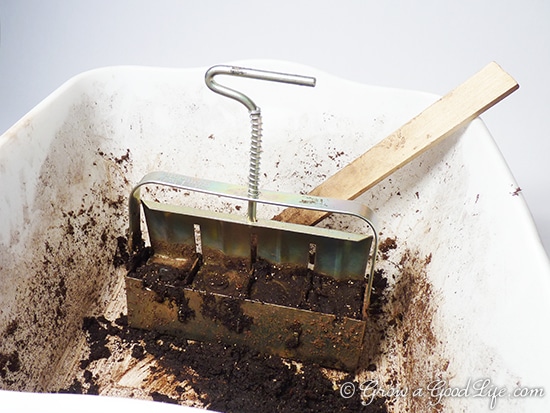
 A soil block is a cube of lightly compressed soil and nutrients that will grow one transplant. I start all my seedlings in soil blocks that I make with a 2-inch Soil Blocker that produces four soil blocks at once.
Soil blockers are the spring-loaded tools that form and compress the soil mixture into blocks. Once ejected, each block has an indentation at the top of the cube to plant your seed. Soil blockers are available different sizes but I use a 2-inch Soil Blocker. Soil Block Makers are available at Amazon and other places online. Seek out the quality Ladbrooke brand and it will last forever.
Benefits of Using Soil Blocks to Grow Seedlings:
- Eliminates the need for plastic cell packs or peat pots. Since the soil block functions as both the container and the soil for starting and growing seedlings, this reduces the need for plastic growing pots.
- Seedlings develop a stronger root system. More oxygen is distributed to the roots since the growing medium is not contained. Roots are also “air-pruned” once they reach the edge of the block. This means that they stop growing rather than winding themselves around the plastic pot seeking nutrients.
- Transplants establish more quickly. Since there is less disruption to the roots, the seedlings are less prone to transplant shock.
Soil Mix for Soil Blocks
Eliot Coleman’s recommended soil block recipe is composed of peat, lime, coarse sand or perlite, fertilizer, compost, and soil.
Just like any recipe, this one can be altered and adjusted to accommodate the ingredients you have on hand. I have experimented with different mixtures and found that as long as the mixture holds together, it will be fine. I have settled on a mixture of organic seed starting mix, screened compost, perlite, and a little all-purpose granular organic fertilizer.
Soil Block Recipe
The ingredients can be easily found at your local garden center. I have linked to sources online for examples.
Use a 10?quart (2.5 gallon) bucket to measure the bulk ingredients and a standard measuring cup for the other ingredients. You can mix and store the soil block mix in a 12 or 15 gallon storage tote and scoop out as needed.
Ingredients for Soil Block Mix
- 1 1/2 buckets peat moss or coconut coir
- 1/4 cup garden lime
- 1 bucket perlite
- 1 cup all-purpose organic granular fertilizer (such as Espoma Garden Tone).
- 1/2 bucket garden soil
- 1 bucket finished compost.
Directions for Soil Block Mix
1. Add peat moss and lime to your large container. Mix thoroughly to combine.
2. Add perlite and organic granular fertilizer. Mix to combine.
3. Add the garden soil and compost. Mix and store until you are ready to use. This recipe makes about 8 gallons of soil block mix.
How to Make Soil Blocks
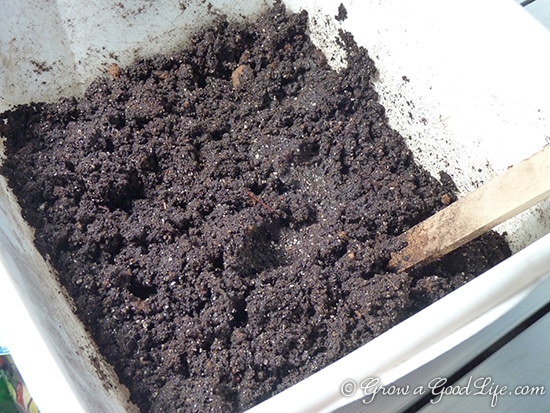
When you are ready to make your soil blocks. Scoop out the soil mix into a flat container, such as a dishpan. Add hot water and let it sit for a few hours or even until the next day. This gives the mixture ample opportunity to soak up as much water as it can.
Once mixed, the soil should look like peanut butter. Add more water, or reserved dry mix to adjust.
To make the blocks, pile the soil mix into a mound that is about double the height of the soil blocker. Then simply plunge the soil block maker into the mixture. Twisting the blocker helps compress the soil and release it from the mixture without sucking out the wet soil back out. Do this three times so cubes are filled tightly.
Scrape off the bottom of the soil block maker with a straight edge, then set the blocker in your seedling tray and release the soil blocks by pushing down on the handle and lifting the blocker.
The blocks should be firm. If the blocks crumble, add more water to the mix. If they slide out easily and fail to hold their shape, add more dry mix.
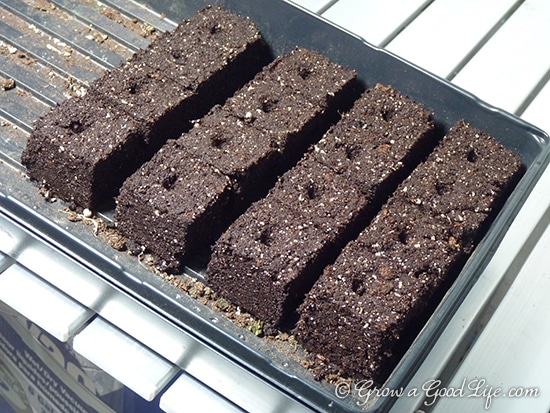
Plant your seeds directly in the depressions created by the soil blocker. Label the soil blocks using tape on the outside of the tray.

As an added bonus, the soil blocks are easy to move around and organize. If a block fails to germinate, it can simply be removed from the tray and recycled. Also, it is easy to know when it is time to transplant the seedling or pot up into larger containers because you will see the roots when they reach the edge of the block.
Out of all the gardening tools and gadgets I have purchased over the years, this soil block maker is one of the most useful. A soil block maker is a great investment that will serve you well for many years.
You May Also Like:
- 10 Steps for Starting Seedlings Indoors
- How to Develop a Seed Starting Schedule
- Vegetable Garden Planning: Mapping the Garden Beds
- Benefits of Pre-sprouting Seeds
- How to Harden Off Seedlings

Canadian Sphagnum Peat: The DO look like cake don’t they? The soil is compact enough to hold together and withstand watering, but porous enough for water to drain and roots to grow through.
The pictures above are like cake. My mouths are getting watery. Oh my God! LOL…
The soil must not be hard or intact so that the roots can freely grow.
Thank you so much for this interesting post.
Deb Fitz: That sounds like a great mix. There is not right or wrong mix. Just experiment and figure out what works for you. I think the ease of transplanting is the largest benefit to using soil blocks.
Soil block are great! I’ve been using a mix of 1/3 garden mix (from the local landscape company…it’s just dirt and compost) + 1/3 peat moss + 1/3 vermiculite and the blocks hold together just fine…they are SO easy to transplant!
Meemsnyc: I had to invest in seed starting equipment last year anyway since I was starting from scratch. So purchasing the seed block maker seemed smart since I will be using it over and over through the years. I really like the way it works.
Liisa: Try mixing up a small batch to see how it works. I also loved the wooden boxes in the “Grow Biointensive” videos. Some were 6-inch deep, so I imagine the crops grow just like normal until space opens up in the garden then they continue to mature in a shorter amount of time.
Robin: I like that I only have the trays to clean every year instead of all the little cell packs. I have always had difficulty getting seedlings out of the cell packs. Transplanting or potting up the soil blocks is really easy. I think it is worth the investment.
Sinfonian: Experimenting is the only way to really figure things out on our own. I tried using straight seed starting mix and the soil blocks crumbled when watered as well. I also tried using straight compost without sifting and these didn’t hold up well either. So now I sift out the little chunks in the compost before mixing and everything holds together much better. Then when the roots grow, they help hold the block together as well.
Laura (kitsapFG): I know the mixture will be easy for you to figure out. I bet a few test runs and you will be good to go. You probably already have the components on hand. They worked really well for the tomatoes and peppers. As I mentioned before, potting these up was really easy and there was no transplant shock because the roots are not disturbed.
Thanks for posting this. I have been seriously tempted to switch to soil blocks for my seed starting but hesitant because the mixture process seems a little fussy and potentially unforgiving. It sounds like I should just do my homework and go for it. I think I will be asking Santa for the 2 inch block maker for Christmas this coming year. 😀
Great work! I love my home made single block maker, though some day I want the one you have. You may have seen my problems with my blocks on my blog. It was my laziness that caused it. I grabbed mostly finished compost and didn’t screen it at all. Threw in some vermiculite and water and presto, impromtu soil block mix. The blocks set up nicely, but crumbled later. May have been the worms in it. ROFL. Should work though. Just let them dry out before planting. I refuse to buy potting soil if I have compost. I suppose screening it would be a good idea. ROFL. Great post!
I have been growing my own seedlings for years but have never used soil blocks. From everything that I have been reading, I think that I will try them next year.
Thanks for the great informative post!
Thanks for this post. I bought a soil block maker back in January but did have time to research the soil mix before it was time to get the seeds started for this year. I will definitely use it next year. I also want to check out the wooden seedling boxes that were shown in the “Grow Biointensive” Videos.
This is so fascinating. I’ve never done this method before. Really like it!!