Roasted Tomatillo Salsa Verde Canning Recipe
This post may contain affiliate links, which means that I may receive a commission if you make a purchase using these links. As an Amazon Associate I earn from qualifying purchases.
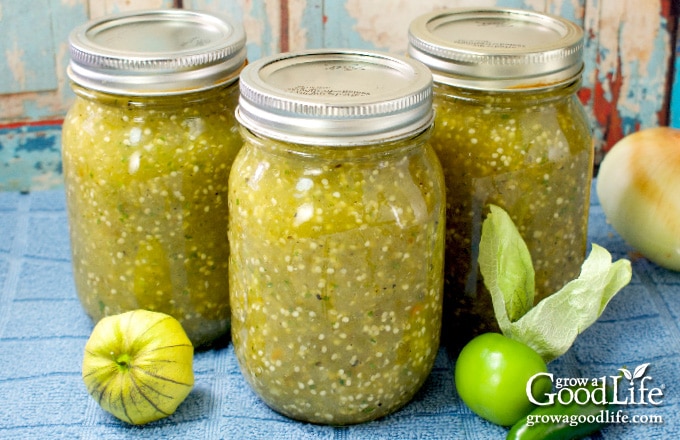
Canning roasted tomatillo salsa is a great way to preserve the abundance of tomatillos that the garden produces. Jars of tomatillo salsa verde come in handy for all your favorite Mexican dishes.

The first time I grew tomatillos in the garden, I thought six plants would be a good number to grow. Ok, ok, I hear the snickers from those of you with experience growing tomatillos.
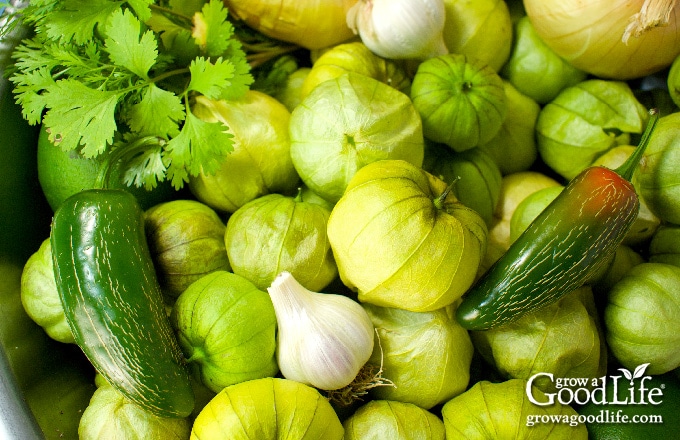
Tomatillos (Physalis philadelphica), also called husk tomatoes, are native to Mexico and are not very common to our corner of the world, Maine. They are related to the tomato, but grow enclosed in a papery husk.
Tomatillos produce a lot of fruit even when growing in cooler climates, so consider yourself warned if you are thinking of growing some for the first time. Each plant can put out about ten to fifteen pounds.
On a positive note, I had a lot of tomatillos to experiment with. Biting into my first ripe fruit was an unexpected pleasure. I thought it would taste similar to a tomato. Instead, it has a tart and slightly citrus flavor.
The first thing I tried is making with tomatillos was a small batch of salsa verde. It was good! Then I tried roasting it. Roasting the vegetables adds a delicious smoky flavor and mellows the acidity of the tomatillos: Small Batch Roasted Salsa Verde Recipe.
Finding a safe canning recipe for salsa verde that tasted good was challenging. In fact, the recipe I published here previously from the NCHFP website required bottled lemon juice to make it safe for home canning. Many commented that there was too much lemon flavor, and I had to agree.
Finally, I tried a salsa verde recipe from The All New Ball Book of Canning and Preserving that uses fresh lime juice and cilantro. I tested it several times, and it tastes so much better. If you tried the old recipe and were disappointed with the lemon flavor, please give this one a shot.
This roasted tomatillo salsa is delicious as a dip with tortilla chips, drizzled on tacos and fajitas. We also like it pouring it over some boneless chicken breasts and cooking in a crockpot to make shredded chicken for salsa verde chicken enchiladas similar to this recipe.
Steps for Canning Roasted Tomatillo Salsa
Tomatillos are easy to preserve into jars of salsa verde. There is no peeling or seeding, simply roast the vegetables, combine the ingredients, blend together, simmer briefly, and process in a water bath canner.
When canning, it is important to follow a recipe that has been scientifically tested. This is the “Roasted Salsa Verde” recipe from The All New Ball Book of Canning and Preserving. It has been doubled for a canner load of 6 pint-sized jars, and the seasonings have been adjusted.
Some ingredient changes are safe when canning salsa, but others can affect acidity and processing safety. Learn which adjustments are allowed in this guide: Safe Adjustments for Canned Salsa Recipes.
If you’re new to water bath canning, it helps to review the basic process before getting started. My step-by-step guide walks you through everything you need to know: Water Bath Canning for Beginners.
To make canning day easier, I also created a free Home Canning Checklist you can print and keep nearby while you work. It includes safety reminders, preparation steps, and space to track your batches. Get your copy here:
Grab your Free copy
Home Canning Checklists
A more detailed and printable recipe can be found at the bottom of this article. These are the illustrated steps for making and preserving roasted tomatillo salsa in a water bath canner:
Step 1: Gather the Kitchen Equipment
- 4 rimmed baking sheets or a large roasting pans to roast the vegetables
- Rubber gloves for handling hot peppers
- Food processor to blend the salsa
- Kitchen scale
- Water bath canner and canning rack
- 6 pint sized canning jars
- Canning lids and bands (new lids for each jar, bands can be reused)
- Canning tools: jar lifter, canning ladle, funnel, and bubble popper
- Plus basic kitchen supplies such as a large prep bowl, large saucepan, towels, knife, and a cutting board.
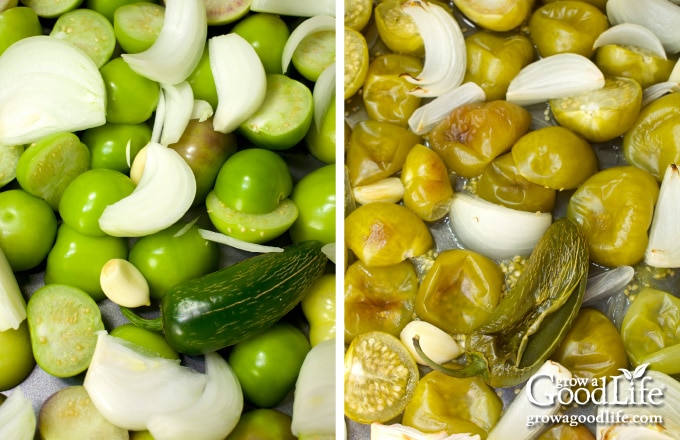
Step 2: Prepare the Vegetables
Peel the husks off the tomatillos and rinse them well to remove the sticky residue. Cut the tomatillos in half and add to the roasting pans. Peel and cut your onions into chunks, wash the jalapeño peppers and add them whole to the roasting pans. Peel your garlic and scatter them over the vegetables.
Roast the vegetables in a preheated oven until everything is softened and charred, about 15-20 minutes. Flip half way through so the vegetables roast evenly. Remove the pan from the oven and let it cool for 5-10 minutes.
Step 3: Prepare the Canning Jars and Lids
While the vegetables are roasting, prepare the jars, set up the canner, and organize your work area.
Wash your canning jars, lids and bands, and canning tools with warm, soapy water and rinse well. Look the jars over carefully, and eliminate any with chips and cracks. Set lids and bands aside until you are ready to use them.
Place the canner on the stove and insert the canning rack. Set the jars in the canner, add water to cover, and simmer (180˚F) for 10 minutes. Keep hot until you are ready to fill them.
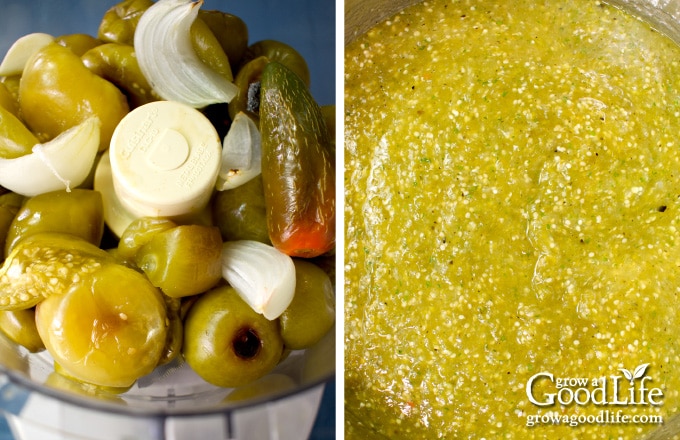
Step 4: Make the Salsa Verde
While wearing gloves, remove stems and seeds from the jalapeño peppers. You can keep the seeds if you like more heat.
Working in batches, add the roasted vegetables and their liquid to a food processor. Process until smooth, and then pour into a large sauce pot. Continue processing the vegetables in batches until done.
Add the lime juice, cilantro leaves, salt, pepper, cumin and stir to combine. Bring the pot to a simmer (180˚F), and then turn the heat to low and keep warm.
Step 5: Can the Salsa
Spread a dry kitchen towel on the counter. Use the jar lifter to remove a hot jar from the canner, drain, and place on the towel. Keep the remaining jars in the canner, so they stay warm.
Place the canning funnel on the jar, and ladle the hot salsa into the jar while leaving 1/2-inch headspace. Run the bubble popper through the jar to release any trapped air bubbles. Adjust the headspace again if needed.
Wipe the rim with a damp towel to remove residue. Center a lid on the jar, add the band, and screw it on until fingertip tight. Place the jar back into the canner, and repeat with the rest of the jars.
Adjust the water level so it is covering the jars by two-inches, cover the canner, bring it to a boil, and process the jars in a boiling-water canner for the times indicated in the recipe below.
Once processing time is complete, remove the jars, and let them cool undisturbed for 12 to 24 hours. After cooling for at least 12 hours, test the seals. Refrigerate any that did not seal, and use up within a week.
Wash the jars with warm soapy water, dry, label and date the jars, and store in a cool, dark location for 12 to 18 months. Wait several weeks for the salsa to develop its flavor before opening a jar.
Roasted Tomatillo Salsa Verde Canning Recipe
Ingredients
- 8 pounds tomatillos husks removed
- 4 medium white onions cut into wedges
- 4 jalapeño chiles or serrano peppers
- 6 cloves garlic peeled
- 1 cup fresh lime juice or bottled lime juice
- 1/2 cup chopped fresh cilantro leaves
- 2 teaspoons kosher salt (optional for flavor)
- 1 teaspoon black pepper (optional for flavor)
- 1/2 teaspoon ground cumin (optional for flavor)
Instructions
Prepare the Vegetables:
- Preheat oven to 425˚F.
- Peel the husks off the tomatillos and rinse them well. Cut the tomatillos in half and divide up into the rimmed baking sheets or roasting pans.
- Peel and cut your onions into chunks. Add to the roasting pans.
- Wash the jalapeño peppers and add them whole to the roasting pans.
- Peel your garlic, and scatter into the roasting pans.
- Roast the vegetables in a preheated oven until everything is slightly softened and charred, about 15-20 minutes. Flip half way through so the vegetables roast evenly.
- Remove the baking sheets from the oven and let the roasted vegetables cool for 5-10 minutes.
Prepare your Canning Equipment:
- Wash your jars, lids, screw bands, and canning tools in hot soapy water. Rinse thoroughly to remove all suds. Set aside to air dry on a clean kitchen towel.
- Place the jar rack into water bath canner, place jars in the canner, and add water to cover. Bring the canner to a simmer (180˚F) for 10 minutes, and keep the jars hot until you are ready to fill them.
Make the Tomatillo Salsa Verde:
- While wearing gloves, remove stems and seeds from the jalapeño peppers. You can keep the seeds if you like more heat.
- Working in batches, add the roasted vegetables and their liquid to a food processor. Process until smooth, and then pour into a large sauce pot. Continue processing the vegetables in batches until done.
- Add the lime juice, cilantro leaves, salt, pepper, cumin, and stir to combine. Bring the pot to a simmer (180˚F), and then turn the heat to low and keep warm.
Can the Roasted Tomatillo Salsa Verde:
- Lay a dry kitchen towel on the counter. Use the jar lifter to remove a jar from the canner. Drain the water back into the canner, and place on the towel. Keep the remaining jars in the canner so they stay hot.
- Use the canning funnel and ladle to fill the jar with hot relish, leaving 1/2-inch headspace.
- Wipe the rim to remove any residue, center a lid on the jar, and screw on a band until it is fingertip tight. Use the jar lifter to place the jar back into the canner, and repeat with the remaining jars.
- Once all the jars are in canner, adjust the water level so it is two inches above the jar tops.
- Cover the canner and bring to boil over high heat. Once water boils vigorously, continue boiling for 20 minutes at altitudes of less than 1,000 feet. Adjust processing time for your altitude if necessary (See Notes).
- When processing time is complete, turn off the heat, and let the canner cool down and settle for about 5 minutes.
- Spread a dry kitchen towel on the counter. Remove the cover by tilting lid away from you so that steam does not burn your face.
- Use the jar lifter to remove the jars from canner and place on the towel. Keep the jars upright, and don't tighten bands or check the seals yet. Let sit undisturbed for 12 to 24-hours to cool.
- After 12 to 24-hours, check to be sure jar lids have sealed by pushing on the center of the lid. The lid should not pop up. If the lid flexes up and down, it did not seal. Refrigerate jar and use up within a week.
- Remove the screw on bands and wash the jars. Label, date, and store in a cool, dark place for 12 to 18 months. Allow at least 3 to 4 weeks for the salsa to develop its flavor. Once the jar is open, refrigerate and use up within a week. Yields about 6 pints.
Notes
Nutrition
This recipe was originally published July 29, 2018. It has been updated with new photos, more detailed information, and a much better tasting safe canning recipe.
You May Also Like:
- Zesty Salsa Recipe for Canning
- How to Can Tomatoes
- Seasoned Tomato Sauce Canning Recipe
- How to Can Poultry Meat

Thank you for providing a canning recipe that yields more than a few little jars! I hate doing all that work to end up with 3 or 4 jars. I made 12 half pints and still have more to can.
The flavor is excellent as well. I will be proudly handing some out as gifts this Christmas.
I’m looking forward to trying more or your recipes.
Thanks for your comment, Darla. I am glad you like the recipe. I agree. If you are doing all the work, you might as well fill your canner. You can adjust the recipe too. Just hit print, and click the plus sign to increase or decrease the number of pints, and the ingredients will adjust for you.
This sounds delicious! Is it safe to substitute red tomatoes if I don’t have enough tomatillos?
This is a tested safe canning recipe. Altering the recipe may make it unsafe for canning. If you make changes, freeze the salsa instead.
This recipe looks great! Can I cut the recipe in half or quarter it (i.e., 2 lbs tomatillos, one onion, one jalapeno, etc) and still can it as long as all the ratios stay the same?
April, Yes, you can cut the recipe in half or quarter it. If you hit the print button, you can use the slider in the upper left corner to change the number of pints, and it will adjust the portion of the ingredients for you.
Hi there, is it problematic if I have frozen some of the tomatillos beforehand?
Thanks and looking forward to trying this!
Kelsey, Yes, you can use frozen tomatillos for this recipe. I do this all the time since they tend to ripen unevenly. It can take a while to gather enough for a full recipe. As they mature, I remove the papery skins, wash them well, and pop them into freezer bags. When it is time to make the recipe, thaw overnight in the refrigerator, and weigh the frozen tomatillos along with the fresh ones. Be sure to include any liquid.
Can I use yellow onions rather than white?
Betsy, Yes, you can exchange the white onions for an equal amount of yellow or red onions.
Could you pressure cook the jars
Jamie, This is a water bath recipe. Currently, there is no tested recipe for pressure canning tomatillo salsa verde.
This is sad! I do not have 8 pounds of tomatillos! We have limited space, so we only get a 1/2 pound at a time. It will take a long time before I can get that amount!
Amy, I have a small batch recipe you can use for fresh eating or freezing. Try this Roasted Salsa Verde recipe.
Hi!
Can I increase cilantro leaves in this recipe and can some dried herbs be added to enhance the flavours. What will be the shelf life of I increase the cilantro leaves and some dried herbs?
Tanu, It is best to follow the recipe because that is how it was tested and determined to be safe for home canning. You can however add extra cilantro and herbs after opening the jar to serve.
Definitely trying this recipe next weekend…question is why do you remove your screw bands? I’ve always left them with my canning (fruit, veggies, jams, bolognese sauce etc) thanks so much
Cici, I hope you enjoy this recipe. It is a big favorite in our household. However, I highly recommend removing the rings and washing the jars well with soapy water before storing them to remove any food that could turn moldy. Also, if the lid should become unsealed while in storage, it will be easier to find if there is no ring to hold it down.
Will omitting the cilantro still make it safe for canning?
Rachael, Yes, you can omit the cilantro. Just keep the other ingredients the same.
can this recipe be done in a pressure canner..of so, how long for processing? water bath is 20 mins so would pressure canning be 10 mins?
Nancy, This is a water bath recipe. Currently, there is no tested recipe for pressure canning tomatillo salsa verde.