Grow Herbs Indoors: Potting Up Chives
This post may contain affiliate links, which means that I may receive a commission if you make a purchase using these links. As an Amazon Associate I earn from qualifying purchases.
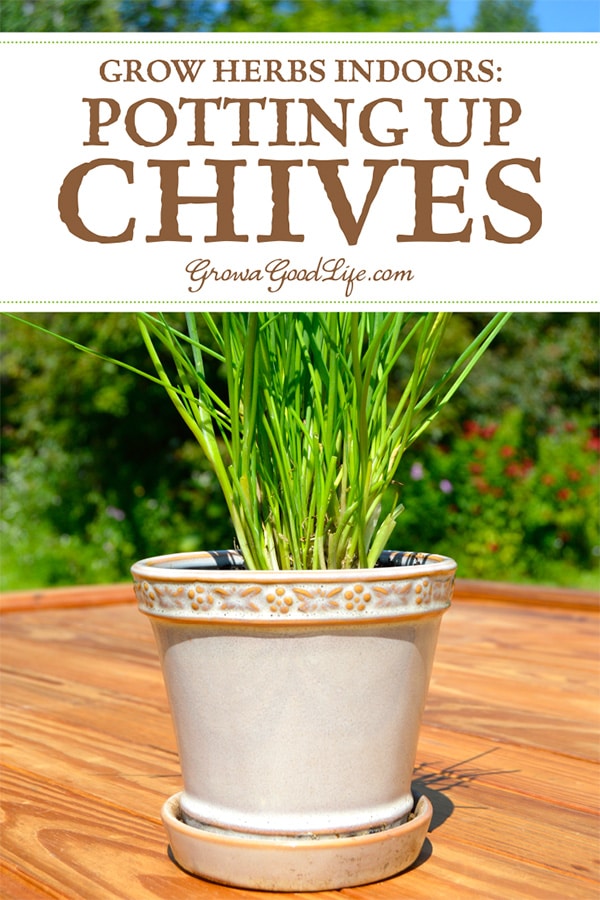
Chives have a mild onion flavor and are delicious eaten raw on salads or as a colorful garnish. Late summer into early fall is a great time for potting up chives into containers to grow indoors. Grow chives all year even when the garden is under snow.

Chives are one of the most dependable herbs in the garden. They are the first to emerge in early spring, pushing their spiky foliage through the snow and mulch.
I begin clipping a few shoots from established plants when they reach several inches high and sprinkle chopped chives on everything from vegetables and soups to salads and pizza. The mild flavor of chives invigorates almost any dish with its fresh fragrance and slightly sharp essence. The vivid green color adds vibrancy that wakes up any dish.
There are two main varieties of chives; Common Chives (Allium Schoenoprasum) are mild onion flavored chives with the round hollow foliage, and Garlic Chives (Allium tuberosum) have a light garlic flavor and flatter foliage. Both are perennials and share similar growing conditions.

By June, edible lavender flowers of Common Chives bloom and attract pollinators to the garden. Some of the chive blossoms are snipped and used to make Chive Blossom Vinegar. Garlic Chives bloom in late July with edible white flowers.
After blooming, the chive plants are trimmed down to about 6-inches and allowed to grow a fresh flush of spiky foliage that continues to provide harvests well into fall. As winter approaches, the chives go dormant and wait for the spring soil to thaw so they can emerge once again.
Grow Chives Indoors:
You can enjoy the mild chive flavor all winter long. Chives are one of the easiest plants to grow indoors over winter. They tolerate the lower light of the winter sun and typical temperature fluctuations that they may experience on a kitchen windowsill. See 5 Herbs that Thrive Inside All Winter for more herbs that withstand indoor winter growing conditions.
Indoor chives thrive on a south-facing window that receives at least 4-6 hours of sunlight per day. Alternatively, you can grow chive plants under Growing Lights.
Chives can be started from seed, but they will produce quicker when grown from divisions from established garden plants.
How to Divide and Pot Up Chives
Late summer into early fall is the perfect time to divide and pot up chives to grow on a sunny windowsill indoors for fresh harvests all winter. This allows time for the plant to become established in the container and adjust gradually to the lower light levels inside the house before winter.
You’ll Need:
Scissors
Shovel or digging fork
6 to 8-inch pots for transplant
All-purpose potting mix
Procedure:
1. Water Well: Chives grow in clusters of small bulbs that are close to the soil line. Their roots extend several inches beyond the cluster and downward. Water the chives well a few hours before you begin dividing the clump to help ease the stress of the procedure.
2. Prepare Your Pots: Fill the bottom of your pots with damp, all-purpose organic potting mix. If you are also transplanting some chive divisions to other parts of your garden, dig your holes and work in some compost and organic fertilizer.
3. Trim Foliage: Use scissors to snip back the tops of the chive plants to about 6-inches.
4. Dig up the Chives: Use a shovel or digging fork to loosen the soil around the clump. Push the blade into the ground and work it around the cluster using a back and forth action to release the roots from the soil. Work the shovel into the ground beneath the cluster and pull back to lift the plant from underneath.

5. Divide the Cluster: Lay the cluster on its side. Often times, it will break apart on its own. Separate small clumps of small bulbs in clusters of around 8-10 plants. This may take some effort if the roots are dense. Discard any bulbs that become damaged around the edges of the cluster.
6. Replant the Divisions: Replant your chive divisions into your prepared pots about 1/2-inch deeper than they grew before. Hold the foliage upright as you fill in the sides of the pot with potting mix. Use your fingers to work the potting mix down the sides of the pot. Press gently to eliminate air pockets without compacting the soil. Transplant remaining clumps to the prepared holes in your garden setting the crown about 1/2-inches below the soil surface.

7. Water Well: Water your newly transplanted chives well and allow excess water to drain out the bottom of the containers. Keep pots evenly moist until the plants are established, then water when soil surface feels dry.
Caring for your New Chive Plants:
Keep newly potted plants out of direct sunlight until they adjust and begin growing. You should see some new growth in about a week. Slowly acclimate your chive plants to indoor conditions and reduced sunlight.
To help your chive plants adjust to their new growing environment, start bringing the pots indoors and place them in their winter location for a few hours. Then return the plants outside. Increase indoor exposure a little each day for about a week or two until the plants are indoors permanently.
Choose a south-facing window that receives at least 4-6 hours of sunlight or set plants under Grow Lights for 14-hours per day. Water when the soil surface feels dry.
Chives will grow slowly on a windowsill during the darkest winter period, but begin to flourish once the daylight increases. At this point, feed your chives lightly with diluted fish emulsion fertilizer to give your plants a boost. Take care to water the soil and avoid the foliage.
Harvesting Your New Chives
Your new chives will begin to grow in a few weeks after transplanting. Allow the plant to adapt for about 4-weeks before harvesting so it can adjust to the new environment.
Once the plant is established, begin harvesting by trimming foliage, leaving at least 2 inches of growth above the soil. The plant will continue to grow and produce more chive foliage.
When spring rolls around, harden off your chive plants and transplant to larger pots or in the garden.
Good planning is key to a successful vegetable garden
Whether you are new to growing your own food or have been growing a vegetable garden for years, you will benefit from some planning each year. You will find everything you need to organize and plan your vegetable garden in my PDF eBook, Grow a Good Life Guide to Planning Your Vegetable Garden.

You May Also Like:
- 5 Herbs that Thrive Inside All Winter
- Mason Jar Chive Vinaigrette Recipe
- 7 Herbs to Start from Seed
- Zucchini Garlic Bites Recipe
- Chive Blossom Vinegar Infusion
Love your blog! I want to start a small garden this year and this is one of the items I was wanting to have in it! Thanks for sharing your knowledge and information.
I’ve got one -2 year bunch of chives and 1 -2 year bunch of garlic chives I’m going to let go to seed and also transplant them to pots because I’m moving by or before spring and want to take them with me. Thank you for the great info. I now feel more confident to do it right. I’ve already harvested the chive seeds but I’m not sure how soon I can take the bulbs for the garlic chives. Can you please send me that information so I do it right? ,, thanks
Lisa, You can divide and pot up chives anytime. Just follow the steps outlined above.
LOVE chives.. Have pinned this one to attempt to grow indoors next year to enjoy all year long!!
Thanks!!
I love chives. It’s so great to know how to grow herbs indoors!
I have chives in a pot in my kitchen and also outside in the garden, I just love this herb too much to limit it growing in one pot only. My sister is not very into gardening at all but recently decided to grow some of this lovely plant. Your post will be of a great help for her, so I’m surely recommending your post. Thanks for all the lovely info you’ve shared!