Homemade New England Hot Dog Buns
This post may contain affiliate links, which means that I may receive a commission if you make a purchase using these links. As an Amazon Associate I earn from qualifying purchases.
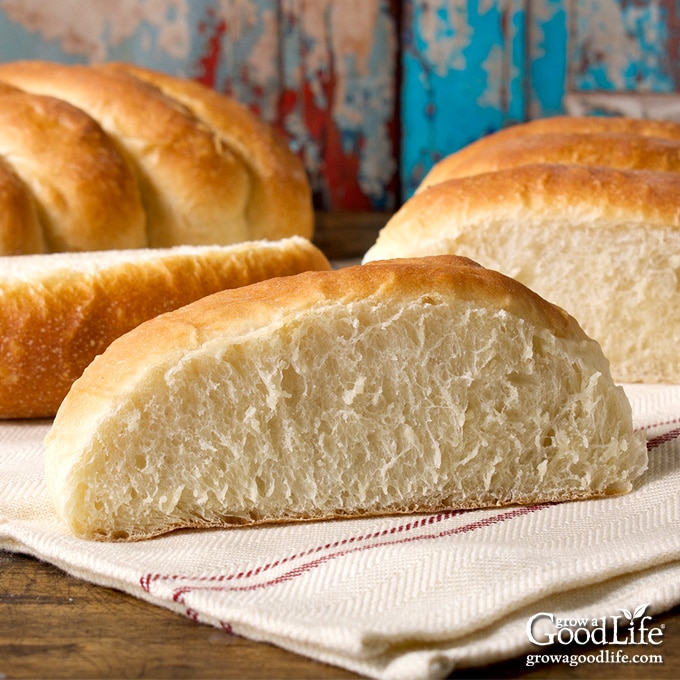
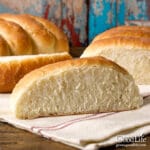
These soft New England hot dog buns are made for stuffing with your favorite filling! They are the classic vessel for making lobster rolls, hot dogs, tuna salad sandwiches, and Italian sandwiches.
What Makes New England Hot Dog Rolls Different?
If you live in New England or have ever visited and enjoyed a lobster roll, you probably noticed the rolls were different than the regular hot dog buns in other parts of the US.
A New England style hot dog bun is a soft white roll that stands upright on its own. The sides are flat and often toasted, and the filling is stuffed into the top of the bun rather than the side. They are also called split-top, top-sliced, frankfurter rolls, or frankfurt rolls.
Growing up in New England, we only had one type of hot dog bun in the house and that was the classic Country Kitchen Frankfurt Rolls by LePage Bakeries in Maine. While researching the history of this unique roll, I discovered that the split top bun was an invention developed by another Maine bakery, J.J. Nissan at the request of a restaurant chain back in the 1940s. According to The Boston Globe, Howard Johnson’s asked the bakery to create a special bun for their fried clam sandwiches that would stand upright to make it easier to prepare and serve.
Ways to Enjoy New England Split Top Rolls
I was a picky eater as a child, but one of my favorite things was a hot dog. Whenever we had a get together with family or friends, my parents often brought a few hot dogs and rolls just in case I refused to eat what was served. Steamed or grilled hot dogs with a little yellow mustard always solved the issue.
Now I only eat hot dogs occasionally at summer barbecues, but these rolls are not just for holding hot dogs. Split top buns are a perfect vessel for many classic New England style sandwiches, including:
- Lobster Roll: A classic Maine lobster roll isn’t complete without a top-split roll that has been buttered and toasted on the outside before it is filled with lightly dressed lobster meat.
- Tuna Rolls: Elevate a plain tuna fish salad sandwich by serving it in a toasted split top roll. Butter and toast the buns, add a layer of lettuce on the bottom, pile in the tuna salad, squish in the sides, and eat. Also try egg salad and chicken salad sandwiches. Cut in half for finger sandwiches.
- Italian Sandwich: When I was growing up in Northern NH, every neighborhood variety store made Italian sandwiches to order. Classic New England Italians are made by layering slices of Provolone cheese, ham, salami, onions, peppers, pickles, tomatoes, and sliced black olives in a New England style top-split bun. It is finished with a dash of salt, pepper, a squirt of olive oil, and wrapped tightly in a square of butcher paper. They are best eaten fresh before the oil has a chance to saturate the bun.
- Meatball Subs: Toast the rolls and fill with warm meatballs and tomato sauce. Top with shredded mozzarella cheese, chopped fresh parsley, and place under a broiler until the cheese is melted and bubbly.
- Sausage Pepper Grinders: Toast the buns in a large skillet, remove them and add Italian sausage links, sliced onions and bell peppers. Cook until the sausages are done and the onions and peppers are soft and slightly charred. Pile the sausages, peppers, and onions into a soft New England style bun and enjoy.
- Grilled Hot Dogs: New England style frankfurter buns are made for grilling right alongside the hot dogs. Top with your favorite condiments, including mustard, relish, ketchup, or a few spoons of homemade baked beans.
- Fried Seafood: If you dine at any seafood restaurant or clam shack in New England, you will find fried clam rolls on the menu. The classic New England style roll was created for that purpose and is perfect for stuffing with fried clams, shrimp, and scallops. You can turn any fried, air-fried, or baked finger food into a sandwich by stuffing it into a hot dog roll, even fish sticks!
Tips for Making New England Hot Dog Rolls
The classic New England hot dog bun is soft white roll that is a bit squishy. They are designed to stand up on their own for easy stuffing and have flat sides that are perfect for toasting or grilling.
About the Ingredients
You only need a few basic ingredients to make these rolls: flour, water, milk, yeast, sugar, salt, and butter.
- Flour: Either all-purpose flour or bread flour can be used for this recipe. Bread flour will bake up a little fluffier.
- Water: Use warm water between 105-115˚F to wake up the yeast.
- Milk: Including whole milk in your bread dough will help make the rolls nice and soft.
- Yeast: Both active dry yeast and SAF instant yeast can be used. If you are sure your yeast is fresh, you can mix SAF instant yeast with the ingredients and it will activate once it has moisture. If in doubt, activate it first in warm water as explained in the recipe.
- Sugar: A little sugar helps feed the yeast and sweetens the bread.
- Salt: Helps fortify the gluten structure of the dough and adds flavor.
- Butter: Adds richness and moisture to the dough, and helps make the bread tender. Additional butter brushed on the rolls after they come out of the oven gives the buns a nice shiny, soft, and tender crust.
No Special Pan Needed
There are many recipes online that require a special pan for making New England-style hot dog rolls. Save your money! I’ve been making homemade hot dog buns for years using standard baking pans I have had on hand.
So, pull out your pans and casserole dishes and measure them to see if you have already have a pan you can use. You are looking for a pan that will accommodate 12 hot dog rolls. The finished rolls should measure around 1 inch wide, by 6 inches long. To achieve the tall flat sides, you’ll need to place the rolls close together so the edges touch when the dough rises and bakes. Here are some common pans to consider:
- Standard Baking Pan: I’ve been making homemade split top rolls for over 30 years using a regular 9 x 13-inch rectangular baking pan. It holds 12 rolls when placed in two rows side by side.
- Small Casserole Pans: Two of the small Pyrex casserole pans will work too. Each 7 x 11-inch baking pan snugly holds 6 rolls.
- Sheet Pans: Sheet pans are rimmed aluminum baking sheets with rolled edges like the ones you probably use for baking cookies. They are easy to store, come in different sizes, and are sometimes sold in sets. The quarter sheet pan is about 9 1/2 x 13, and the one-eighth pan measures 6 1/2 x 9 1/2-inches. One quarter sheet pan or two one-eighth pans would work for making New England rolls.
- Toaster Oven Pan: Recently, I noticed that the baking pan that came with my air fryer/toaster oven was 9 x12-inches, also the perfect size to hold 12 rolls when placed in two rows side by side. This is the pan I use in the photos below.
Other Kitchen Tools
You don’t need special equipment to make bread, but some kitchen tools and appliances can make it easier.
- Kitchen Scale: A kitchen scale is helpful for measuring the ingredients and portioning the dough before forming the rolls. Flour can be tricky to measure when using measuring cups because flour compresses when you handle it. Measuring by weight is more accurate.
- Digital Thermometer: Use to check the temperature of the liquids to make sure they are not too hot to kill the yeast.
- Kneading Board: A large cutting board or kneading board provides a clean work surface for kneading and working with dough. Plus it helps keep the flour from scattering around your kitchen.
- Dough Scraper: Also called a pastry or bench scraper is rectangular flat edged blunt blade with a handle. It is a helpful tool for working and dividing dough, spreading flour, and scraping up the board for clean up.
- Common Kitchen Tools: Such as small saucepan, mixing bowls, measuring cups, cooling rack, pastry brush, and clean kitchen towels.
Steps for Making New England Style Hot Dog Rolls
I am using a Kitchen Aid stand mixer and dough hook for these photos, but I often use a bread machine for mixing, kneading, and the first rise. Then I remove the dough, shape it and let it rise for the second time before baking. Check out the tips for kneading bread in this post: Roasted Garlic Rosemary Bread.
Scroll down to the bottom for the full, printable recipe. Now, on to the method and step-by-step tutorial for making New England style rolls:
Step 1: Prepare the Ingredients
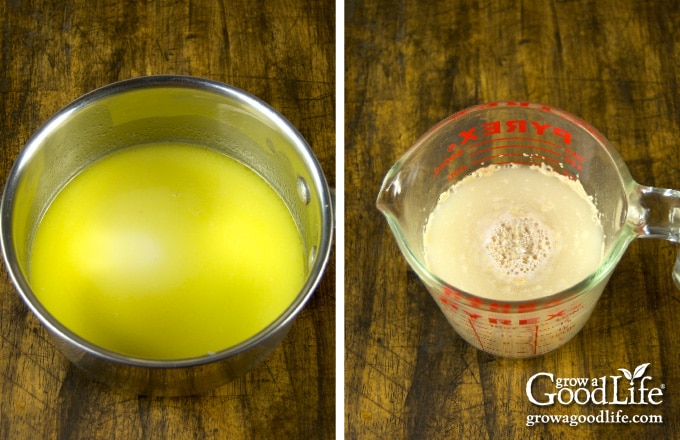
Heat the milk, butter, sugar, and salt in a small saucepan over low heat (or microwave on high for about 60 seconds) until the butter is melted and the sugar and salt dissolved. Stir to combine and let the mixture cool until it is between 105-115˚F.
Activate the yeast by combining it with the warm water. Let the yeast dissolve and become foamy.
Measure your flour using a kitchen scale into a separate bowl.
Step 2: Make the Dough
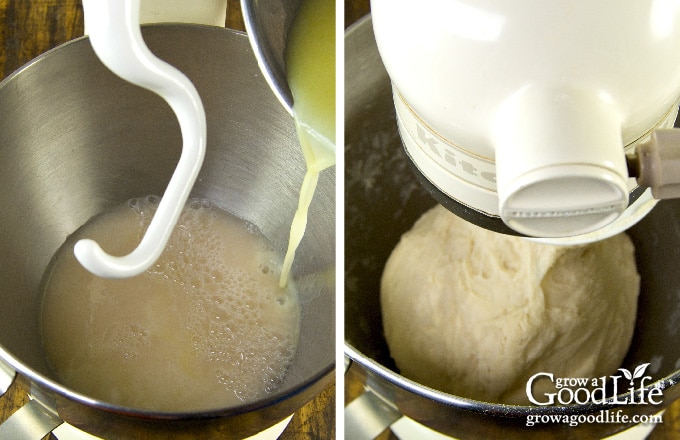
Add the lukewarm milk mixture, yeast mixture, and about 4 1/2 cups (540gm) of flour to the mixing bowl. Turn on the mixer to low speed to combine the ingredients.
Slowly add the remaining flour a little at a time until the dough clings to hook and pulls away from the sides of the bowl.
Step 3: Knead the Dough
Continue to knead on low speed until dough is smooth and elastic. It will be slightly tacky to the touch. If the dough is too sticky, add more flour a tablespoon at a time and knead further.
Step 4: Let the Dough Rise
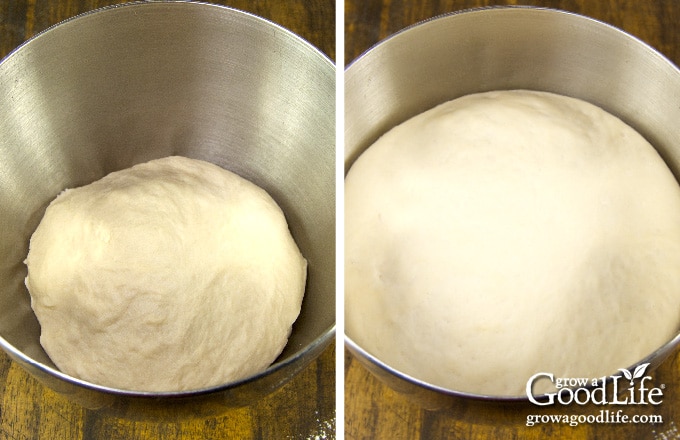
Coat a clean bowl with olive oil. Shape the dough into a ball and place in the oiled bowl. Flip the dough over to oil the other side. Cover with a clean kitchen towel, and let it rise in warm place, until doubled in bulk, about 1 hour.
Step 5: Form the Rolls and Let Rise Again
Use the kitchen scale to weigh the dough so you can calculate the size each roll should be.
Sprinkle the kneading board well with flour. Scoop the dough out of the bowl on to the floured surface. Place the empty bowl on the kitchen scale, and press the tare button to zero out the scale. Add the dough to the bowl and note the weight. Divide the weight amount by 12. It should be around 3.8 ounces or 108 grams.
Place the dough back on your kneading board, press it down gently to deflate, cover with a kitchen towel, and let it rest for 15 minutes. While your dough is resting, grease your baking pan or line with parchment paper.
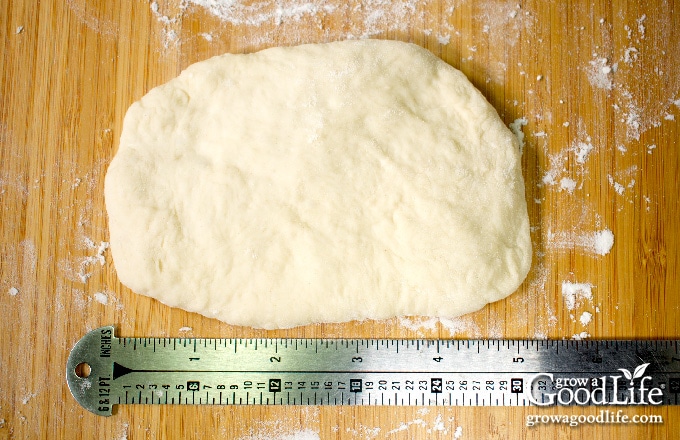
Divide the dough into 12 pieces using the scale to measure out the weight of each piece. Flatten each piece into a rectangle that measures about 3 x 5-inches. Roll up the rectangle to form a cylinder, pinch the edges closed, and place seam side down in your prepared baking pan.
Repeat with the remaining dough, placing each piece close together so the long edges touch. The snug spacing will force the dough to rise upward instead of spreading out, and will help form a tall roll that will stand up on its own.
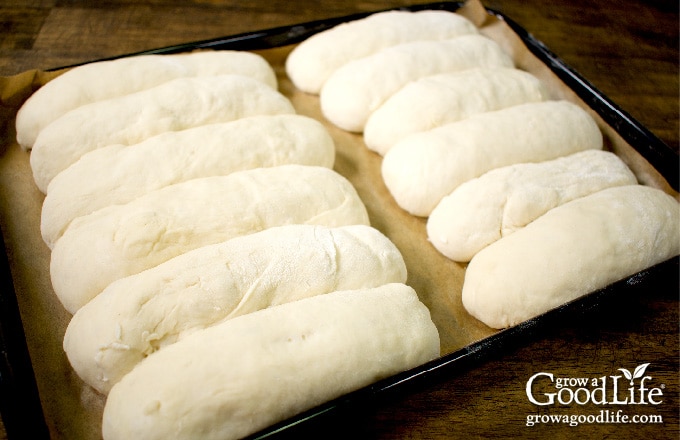
Cover the pan and let the rolls rise in a warm place, free from drafts, until doubled in bulk, about 1 hour.
Step 6: Bake the Rolls
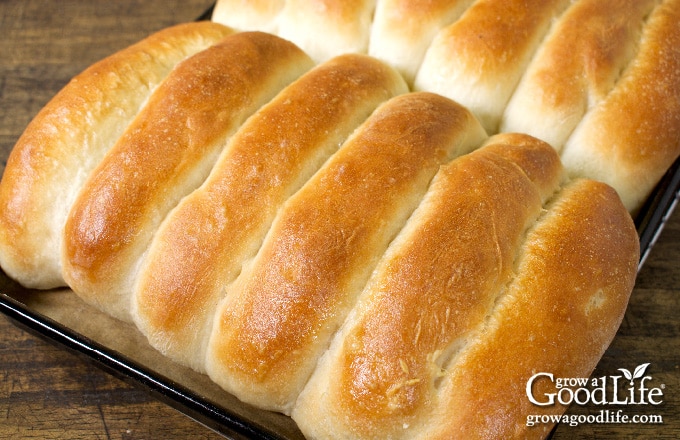
When the dough is almost finished rising, turn on the oven and preheat to 400˚F. Bake the hot dog buns in a preheated oven until deep golden brown, about 12-15 minutes.
Brush the tops of the rolls with butter immediately after baking for a soft and tender crust.
Remove the rolls from the pans, and let the cool completely on a wire rack. Keep the rolls together until you are ready to use them to prevent them from drying out.
Step 7: Toast the Sides
After the rolls have cooled completely. Use a serrated bread knife to separate the rolls at the seams where each roll meets one another.
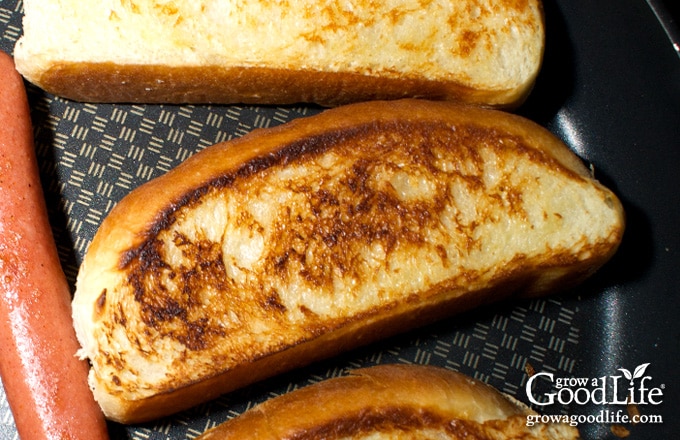
Heat a skillet over medium heat. While the pan is heating, slice each roll in the middle about 3/4s of the way down, and spread a thin layer of butter along both sides of the rolls.
Place butter side down into the hot skillet, and toast each side until browned. Stuff with your favorite filling and enjoy!
How to Store the Rolls
Place the cooled rolls into a zipper bag and store in a cool location away from direct sun. Homemade rolls will stay soft for about 3 days at room temperature if the weather is dry. Freeze the rolls for longer storage. Separate the rolls before freezing to make it easy to grab a roll or two when you need them. Place into a freezer bag, and freeze. Thaw overnight before using.
Homemade New England Hot Dog Buns
Ingredients
- 1/2 cup whole milk
- 3 tablespoons unsalted butter
- 3 tablespoons cane sugar
- 2 teaspoons kosher salt
- 1 1/2 cup warm water between 105-115˚F
- 2 1/4 teaspoons active dry yeast 1 envelope
- 5-6 cups unbleached bread flour 600-720gm
- extra virgin olive oil for greasing the bowl
- additional flour for kneading and dusting
- softened butter for brushing the rolls after baking
Instructions
Make the Dough
- Heat the milk, butter, sugar, and salt in a small saucepan over low heat (or microwave on high for about 60 seconds) until the butter is melted and the sugar and salt dissolved. Stir to combine and let the mixture cool until it is between 105-115˚F.
- Dissolve the yeast in the warm water. Combine all the ingredients using a bread machine, stand mixer, or knead by hand until the dough is smooth and elastic. If you are using a bread machine's dough cycle, skip to Shape the Rolls.
First Rise
- Grease a large bowl with olive oil. Place the dough in the bowl and turn to grease the top. Cover and let rise in a warm place, free from drafts, until doubled, about 45 to 60 minutes.
Shape the Rolls
- When the dough is doubled in size, press it down, turn it onto a lightly floured surface, cover with a kitchen towel, and let rest for 15 minutes.
- While the dough is resting, grease a 9 x 13-inch rectangular baking pan or line with parchment paper.
- Divide the dough into 12 even sized pieces. Use a kitchen scale to be precise. Each piece should be around 3.8 ounces or 108 grams.
- Flatten each piece into a 3 x 5-inch rectangle. Roll to form a cylinder, pinch the edges closed, and place seam side down in your prepared baking pan.
- Repeat with the remaining dough, placing each piece close together so the long edges touch. Cover and let the dough rise again until doubled, about 45-60 minutes.
Bake the Buns
- Preheat your oven to 400˚F when your dough is almost finished rising. Bake the hot dog buns in a preheated oven 12-15 minutes, or until golden brown on top
- Brush the tops of the rolls with melted butter immediately after baking for a soft and tender crust.
- Remove the rolls from the pans, and let the cool completely on a wire rack. Keep the rolls together until you are ready to use them to prevent them from drying out.
Toast the Sides
- After the rolls have cooled completely. Use a serrated bread knife to separate the rolls at the seams where each roll meets one another.
- Heat a skillet over medium heat. While the pan is heating, slice each roll in the middle about 3/4s of the way down, and spread a thin layer of butter along both sides of the rolls.
- Place butter side down into the hot skillet, and toast each side until browned. Stuff with your favorite filling and enjoy!
Notes
Nutrition
You May Also Like:
Good planning is key to a successful vegetable garden
Whether you are new to growing your own food or have been growing a vegetable garden for years, you will benefit from some planning each year. You will find everything you need to organize and plan your vegetable garden in my PDF eBook, Grow a Good Life Guide to Planning Your Vegetable Garden.


Best hot dog buns ever! I halved the recipe as cooking for two and they turned out perfect! So light and fluffy! Easy to make with a stand mixer. Can’t wait to try these for meatball sandwiches! Thanks
Beverly, Delighted to hear you enjoyed the hot dog buns! They’re versatile and should work wonderfully for meatball sandwiches.
No egg in this recipe? Just wanting to make sure before I try!
Karla, No egg.
Can the dough be made in a bread machine and then bake in the oven?
Nora, Yes, you can use a bread machine for mixing, kneading, and the first rise. Then I remove the dough, shape it and let it rise for the second time before baking.
In Germany you also don’t get split-top buns, usually folks there don’t even know something like that exists. But anyway I prefer to make my buns from scratch, no matter if they are for burgers, hot dogs or lobster rolls. Yesterday we had Lobster with buns according to your recipe and from now we will always use this for all rolls or hot dogs. Easy to make, really fluffy and great buttery taste. Thanks for sharing.
Thank you for your comment, Stefan. I am so happy you enjoyed the recipe.
Mahalo, mahalo, mahalo. You can not find split-tops in Hawaii. This reminds me of going to the A&P on a Saturday morning, buying a bag of buns, and having hot dogs and spaghetti-o’s for lunch. Can’t wait to make these and look forward to seeing more New England recipes from you 🌞🌞.
Mahalo
Ah, hot dogs and spaghetti-os! That takes me back! I hope you enjoy the rolls. 🙂