How to Grow Vegetables Indoors
This post may contain affiliate links, which means that I may receive a commission if you make a purchase using these links. As an Amazon Associate I earn from qualifying purchases.
No need to worry about seasons or climate if you are an indoor gardener! Whether you are craving fresh harvests during the winter or live in an area without gardening space, you can grow edibles in your home. Follow these tips to grow vegetables indoors.

Winter always seems to sneak up on me. It’s not until the first snowfall that I consider the growing season over. Up until then, I am still clipping hearty herbs and fall greens. Once the snow falls, I am reminded that soon the ground will be frozen, and the garden covered with a heavy winter blanket.
I start to miss freshly harvested greens quickly. Most years, I have a good supply of fall greens such as lettuce, spinach, chard, kale, pak choi, and other leafy greens to fill the refrigerator before the hard freeze. Unfortunately, some years, I lose my fall greens to the hungry deer as they prepare for winter too.
Since I don’t garden outside during winter, I began experimenting with indoor vegetable gardening. I started with herbs and then progressed to salad greens and more.
Growing edibles indoors can be rewarding. It is not difficult to grow a small number of vegetables in an indoor environment of your home, but there are some important things to consider before you get started.
Tips for Indoor Gardening
An indoor vegetable garden provides a weed-free, controlled environment that will allow you to grow a variety of edibles. With some planning and creativity, you’ll have a wide range of veggies at your fingertips this winter. Here are tips to help you create the ideal environment for growing vegetables indoors:
Use Grow Lights
All plants need light for photosynthesis to convert light, oxygen, and water into energy. Therefore, you’ll want to provide at least 12 hours of supplemental light daily for your plants. While some plants may do ok in natural light from a south-facing window, using artificial lights will help you grow a thriving indoor vegetable garden.
This article explains how to set up a simple grow light unit and choose the right lamps for your indoor garden: Using Grow Lights for Indoor Gardens
Gather Planting Containers
Choose food-safe pots and large containers to support the plant’s growth. You can start seeds in seedling flats, but eventually, the plants will need to be repotted into larger containers. Check out this article for ideas using Recycled Containers for Gardening.
Pots 4-inches deep work well for most greens, while carrots and other shallow root vegetables need at least 6 inches. Consider using window boxes or recycled bakery or produce containers. Poke drainage holes in the bottom to let extra water drain, and use plastic trays beneath containers to catch the water and prevent it from dripping.
Use the Right Potting Mix
Select an organic, all-purpose potting mix for your indoor garden. Start with a fresh potting mix. Don’t use soil from your outdoor garden because it is too compact for containers and may contain pests and diseases. A good quality growing medium for container plants is light, fluffy, and drains well.
Look for an all-purpose soilless potting mix that contains peat moss (or coconut coir), vermiculite, and perlite. You can mix your own basic soilless potting mix with this simple formula: 4 parts sphagnum peat moss or coconut coir, 1 part finished compost, 1 part perlite, and 1 part vermiculite.
Set Up a Fertilizing Schedule
Indoor plants need supplemental fertilizer to grow healthy. So whether you purchase potting soil, or mix your own, eventually, you will need to add fertilizer to keep your plants nourished.
If your potting mix contains fertilizer, you won’t have to worry about supplementing nutrients for a little while. However, the fertilizer will diminish over time as the plants use it to grow, and some will wash out of the soil from regular watering.
If you make your own potting mix, consider including a slow release organic granular fertilizer, such as Epsoma Garden-tone to help feed your plants for an extended period of time.
Follow the instructions on the packaging for the proper amounts, and follow up with regular feedings according to the manufacturer’s recommendations. For example, Garden-tone recommends mixing 2 cup of fertilizer with 1 cubic foot of potting soil, and then feed established plants 1 1/2 teaspoon each month.
If you prefer using a liquid fertilizer, you can also fertilize plants with a weak solution of fish emulsion or seaweed fertilizer every two weeks, or when leaves show signs of stress.
Steps to Set Up an Indoor Vegetable Garden
Plant growth is affected by temperature, light, soil, nutrition, and proper moisture. Here are steps to set up your indoor growing area:
You’ll Need the Following:
- Grow light equipment
- Pots, containers, and trays
- Organic potting mix
- Fertilizer
- Seeds or seedlings
- Small watering can
- Small fan for air circulation
Step 1: Decide on a Location
First, decide on the area in which you would like to grow your vegetables or herbs. Most leafy greens, roots, and herbs will grow well in temperatures between 55 to 70˚F. Therefore, a cool area, such as a basement or spare room, is ideal.
Keep the plants away from wood stoves and other heat sources because warm temperatures will cause some plants to bolt or go to seed prematurely instead of producing a continuous harvest.
Step 2: Set Up the Grow Light Equipment
Set up your grow light shelving unit in its permanent location. Place the unit near an outlet, hang the lights, and plug them into a power strip with a timer. Set the timer to turn on the lights automatically for 16 hours, then off for 8 hours each day.
Step 3: Organize the Plants
Set the drip trays on the shelves, and arrange the plants by similar heights under the grow lights. Try to leave some space in between the pots. Plants need full access to light and good air circulation around the foliage to keep them healthy. Adjust the lights so they are about 2-inches above the plants.
If growing from seed, follow the sowing instructions on the back of the seed package and keep the soil evenly moist until the seeds germinate. Repot plants into larger containers as they grow. Purchased seedlings may need repotting right away if roots are showing through the drain holes.
This article will teach you the basics of starting seeds and help you to make sure your seedlings get the proper care for a successful garden: How to Start Seeds Indoors
Step 4: Control the Environment
Plants need light, moisture, warmth, good air circulation, and nutrients to flourish. Maintaining that balance helps your seedlings thrive and grow into healthy plants that produce numerous harvests. Then, once your plants become established, you only need a little time and attention to keep them happy.
Light
Keep the plants under grow lights for up to 16 hours daily. Keep the lights about 2-inches above the plants, so you don’t burn the leaves, and adjust the level as the plants grow. Plants that are not receiving enough light will be weak, leggy, and stretch towards the light source.
Moisture
Water the plants twice a week or when the soil surface feels dry. To check, stick your finger into the soil a couple of inches; if it feels dry, water. If it is not dry, check it the following day. Water at the base of the plants and try to avoid wetting the foliage.
Warmth
Seeds need warm temperatures between 65 to 75˚ F to germinate. You can use a seedling mat to provide extra heat for germination. Once the plants become established, try to maintain temperatures between 55 to 70˚ F for leafy greens, roots, and herbs.
Air Circulation
As plants grow, they absorb oxygen from the air and release carbon dioxide. A small fan in the growing area will provide a slight breeze that will help to maintain airflow to help remove excess moisture and lessen the chance of damping off or other fungal diseases. In addition, it will reduce the amount of air-borne spores that settle on leaves and make for healthier plants with thicker stems.
Nutrients
The success of your indoor vegetable garden depends on the nutrition they receive. Fertilize regularly to provide your plants with the nutrients needed for optimal growth. Follow the manufacturer’s instructions on the packaging for the proper feedings.
Step 4: Harvest Frequently
Harvest and enjoy fresh, nutritious edibles throughout the cold winter months. Pick greens from the outside of the plant by snipping the leaves off with scissors. The plants will continue to produce more leaves from the center. Thin the plants as needed to give them room to grow, and toss the thinnings in salads and soups.
What Can You Grow in an Indoor Garden?
It is amazing what you can grow indoors with just a little effort. Harvesting fresh vegetables and herbs add lots of flavor to winter comfort foods.
Choose plants that grow under artificial light, mature quickly, and stay compact enough to grow in containers without outgrowing their space for the best results.

Most leafy greens, herbs, and some root vegetables will grow well inside under lights. Here are some of the things I have grown successfully inside during the winter months in a cool basement:
Beets
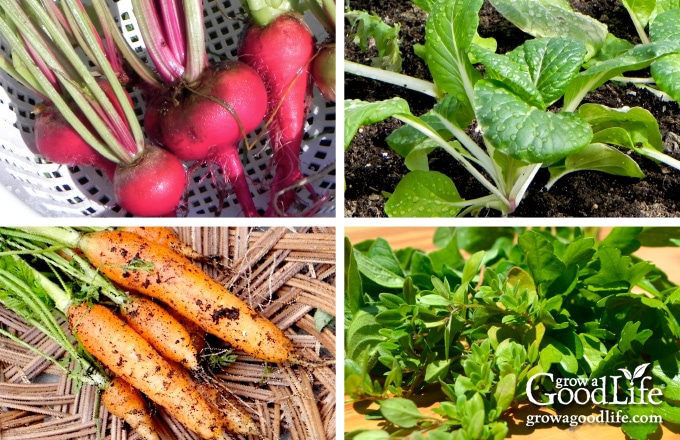
Growing beets indoors will provide you with delicious beet greens and tender baby beets.
- Container Size: Deep pots, at least 6-inches high. Harvest: Ready as baby beet greens in about 6 weeks.
- Harvest: Harvest greens by cutting at the soil surface or clipping a few leaves from the outer edge allowing the plant to continue growing. Pull young baby beets in about 30 days, depending on the variety.
- Varieties to Consider: Detroit Dark Red Beets, Golden Boy, and Chioggia.
- See How to Grow Beets for more detailed growing tips.
Bok Choy or Pac Choi
These Asian cabbage greens grow quickly and need lots of water, so they will benefit from a larger container with more soil to hold moisture. Bok Choy is a delicious addition to soups, stir-fries, and salads.
- Container Size: Deep pots, at least 6-inches high.
- Harvest: Ready in 4-weeks at baby stage. Tends to bolt quickly, so go ahead and harvest small and sow more seeds, or snip the outer leaves and let the plants continue growing.
- Varieties to Consider: Bopak Bok Choy and White Stem Pac Choy.
Carrots
Baby carrots are a delicious addition to salads. Carrots grow slowly, so check your seed packet and choose early-maturing varieties. Thin as needed to allow the roots to develop.
- Container Size: Short and round carrot varieties grow very well in 6-inch deep pots. Choose a deeper container for longer varieties.
- Harvest: Quick maturing baby carrots can be ready in 6 to 8 weeks. Pull gently from the soil as needed, or allow them to develop further.
- Varieties to Consider: Parisian, Little Finger, and Thumbelina.
- See How to Grow Carrots for additional growing information.
Culinary Herbs
If you can grow houseplants, you can grow herbs inside. Some will even do well with as little as 4 to 6 hours of sunlight on a windowsill. Adding artificial lighting increases the selection of herbs you can grow.
- Container Size: A 6-inch diameter and 6-inch deep pot will work well for most herbs. Basil and parsley have a larger root system, so plant them in containers at least 12-inch deep.
- Harvest: Keep plants compact by trimming and frequently harvesting as needed to flavor meals.
- Varieties to Consider: Cilantro, Genovese Basil, Italian Parsley, Oregano, Chives, Thyme, and Sage.
- See How to Grow Herbs Indoors for more herb-growing tips.

Garlic Greens
If you have discovered your garlic is sprouting, separate the cloves, plant it in pots, and let it produce garlic greens. It won’t grow large cloves, but it will grow green foliage that has a mild garlic flavor.
- Container Size: At least 6-inches deep.
- Harvest: Ready in about 2-weeks. Snip long garlic shoots with scissors and use the same way that you would use garlic chives.
- See How to Grow Garlic for additional growing tips.
Kale
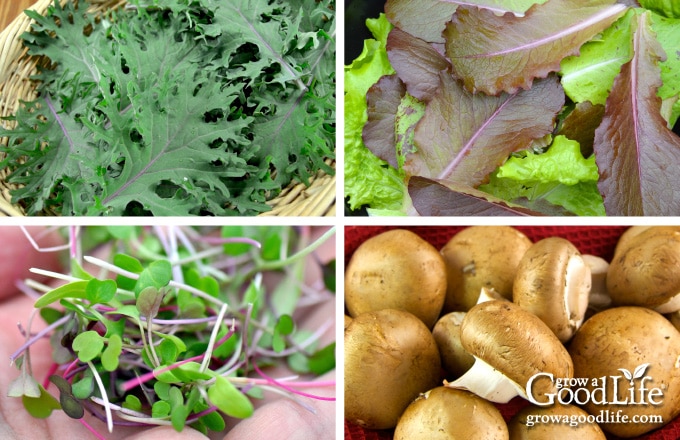
Young kale has a milder and sweeter flavor than mature kale and is delicious in salads or sautéed with a little olive oil and garlic. Dwarf varieties will stay compact and more manageable under lights.
- Container Size: Deep pots, at least 6-inches high for young plants. Pot up as needed to 12-inch deep pots to support larger growth.
- Harvest: Ready at baby stage in about 4-weeks. Snip foliage from the outer edge and allow the plants to continue to produce new growth from the center.
- Varieties to Consider: Red Winter Kale, Dwarf Blue Curled Kale, and Italian Nero Toscana Kale.
Lettuce
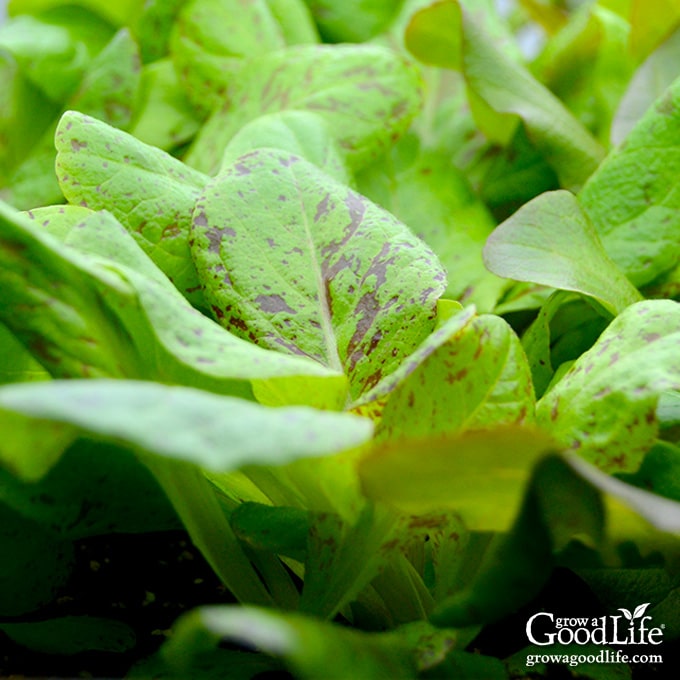
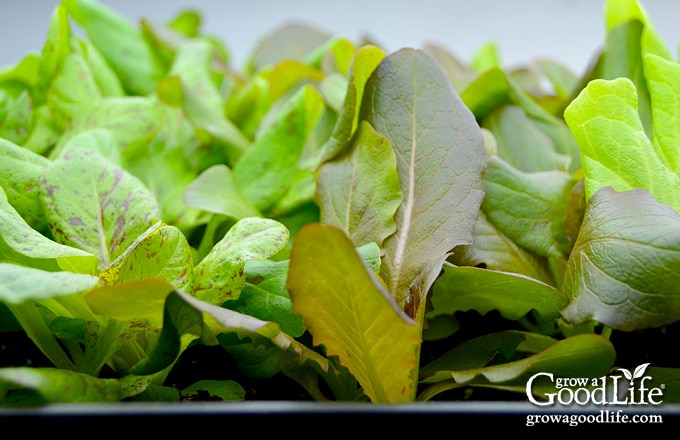
Lettuce is fun and rewarding to grow because there are so many varieties with various colors, leaf shapes, and flavors. Leaf lettuce varieties mature quickly for salads and sandwich toppings. Thin as needed for healthy growth.
- Container Size: 4 to 6-inches high container per plant, or you can grow multiple lettuce plants in a window box container.
- Harvest: Baby lettuce is ready in about 4 weeks. Snip the outer leaves and allow the plant’s center to continue growing.
- Varieties to Consider: Black Seeded Simpson, Tango, and Mesclun Mix.
- See How to Grow Lettuce for more growing information.
Microgreens
Microgreens are young edible vegetables and herbs harvested within weeks of sprouting. The tender sprouts are very flavorful and nutrient dense. Toss into soups, salads, or smoothies.
- Container Size: Any shallow containers, such as recycled yogurt containers, produce trays, and bakery and berry containers from the grocery store.
- Harvest: Ready when the first true leaves unfurl in 7 to 14 days. Ready to when the first true leaves unfurl in 7-14 days. Snip the microgreens right above the soil level.
- Varieties to Consider: Pea Shoots, Kale, and Spicy Microgreen Mix.
- See How to Grow Microgreens for more growing information.
Mushrooms
No grow light is needed! Mushrooms grow well indoors in a cool, dark, and damp place. Mushroom kits have made it so easy to grow mushrooms indoors. They come in a complete package with full instructions. Enjoy your homegrown mushrooms in soups, sauces, and sauté with other veggies and meats.
- Harvest: Ready in just 2-weeks.
- Kit Varieties to Consider: Brown Oyster Mushrooms and Pink Oyster Mushrooms

Mustard Greens
Young mustard greens are mild-flavored and add a peppery dijon-ish flavor to salads. Older leaves taste better steamed, boiled, or braised. In addition, they add a tasty mustard flavor to soups and stir-fries.
- Container Size: Deep pots, at least 6-inches high for young plants. Pot up as needed to 12-inch deep pots to support larger growth.
- Harvest: Baby greens in about 4 weeks once the leaves are 3-4-inches tall. Snip older foliage and let the plant continue to produce new growth.
- Varieties to Consider: Red Lace Mustard, Golden Frill Mustard, or a mix of types in this Mild Mustard Blend.
Radishes
Radishes grow quickly, and their peppery flavor adds a kick to soups and salads. The greens are edible and can be added to salads, pureéd into pesto, or sauteéd with garlic and olive oil.
- Container Size: Short and round radish varieties grow very well in 6-inch deep pots.
- Harvest: About 4 weeks or when the radish is approximately 1-inch diameter.
- Varieties to Consider: Cherry Belle, French Breakfast, and Easter Egg Blend.
- See How to Grow Radishes for more detailed growing information.
Scallions
Scallions or green onions are grown for their greens and small bulb, which has a mild onion flavor. Enjoy snipped greens in stir-frys, salads, sandwiches, and the bulb in any recipe you usually use onions.
- Container Size: Deep pots, at least 6-inches high.
- Harvest: Ready in about 30 days, depending on the variety. Begin trimming foliage as needed for meals when the scallions reach 4-inches tall. The greens will continue to grow, and the scallion bulb will get larger over time.
- Varieties to Consider: Evergreen Bunching Onions, Italian Red Scallions, Parade Green Onions, and Tokyo Long Scallions.
- See How to Grow Green Onions for more detailed growing information.
Spinach
The vitamin-rich and tasty dark-green spinach leaves are excellent for salads and winter soups.
- Container Size: Deep pots, at least 6-inches high.
- Harvest: Ready in a little over a month as baby spinach. Snip leaves from the outside of the plant allowing the plants to continue to produce from the center.
- Varieties to Consider: Bloomsdale, Space, and Tyee.
- See How to Grow Spinach for more detailed growing information.
Swiss Chard
Swiss chard leaves are tender and can be used the same way as beet greens and spinach. The crunchy stalks are slightly sweet, have a similar taste and texture to celery, and can be added to soups and stews.
- Container Size: Deep pots, at least 6-inches high. Transplant chard seedlings to larger containers as they grow larger to prevent the plant from becoming top-heavy.
- Harvest: About 4 weeks as baby greens. Cut outer leaves at the base of the plant, and new foliage will grow from the center of the plant.
- Varieties to Consider: Ruby Red, Fordhook, or a colorful Rainbow Blend.
- See How to Grow Swiss Chard for detailed growing information.
—
Growing herbs and vegetables indoors is a great way to supplement your diet with fresh, organic foods. I hope this article has encouraged you to set up an indoor growing area and start growing vegetables indoors.
You May Also Enjoy Reading the Following:
- 10 Reasons to Grow a Vegetable Garden
- Troubleshooting Seed Starting Problems
- How to Grow a Container Vegetable Garden
Good planning is key to a successful vegetable garden
Whether you are new to growing your own food or have been growing a vegetable garden for years, you will benefit from some planning each year. You will find everything you need to organize and plan your vegetable garden in my PDF eBook, Grow a Good Life Guide to Planning Your Vegetable Garden.


good information.
I need to know What should be the height of full spectrum light for seed germination?
Thanks for your comment, Jessica! Most seeds actually don’t need light to germinate. However, once the seeds have sprouted, it’s important to keep the lights about 2 inches above the plants to avoid burning the leaves. You can adjust the height as the plants grow. I recommend checking out this article for more information on using grow lights for seed starting.
What growing zones does your Guide book cover, or does it cover all zones and your advice would apply in general to all zones? I’m looking for information on building cold frames and using them. Can you help with this?
Thanks
Gord, The information in the book is about planning the vegetable garden and applies for all growing zones in the US. You can find out more here: Planning Your Vegetable Garden
It does not cover cold frames, though. For that, I highly recommend Niki Jabbour’s books, The Year-Round Vegetable Gardener and Growing Under Cover.
Hi, I am curious about yields from this endeavor. I love the concept but don’t have any sense about how much of one’s diet (or one’s family’s diet) it could generate. I’ve not seen this info in any of the reading I have done. Would love to hear about your experience. Thanks!
Sue, I haven’t gone into specific numbers, but we do enjoy fresh salad greens, spinach, herbs, baby root vegetables all winter. Depending on the amount of space and types of crops you grow, it could become a good supplement to regular shopping, but you would have to experiment to get an idea on the full potential.
Thanks for the post, i’m going to give the DIY grow shelves a go.
I love growing microgreens, they really step up the look of your dishes. Apparently they are also a lot higher in nutrients than matured greens, but most importantly they taste better.
My dad got us a little indoor grower for herbs and such, but I really want to use it for lettuce and sprouts during the winter! I love all these ideas!
We have a big garden in the summer/fall. Maybe we’ll have to try growing some stuff inside!
Hi! thanks for all the tips. I was wanting to start seeds indoors and hopefully try the winter indoor gardening you mentioned. I was wondering if it would be beneficial to have my basement growing station near a window for some natural light as well? Would that make a difference, positive or negative? Thanks!
Kristin, Natural light would absolutely be a benefit to your plants. Although, I would still use lights in the winter as well because the sun isn’t very strong.
Nice list and great guidance for growing those indoor. Excellent information on indoor gardening. Thanks a lot for sharing your knowledge.
Impressive write-up, indeed!
Thank you for a nice article! Is there a reason other plants, such as a tomato or zucchini wouldn’t work indoors under lights (assuming space is available of course)?
Leslie, I’ve never tried growing tomatoes or summer squash under lights. However, I have grown a tomato on the windowsill over winter: https://growagoodlife.com/windowsill-tomatoes-in-the-winter-it-can-be-done/
Very timely!
We move from CA to Oregon a year ago and our first harvest here was less than we expected I’m afraid.
Now were getting ready to start our seeds indoors in hopes of a better harvest this year. The herbs we started a couple weeks are already looking great. Ahhh fresh cilantro!
Thank you Rachel!