How to Harden Off Seedlings
This post may contain affiliate links, which means that I may receive a commission if you make a purchase using these links. As an Amazon Associate I earn from qualifying purchases.
If you grow your own seedlings indoors under lights, or if you purchase transplants from a nursery greenhouse, you will need to acclimate your seedlings before transplanting them into the garden. This adjustment process is called “Hardening Off.” Here is how to harden off seedlings.
Hardening off is the process of adapting plants to the outside, so they can get used to sunlight, wind, rain, cool nights, and less frequent watering and fertilizing. The hardening off period allows your seedling to transition from the comfortable growing conditions under lights or in a warm greenhouse to the normal conditions they will experience in the garden.
Allow at least a week to harden off seedlings before transplanting to the garden. Depending on the weather, sometimes two weeks are necessary. Be patient and you will be rewarded with healthy, strong plants that will adapt quickly and begin growing.
Why Should You Harden Off Seedlings?
Sunlight is stronger than grow lights and can burn foliage if the seedlings are placed in the direct sun. Light breezes can sap your plants’ moisture and cause weak stems to break. Cooler nighttime temperatures may stunt growth or even kill a seedling that is not used to it. Gradual exposure to the outside elements allows the plants to toughen up and adjust to being outside.
Steps to Harden Off Your Transplants:
The hardening off period allows your plants to adjust to conditions they will experience in the garden. Refer to your seed starting and planting schedule, check the weather, and follow these steps to harden off your transplants:
Step 1: Begin hardening off your plants
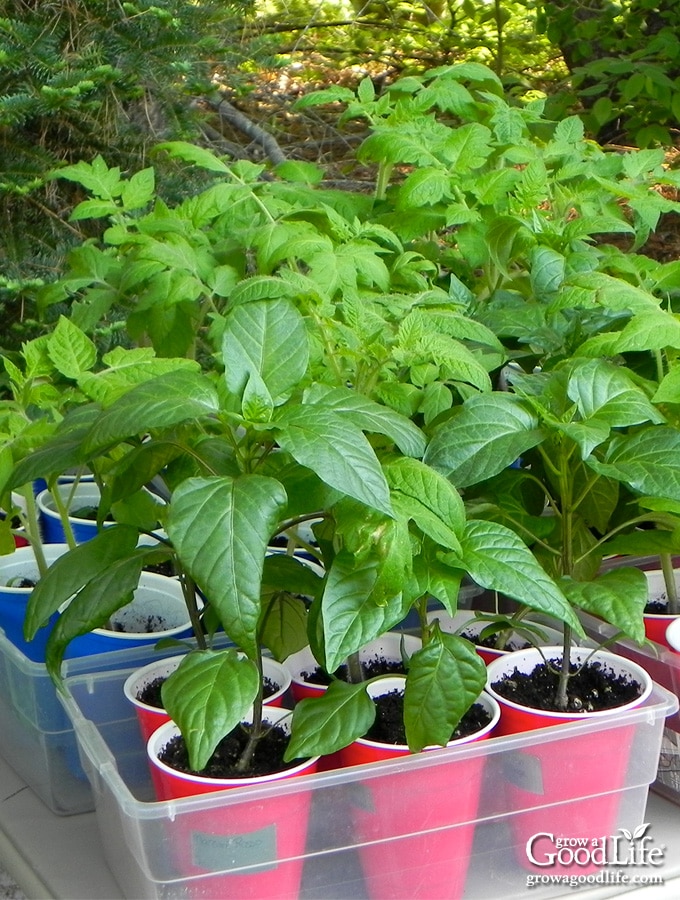
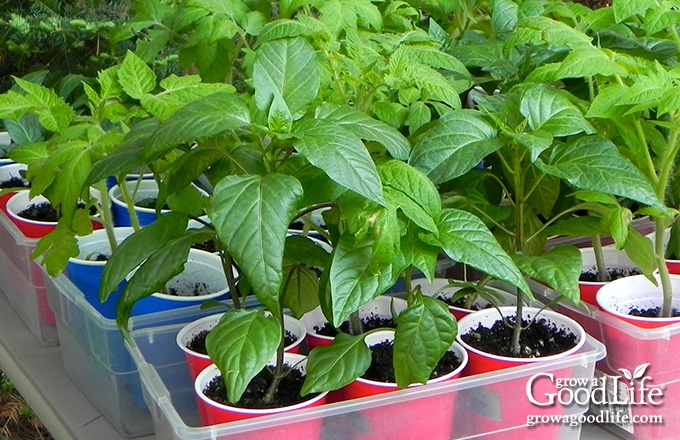
About a week or two before your transplant date, place your plants outdoors in a protected spot for a few hours on the first day. Your seedlings need some protection from wind and sun during their first hours outside.
I like to place my seedlings on a patio table under an umbrella to shade them from the sun. The table is located in an area near the house that is also protected from harsh wind. Let your plants remain outside for a few hours, then bring them back inside.
Keep an eye on the weather during the hardening off period. Temperatures can drop to unseasonable levels quickly, and high winds can destroy tender foliage and knock over seedling trays. Watch the weather for early-season frost or unsettled conditions and bring transplants indoors until the weather returns to normal.
Step 2: Increase outdoor exposure each day
Gradually increase the amount of time that the seedlings spend outside to allow the plants to adjust. Continue to harden off seedlings by moving the plants outside while temperatures are warm and then back inside at night when the temperature is cool.
I usually add a couple of hours each day as long as long the weather cooperates. Alter the shade or move the seedlings to a location that receives morning or evening sun, so they are exposed to a little more sun each day. Allow the seedlings to experience gentle breezes. Even filtered sunlight and light breezes can deplete your plants’ moisture. Check on them frequently and give them enough water, so they do not wilt.
Step 3: Leave seedlings outside overnight
Eventually, allow your plants to stay in full sun and outside overnight as long as night temperatures do not drop below freezing. If it is going to get below freezing move the plants indoors. Resume the hardening off process once temperatures return to normal conditions.
Cool season crops such as broccoli, Brussels sprouts, cabbage, celery, lettuce, onions, parsley, peas, spinach, Swiss chard, and other hardy greens can tolerate low nighttime temperatures of around 45°F once they have had time to adjust. Light frost won’t harm these seedlings after these are hardened off.
Warm-season crops such as tomatoes, peppers, eggplants, melons, cucumbers, and some herbs prefer warm nights, at least 60°F. They can’t stand below-freezing temperatures, even after the seedlings are hardened off. So continue to bring indoors if nights remain cool.
Steps to Transplant Seedlings to the Garden
After your seedlings are hardened off, they are ready to be transplanted into their permanent location in the garden.
Choose a cloudy day with no wind and transplant in the late afternoon or evening to give your plants time to adjust without the additional challenge of the sun.
Follow these steps to transplant your seedlings into the garden:
- Prepare your beds: If you haven’t done so already, prepare your garden beds by removing all the weeds and adding some compost and fertilizer. If the weather has been dry, prepare and water the bed very well the day before you plant.
- Water: Water the seedlings well before transplanting. This will help contain the soil and prevent transplant shock.
- Review your garden map: Bring a copy of your garden map out to your vegetable garden. Refer to your map and plot out where the seedlings will be planted in each bed.
- Dig your holes: Use a shovel or trowel to make a hole in your garden for each seedling. Make the hole a little wider than your container, but about the same depth. (Exception: If you are transplanting tomatoes, try to bury as much of the stem as you can. Unlike other plants, tomatoes will grow extra roots along the portion of the stem below the soil.).
- Remove the plant from the pot: Remove the seedling carefully from its original container by squeezing the sides of the container and inverting it while holding your hand over the soil so the base of the plant is between the index and middle fingers. Tap the bottom of the container several times and the root ball should slide out of the container. Try not to mangle the roots or pull from the stem.
- Plant the seedling: Gently center the plant in the hole, pull the soil in from the sides, and firm it in lightly.
- Water well: Use a watering can to deliver a gentle shower of water at the base of the plant. Continue to water frequently until the seedlings become established and begin to grow. Once the seedlings become established, let the soil dry slightly between watering.
- Mulch to hold in soil moisture: Once the seedlings become established, mulch the beds to help suppress weeds and hold in soil moisture. Keep the mulch a few inches away from the stems of your seedlings so it doesn’t smother the plants.
Pamper your newly planted seedlings frequently until they become established. You may see some wilting the first day, but plants should quickly perk up. And while some may adjust just fine and not need any special care, others may need supplemental watering.
Also monitor temperatures carefully; unexpected temperature dips are rare but do happen, and you may need to cover some plants to protect them.
—
Hardening off is an important step to reduce stress on your plants. If you harden off seedlings properly, they will be strong and able to withstand full sun, light breezes, spring rains, and fluctuating temperatures. Once transplanted to the garden, the plant’s energy will be focused on establishing roots and growing rather than surviving.
You May Also Like:
- How to Build a Grow Light Shelf for Growing Seedlings
- Using Soil Blocks to Grow Seedlings
- Vegetable Gardening Tips for Beginners
Good planning is key to a successful vegetable garden
Whether you are new to growing your own food or have been growing a vegetable garden for years, you will benefit from some planning each year. You will find everything you need to organize and plan your vegetable garden in my PDF eBook, Grow a Good Life Guide to Planning Your Vegetable Garden.

I was hoping you were going to include information on what happens if in the middle of your hardening out there is a cold snap of freezing temps. Can I leave hardy annuals out during this time?
Wendy, I wouldn’t leave hardy annuals out during cold snaps of freezing temperatures because young plants are not mature enough to handle it. I touched unexpected cold snaps in the article above under Step 1: “Watch the weather for early-season frost or unsettled conditions and bring transplants indoors until the weather returns to normal.” And again under Step 3: “If it is going to get below freezing move the plants indoors. Resume the hardening off process once temperatures return to normal conditions.” Does this answer your question? If not, please let me know and I will try to clarify further.
Like to start my precious seeds indoors til ready to go outside by May of mother’s day. Have been successful for a number of years doing it this way. Will harden off to withstand cold and sun per your advice.
I never want to transplant seedlings from tiny cells, to bigger cups, to even bigger containers! Right now I am using a larger flat containing 12 individual square cups. I hope this size works out. Does anyone have tips regarding this process? I only have enough room under the grow lights for about 3-4 trays of plants, so getting as many in a flat as possible is best, but I don’t want to continuously transplant – just go from container to garden.
Kayray, It is always a challenge to juggle seedlings under lights. There never seems to be enough space. I use soil blocks for most of my seedlings. The only plants that are potted up to larger containers are peppers, tomatoes, and eggplant. The rest are hardened off and transplanted into the garden without potting up.
Quite interesting and informative details you have mention for those who are interested in growing by themselves….thanx.
I learned this lesson well! I plopped my little tomato babies into some full sun with some wind and boy did they NOT love me! Most of them survived, and the sun/wind burned leaves have peeled off, but I’ll sure take things slower next time!
Your suggested nighttime low temperatures are laughable to this northern gardener. Most of the cool season crops are perfectly fine with light frosts (although some would still prefer some coverage.) And if we waited until nighttime lows were in the 60’s to plant out our tomatoes, etc…..we’d only have a 10 day growing season here in Montana! We put them out about the time of last frost, and watch them like a hawk if it dips below 40.
Great tips! I learned the hard way that you can’t just pop them in the ground when you are ready! 🙂
What a great post, full of helpful information. We are coming into winter here so I am going to keep this handy for when spring rolls around.
This is great information, especially for a gardening novice like myself. Thank you so much for sharing this with us over at Merry Monday! We hope you’ll join us again this week!
I can’t really grow anything indoors anymore…the cat thinks they’re her toys and steals my starters! Pinned these for the future.
Excellent post, Rachel! I’ve been looking for a great guide on how to harden off seedlings. Looking forward to reading more on your blog!