Homemade Flour Tortilla Recipe
This post may contain affiliate links, which means that I may receive a commission if you make a purchase using these links. As an Amazon Associate I earn from qualifying purchases.
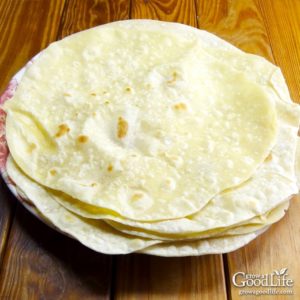
Only four basic ingredients are needed for this flour tortilla recipe. Making homemade tortillas is worth the extra effort because they taste so much better than store bought tortillas. Try this simple flour tortilla recipe and you will know exactly what ingredients you and your family will be eating.

With all the Anaheim and Jalapeño peppers in the garden this year, I know I am going to be sharing several of our favorite Mexican inspired recipes. I wanted to be sure to include my go-to flour tortilla recipe.
We use these homemade tortillas for many things from fajitas, sandwiches, breakfast burritos, enchiladas, quesadillas, and soft tacos to simply wrapping up a salad for an easy to eat lunch when we are on the go.
Tips for Making Flour Tortillas
Making great flour tortillas is not as complicated as it may seem. The key to a perfect, light, and airy tortilla is having the right ingredients and technique.
Ingredients
The ingredients used to make flour tortillas are simple, basic pantry items: Flour, salt, water, and cooking fat.
Flour: This recipe uses unbleached all-purpose flour for a soft, pliable flour tortilla. However, you can use other types of flours with some slight adjustments:
- Whole Wheat Flour Tortillas: Using spelt or white whole-wheat flour will give your tortillas a nutty and slightly sweet flavor. Add an extra 2-3 tablespoons of water for softer dough. Also let the dough rest for up to 30 minutes to hydrate the flour, develop the gluten, and make the tortillas easier to roll. The tortillas will be less puffy and slightly denser than using regular flour, so be sure to roll them nice and thin before browning.
- Gluten Free Flour Tortillas: Replace the all-purpose flour with 1 3/4 cups rice flour, 1/4 cup tapioca starch, and add 1 teaspoon xanthan gum. You’ll need to adjust the water slightly to get a pliable dough that is easy to roll.
Salt: The salt is simply added for flavor and can be left out if you are watching your sodium. I use kosher salt or Himalayan salt in my kitchen, but any table salt will be fine.
Hot Water: Warm water helps to distribute the cooking fat evenly through the dough, and hydrates the flour quicker. Heat water briefly in a teapot or in the microwave. You want it warm to the touch, but not boiling.
Cooking Fat: I tend to use avocado oil because it is easy. I always have it in my pantry and it combines effortlessly with the other ingredients. You can also use use extra-virgin olive oil or vegetable oil in the same way.
Traditional flour tortillas are made using lard. Lard is rendered back fat or leaf fat from pigs. It’s rather difficult to find in my area, and I am not likely to render my own very often. Vegetable shortening or butter can be used in place of lard. Bacon fat works too, but adds a rich, bacon-y flavor that can overpower depending on how you are using the flour tortilla.
Mixing the Dough
This recipe uses a food processor to make the tortilla dough, but you can also make it with a stand mixer or mix by hand.
If you are using lard instead of oil, add it before the water and mix until it is evenly incorporated into the flour, and then trickle in the hot water until a dough ball forms.
- Food processor makes it easy to create the dough quickly, simply add the dry ingredients to the bowl, pulse to combine. Then turn on the blending setting and drizzle in the water and oil mixture while the food processor is running until the until the dough forms a ball. This happens pretty quickly.
- Stand Mixer with paddle attachment makes quick work of combining the ingredients and kneading the dough for tortillas. First add the flour and salt to the bowl of a stand mixer, and mix on low speed until combined. Turn the mixer to medium, drizzle in the water and oil, and mix until the dough begins to form a ball.
- Mix by Hand: If mixing by hand, add the dry ingredients to a large bowl and stir to combine. Add the oil or lard and mix until distributed evenly, and then add the water a little at a time while mixing until the dough comes together. Turn the dough out onto a well-floured surface and knead for 5 minutes.
Let the Dough Rest
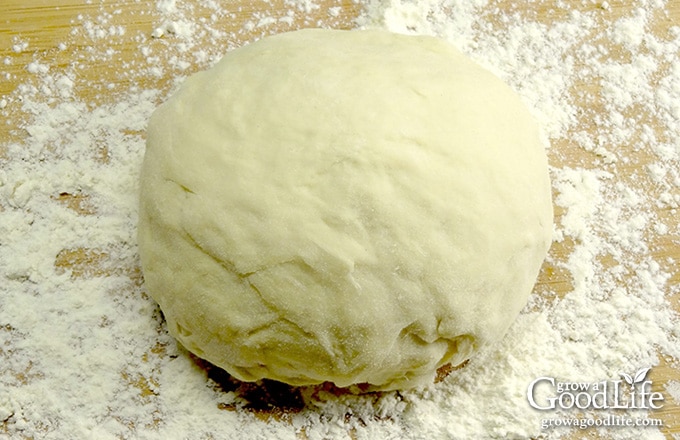
After the dough is kneaded, it is important to let it rest for at least 15 minutes before rolling. This rest period allows the gluten to develop resulting in more pliable dough that will be easier to roll. After mixing, transfer dough to a floured work surface. Cover with a clean kitchen towel to prevent it from drying out, and let the dough rest.
If you find your dough springing back as you roll it, it is too elastic and needs more time to rest. Simply cover it with a towel and let it rest 5 minutes longer.
Rolling the Tortilla
Rolling a perfect round tortilla takes practice. More importantly is that you roll the dough thin so it cooks evenly.
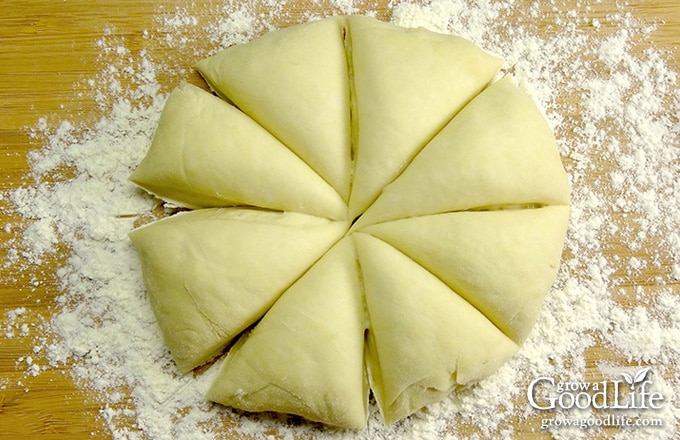
After letting the dough rest, and before rolling the tortillas, you will divide the dough into eight even sized wedges. Then you will roll each piece into a smooth ball with a rolling pin.
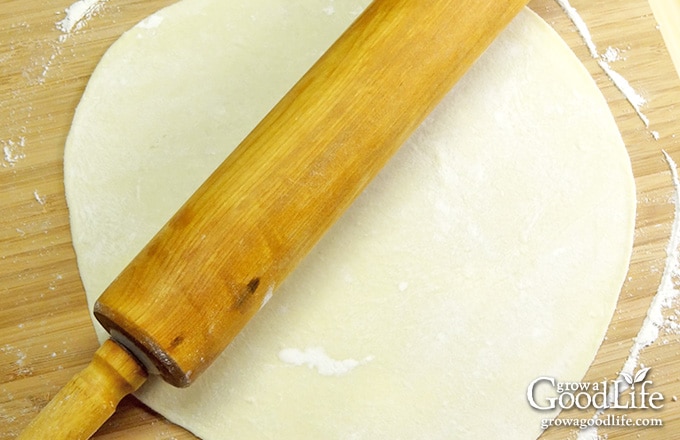
Working with one dough ball at a time, place it in the center of your floured work surface, and flatten it into a round disk with the palm of your hand. Dust the rolling pin well with flour and place it in the center of the dough. Press firmly, and roll from the center away from you. Lift the dough, turn it, and continue rolling from the center into a circle.
Dust with flour as needed to prevent sticking. Keep turning the dough to roll the tortilla evenly. You are aiming for an 8 or 9-inch circle, which will make the dough about 1/16 inch thick, thin enough to see your hand through the opaque dough.
Use a Hot Skillet
Make sure to preheat your pan or griddle to medium-high heat, and that it is hot before browning your first tortilla. If you place your tortilla on a cold skillet, it will cook too slowly, dry out, and stiffen up instead of remaining pliable. If you end up with a stiff tortilla, break it up and use it for dipping into homemade salsa.
Steps for Making Flour Tortillas
A full printable recipe can be found at the bottom of the article, but here are the illustrated steps for making flour tortillas from scratch:
Step 1: Prepare the Tortilla Dough
In a food processor, combine flour and salt by pulsing several times. Combine the oil and water and drizzle it in slowly while the food processor is running. Process until the dough comes together and forms a ball.
Turn the dough onto a floured work surface and knead several times until the dough is smooth. Add flour if the dough is too wet, and extra water if dry. Form the dough into a ball, cover with a clean kitchen towel, and let it rest for at least 15 minutes..
Step 2: Roll Out Your Tortillas
When you are ready to roll your tortillas, preheat your pan, divide the dough into eight portions, and roll into balls.
Work with one tortilla at a time. Sprinkle flour on your work surface and rolling pin. Flatten one dough ball with the palm of your hand, and use the rolling pin to roll each ball into an 8 or 9-inch circle. Dust with extra flour as needed to prevent the dough from sticking. Cover the dough balls in between rolling to prevent them from drying out.
Step 3: Cook the Tortillas
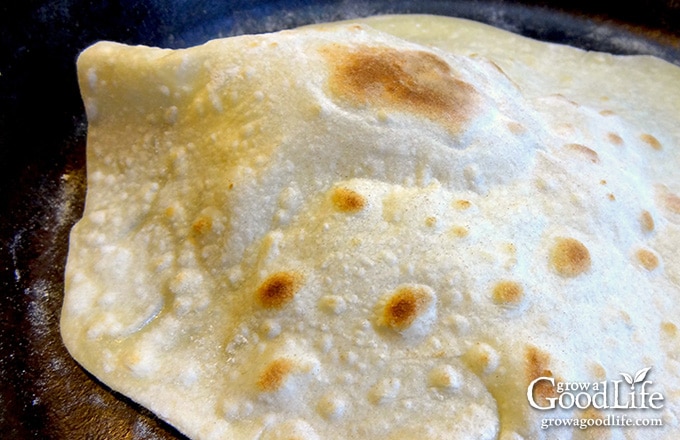
Cook the tortilla in a pre-heated, dry skillet. Once the tortilla hits the pan, it should begin puffing up with air bubbles. The tortilla is ready to flip when it is puffy and develops golden brown spots. Flip and cook on the other side until it is puffy and browns in spots. Place the cooked tortilla on a plate, and cover with a towel to keep warm. Repeat until all the tortillas are cooked. That’s it! It should take about a half an hour, and you’ll have fresh homemade tortillas.
If your tortillas feel stiff after cooking instead of pliable, your pan may not have been hot enough, or you may have cooked them too long. Adjust the temperature if necessary, and only cook until puffy with light brown spots. If you find extra flour collecting in the pan, remove it with a damp paper towel, or it may add a burnt flour flavor to your tortillas.

How to Store Flour Tortillas
Store extra tortillas in a zipper bag at room temperature for 24 hours, refrigerate up to a week, or freeze for longer storage.
- To refrigerate, place the tortillas in a zipper bag and store in the refrigerator for about one week. Warm the tortillas before using.
- Freeze the flour tortillas for longer storage. Layer the tortillas on baking sheets and freeze. Once solid, stack the frozen flour tortillas, place in a freezer zipper bag, and store flat in the freezer for up to 6 months.
Warm the tortillas before serving by reheating individually in a hot skillet, wrapped in foil in a warm oven, or wrapped with damp paper towels in the microwave. Thaw the frozen tortillas, and then warm before serving.
Homemade Flour Tortillas Recipe
Ingredients
- 2 cups unbleached all-purpose flour plus extra for kneading and dusting
- 1/2 teaspoon kosher salt
- 3/4 cup hot water
- 3 tablespoons avocado oil extra virgin olive oil, lard or butter softened
Instructions
- Add flour and salt to the bowl of a food processor. Pulse to combine.
- Combine the oil and water together.
- Turn on the blending mode and drizzle in the water and oil while the food processor is running.
- Continue to process until the dough comes together and forms a ball.
- Turn the dough onto a floured surface and knead several times until the dough is smooth. Add extra flour or water if necessary.
- Form the dough into a ball, cover with a towel, and let it rest for 15 minutes.
- Preheat a cast-iron skillet, griddle, or frying pan over medium heat.
- Divide the dough into eight portions and roll into balls.
- On a lightly floured surface, flatten the ball and use a rolling pin to roll each ball into an 8 to 9-inch circle. Sprinkle with flour as needed to prevent sticking.
- In the preheated skillet, cook tortillas over medium heat for about 30 to 45 seconds on each side or until you see some light brown spots, and the tortilla is puffy.
- Transfer the tortillas to a plate and cover with a clean towel to keep warm. Yield: 8 tortillas.
Nutrition
You May Also Like:
- Chicken Enchiladas with Roasted Green Chile Sauce
- Chili Lime Beef-Steak Fajitas Recipe
- Homemade Taco Seasoning
- Chili-Lime Chicken Fajitas

Thank you, Rachel,
These were simple, delicious, and certainly healthier that anything you can buy in the regular market! I had a bit of King Arthur’s GF one-for-one flour that I needed to use up, so I didn’t follow your gf recipe to the letter I’m afraid, and though they were not nearly as thin and gorgeous as yours (pictured deliciously in your recipe above), they were quite tasty! I will be trying your GF flour suggestion next. I also have a small, cast iron tortilla press that shapes the balls in a snap! If you regularly make tortillas at home, I highly recommend buying one! (Note: with the non-glutenous flours, I personally have found you need to oil, rather that dust your hands and the press or rolling pin, and also keep them on the smaller, slightly thicker side.) Thank you again for the inspiration! This is my first foray into your blog, but I look forward to reading more posts and trying more recipes!
Ellen, I am so glad you enjoyed the flour tortillas. Yes, a tortilla press would eliminate much of the labor and save time too. I really appreciate your feedback on the gluten free flours. I don’t use them very often but I did test the recipe with a GF option for those who requested it.
Can you freeze the dough after it has been rolled out but before cooking?
I have not tried this. Please let me know how it works out if you give it a go.
I freeze the dough after rounding into balls, before rolling them out. Works very well. That way I can cook fresh tortillas with less work more often.
Rachel, This is a great tip! Thanks for sharing.
Hi! I have a question, is the nutritional value per tortilla? I mean, 160 kcal each one? Thanks!!
Yes, the calories are per tortilla. I use this recipe nutrition calculator.
These are so yummy, I’ve done with the olive oil, tried with butter and tallow. All 3 versions turned out great! ?.
I rarely if ever make comments, but I have used your recipe so many times that I had to say thank you! Also, as it is breast cancer awareness month, I added 3/4 tsp. of beet powder and made PINK tortillas. They turned out great with the purple cabbage and pickled red onion I used to make shrimp tacos?. Thanks again for a great recipe!!!
Do you think these will freeze and then thaw well? Thinking about making a huge batch because we use tortillas so much. Spending $4 for 8 tortillas at a time is getting pretty expensive.
Mandy, I haven’t tried freezing the tortillas. Let me know if you try it. Update: Yes, they do freeze well. I have added instructions for freezing above.
I’ve heard that they freeze well in a ziplock with something between each tortilla, like a piece of parchment. Personally, mine don’t last long enough to store. I like to eat them right off the grill.
Really nice recipe. Easy and delicious.
Very yummy, I had no idea making tortillas was that simple, let alone that yummy! I loved them, the only thing we did differently was to flip them one extra time. It helped ours puff up a little better.
Fro some reason I have myself convinced making tortillas is hard. I just need to make it happen. I make everything else from scratch why not these?
This was so much fun, why have I been buying tortillas all of these years!
I’ve made this recipe 4 times so far and the recipe is I impeccable! Perfect for my meal prep in the week! Thank you!!
Krys, I am so glad you enjoy the recipe. Thanks for letting me know!
Very simple can’t wait to try it.