How to Grow a Container Vegetable Garden
This post may contain affiliate links, which means that I may receive a commission if you make a purchase using these links. As an Amazon Associate I earn from qualifying purchases.
A container vegetable garden is a great way to utilize a small space to grow food. Once planted, all you need to do is water and harvest. Have fresh food at your fingertips this summer by planting vegetables in containers.
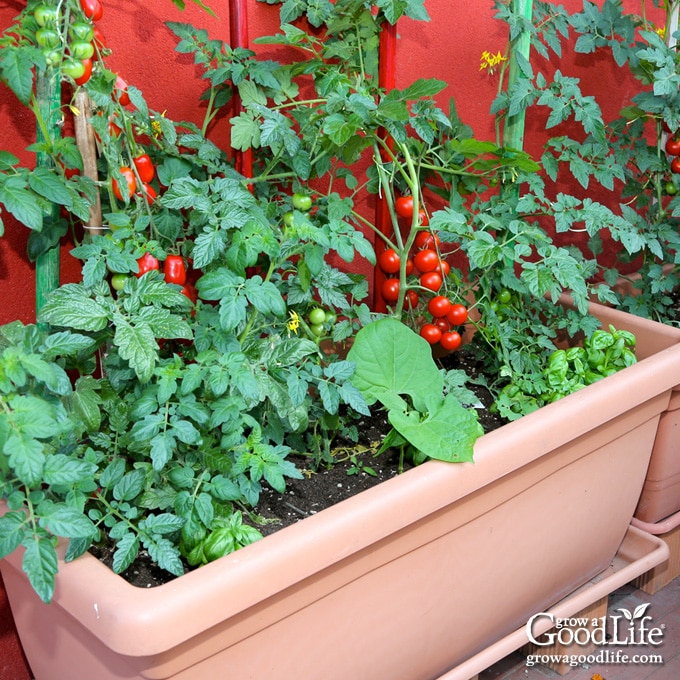
I didn’t always have a yard with a vegetable garden. There were many years when I lived in apartments and condos that only had a small deck or patio. Even so, I managed to turn just almost any sunny spot into a container garden.
I grew plenty of flowers, herbs, and vegetables in window boxes, hanging planters, and in large pots crowded on a deck with only enough space for me to sit and read a book. I loved spending time in my little container garden.
Growing vegetables in pots is an ideal way to grow food without all the work involved with tending a garden. Container gardens are easy to care for, especially for those with physical limitations that may make digging and weeding a garden difficult.
Container gardening will also help you avoid having to deal with poor quality soil, and you’ll be less likely to lose your harvest to hungry deer, ground hogs, and rabbits.
Planters can be placed on your front steps, patio, deck, balcony, or whatever sunny spot available. You can even grow in window boxes attached to your windows or fastened to a balcony railing or fence.
Types of Containers
There are many kinds of containers suitable for growing vegetables. Materials include terra cotta, plastic, fabric, wood, and metal. Keep these things in mind when choosing pots for your container vegetable garden:
Think Outside the Pot
While there are numerous containers you can purchase at the garden center, almost any type of container can be used for growing vegetable plants. For example, try using fabric grow bags, 5-gallon buckets, storage totes, wooden barrel planters, recycled tubs, or a galvanized stock tank.
Recycle Safely
If you are using recycled containers, make sure the containers are not made from or have never held anything that would be toxic to plants or people.
All plastic releases chemicals into the soil and can be absorbed by plants. However, most of these chemicals are at very low levels and considered safe. Some types of plastic have been identified as being safe for food includes #1, #2, #4 and #5.
Don’t use buckets that have held chemicals, tar, or other manufacturing polymers. Instead, stick to containers that have been used to store food, such as pickles, olives, or frosting. Avoid old planters that may be coated with lead-based paint, and building materials that may contain asbestos, or treated with rot resistant chemicals such as pressure treated wood.
Prevent Soggy Soil
The containers must have holes in the bottom to allow extra moisture to drain. Plants take up moisture and oxygen with their roots. Soil that is too soggy will fill air pockets, and the roots can’t breathe. Drill additional holes in your container if needed, and place the pot on blocks to let extra moisture drain out freely.
Types of Vegetables for Containers
Many vegetables and herbs grow really well in pots. By matching the plants to the right sized pots, you can harvest fresh food from your container garden all summer long. The container must be large enough keep the plants healthy once they are fully-grown. Pots that are too small will dry out quickly and won’t allow the roots to flourish.
1 to 3 Gallon Containers
Small containers that are at least 6-inches deep and hold 1 to 3 gallons of potting mix are ideal for growing shallow rooted plants such as:
- Asian Greens: Including bok choy, Chinese cabbage, mizuna, mustard greens, and tatsoi.
- Green Onions: Also called scallions, bunching onions, or spring onions.
- Herbs: Such as basil, chives, cilantro, lavender, lemon balm, mint, oregano, parsley, and thyme.
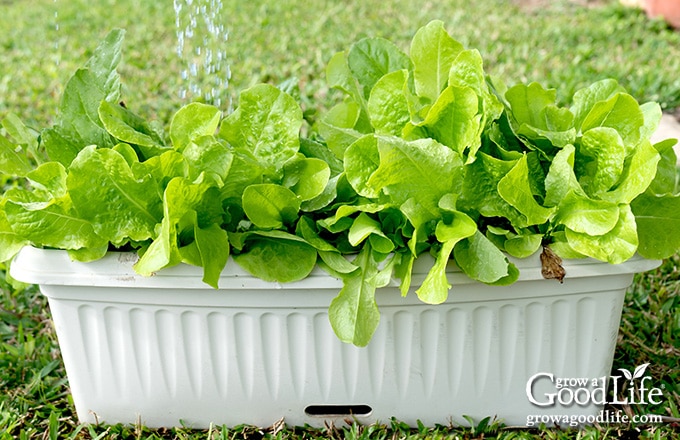
- Leaf Lettuce: All varieties can be grown and harvested from the outer leaves.
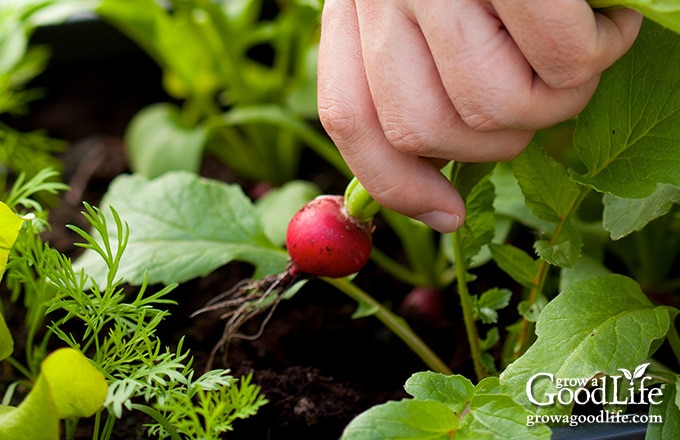
- Radishes: Such as cherry belle, scarlet globe, and white icicle.
- Spinach: any cultivar will grow well in containers.
- Swiss Chard: All varieties of Swiss chard, including bright lights, fordhook giant, lucullus, rainbow chard, rhubarb chard, and ruby red.
5 to 10 Gallon Containers
Medium pots that are at least 12-inches deep and hold 5 to 10 gallons of potting mix are small enough to move around your yard to take advantage of maximum sunlight as it shifts across your yard during the season. You can grow:
- Beets: All varieties of beets will grow very well in containers, and can be harvested for both their greens and roots.
- Broccoli: Grow one plant per 5-gallon pot for a large head, or grow up to 4 plants for smaller main heads, but plenty of side shoots. Give them plenty of room for the foliage to spread out. Seek out compact cultivars if space is an issue.
- Bush Beans: String bean varieties that grow in compact plants, about 1 to 3 feet tall won’t need supports.
- Carrots: Plant short varieties in containers. Use pots that are at least 2-inches deeper than the full-grown carrot length. Consider growing French round, little finger, or thumbelina varieties in shallow containers.
- Determinate Tomatoes: Determinant tomatoes are short plants that are suitable for small spaces. They are also called bush tomatoes and usually grow between 1 to 3 feet tall. There are plenty of tomato varieties that have been developed for growing in containers. Look for names like Patio, Pixie, Tiny Tim, Saladette, or Window Box Roma. A variety called Tumbling Tom is great for hanging baskets.
- Eggplant: All varieties of eggplant will grow very well in containers. Grow one plant in a 5-gallon container, and up to 2 plants in a 10 gallon pot.
- Garlic: Both spring planted and fall planted garlic will thrive in a container garden. Plant in fall, and keep the pot in a cool shed or garage for large garlic bulbs. Plant sprouted garlic in spring for green garlic shoots and small garlic bulbs.
- Kale: A delicious green that will grow all season long. Harvest leaves from the bottom of the stalk and the plant will continue to produce more foliage on tall stalks.
- Kohlrabi: I have better success growing kohlrabi in containers than in the garden. It thrives in moist, fertile soil in as little as 6 hours of full sun each day.
- Onions: Plant onion sets or plants and harvest at any size as needed for meals.
- Peppers: So many varieties of peppers, both hot and sweet are suitable for growing in containers. Most pepper plants are grown as annuals, but they can be overwintered indoors and will continue growing the following year.
25 Gallon Containers and Larger
Large planters that are at least 24-inches deep and hold 25 gallons of soil are much easier to maintain. They hold more moisture so you won’t have to water as frequently.
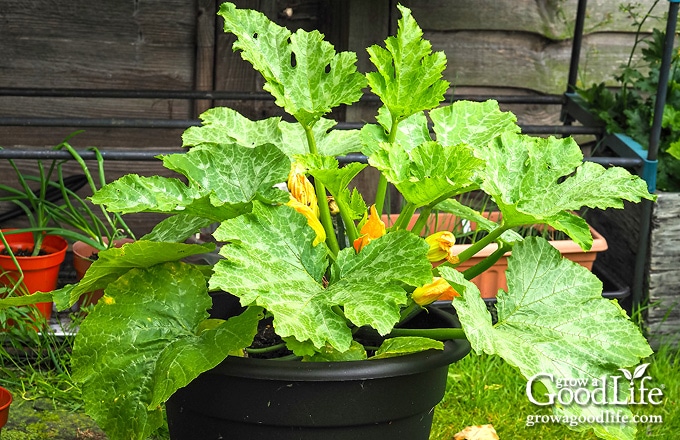
You can plant potatoes, summer squash, and zucchini, and other patio or bush variety vegetables. Attach a trellis to the container and you can grow indeterminate tomatoes, cucumbers, peas, pole beans, and winter squash vertically.
Consider growing a variety of crops together in large containers. Herbs such as lavender, thyme, oregano, marjoram, and chives thrive in similar environment and grow best in a loose growing medium and dryer conditions than most vegetables. Use a cactus potting mix or add coarse sand to the potting mix and let the containers dry out on the surface in between watering.
Many crops are considered companion plants, which means they grow better near a compatible companion. Consider growing these combos in the same planter:
- Asian greens, lettuce, radish
- Beans, carrots, zucchini
- Eggplant, beans
- Spinach, chard, onions
- Tomatoes, basil, onions
- Avoid planting onions and garlic with beans and peas
Dwarf or bush plants will take up less space and produce the same size vegetable as a full-size plant. They will have names that start with Patio, Dwarf, or Bush.
Steps to Growing Vegetables in a Container Garden
Use these tips to successfully plant and grow a container vegetable garden:
Step 1: Planning
It is helpful to plan your container garden so you can evaluate your space, decide what to grow, and determine the amount of plants you need to fill your pots. You can read more about each process at the links below:
The first step to starting your container vegetable garden is to figure out what you would like to grow. Keeping the size of containers in mind, reviewing this article will help you narrow down your choices:
To avoid overcrowding, it will be helpful to plot out your growing area just like you would do if you were planning a regular vegetable garden. Do a rough sketch of your containers and calculate the amount of space your plants need to thrive. Sort your containers by size and assign plants to each pot. This article will help you with designing your growing area:
If you are starting transplants from seeds, it will be useful to make a planting schedule based on your last frost date. This will help you understand which vegetables can tolerate some frost and which need to grow after all danger of frost is past:
- How to Make a Seed Starting and Planting Schedule
- How to Start Seeds Indoors
- How to Harden Off Seedlings Before Transplanting
Step 2: Gather Your Materials
- Growing Pots: Select containers that are at least 6-inches deep so the plant roots will have plenty of room to grow.
- Soilless Potting Mix: A soilless potting mix is ideal for container gardening. It is lightweight, but will retain moisture and resist compaction. Do not use soil from your garden. It is too heavy and may contain disease spores and weeds that will thrive in a container environment.
- Organic Granular Fertilizer: Your plants need supplemental nutrition to grow into healthy plants. If your potting mix doesn’t contain fertilizer, adding organic fertilizer right into the growing medium will provide the boost they need to establish quickly and grow.
- Fish Emulsion Liquid Fertilizer: Since the containers are small and watered often, nutrients in the soil need to be replenished frequently. A weekly feeding of liquid fertilizer such as fish and seaweed emulsion will keep your plants nourished.
- Watering Can: Easy access to water will make caring for your window box garden much easier. A good-sized watering can will reduce the number of trips to the faucet for refills.
- Seedlings or Seeds: Starting a container garden with purchased seedlings or transplants you grew yourself will get you on your way to a quicker harvest. Even though growing vegetables from seed can take a litter longer, it is much less expensive, and you have more varieties to choose.
Step 3: Choose a Sunny Location
Try to find a sunny area that you will be able to access easily to water and harvest your vegetables. Most vegetable plants grow best with at least 6 hours of direct sunlight every day. Patios or decks located at the south side of your home are ideal for growing a container vegetable garden, but an east or west-facing area that receives 6 hours of morning or evening sunlight will also work well.
If a north side location is all that you have, then select plants that will grow in low-light, like arugula, beets, broccoli, cabbage, carrots, cauliflower, celery, chard, garlic, kale, leaf lettuce, leeks, mustard greens, and parsnip.
Step 4: Prepare the Containers
Make sure whatever the container you are using has several bottom drainage holes to allow excess water to empty out quickly. Add more drainage holes to box bottom if needed.
Large containers will be too heavy to move once full, so position large pots and planters in their permanent location before filling with soil.
Pre-moisten the potting mix before filling your pots. Use a clean bucket or bowl and warm water to the soil mix. You will want the potting soil to be slightly damp, but not soaking wet. If you are using granulated fertilizer, now is the time to mix it into the potting soil. Follow the directions and combine it with the soil.
Fill your containers with damp potting soil to about two-thirds full. Press gently to remove air pockets.
Step 5: Plant Your Container Garden
If you are growing different crops in one container, try to group vegetables that have the similar watering needs and the same amount of sun exposure.
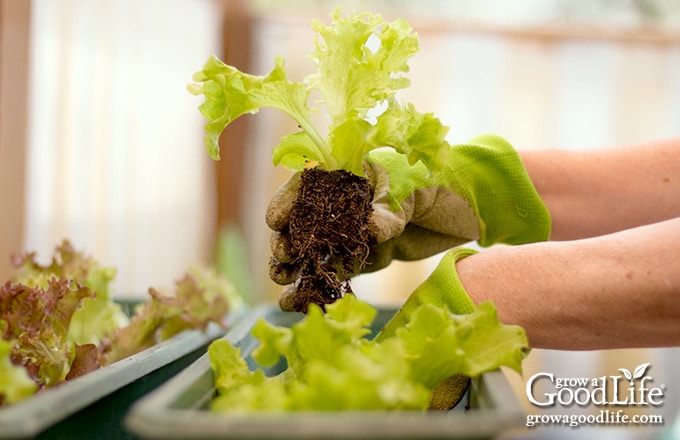
Planting Vegetable Transplants: With plants still in their original containers, place them on top of soil, and play with the arrangement until you are satisfied. If you are planting very large containers, try to place the taller plants in the back and shorter plants in front for optimum sun exposure.
Dig holes in the soil, remove the seedlings from their containers, and place into the holes at the same soil level. Add more soil around the base of each plant until roots are covered. Gently firm the soil with fingertips and water plants well.
Growing from Seeds: Review the seed package for information on how to sow your seeds for the best results. The package will tell you when to sow the seeds, how deep to sow the seeds, how far to space them out, and how far away to thin the seedlings once the seeds have sprouted.
Poke holes into the soil and plant 2 or 3 seeds per hole. Cover the seeds with soil, press down gently so the seed makes contact with the soil, and mist the soil surface with water. Keep the soil evenly moist until the seeds sprout, and then water when the top inch of soil is dry.
The plants need plenty of space to grow, so be careful not to overcrowd them in the pots.
Step 6: Caring for Container Plants
A container garden needs just a few minutes of maintenance a day.
- Watering: Since the growing space is small and shallow, your pots will need to be watered frequently, sometimes twice a day during the middle of summer. Water when the top inch of soil is dry.
- Fertilizing: The plants are competing for food, so they will require a steady diet of plant food. Feed your plants weekly with an organic liquid fertilizer mixed according to the directions for container vegetables.
- Provide Support if Needed: Tall and trailing plants, like tomatoes, pole beans, cucumbers, and peas will need some support such as a pole, trellis, or sturdy tomato cage.
- Check for Pests and Disease: Inspect plants daily for pests or disease and treat immediately if anything is found. Pests or diseases will spread rapidly when plants are grown in close to each other.
- Thin Plants: Crowded plants compete for water, nutrition, and air circulation. Thin your plants as needed by clipping the unwanted seedlings at the soil line. If you are thinning greens, toss these clippings into salads.
- Enjoy the Harvest: Harvest frequently to encourage the plants to continue to produce. Harvest leafy greens by picking from the outside of the plants, and the center will continue to grow and produce more greens. Harvest fruits as they mature.
—–
I hope these tips help you harvest big yields from your container garden.
Do you grow vegetables in pots? Have any tips to share? Let us know in the comments.
You May Also Like:
- Tips for Growing Peppers in Cooler Climates
- 10 Vegetable Gardening Tips for Beginners
- Tips to Improve Your Tomato Harvest
Good planning is key to a successful vegetable garden
Whether you are new to growing your own food or have been growing a vegetable garden for years, you will benefit from some planning each year. You will find everything you need to organize and plan your vegetable garden in my PDF eBook, Grow a Good Life Guide to Planning Your Vegetable Garden.

