How to Can Apple Juice
This post may contain affiliate links, which means that I may receive a commission if you make a purchase using these links. As an Amazon Associate I earn from qualifying purchases.
Homemade apple juice tastes so much better than store-bought juice, and you can preserve it without added sugar. Learn how to make apple juice and home can it for your food storage shelves.
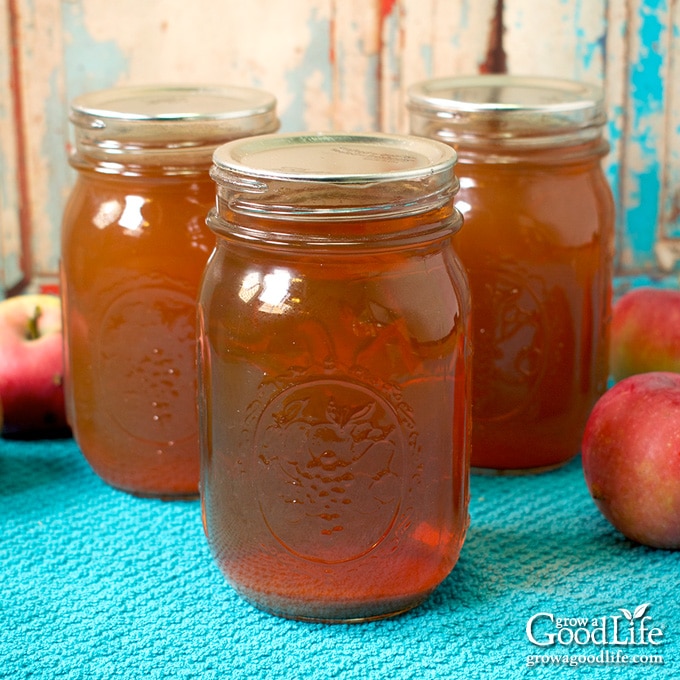
Tips for Making Apple Juice
Apple juice is made by cooking apples with water and straining it to separate the juice from the solids. It is then heated, poured into jars, and processed in a water bath canner to make it shelf stable. Here are tips for a making and preserving a flavorful apple juice:
Use a Variety of Apples
The best apples for making juice are ones that taste good to you. Each apple has unique sweet, acid, or astringent properties. Choose ripe apples that are naturally sweet, and you won’t miss the sugar. A few tart flavored or green apples should also be included because they add more flavor and natural tannic acid that helps preserve the flavor of fresh apples.
- Sweet apple varieties include Ambrosia, Cameo, Crispin, Fuji, Gala, Golden Delicious, Honeycrisp, Red Delicious, Rome Beauty, and Sunrise.
- Tart varieties include Braeburn, Ginger Gold, Granny Smith, Gravenstein, Jazz, Jonathon, and Pink Lady.
We have eight apple trees on our property. Although we are unsure about the varieties, we do know that there are at least three types, four if you include the crabapple tree.
The best tasting apple juice I have made came from a blend of apples from our yard along with others from a local u-pick orchard. Most orchards also offer what they call, seconds at a lower price. These apples may not look pretty, but they are perfect for making apple juice.
Overripe or minimally damaged apples are perfect for juicing since you will be cooking the fruit to release the flavorful juice. You can trim off bad sections as long as the rest of the fruit is good.
Don’t preserve apples that are rotten or infested with worms. Additionally, avoid any that have been resting on the ground for a longer than a day, or partially eaten by wildlife. Windfall apples are likely to contain bacteria and mold spores.
Apple Cider vs. Apple Juice
Both apple cider and apple juice are a fruit beverage made from fresh apples. The major difference is cider is a raw, unfiltered juice that contains apple pulp and sediment. It us usually made by pressing or crushing the apples and collecting the juice. While apple juice is filtered to remove the solids, and pasteurized so it will last longer.
How to Make Apple Juice
You don’t need an apple press to make apple juice. You just need a way to heat the apples to break down the fruit so it releases juice. Then the juice is strained from the solids by letting it drip through a jelly bag or layers of cheesecloth. There are several ways you can accomplish this using common kitchen equipment:
- Heat Apples on the Stove: You can cook the apples in a large pot with a little water until softened, and then strain the apple pulp to let the juice drip through a jelly bag.
- Use a Pressure Cooker: An electric multi-functional pressure cooker (such as Instant Pot) is a fast way to cook the apples. You will need to do two batches of apples. Place about 6 pounds of the prepared apples, and 1/2 cup of water into the pressure cooker. Cover and set it to Pressure Cook for 5 minutes. Let the pressure release naturally after the cooking cycle is complete. Open the lid, stir the apples, and strain to separate the solids from the juice. Add about 3 cups of additional water when you re-heat the juice to can it.
- Use a Steam Juicer: If you preserve a lot of juice or fruit jelly, you may want to consider investing in a steam juicer to speed up the process. A steam juicer is a stacked multi-pot unit. The fruit is put into the top pot, which is stacked over a collection pan. This is placed over a bottom pot of water, and placed on the stove. As the water boils, steam rises, and the fruit releases the juice. The juice drips through the perforated holes into the collector pan. If you are using a steam juicer, follow the manufacturer’s directions to extract the juice.
How to Achieve a Clear Juice
A cloudy apple juice just has tiny bits of pectin and apple solids in the juice. Commercial apple juice goes through a process that removes these particles. Here are tips for achieving a clear apple juice like you find in the grocery store:
- Let the juice drip naturally from the cooked apples for at least 2 hours or overnight in the refrigerator.
- Don’t squeeze the jelly bag. Squeezing will force small particles of apple pulp through the strainer, and will make your apple juice cloudy.
- Let the sediment settle. Cover and refrigerate the juice overnight to let the sediment sink to the bottom. When you are ready to can the juice, ladle it out carefully without disturbing the sediment at the bottom. You will get less juice, but it should be nice and clear.
Don’t Have a Water Bath Canner?
You can use a large saucepot to can the jars as long as it is tall enough to cover the tops of the jars by a few inches, plus two or more inches of space to prevent boiling water from splashing out of the pot. Place a rack in the bottom to hold the jars up away from direct heat, so they won’t break, and can in several batches depending on the size of your pot.
Fresh apple juice also freezes very well. To freeze apple juice, let it cool, and pour into freezer safe containers. Leave about a 2-inch headspace to allow for expansion. Label, date, and place the containers in the freezer. Apple juice will last in the freezer for 4 to 6 months. Thaw the apple juice overnight in the refrigerator.
Ways to Use Apple Juice
We like canning apple juice in pint-sized jars that can be chilled in the refrigerator, opened, and enjoyed fresh. Here are other ways to enjoy homemade apple juice:
- Mulled Apple Juice: Larger jars come in handy to make mulled apple juice by simmering on the stove with spices, such as cinnamon, nutmeg, cloves. Feel free to add a little sugar or honey for sweetness, or brighten up the flavor with a splash of lemon juice or orange juice.
- Fruit Smoothies: Use apple juice in your smoothies for a fresh fruity flavor. Apple juice combines well with many fruits. Try blending together apple juice with pineapple, banana, pears, baby spinach, and a handful of crushed ice in a high-speed blender.
- Savory Recipes: Apple juice also pairs well with pork, chicken, and fish. Replace the liquid in your favorite savory recipes with apple juice and add a boost of sweet flavor. Use apple juice to poach salmon, slow cook pulled pork, or as a glaze for baked ham.
You can even use apple juice as the liquid to home can fruits such as peaches, pears, or apple slices.
Steps to Making and Canning Apple Juice
If you are new to canning or haven’t canned in a while, it may be helpful to review this article on water bath canning at the National Center for Home Food Preservation website.
This apple juice recipe is from the Ball Blue Book Guide to Preserving. The full, printable recipe can be found at the bottom of this article, but these are the general steps for making and canning unsweetened apple juice:
Step 1: Gather the Canning Gear:
- Water Bath Canner with a canning rack
- 6 pint sized canning jars (or 3 quart sized jars)
- Canning lids and bands (new lids for each jar, bands can be reused)
- Jelly bag or cheesecloth
- Candy thermometer, or instant read thermometer
- Canning tools: jar lifter, canning ladle, and funnel
- Plus basic kitchen supplies such as a cutting board, knife, large sauce pot, large bowl, large spoon, and kitchen towels.
Step 2: Extract the Juice from the Apples
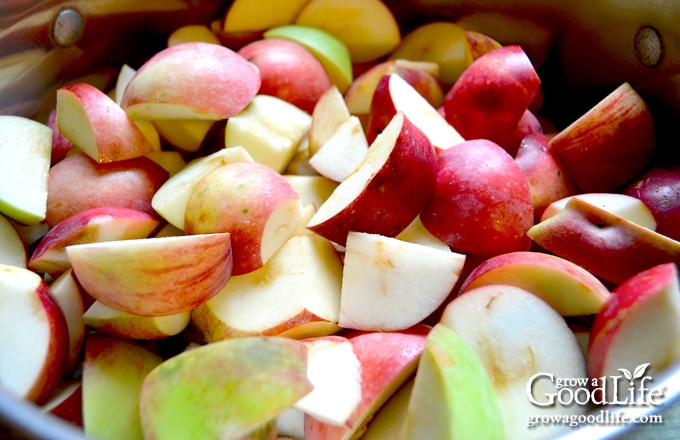
Wash the apples well under clean running water. Remove the stems, blossom ends, and chop into 2-inch chunks. There is no need to peel or core the apples because these will be strained out after cooking.
Place the apples in a large sauce pot, add the water and lemon juice, and cook over low heat until the apples are soft and release their juices. Simmer slowly and avoid overcooking because it can destroy the flavor.
Strain the cooked apples through a damp jelly bag or double layers of cheesecloth in a fine mesh strainer. Let the juice drip for at least 2 hours. Don’t squeeze the jelly bag if you want a clear juice.
For an even clearer juice, cover and refrigerate the juice overnight to let the sediment settle. When you are ready to can, ladle the juice out carefully without disturbing the sediment at the bottom. You will get less juice, but it should be nice and clear.
Discard the solids, or you can use the leftover apple puree to make a small batch of homemade applesauce. Simply run the solids through a food strainer or food mill to remove the peels, cores, and seeds.
While the juice is straining, wash the pot well with hot soapy water and rinse to remove all suds. You will reuse this to heat the juice before canning.
Step 3: Prepare the Canning Equipment
This recipe is for pint-sized jars, but you can use half-pints for kid sized servings, quarts, or even half-gallon jars. All are processed for the same amount of time no matter what size jar you use at altitudes of less than 1,000 feet.
Wash your jars, lids, bands, and canning tools in warm, soapy water. Rinse well, and set aside until you are ready to use them.
Jars must be heated before filling to prevent breakage due to thermal shock. Place the jar rack into the water bath canner, set the jars upright on the rack, and add water to fill the pot covering the jars. Bring the canner to a simmer (180˚F) for 10 minutes, and keep the jars hot until you are ready to fill them.
Step 4: Can the Apple Juice
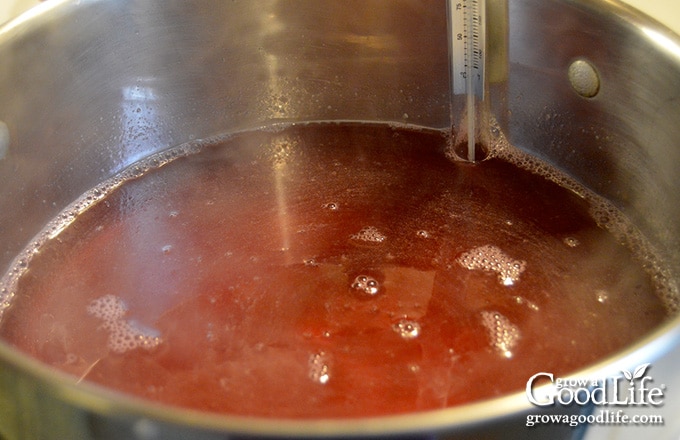
Add the strained apple juice to a large saucepot. Attach the candy thermometer to the pot. Turn the burner on to medium-high heat and warm the juice to 190˚F (88˚C). Do not boil, but adjust the heat to keep the juice at 190˚F (88˚C) for at least 5 minutes.
Spread a dry kitchen towel on the counter. Use the jar lifter to remove a jar from the canner, drain, and place on the towel. Keep the remaining jars in the canner so they stay hot.
With the canning funnel and ladle, add juice to the jar leaving 1/4-inch headspace. Wipe the rim with a damp towel to remove any residue. Center a lid on the jar, place the band over the lid, and screw it on until fingertip tight. Place the jar back into the canner, and repeat with the rest of the jars.
Once the jars are in the canner, adjust the water level so it is covering the jars by two inches, bring the canner to a boil, and process the jars for the times indicated in the recipe below. When processing time is complete, turn off the heat, remove the cover, and let the canner cool down and settle for about 5 minutes.
Spread a dry kitchen towel on the counter, remove the jars carefully from canner, and place on the towel. Keep the jars upright, and don’t tighten bands or check the seals yet. Leave about 1-inch in between jars. Let the jars sit undisturbed for 12 to 24-hours to cool completely.
After the jars have cooled for at least 12 hours, check to be sure jar lids have sealed by pushing on the center of the lid. The lid should not pop up. If the lid flexes up and down, it did not seal. Refrigerate the applesauce and use within a week.
Remove the bands and wash the jars well with warm soapy water to remove any residue. Label, date, and store in a cool, dark place, between 50 to 70 degrees F. Use within 12 to 18 months. Refrigerate your juice once the jar is opened and consume within a week. Yields about 6 pint sized canning jars (or 3 quart sized jars) depending on the juiciness of your apples.
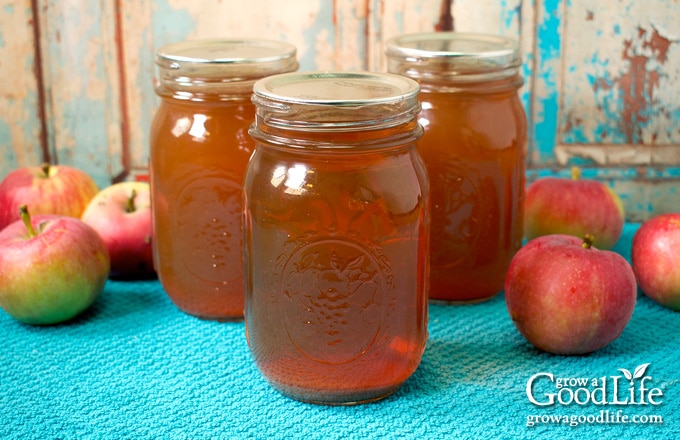
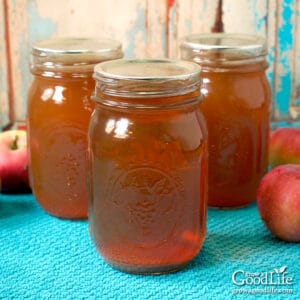
Canning Homemade Apple Juice
Ingredients
- 12 pounds apples stemmed and chopped
- 4 cups water
- 3 tablespoons bottled lemon juice
Instructions
Extract the Juice
- Combine the apples, water, and lemon juice in a large saucepot. Bring the pot to a boil over medium-high heat, and then reduce the heat to low and simmer until the apples are soft, about 10 to 15 minutes. Stir occasionally to prevent sticking, and avoid overcooking because it can destroy the flavor.
- Strain the apple mash through a damp jelly bag or double layers of cheesecloth. Let the juice drip for at least 2 hours. Don't squeeze the jelly bag if you want a clear juice. Discard the solids.
Prepare the Canning Equipment
- Wash your jars, lids, and canning tools in hot soapy water. Rinse thoroughly to remove all suds. Set aside to air dry on a clean kitchen towel.
- Place the jar rack into water bath canner, set the jars on the rack, and add water to cover the jars. Bring the canner to a simmer (180˚F) for 10 minutes, and keep the jars warm until you are ready to fill them.
Can the Apple Juice
- Add the strained apple juice to a clean large pot. Attach the candy thermometer to the pot. Heat the juice over medium-high heat until the temperature is 190˚F . Do not boil, but adjust the heat to keep the juice at 190˚F for at least 5 minutes.
- Spread a dry towel on the counter. Use your jar lifter to remove a jar from the canner, drain, and place on the towel. Keep the remaining jars in the canner so they stay hot.
- Use your canning funnel and ladle to add the hot apple juice to the warm jar leaving 1/4-inch headspace.
- Wipe the rim of the jar with a damp towel. Center a lid on the jar, and screw on the band until it is fingertip tight.
- Use the jar lifter to place the jar back into the canner, and repeat with the remaining jars.
- Once all the jars are in canner, adjust the water level to two inches above the jar tops.
- Cover the canner and bring to boil over high heat. Once water boils vigorously, continue boiling for 10 minutes at altitudes of less than 1,000 ft. Adjust processing time for your altitude if necessary. (See notes below).
- When processing time is complete, turn off the heat, remove the cover, and allow the canner to cool down and settle for about 5 minutes.
- Spread a dry towel on the counter. Use a jar lifter to remove the jars one at a time from the canner. Keep the jars upright, and place them on the towel a few inches apart. Do not tighten ring bands or test the seals yet. Let the jars sit undisturbed for 12 to 24-hours to cool.
- After the jars cool for at least 12 hours, check to be sure jar lids have sealed by pushing on the center of the lid. The lid should not pop up. If the lid flexes up and down, it did not seal. Refrigerate the jar and use up within a week.
- Remove the screw on bands and wash the jars. Label and date the jars. Store your jars in a cool, dark place and use within 12 to 18 months. Refrigerate your juice once the jar is opened and consume within a week. Yields about 6 pint sized canning jars (or 3 quart sized jars) depending on the juiciness of your apples.
Notes
- Processing time for half pints, pints, or quarts 1,001 – 6,000 = 10 minutes, above 6,000 feet = 15 minutes.
- Half-gallons 1,001 – 6,000 = 15 minutes, above 6,000 feet = 20 minutes.
Nutrition
Other Ways to Preserve Apples:
- Spiced Apple Jelly Canning Recipe
- How to Can Apple Slices
- Homemade Applesauce Canning Recipe
- 3 Ways to Dehydrate Apples for Food Storage
40+ Meals in a Jar Pressure Canning Recipes
In this eBook, you will find 50 pressure canning recipes, including 44 meals, along with homemade stocks and bone broths. Recipes include soups, stews, chilis, beans, beef, pork, and poultry. Explore the world of preserving delicious home-cooked meals for all seasons.


I made applesauce the other day, but now have a ton of scraps (peels and cores). Can these be used to make the apple juice or does it need to be the whole apple?
Shelby, Since it’s been a few days, the scraps are probably not good unless you froze them. Apple scraps can be used for juice, but extracting the liquid without adding extra water is necessary to maintain acidity for safe canning. Unfortunately, you won’t end up with much liquid from peels and cores. Next time, consider making apple cider vinegar with them! Here’s a recipe you might find helpful:apple scrap vinegar.
I probably had 100 lbs of apples given to me. I’ve done pie filling, jam apple butter. This is my 3 round of juice.
Yesterday I took my large strainer poured the cooked apples into it. Let it sit when it quit dripping I poured the liquid in a second container. Took my wooden spoon pressed the apples into the bottom of the strainer. This made apple sauce. I threw away the peels left in the strainer. The liquid that had been strained I put in the cloth strained it again., got more applesauce, got more juices .
Joyce, Wow, you have been busy. That sounds like a fantastic way to make the most of those apples!
My mash is so thick I’m not really getting any juice draining out of it…
Connie, If you find that your apple mash is exceptionally thick, consider adding a bit more water to the mixture. This should help to loosen it up, making it easier for the juice to drain out. It’s worth noting that some apple varieties are naturally less juicy than others. As a troubleshooting step, please double-check if you initially started with the recommended 4 cups of water and simmered the apples until they were soft. If, however, you accidentally boiled the mixture, it’s possible that you may have caused some liquid to evaporate or activated the pectin in the apples, leading to a thicker consistency. In either case, a helpful solution would be to return the mixture to the pot, add a little more water, and then simmer it on LOW heat until the apple mash loosens up to a more suitable consistency. Afterward, proceed with straining to extract your apple juice. This should help you achieve the desired results.
Your recipe states 4 cups of water but also states fill to the apples are covered which is much more than 4 cups – ?
Laurie, You’re right, and I appreciate your observation. The 4 cups of water mentioned is a general guideline. Depending on the size and quantity of apple pieces, it may take slightly more or less water to cover them adequately. The main goal is to ensure the apples are covered in water during cooking to extract their juices effectively.
I like the idea of making/canning apple juice, but is it cost effective? Twelve pounds of apples is about $24 for less than a gallon of juice. Do you water it down or drink as is?
Tricia, Making apple juice from scratch is more cost-effective if you have access to a local source of apples or grow your own. The recipe is intended for those who have a surplus of apples during the season and are looking for a way to preserve them. If you have to purchase apples from the grocery store, it may not be as cost-effective. However, making your own apple juice can be a fun and rewarding activity, and you can customize the flavor to your liking. As for watering it down, that’s a matter of personal preference. Some people prefer their juice more concentrated, while others prefer it diluted. You can experiment with different ratios to find what works best for you.
My apple juice is not very dark did I not cook them long enough in the beginning?.
Lisa, The color will vary depending on the apples you use. The skins add color to the juice, too. For example, red and green make brown.
Is the straining to get a clear juice a requirement for canning? If you don’t mind some solids is it ok to leave them? I am hoping to use my Breville juicer, which makes a cloudy juice that does settle/separate, but I like it fine and it doesn’t seem worth the effort to strain that out. Unless it’s unsafe for canning, of course! I have always frozen the juice but this year I’m hoping to put more up by canning. Thanks for your help!
Elaine, You do need to strain out the apple skins, but you can include the pulp if you don’t mind a cloudy juice.
If wanting to make long lasting apple juice, Could I liquidize the apples through a Vitamix to get juice then can that in the water bath as you describe?
Thank you.
Emma, Yes, you can juice the apples using a Vitamix. First, cut out the cores to remove the seeds and cut the apples into pieces to fit. Then, while working in batches, place the cored apples and water into the Vitamix. Cover and start blending on low, then increase to high and blend for about a minute. Transfer the puree to a jelly bag or cheesecloth and strain. You can go ahead and squeeze the bag to press out the liquid. Heat the juice to 190˚F for 5 minutes, and proceed with canning as described in the recipe above.
Is there a difference between leaving the peels on or off?
Marianna, No difference. The peels are strained out.
Made apple sauce in crockpot and turned out great, looking forward to making apple juice.