How to Grow Sage
This post may contain affiliate links, which means that I may receive a commission if you make a purchase using these links. As an Amazon Associate I earn from qualifying purchases.
Looking to grow sage? Our step-by-step guide covers everything you need to know about successfully cultivating sage plants. Explore tips for planting, care, and harvesting sage. Start growing sage today!
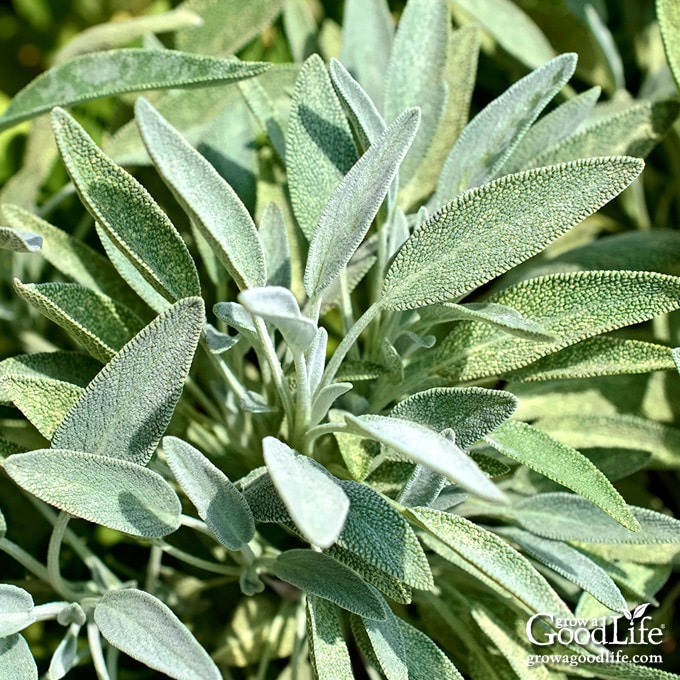
Sage is a superstar in the herb garden. Its aromatic leaves, rich in flavor, have been used for centuries to enhance a wide range of dishes. From hearty soups and roasted meats to flavorful stuffings and savory sauces, sage adds a distinct and delightful taste to your culinary creations.
Sage is an easy herb to grow too, making it a great choice for both experienced gardeners and beginners. But growing sage isn’t just about the flavor it brings to your kitchen. This fragrant herb will also attract pollinators to your garden while repelling several garden pests.
This guide covers everything you need to know, from starting sage from seeds and cuttings, caring for your plants, and how to harvest, use, and preserve sage.
About Sage
Originating from the Mediterranean region, culinary sage (Salvia officinalis) has a rich history deeply intertwined with human civilization. The name “sage” comes from the Latin word “salvus,” meaning “healthy” or “to save,” which reflects its traditional use as a medicinal herb. This evergreen perennial herb belongs to the mint family (Lamiaceae) and boasts an impressive array of culinary and therapeutic benefits.
Throughout the ages, sage has been revered for its remarkable properties. Ancient civilizations such as the Greeks and Romans held sage in high regard, considering it a sacred herb with powerful healing properties. It was believed to bestow wisdom, protect against evil spirits, and promote longevity.
In addition to its revered status, sage played a significant role in traditional medicine. It was commonly used to alleviate digestive issues, soothe sore throats, and aid in treating various ailments. The dried leaves were often brewed into tea or burned as incense for their therapeutic effects.
Fast forward to the present day, and sage continues to be celebrated for its distinctive flavor and versatile uses. As a staple herb in many cuisines worldwide, sage brings a delightfully earthy and slightly peppery taste to dishes. It pairs exceptionally well with poultry, pork, roasted vegetables, and stews, adding a savory depth that elevates the flavor.
Whether using it in your Thanksgiving stuffing, homemade breakfast sausages, infusing it into oils for marinades, or incorporating it into herbal teas, sage adds a touch of aromatic brilliance to your creations.
Common Types of Culinary Sage for Herb Gardens
There are several varieties of culinary sage that are ideal for herb gardens. Here are a few popular types you might consider growing:
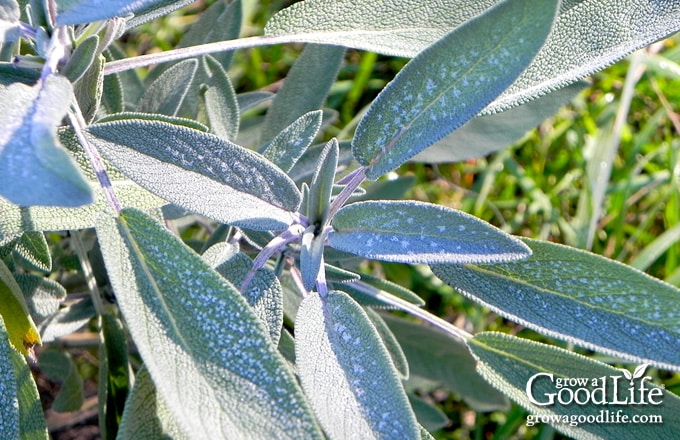
- Common Sage (Salvia officinalis): Also known as garden sage, this is the classic and most widely recognized type. It features gray-green leaves with a slightly fuzzy texture and a strong, earthy flavor. Common sage is a versatile culinary herb used in a wide range of dishes, from roasted meats and stuffing to soups and sauces.
- Purple Sage (Salvia officinalis ‘Purpurascens’): This variety is known for its striking purple-tinged leaves, adding a vibrant touch to herb gardens. Purple sage has a flavor profile similar to common sage but has a milder and slightly sweeter taste. The purple leaves can be used as a garnish, in culinary preparations, or as an ornamental addition to floral arrangements.
- Tricolor Sage (Salvia officinalis ‘Tricolor’): Tricolor sage is a visually captivating variety that boasts leaves with a combination of green, white, and purple colors. It adds a beautiful contrast to herb gardens and container plantings. Tricolor sage has a flavor profile similar to common sage and can be used in recipes, but it is also valued for its ornamental appeal.
- Berggarten Sage (Salvia officinalis ‘Berggarten’): This cultivar of sage is known for its large, broad, silvery-green leaves. It has a milder flavor than common sage, making it an excellent choice for those who prefer a more subtle sage taste in their culinary creations. Berggarten sage is often used in herb butters, sauces, and teas.
- Golden Sage (Salvia officinalis ‘Icterina’): Golden sage is prized for its vibrant yellow-golden leaves, which bring a sunny splash of color to herb gardens. It offers a milder flavor compared to common sage. Besides its culinary use, golden sage is often utilized for its ornamental value in garden borders or container displays.
These are just a few examples of the common types of culinary sage available for your garden. Each variety brings its own unique characteristics in terms of flavor, appearance, and ornamental appeal. You can choose one or multiple types of sage to suit your taste preferences and enhance the visual diversity of your herb garden.
Tips for Growing Sage
Sage is a hardy perennial herb that can withstand various growing conditions. It is resilient to drought and can tolerate a range of temperatures, including both heat and cold. This adaptability makes it easier to maintain and ensures its longevity in the garden.
Sage requires minimal care and attention once established. It is relatively resistant to pests and diseases, reducing the need for frequent monitoring or intervention. With proper planting and a few basic maintenance practices, sage can thrive with minimal effort.
When to Plant Sage
The best time to start growing sage depends on your specific location and climate. Generally, sage is best planted in the spring or fall when the temperatures are moderate, and the soil is workable. Here are some guidelines to help you determine the ideal timing:
- Spring Planting: If you live in a region with cold winters, planting sage in the spring after the last frost date is a good option. This allows the plants to establish themselves during the warmer months and develop a strong root system before facing the summer heat.
- Fall Planting: In areas with hot summers, fall planting is often preferred. Planting sage in the early to mid-fall, around 4 to 6 weeks before the first expected frost, gives the plants time to establish their roots before winter sets in. The cooler temperatures and increased rainfall in fall provide favorable conditions for sage to establish itself before going dormant during winter.
Sage is a perennial herb, meaning it can survive and grow for multiple years under the right conditions. Sage can be grown year-round if you live in an area with mild winters. In colder climates, sage will die back during winter but will regrow from the roots in the following spring.
Best Planting Site for Sage
Since sage is a perennial plant that will return each year, select a permanent planting location to allow it to become established and grow each year.
Sage thrives in full sun but will also tolerate partial shade. Choose an area that receives between 6 to 8 hours of direct sunlight per day to thrive and produce abundant foliage.
Sage prefers well-draining soil with a soil pH level of around 6.0 to 7.0. However, it can tolerate different soil types, including sandy or rocky soils. Avoid waterlogged or overly compacted soil, which can lead to root rot or other fungal issues.
Before planting, prepare the soil by removing any weeds or grass from the area. If the soil is heavy or clay-like, consider amending it with organic matter like compost or well-rotted manure to enhance drainage and nutrient content.
How to Start Sage from Seed
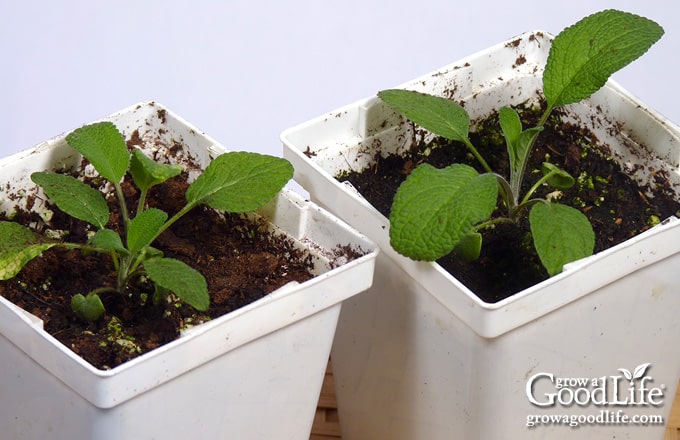
Sage seeds have a reputation for fickle germination rates, so I recommend sowing more seeds than you actually need to increase your chances of success. Patience is also important, as sage seeds can take up to three weeks to germinate.
Following these steps, whether starting sage seeds indoors or sowing them directly in the garden, will set the stage for successful germination and healthy seedling growth.
Sowing Seeds Indoors Under Lights
Starting sage seeds indoors gives you a head start on the growing season and allows you to control the germination conditions. By setting up your seed starting area early and incorporating a seed heat mat, you can create an optimal environment that encourages the successful germination of your sage seeds.
For more information on using grow lights and starting seeds indoors, check out the articles Using Grow Lights for Starting Seeds and 10 Steps to Start Seeds Indoors. Then follow these steps for sowing sage seeds:
- Timing: Sow seeds about 6 to 8 weeks before your last frost date.
- Containers: Select seed trays, pots, recycled containers, or seedling trays with drainage holes. Alternatively, you can use soil blocks that can be planted directly into the ground later, reducing the risk of disturbing the seedling roots during transplanting.
- Soil Mix: Use fresh, well-draining sterile seed-starting mix to provide a light, airy medium promoting healthy root development.
- Sow the Seeds: Moisten the seed-starting mix before sowing the seeds. Place 2 to 3 seeds in each cell or pot, sowing them at a depth of about 1/4 inch. Lightly cover the seeds with the mix and gently pat it down. Sage needs light to germinate, so don’t sow the seeds too deep.
- Provide Ideal Conditions: Create ideal conditions for your sage seeds by covering the seed trays or pots with a humidity dome and placing them in a warm location, ideally between 65°F to 75°F. Keep the soil consistently moist, ensuring even moisture throughout the germination period. Provide bright, indirect sunlight or use fluorescent grow lights to deliver 12 to 16 hours of light per day, promoting healthy seedling growth.
- Germination Period: Sage seeds usually germinate within 10 to 21 days. Once the seedlings emerge, adjust the lights so they are about 2 inches above the seedlings.
- Thin if Needed: Once the plants are several inches tall, remove any weaker or overcrowded seedlings, leaving only the strongest one in each cell or pot.
Direct Sowing Seeds
Direct sowing sage seeds outdoors is another viable method, especially if you have a longer growing season and mild climate. Follow these steps for successful direct sowing:
- Timing: Wait until the danger of frost has passed and the soil has warmed up in spring or early summer. Ensure the soil temperature is consistently around 60°F to 70°F for optimal germination.
- Prepare the Soil: Choose a sunny location with well-drained soil. Loosen the soil and remove any weeds or debris. Rake the soil surface to create a fine seedbed.
- Sow the Seeds: Sow the sage seeds directly into the prepared soil, spacing them about 12 to 18 inches apart. Sow the seeds at a depth of about 1/4 inch. You can also sow multiple seeds in a shallow trench and thin them later, leaving the strongest seedling.
- Watering: After sowing, water the soil gently to ensure good seed-to-soil contact, then keep the soil consistently moist but not soggy until the seeds germinate and the seedlings become established.
- Thinning: Once the seedlings have developed their first set of true leaves, thin them to ensure proper spacing. Remove the weaker seedlings, leaving only one healthy seedling per spacing recommendation.
- Learn More: You can learn more about sowing seeds outdoors in this article: How to Direct Sow Seeds.
Propagating Sage from Cuttings
Propagating sage from cuttings is an excellent way to multiply your sage plants and ensure genetic consistency. Follow these steps to propagate sage from cuttings successfully:
- Timing: The best time to take sage cuttings is in late spring or early summer when the plants are actively growing and before they bloom.
- Selecting Stems: Choose healthy stems approximately 4 to 6 inches long. Use sharp gardening shears, and make a clean cut just below a leaf node (the point where the leaf connects to the stem).
- Preparing the Cuttings: Remove the lower leaves from the bottom 2 inches of the cutting, leaving several sets of leaves at the top.
- Rooting the Cuttings: Fill a small pot or seed tray with a well-draining rooting medium. A mixture of equal parts perlite and vermiculite or a commercial seed-starting mix works well. While not necessary, you can use a rooting hormone to speed up the process. Make holes in the medium using a pencil or your finger, and insert the cuttings about 2 inches deep. You can plant multiple cuttings in the same container just keep about 2 inches between them.
- Providing Humidity: Create a mini greenhouse environment by covering the container with a clear plastic bag or cutting the bottom out of a plastic water or soda bottle and placing it over the cutting.
- Monitoring the Environment: Place the pot or tray in a warm location with indirect sunlight. Maintain a temperature of around 70°F to 75°F for optimal rooting. Keep the rooting medium consistently moist but not soggy. Check the moisture level regularly and mist the cuttings if necessary.
- Ensuring Successful Rooting: After about 4 to 6 weeks, gently tug on the cuttings to check for resistance, indicating the development of roots. Once the cuttings have developed a healthy root system, they are ready to transplant to their permanent growing location.
By propagating sage from cuttings, you can create new plants with identical characteristics to the parent plant. With the right timing, preparation, and care, you can expand your sage garden and enjoy an abundant harvest of this versatile herb.
How to Transplant Sage Seedlings
Your sage seedlings are ready to transplant outdoors once the danger of frost has passed and the soil has warmed and drained. Check your local frost dates to determine the appropriate time for your specific area, and then begin hardening off your seedlings about a week before you plan to transplant.
Whether you started sage from seed indoors, purchased transplants from a greenhouse, or propagated plants from cuttings, here’s a guide on when and how to transplant sage seedlings:
- Hardening Off: Before transplanting, it’s important to gradually acclimate the seedlings to the outdoor conditions in a process called hardening off. Start by placing the seedlings outdoors in a sheltered location for a few hours each day, gradually increasing their exposure to sunlight and outdoor elements over the course of 7 to 14 days. This helps the seedlings adjust to temperature fluctuations, wind, and direct sunlight. You can learn more in this article: How to Harden Off Seedlings.
- Preparing the Planting Area: Choose a planting site that offers full sun, as sage thrives in bright sunlight. Ensure the soil drains well to prevent water logging, as excessive moisture can cause root rot. Amend the soil with compost or organic matter to improve its fertility and drainage if necessary.
- Transplanting: Dig a hole slightly larger than the seedling’s root ball. Gently remove the seedling from its container, taking care not to damage the delicate roots. Place the seedling in the hole, ensuring that it sits at the same depth as it was in the container, then backfill the hole with soil, gently firming it around the base of the seedling. Repeat with any additional seedlings spacing them about 12 to 18 inches apart or according to the spacing requirements for the variety you are growing.
- Watering and Mulching: To help your newly transplanted plants thrive, water them generously and consistently until they are established and begin to show new growth. Once they have taken root, you can reduce watering. Additionally, adding a layer of organic mulch around the base of the plants will help to retain moisture, prevent weed growth, and stabilize the soil temperature.
By following these steps for transplanting sage seedlings and providing them with the right conditions in the garden, you’ll give them the best chance to thrive and continue their growth toward becoming mature sage plants.
Tips for Growing Sage in Containers
Sage is a versatile herb that thrives not only in garden beds but also in containers, making it an excellent choice for those with limited space or who prefer to cultivate herbs on a smaller scale.
Growing sage in containers offers the added advantage of mobility, allowing you to position the plant strategically for optimal sunlight and convenience. Here’s what you need to know about successfully growing sage in containers:
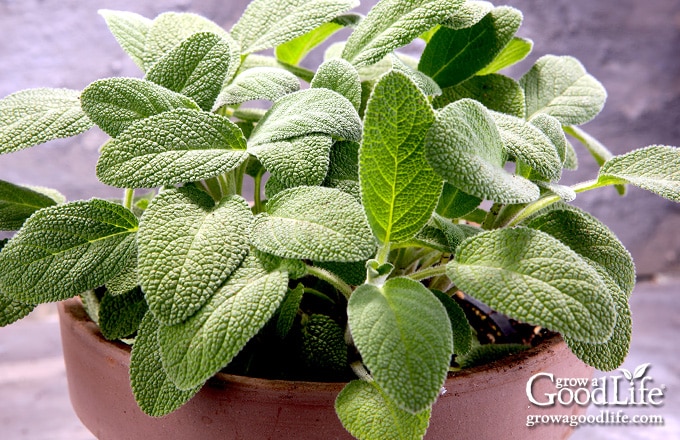
- Container Size: Terracotta clay pots are an ideal choice for growing sage. The porous clay material allows for good air circulation and drainage, which can help prevent waterlogged soil and potential root rot. Choose a container that provides sufficient space for the sage plant to grow and develop a healthy root system. A container with a diameter of at least 12 inches and a depth of 8 to 10 inches is recommended. This size allows the roots to spread comfortably while providing stability to the plant.
- Soil Requirements: Use a well-draining potting mix specifically formulated for container gardening. You can also create a mix by combining equal parts of quality potting soil, perlite, and compost. The well-draining soil helps prevent soggy soil, which can cause fungal issues in sage plants.
- Placement and Sunlight: Select a sunny location for your container-grown sage. Place the container where it receives at least 6 to 8 hours of direct sunlight daily. You can move the container to follow the sun’s path or provide supplemental light using grow lights if necessary.
- Watering and Drainage: Containers require regular watering as they tend to dry out faster than garden soil. Check the soil’s moisture level by inserting your finger into the top inch. Water the sage when the soil feels dry at that depth, ensuring thorough watering until water drains from the bottom of the container. Avoid overwatering, as sage prefers slightly drier conditions.
- Fertilizing: Container-grown sage may benefit from occasional fertilization to ensure adequate nutrient supply. Apply a balanced organic fertilizer following the package instructions, typically once every 4 to 6 weeks during the growing season. Avoid excessive fertilization, as it can lead to an imbalance and negatively affect plant health.
- Maintenance: Regularly monitor your container-grown sage for any signs of pests or diseases. Check for adequate drainage and prevent waterlogging, which can cause root rot. Prune back any leggy or overgrown branches to maintain the plant’s shape and promote bushier growth.
Growing sage in containers offers flexibility and convenience while providing a bountiful harvest of aromatic leaves. With the right container size, well-draining soil, proper sunlight, and regular maintenance, you can enjoy the beauty and flavor of sage in compact gardening spaces. You can learn more about growing edibles in containers in the article: How to Grow Edibles in Containers.
Sage Plant Care
Sage is easy to care for and doesn’t demand a great deal of attention. By following a few simple practices, you can ensure the vitality and longevity of your sage plants without feeling overwhelmed:
- Watering: Sage prefers slightly drier conditions, so water your plants when the top inch of the soil feels dry. Water deeply and thoroughly, allowing the water to reach the root zone. Increase watering frequency during hot, dry periods to maintain adequate moisture levels.
- Weeding: Regularly weed the area around your sage plants to prevent competition for nutrients and reduce the risk of pests and diseases. Be gentle when removing weeds to avoid disturbing the shallow root system of sage. Check out this article for Tips for Controlling Weeds in the Garden.
- Mulching: Apply a layer of organic mulch, such as straw or wood chips, around the base of your sage plants. Mulching helps retain moisture, suppress weed growth, and regulate soil temperature. Maintain a mulch depth of around 2 to 3 inches, ensuring the mulch doesn’t come in direct contact with the sage stems. Learn more about How Mulch Helps Your Garden.
- Fertilizing: Sage is a relatively low-maintenance herb and doesn’t require heavy fertilization. In most cases, organic matter added during soil preparation is sufficient. However, if your soil is poor or lacks nutrients, you can apply a balanced organic fertilizer once in early spring. Follow the manufacturer’s instructions for application rates.
- Pruning: Pruning sage helps maintain its shape, promotes bushier growth, and prevents legginess. In early spring, before new growth begins, prune back the previous year’s growth by cutting about one-third of the plant’s height. Remove dead or diseased branches throughout the growing season to keep the plant healthy.
- Common Pests and Diseases: Sage is generally resistant to pests and diseases, but some issues may arise. Common pests include aphids, spider mites, and slugs. You can use organic insecticidal soaps or wait for natural predators like ladybugs to control pests. Fungal diseases like powdery mildew or root rot can also affect sage. To prevent these, ensure proper air circulation, avoid overwatering, and provide well-drained soil.
By following these guidelines for sage plant care, you’ll help maintain the vigor and health of your sage plants.
Overwintering Sage
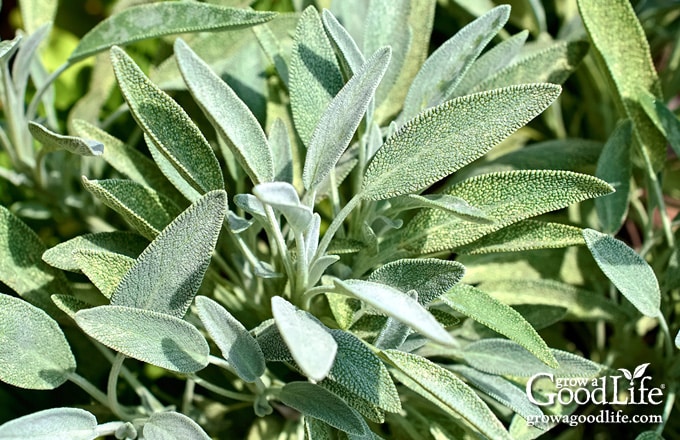
Sage is a hardy perennial herb that can survive winters in many regions without any special care. However, these tips can help ensure its successful overwintering and encourage healthy growth the following year:
- Pruning: Prune the sage plant in late summer or early fall before the first frost. Remove any flower stalks, dead or damaged branches, and trim back the plant’s overall size. This will help promote good air circulation and reduce the risk of disease or pest issues during the winter.
- Watering: Reduce watering frequency as the weather cools down. Sage plants are susceptible to root rot in soggy soil, so ensure the soil is well-drained.
- Mulching: Before winter arrives and after the ground has frozen, apply a layer of organic mulch around the base of the sage plant. Don’t mulch too soon. You want the plant to go dormant naturally. Once the ground is frozen, the mulch will then help insulate the roots and protect them from extremely cold temperatures. Use materials such as straw, leaves, or wood chips for effective insulation.
By implementing these care practices, you can increase the chances of successful overwintering for your sage plants and ensure their longevity in your herb garden.
If you’re growing sage in containers, it’s convenient to transition the plants indoors, where they can thrive. Sage adapts well to indoor environments, making it an excellent choice for indoor herb gardens. For more information on growing herbs indoors, you can explore the article, Herbs that Thrive Inside, which provides tips for growing herbs in indoor settings.
Sage as a Companion Plant
In addition to its culinary and medicinal uses, sage is a valuable companion plant in the garden. When strategically planted alongside other herbs and vegetables, sage offers numerous benefits, including pest repellence and attraction of beneficial insects.
Sage has natural properties that repel certain pests, making it a helpful ally in pest management. Its strong aroma helps deter pests like cabbage moths, carrot flies, and some species of beetles. Interplanting sage with susceptible plants can create a natural barrier and reduce the risk of pest damage.
Sage flowers bloom in vibrant hues, attracting beneficial insects such as bees, butterflies, and predatory wasps. These insects play a vital role in pollination and prey on harmful garden pests, contributing to the overall health of your garden ecosystem.
Sage thrives alongside a variety of other herbs and vegetables. Some compatible companions include:
- Beans: Sage can assist in deterring bean beetles, a common pest that can damage bean plants. By planting sage near beans, you can help protect them from these pests and promote healthier bean growth.
- Cabbage Family: Sage is known to repel pests like cabbage moths and cabbage loopers, which can harm cabbage family crops. By planting sage near broccoli, cauliflower, cabbage, kale, and other brassica vegetables, you can help deter these pests and reduce the risk of infestations.
- Carrots: Sage repels carrot rust flies, a common pest that can damage carrot plants. Planting sage near your carrot patch can help deter these flies and protect your crop.
- Herbs: Sage is an excellent companion when planted with other herbs, such as rosemary, thyme, oregano, parsley, and basil. When planted together, they can repel pests, support each other’s growth, and attract a diverse range of beneficial insects to the garden.
- Strawberries: Sage can deter slugs and snails, which are common pests that can damage strawberry plants. By planting sage around your strawberry patch, you can help protect your strawberries from these slimy intruders.
- Tomatoes: Sage is a natural deterrent for harmful insects that commonly affect tomato plants, such as hornworms and whiteflies. By planting sage near your tomato plants, you can create a protective barrier and minimize the risk of infestations.
Consider the spacing when using sage as a companion plant and allow enough room for each plant to grow and develop fully. You can plant sage directly in the garden bed or in containers placed near other compatible plants.
Using sage as a companion plant can enhance your garden’s overall health and productivity. Its pest-repellent properties and ability to attract beneficial insects contribute to a thriving ecosystem, reducing the need for interventions and promoting a more sustainable approach to gardening.
How to Harvest Sage
Sage leaves can be harvested once the plant is well established, typically after the first year of growth. Harvest the leaves in the morning when the essential oils are most concentrated for the best flavor. Avoid harvesting during wet weather to prevent the spreading of mold or mildew spores.
Gently pluck individual leaves from the sage plant. Alternatively, you can trim entire stems to encourage new growth. Use clean, sharp scissors or pruning shears to make clean cuts.
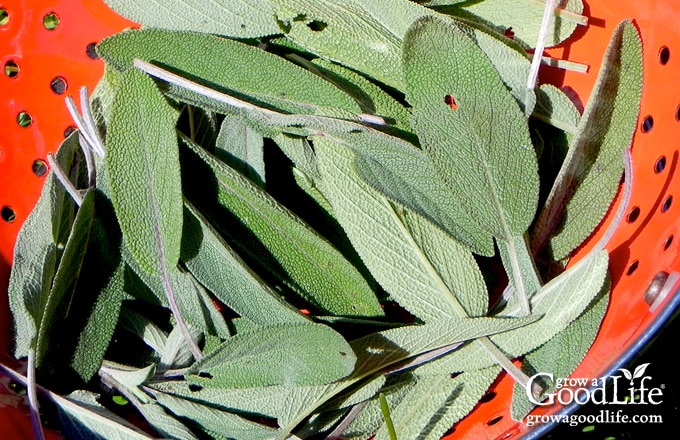
Regularly harvesting sage leaves promotes bushier growth and encourages the plant to produce more foliage. Aim to harvest no more than one-third of the plant at a time, allowing it to recover and continue thriving.
Sage is extremely cold hardy and established plants can withstand frosts and tolerate temperatures down to approximately 20°F before going dormant for winter. While the exact hardiness of sage can vary depending on the specific cultivar and growing conditions, I have dug through the snow to harvest sage for Thanksgiving dinner many times.
How to Preserve Sage
You can preserve sage to enjoy the flavor throughout the year. Here are two common methods for preserving sage:
Freezing Sage
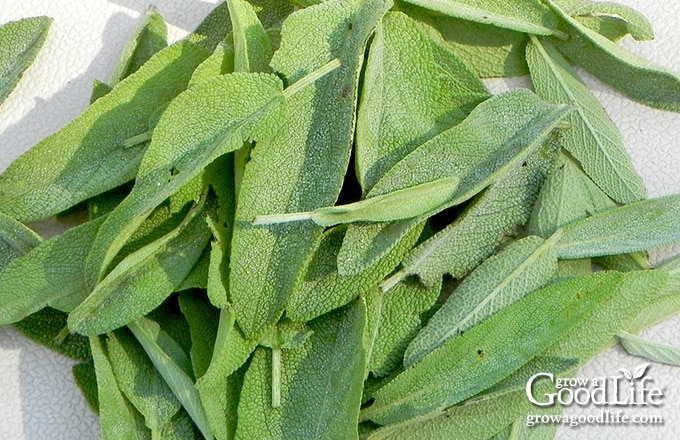
Freezing is a simple and effective way to preserve sage leaves. The thick leaves hold up very well in the freezer. Wash the leaves, pat them dry, and place them in a single layer on a baking sheet. Freeze the leaves until they are firm, and then transfer them to a freezer-safe bag or airtight container. Frozen sage can be chopped and used directly in cooked dishes without thawing.
Drying Sage
You have two options to dry sage: air drying or using a food dehydrator. For air-drying, gather small bunches of sage and fasten them with a rubber band. Hang the bundles upside down in a cool, dry location that is not exposed to direct sunlight. After the leaves have completely dried and they can easily break apart, take them off the stems and store them in airtight containers in a cool, dark area. For more information on drying herbs, check out this article: How to Harvest, Dry, and Store Herbs.
Ways to Use Sage
Both fresh sage leaves and dried sage adds a distinctive flavor to a wide range of dishes and beverages. Here are some ideas for incorporating sage into your meals, herbal teas, and even homemade cleaning products:
- Culinary Pairings: Sage pairs well with roasted meats, poultry, sausages, and stuffing. Its earthy and slightly peppery flavor complements hearty dishes like roasted vegetables, pasta sauces, and soups. It can also add a unique twist to bread, butter, and cheese recipes.
- Infused Oil and Vinegar: Create infused sage oil or vinegar by steeping sage leaves in a high-quality oil or vinegar. You can then use these infused ingredients in cooking and make salad dressings, marinades, and homemade condiments.
- Herbal Tea: Sage leaves can be steeped in hot water to make a soothing and aromatic herbal tea. Simply pour hot water over fresh or dried sage leaves and let them steep for a few minutes. Add honey or lemon for additional flavor if desired.
- Household Uses: Sage’s natural antimicrobial properties make it a great ingredient for homemade cleaning products. Infuse sage leaves in vinegar, then combine 1/2 cup infused vinegar with two cups of water in a spray bottle. Use it to clean almost any surface in your house (except marble) for a fresh and herbaceous scent.
—
Sage is a resilient and adaptable plant that flourishes in herb gardens, producing fragrant leaves and attractive foliage. This guide covers everything you need to know about growing sage, including planting, maintenance, harvesting, and preservation. By following these instructions, you can successfully grow sage and use it in various culinary dishes for its delicious flavor. Why not give it a try and have this flavorful herb readily available whenever you need it?
Good planning is key to a successful vegetable garden
Whether you are new to growing your own food or have been growing a vegetable garden for years, you will benefit from some planning each year. You will find everything you need to organize and plan your vegetable garden in my PDF eBook, Grow a Good Life Guide to Planning Your Vegetable Garden.

