How to Grow Pumpkins
This post may contain affiliate links, which means that I may receive a commission if you make a purchase using these links. As an Amazon Associate I earn from qualifying purchases.
Looking to harvest your own pumpkins this fall? With this ultimate care guide, you’ll be harvesting homegrown pumpkins right from your backyard vegetable garden. Learn how to grow pumpkins with these tips.
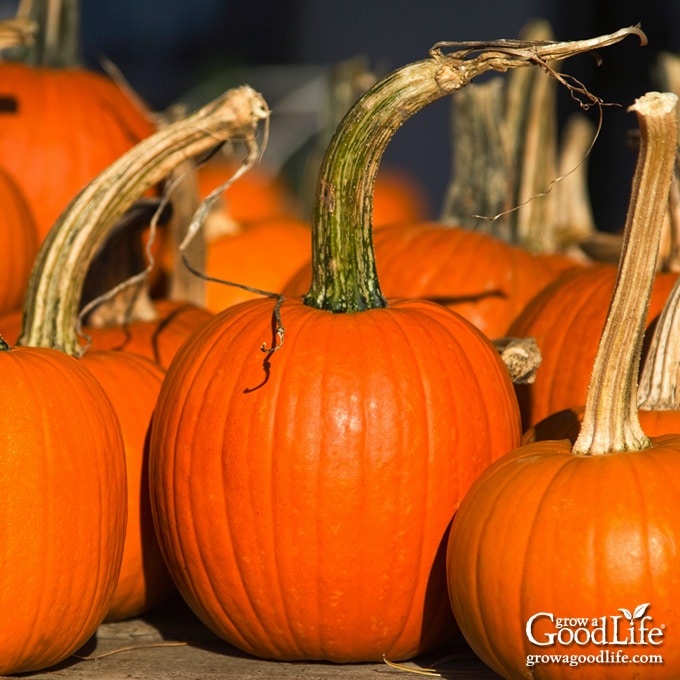
Pumpkins are a great addition to any garden because they are easy to grow, and provide an abundant harvest that can be used in so many different ways. Pumpkins can be puréed into soups, stuffed and roasted in the oven, and made into pumpkin pie.
However, pumpkin’s greatest benefit is their long-term storage capability. Pumpkins can keep for several months when stored in a cool location, making them a great crop to grow for winter food storage.
In this guide, we’ll be covering everything you need to know about growing pumpkins from seed to table. From choosing the right pumpkin variety, to planting seeds, we’ll walk you through every step of the process. Here’s everything you need to know to get started!
About Pumpkins
Pumpkins are a winter squash in the genus Cucurbita, and are often associated with the fall season and Halloween. Squash is one of the oldest domesticated plants, with evidence of having been cultivated in Central America as far back as 9,000 years ago.
Pumpkins are a warm season annual that takes all summer to grow and ripen mature fruit. The seeds are sown spring as soon as all danger of frost is past. The vines spread out, bloom, and develop fruit.
Common Types of Pumpkins
On average, pumpkins can be quite large. One of the largest varieties of pumpkin, Dill’s Atlantic Giant can produce pumpkins that are 200 pounds at full maturity. On the contrary, cute mini types of pumpkins are available too, such as the Jack Be Little variety.
When selecting pumpkin varieties to grow, think about how your will use them. Pumpkins range from edible types perfect for baking, roasting, and pureeing into soups, to ornamental types ideal fall decorating, to giant pumpkins that are fun to grow.
Culinary Pumpkins
Any of the culinary pumpkins can be preserved and used for soups, baked goods, pumpkin pies, and edible seeds, but some are bred specifically for certain uses:
- Pie Pumpkins: If you are looking forward to growing pumpkins mostly for making pies, choose pie pumpkins. These have been bred for good yields, sweet flavor, and dry, smooth flesh without a stringy texture. Varieties of pie pumpkins include Baby Pam, Cinnamon Girl, Cheese, New England Pie, Pumpkin Pie, Sugar Pie, or Winter Luxury.
- Pepita Pumpkins: If you love snacking on pumpkin seeds, but don’t like the shells, consider growing Oilseed or Styrian pumpkin varieties. Pepita Pumpkins have seeds that don’t require shelling. The flesh is edible, and the hull-less seeds are perfect for roasting. Varieties include Naked Bear, Good Egg Godiva, Kakai Hull-less, and Pie Pita Hull-less.
- Other Edible Pumpkins: Jack-Be-Little is a cute, small, miniature decorative pumpkin that is also good for eating, especially stuffed and roasted in the oven. Jarrahdale is a bluish-grey colored pumpkin with sweet, dark orange flesh that is excellent for eating, and can be roasted, purred, and used in baked goods.
Ornamental Pumpkins
Any type of pumpkins used for fall decorating along with your classic carving Halloween jack-o-lanterns. Most of the classic large orange Halloween pumpkins are not great for fresh eating, and can be flavorless and stringy. However, they can be used to feed livestock. We keep a good supply in storage for our chickens to enjoy during the winter months.
- Carving Pumpkins: While any pumpkin can be used for Halloween jack-o-lanterns, some have been developed specifically for carving. They range from small to large size, round or oblong shaped, with prominent ribs, sturdy stems, and thin shells. Halloween pumpkins include Champion, Early Giant, Gumdrop, Howdon, Jack O’Lantern, Racer, Renegade, and Tom Fox.
- Giant Pumpkins: If your goal is to have fun or try to compete with your neighbor or at your local state fair, consider growing giant pumpkins. Types of large pumpkins include Dill’s Atlantic Giant, Big Max, and Mammoth Gold.
- Small Pumpkins: Cute, little miniature pumpkins that can be used table decorations, carving, or even painted by children. Some small pumpkin varieties include Baby Bear, Gumdrop, Jack Be Little, and Wee-B-Little.
- White Pumpkins: These albino pumpkins have been bred to have naturally cream white skins: Casper, Lumina, Polar Bear, Shiver, and Snowball.
If you are growing pumpkins in areas with short summers, be sure to choose pumpkin varieties with fast maturity times, so they will be ready to harvest before the winter frost.
Tips for Growing Pumpkins
Pumpkins are notorious for needing a lot of time to grow, plenty of space to spread out, and lots of nutrients to nourish the plants throughout the growing season. But if you can provide these three simple things, then you’re bound for a perfect pumpkin harvest. Here are tips for growing pumpkins:
When to Grow Pumpkins
Pumpkins thrive best in warm temperatures, are especially sensitive to cold, and are killed by frost. Pumpkins have a long growing season and take all summer to develop a full-sized ripe pumpkin, between 75 to 120 frost-free days depending on the variety. So it is important to get them started as early as you can.
Plan on planting pumpkin seedlings or direct sowing seeds several weeks after all danger of frost is past, and once the soil has warmed to at least 65˚F. The time to start seeds will depend on your last estimated frost date for your area. You can find your last frost date by contacting your local extension office or enter your zip code here at PlantMaps.com.
If you want to give your plants a head start, you can sow seeds indoors under lights approximately 4 weeks prior to your last frost date, and transplant to the garden after all danger of frost is past, and the soil has warmed.
How to Plant Pumpkins
This warm season crop needs full sun, well-draining fertile soil rich with organic matter, and plenty of space for the vines to spread out. Choose an area that receives more than 6 hours of full sun per day, and plenty of room for the vines to spread out.
You can start pumpkin seeds indoors under lights, purchase seedlings from a garden nursery, or direct sow seeds in the garden.
How to Prepare the Garden Bed
Pumpkins are famous for being heavy feeders and will require a hearty dose of nutrients to sustain them throughout their lifespan. Prior to planting your pumpkins, prepare your garden beds by removing weeds, and nourishing the soil with a good dose of finished compost. If the weather has been dry, water the beds well the day before you transplant or sow seeds.
You can plant pumpkins one of two ways, in hills or mounds, and in raised rows. If you wish to keep the vines in the garden, choose an area in the center of a large bed to plant your pumpkins, and allow the vines to ramble. Alternatively, you can locate your pumpkin patch in a corner of the garden, and allow the vines to wander out into your yard.
To prepare a hill, dig a hole about 8 inches deep and fill it with aged compost, and a slow release organic fertilizer, mix it well to combine with the native soil, and then form a mound that is about 6-inches high, 2 feet in diameter. Each hill can grow up to 3 plants. If you’re planting with multiple hills, then each hill should be spaced apart 4 to 8 feet.
To make watering easier, smooth the top of the hill, and shape it into a shallow depression to help hold water. When watering the plants, simply fill the bowl and let the water soak in deeply to the roots.
If you are planting your pumpkins in rows, space your rows 6 to 10 feet apart to ensure adequate space for the vines. Mark the rows, and dig a trench about 6-inches deep. Fill it with finished compost, and a slow release organic fertilizer. Mix to combine and form your rows.
Starting Seeds Indoors
To get a head start on your pumpkin plants, start seeds indoors about 4 weeks before the last expected frost date for your area. Sow in containers that are at least 4-inches wide to support the quick growing plants, and have plenty of holes in the bottom for drainage.
Fill the pots with pre-moistened potting mix, poke holes in the center, about 1/2-inch deep, and add 1 or 2 seeds. Cover the seeds with soil, and mist the soil surface with water. Cover with a humidity dome to hold in moisture, and place the container in a warm location or on a seedling heat mat. Move the plants under grow lights once the seeds sprout. Learn more with this article: How to Start Seeds Indoors.
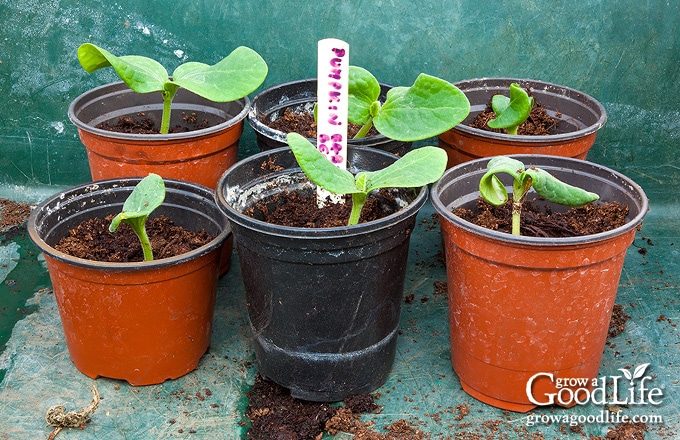
Transplanting Seedlings
Plant pumpkin transplants once the soil warms, and after all danger of frost is past. If you have purchased transplants, or started your seedlings indoors, you will need to harden off your plants prior to transplanting.
Hardening off is the process of adapting your young seedlings to the outside sun and elements. For two weeks, expose your transplants to sunlight for a few hours every day, gradually adding more hours of sunlight until your plants are able to tolerate living outdoors permanently. Learn more about hardening off seedlings in this post: How to Harden Off Seedlings.
Prepare your garden beds ahead of time. If the weather has been dry, water the bed thoroughly the day before you plant. Choose a cloudy day with no wind and transplant in the late afternoon or evening to give your plants time to adjust without the additional challenge of the sun.
Each hill can support 3 pumpkin plants. Space the seedlings out every 18 to 36 inches apart from each other if growing in rows. Water the seedlings well after planting.
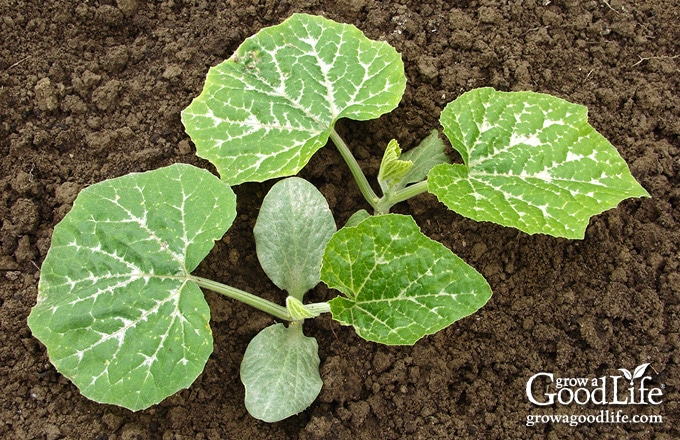
Direct Sowing Seeds
Sow seeds in hills or rows about 2 weeks after your last frost and once the soil has warmed to 65˚F. Pumpkin seeds will germinate in soil temperatures ranging from 60˚F to 105˚F, and will sprout in 5 to 10 days. Germination will take longer at cooler temperatures. So it is best to wait for warmer weather.
- Hills: Direct sow your seeds about 2-inches deep, sowing about 5 seeds per hill. Thin the seedlings to 3 per hill when they are 3-inches tall. Snip the unwanted seedlings with scissors at the soil level so you won’t damage the other plants.
- Rows: If you are planting your seeds in rows, sow your pumpkin seeds about 6 to 12 inches apart in each row. There should be approximately 6 to 10 feet in between each row. When the sprouts begin to grow, thin them until they are spaced out every 18 to 36 inches apart from each other.
Water well at planting time, and keep the soil evenly moist until the seeds sprout and the plants become established.
How to Care for Pumpkin Plants
Once established pumpkin plants are easy to care for, but they do need a little bit of attention in order to grow and produce fruit. Follow these tips for proper care to help ensure a bountiful harvest this autumn.
Watering
Not only are pumpkin plants heavy feeders, but they have a voracious thirst as well. They require about 1-inch of water weekly either by rain or hand watering, especially when the fruit begins to set.
Water your plants in the morning or early afternoon. Try your best to avoid splashing water on the fruit or foliage, as this can open your pumpkin up to the possibility of disease. Use drip irrigation, soaker hoses, or hand watering with a watering wand to deliver water to the base of the plants.
Mulching and Weeding
Mulching has many benefits to your garden, including pest prevention, moisture retention, and weed suppression. It would be extremely beneficial to add organic mulch to cover all the bare soil at planting time. Mulch with a layer of straw or shredded leaves keeping it a few inches away from the stems of your seedlings so it doesn’t smother the plants. Learn more about How Organic Mulch Helps Your Garden.
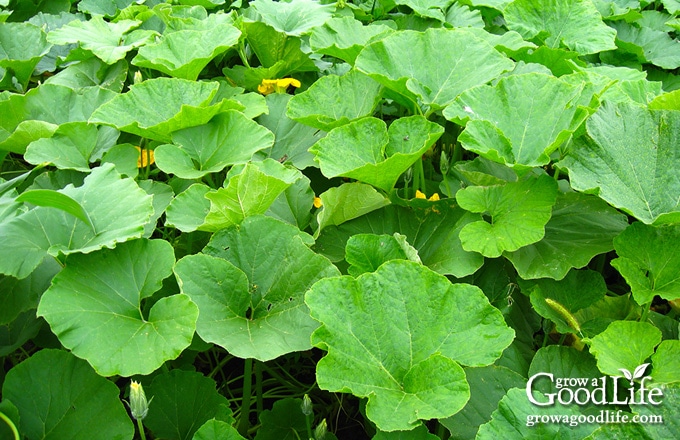
While mulch will help suppress weeds, some weeds will grow through. The garden should be weeded regularly, especially in the early stage. Once the pumpkins grow, their leafy covering will shade the soil, preventing the weeds from sprouting. Also see Tips for Controlling Weeds in the Garden.
Fertilizing
If you worked in a good quality of compost and slow release fertilizer when you prepared the garden beds for planting, you are off to an excellent start.
It is also helpful to fertilize young pumpkin plants that are about 1 foot in length with a high-nitrogen fertilizer. Nitrogen is the element responsible for developing strong foliage growth.
Once your plants form flower buds and right before they bloom, switch over to fertilizer that is high in phosphorous. Phosphorous is an element that encourages strong flower growth, which is essential to the development of a pumpkin.
Pollination
Like cucumbers and melons, pumpkins produce both male and female blossoms on the same plant. The female blossoms grow fruit, but only if pollinated by a male flower. The pollen is distributed naturally as bees and other pollinators go from blossom to blossom collecting nectar.
You can attract bees and other pollinators by growing flowers nearby. However, if the bees are not doing their job, you can hand-pollinate the blossoms. I like to use a small paintbrush or cotton swab to collect the pollen off of the stamen from the male flower, and gently roll the pollen onto the center of the female flower. Repeat this action until all female flowers have been pollinated.
Pruning
As your plant enters the later stages of growth, pruning starts to play a more important role in fruit development. When a few pumpkins have just started forming, prune the fuzzy end of the vine. Doing this redirects your plant’s energy. Your pumpkin will focus on developing fruit rather than growing more vines and foliage.
Pumpkin plants develop three types of vines. The first is the main vine that grows at the center of the plant. Secondary vines sprout from the main vine, and tertiary vines sprout from the secondary vines. When fruit is developing, gardeners should completely prune all tertiary vines and trim back the secondary and main stem to about 15 feet.
Turning Pumpkins
Some gardeners prefer to rotate their pumpkins as they grow to encourage a nice, even shape. This is purely for aesthetic purposes, and not a necessity to grow pumpkins. If you do opt to turn the fruit, do it with extreme caution as not to damage the vine and stem.
Raise the Fruit Off the Ground
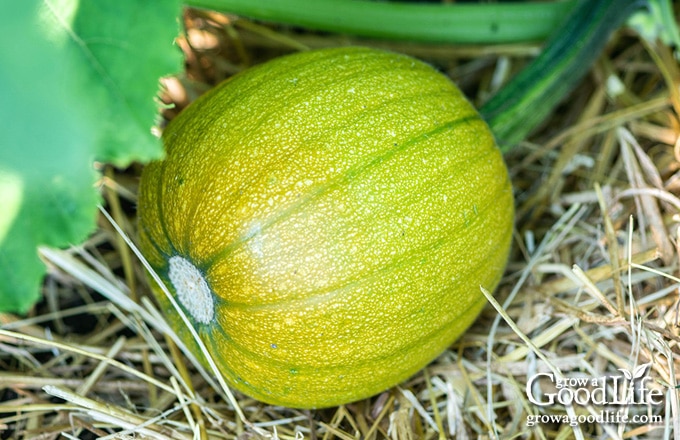
Pumpkins can rot or become damaged by pests if left to sit on wet ground. So it’s a good idea to raise the fruits off the ground using a layer of straw, a wooden board, or melon cradle. By doing this, you reduce the likelihood of the pumpkin succumbing to soil born bacterial or fungal infection as well.
Common Pests and Diseases
Pumpkin plants are susceptible to a few different garden pests and diseases. Here are some to watch for:
Cucumber Beetles
Cucumbers beetles are small spotted or striped insects that attack all members of the cucurbit family, including cucumbers, squash, pumpkins, and melons. Signs of cucumber beetle damage include holes in flowers and leaves, stunted plant growth, and scraped fruit.
Hand pick adult beetles, and crush the orange egg clusters found under the leaves. Rotating crops from year to year can prevent an early infestation. In addition, mulching the area around the base of your plants is also helpful.
Squash Bugs
Squash bugs are also common pests that target crops in the cucurbit family. These insects feed on foliage by piercing and sucking the sap from the plant. Excessive feeding kills the foliage and can cause the plant to struggle and reduce yields.
You will find them gathered in clusters near the crown of the plant, and under leaves. They can overwinter in plant debris, and other sheltered locations. Clean up the garden at the end of each season, and rotate your crops to prevent the early emerging squash bugs from easily finding your plants.
Squash Vine Borer
The squash vine borer is a type of moth larvae that attacks pumpkin plants by burrowing themselves in the stems of the plant. This action causes sudden weakening of the plant, and oftentimes results in the plant’s death.
Squash vine borers are incredibly hard to control once they’ve made their presence known, so the key to never having to deal with them is prevention. Squash vine borers appear during the mid-summer, and are less likely to burrow into a mature, fortified plant.
By starting your pumpkin plant as early as possible, so your pumpkin vines will be well established once vine borers arrive. In addition, natural pest deterrents such as diatomaceous earth can be sprinkled around the base of your plant.
Powdery Mildew
This fungal disease gets its name from the powder-like substance that coats the foliage of your plant. As time progresses, powdery mildew will cause your foliage to die.
If you notice signs of powdery mildew on your plants, you can prevent it from spreading if you act fast. The fungus is carried by the wind and can infect other nearby plants. To reduce infection, prune all signs of powdery mildew and completely destroy the affected foliage. Treat the remainder of your plant with a solution of 1 teaspoon of baking soda combined with a quart of water to kill any residual bacteria.
Powdery mildew is often the results of poor air circulation combined with wet foliage. Always remember to plant your pumpkins in full sunlight to speed up moisture evaporation, avoid wetting the leaves when watering your pumpkins, and space your plants accordingly to allow airflow to pass through.
Anthracnose
Anthracnose is another fungal disease that is identifiable by dark spots all over your plant. Wet, warm conditions are a recipe for the fungus to thrive and spread all over your garden.
Tragically, when anthracnose hits your plants, the best form of control is totally destroying the infected plant, which is why stringent prevention is the key to stopping it altogether. Prevent waterlogged soil by planting your pumpkins in well-draining soil enriched with compost. In addition, watering your plants close to the base of the plant will reduce the risk of damp foliage.
When and How to Harvest Pumpkins
Harvest fully mature pumpkins in late summer and early fall. Here are ways to tell if your pumpkin is ready to harvest:
- Days to Maturity: Depending on the variety and the growing climate, pumpkins are ready to be harvested within 60 to 110 days after sowing, and 50 to 55 day from fruit set. Check the mature date on the seed package.
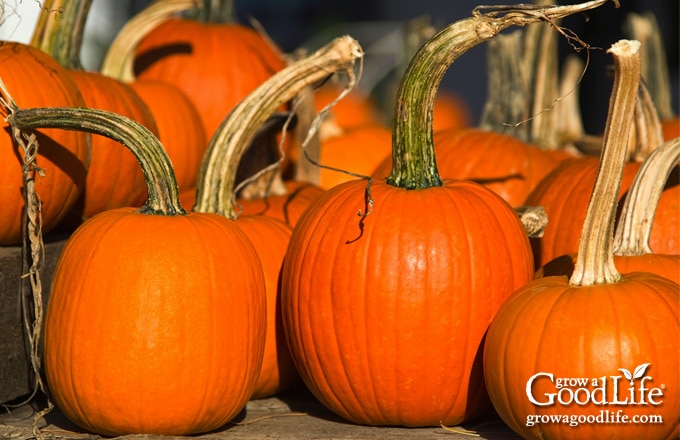
- Fully Colored: You can tell when a pumpkin is ready to be harvested by observing their color. Most varieties of pumpkin turn a solid color, with no green streaks when they are fully ripe.
- Brown Stem: When pumpkins mature, the vines will start to die off, and the stem will turn a dull green, or tan color, harden, and dry out.
- Tough Shell: Give your pumpkins a thump. They’ll make a hollow sound when they are mature. In addition, check the durability of the shell by pressing your fingernail into the skin. If ripe, the fingernail won’t easily pierce or create an indentation.
If you’ve determined your pumpkin is ready to be harvested, leave about 3 to 4 inches of stem, and use a sharp knife to cut the pumpkin from the vine. Leaving the stem attached will slow down the pumpkin’s decaying process, giving you a longer-lasting pumpkin!
How to Cure Pumpkins
Before cutting into your pumpkin, it must be cured first. Curing will help the pumpkin’s skin toughen, and it improves the flavor of the fruit as well!
Allow your pumpkin to sit in a dry, sunny location for at least 10 days for it to cure properly. If temperatures are ideal, you can field cure the pumpkins right in the garden. For the best results, the curing location needs to have consistent temperature between 80°F and 85°F, low humidity, and good air circulation.
Once curing is complete, you are ready to use your pumpkins. Go ahead and cut, roast, and puree as need for your favorite recipes. Freshly cut pumpkin can be stored in a refrigerator for roughly 2 to 3 days, or preserve for longer using one of the methods below.
Roasted Pumpkin Seeds
Don’t forget the pumpkin seeds! Save the seeds and rinse well under running water, and air dry on clean kitchen towels. Toss the seeds in a bowl with melted butter, and salt and pepper to taste. Spread the seeds in a single layer on a baking sheet and bake in a 400˚F oven until crisp and golden, about 30 minutes. Stir occasionally to prevent scorching.
Ways to Preserve Pumpkins
There are several easy ways to preserve your pumpkins long-term, including storing and freezing:
Storing Pumpkins: The easiest way to preserve pumpkins is to store them in a cool, dark location, such as a root cellar or cool basement. Pumpkins can last 3 months or longer when kept under ideal conditions. Learn all about storing pumpkins for winter in this article: How to Harvest, Cure, and Store Pumpkins.
Freezing Pumpkin Puree: If you love pumpkin pie, pumpkin bread, and other pumpkin goodies, freezing pumpkin puree will make it easy to thaw and use in your favorite baked goods. See how to roast pumpkin and make pumpkin puree in this article: How to Make Pumpkin Puree.
—
I hope this article has helped you get started on your pumpkin growing journey. Because of their massive size requirements, pumpkins have built up a reputation as being an intimidating crop for home gardeners, but this is not the case!
As a matter of fact, learning how to grow pumpkins is not only easy, but also incredibly rewarding. As long as you provide the right care, and plenty of room for the vines to ramble, you’ll be a champion pumpkin gardener in no time at all!
You May Also Like:
- How to Map Your Vegetable Garden
- 8 Easiest Vegetables to Grow in Your Garden
- 9 Crops to Grow for Winter Food Storage
- Benefits of Crop Rotation in Your Garden
Good planning is key to a successful vegetable garden
Whether you are new to growing your own food or have been growing a vegetable garden for years, you will benefit from some planning each year. You will find everything you need to organize and plan your vegetable garden in my PDF eBook, Grow a Good Life Guide to Planning Your Vegetable Garden.


Wow, thank you so much for this post! This was super thorough information. I love growing Kakai hullless pumpkins for the pepitas…delicious!! I also grow pie pumpkins and love to stock my freezer with pumpkin puree. So much better than the canned stuff. 🙂 Thanks again for the info…super helpful!