Chicken and Gravy Canning Recipe
This post may contain affiliate links, which means that I may receive a commission if you make a purchase using these links. As an Amazon Associate I earn from qualifying purchases.
Canning your own chicken and gravy is a wonderful way to enjoy a homemade, comforting meal straight from the pantry. This recipe combines tender chicken with flavorful vegetables and rich broth, creating a hearty dish that’s perfect for quick meals.
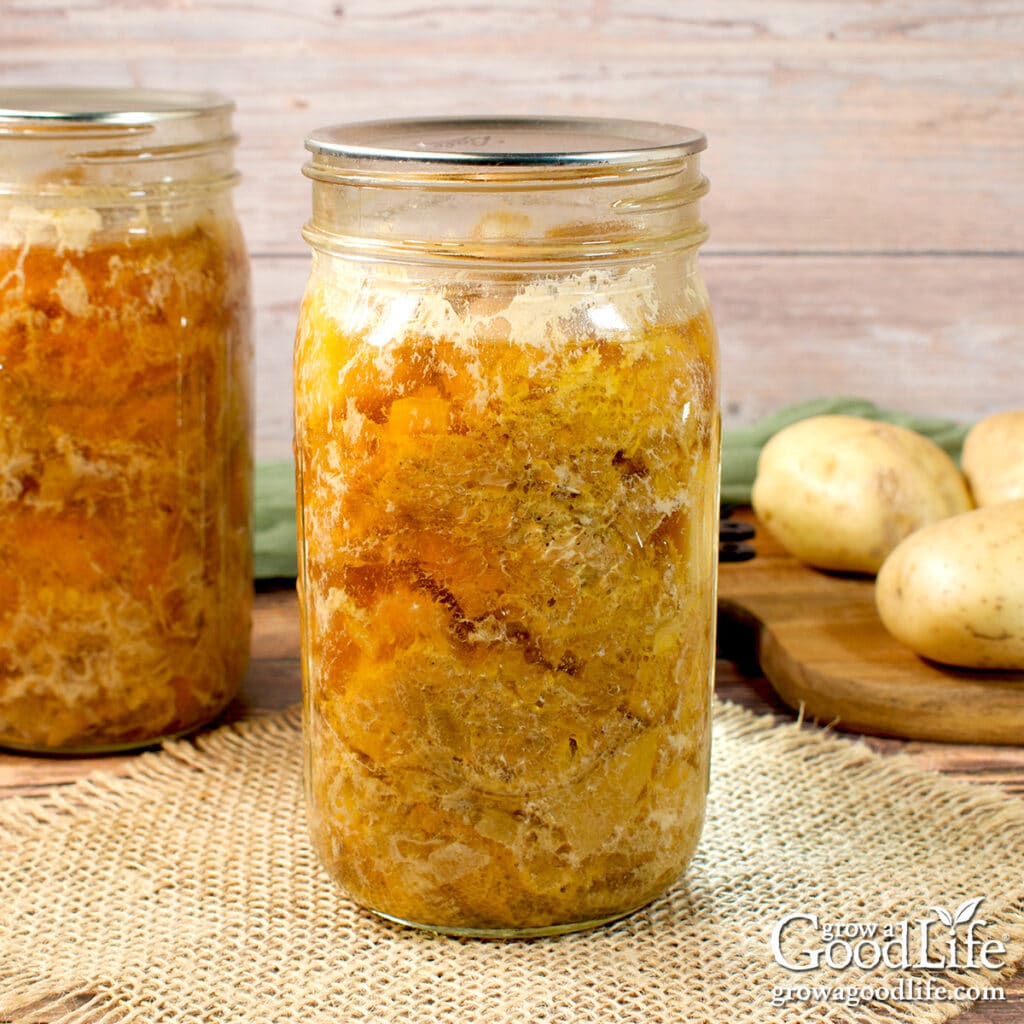
Imagine having jars of hearty home-canned chicken and vegetables ready to heat and serve at a moment’s notice. This easy recipe is not only a huge time saver but also packed with rich, savory flavors. Perfect for quick dinners!
One of the greatest benefits of pressure canning soups, stews, and meals in a jar is the ability to control the quality of the ingredients. You get to choose fresh, wholesome ingredients and preserve them without any additives or mystery components. Plus, there’s nothing more convenient than opening a jar, heating it up, and enjoying a delicious, home-cooked meal in minutes.
Home canning meals in a jar ensures that your pantry shelf is stocked with nutritious and flavorful meals, ready to serve whenever you need them.
This recipe will take you through each step to ensure your jars of chicken and gravy are safely preserved and deliciously satisfying, so you can enjoy the convenience and taste of homemade goodness for months to come.
About the Ingredients
In this section, we’ll detail the essential ingredients needed for canning chicken and gravy, ensuring you achieve the best flavor and texture. From the type of chicken to use, to the importance of a good broth, and the best vegetables to include, you’ll find everything you need to prepare for this delicious canning project.
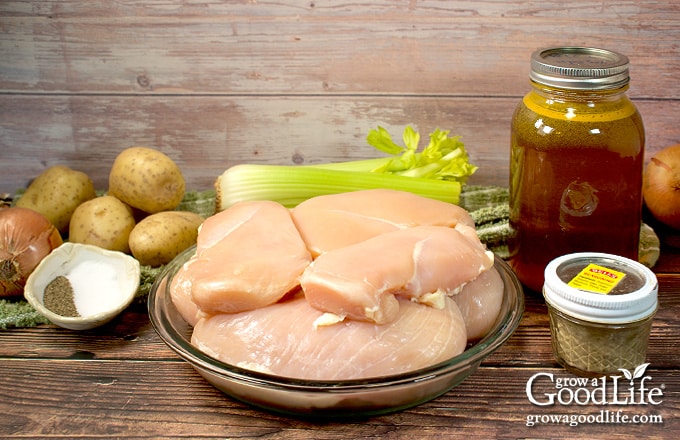
Here’s a rundown of what you’ll need to pressure can chicken and gravy in jars:
Chicken Broth or Stock
You can make your own homemade chicken broth by simmering chicken bones and vegetables, or you can use store-bought chicken stock.
If you opt for homemade, it’s best to make it a day ahead so you can chill it overnight. This will make it easier to skim off the solidified fat before reheating. Check out this recipe for a small batch: How to Make Chicken Stock from Scratch.
When choosing store-bought stock or broth, go for an organic, low-sodium option with few additives. If the broth is high in sodium, you might want to omit the salt from the recipe and adjust the seasoning when serving.
You’ll need about 4 cups or 2 quarts of chicken broth. You can top it off with water if you don’t have enough.
Chicken
For this recipe, you can use boneless chicken thighs or breasts. Chicken thighs become very tender when cooked, while chicken breasts tend to be a bit drier but shred nicely when reheated. You will need 4 pounds of boneless chicken.
Onions
You can use any type of bulb onion, whether yellow, white, or red. To get 2 cups of chopped onions, you’ll need around 2 medium-sized onions.
Celery
Celery adds both flavor and texture to the chicken and gravy. About 8 stalks should give you 2 cups of chopped celery. If you have extra celery, consider freezing it for future use.
Potatoes
Waxy potatoes, also known as boiling potatoes, are best for canning because they hold up well. Varieties like Yukon gold, white, and red potatoes are ideal. You’ll need about 6 medium-sized potatoes to yield 2 cups of diced potatoes.
Dry White Wine
White wine enhances the flavor. Choose a dry white wine that you enjoy drinking, or if you prefer, you can replace it with additional chicken stock.
Poultry Seasoning
Poultry seasoning adds a lot of flavor during the pressure canning process. You can use your favorite commercial blend, such as Bells Poultry Seasoning, or mix your own with dried herbs and spices.
Homemade poultry seasoning: Mix 1 teaspoon each of dried rosemary, dried oregano, and dried thyme, 1/2 teaspoon of dried marjoram, 1/4 teaspoon of dried sage, and 1/4 teaspoon of ginger powder.
Steps to Canning Chicken and Gravy
This safe canning recipe is the “Chicken & Gravy Dinner in a Jar” recipe from the Simple One-Jar Meals section in The All New Ball Book of Canning and Preserving. I’ve made a few adjustments by increasing the poultry seasoning and reducing the salt and pepper.
Before starting, it’s a good idea to review the article on pressure canning at the National Center for Home Food Preservation website, along with your pressure canner’s instructions.
You can find the complete recipe at the end of this article, but here are the detailed steps for pressure canning chicken and gravy:
Step 1: Prepare Your Canning and Kitchen Equipment
First, gather all your kitchen and canning equipment. You’ll need:
- Pressure canner with canning rack
- 4 quart-sized canning jars or 8 pint-sized canning jars
- Canning lids and bands (new lids for each jar, bands can be reused)
- Canning tools: jar lifter, funnel, and bubble popper
- Basic kitchen supplies: large prep bowl, medium pot, vegetable peeler, knife, cutting boards, measuring cups, tongs, ladle, and plenty of clean kitchen towels.
Wash everything in hot, soapy water, rinse well, and set them on clean towels to dry. While washing, carefully inspect the jars for any nicks or cracks. If you find any damaged jars, make sure to discard them. Nicks in the rims can prevent sealing, and damaged jars may break in the canner.
Place the pressure canner on the stove and insert the canning rack. Add water according to your pressure canner’s instructions. For example, Presto requires 3 quarts, Mirro needs 2 quarts, and All American uses 2 to 3 inches of water.
Since this recipe uses the raw pack method, warm the canner and jars to just 140˚F. Fill the clean jars halfway with hot water and place them on the rack in the canner.
Cover the canner and heat it on low for at least 10 minutes. Use a candy thermometer to check the temperature. Keep both the canner and jars warm as you fill them.
Step 2: Prepare the Ingredients
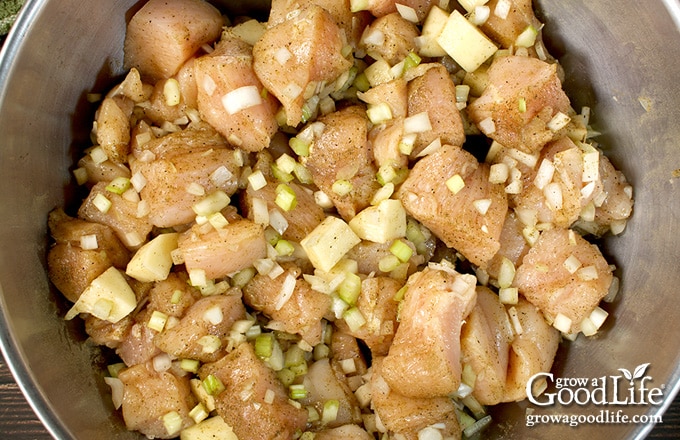
This is a raw-pack canning recipe. You will prepare your ingredients, mix them in a large bowl, fill the jars, and then process them in a pressure canner. The chicken and vegetables will cook in the flavorful broth as the jars are pressure canned.
Get your large bowl ready, then prepare the ingredients as follows:
Chicken: Trim the boneless chicken to remove skin, fat, and cartilage. Cut into 2-inch chunks and add to a large bowl.
Onions: Peel and finely chop the onions. Measure 2 cups of chopped onions and add them to the bowl.
Celery: Rinse celery well, trim the ends and any leafy tops, finely chop, and measure 2 cups. Add to the bowl.
Potatoes: Scrub the potatoes, peel them, rinse again, and cut them into cubes. Add them to the bowl.
Mix in Remaining Ingredients: Add the wine (or additional chicken broth), poultry seasoning, salt, and pepper to the bowl. Mix everything well.
Heat the Stock: Add the chicken stock or broth to a medium pot, cover it, and bring it to a boil over medium-high heat. Keep it hot while filling the jars.
Step 3: Fill the Jars
Lay a dry towel on the counter. Place your lids, bands, and canning tools within reach. Dampen a clean paper towel with vinegar to clean the jar rims.
Use the jar lifter to remove a jar from the canner, pour out the water in a separate container (save it for washing dishes), and place the jar on the towel. Keep the other jars in the canner to stay hot.
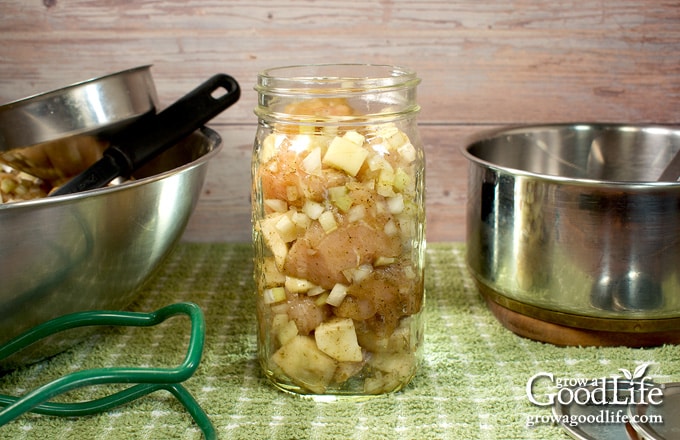
Place the canning funnel on the jar. Using tongs, pack the chicken mixture tightly into the jar, leaving 1 inch at the top. Ladle hot broth into the jar, maintaining a 1-inch headspace.
Run the bubble popper through the jar to release air bubbles, and adjust the headspace with more chicken stock if needed to maintain a 1-inch headspace.
Wipe the jar rim with the vinegar-soaked paper towel, center a lid on it, place the band over it, and twist it until fingertip tight.
Place the filled jar back in the canner and repeat the process until all jars are filled and returned to the canner.
Step 4: Process in a Pressure Canner
Follow your pressure canner’s instruction manual for sealing, heating, and venting. Then, process the jars for the times indicated in the recipe below. Adjust the pressure for your altitude.
After processing, turn off the heat and let the pressure return to zero. Remove the cover and let the jars sit for about 10 minutes. Then remove the jars and set them on a dry towel to cool.
Keep the jars upright to prevent food from spilling into the sealing area and interfering with the seal. Don’t touch the rings or test the seals yet. Let the jars cool undisturbed for 12 to 24 hours.
Check the seals after the cooling period. Refrigerate any jars that didn’t seal properly and use them within a few days. Before storing, remove the rings and wash them thoroughly. Label and date the jars, and store them in a cool, dark place. Use within 18 months for the best quality.
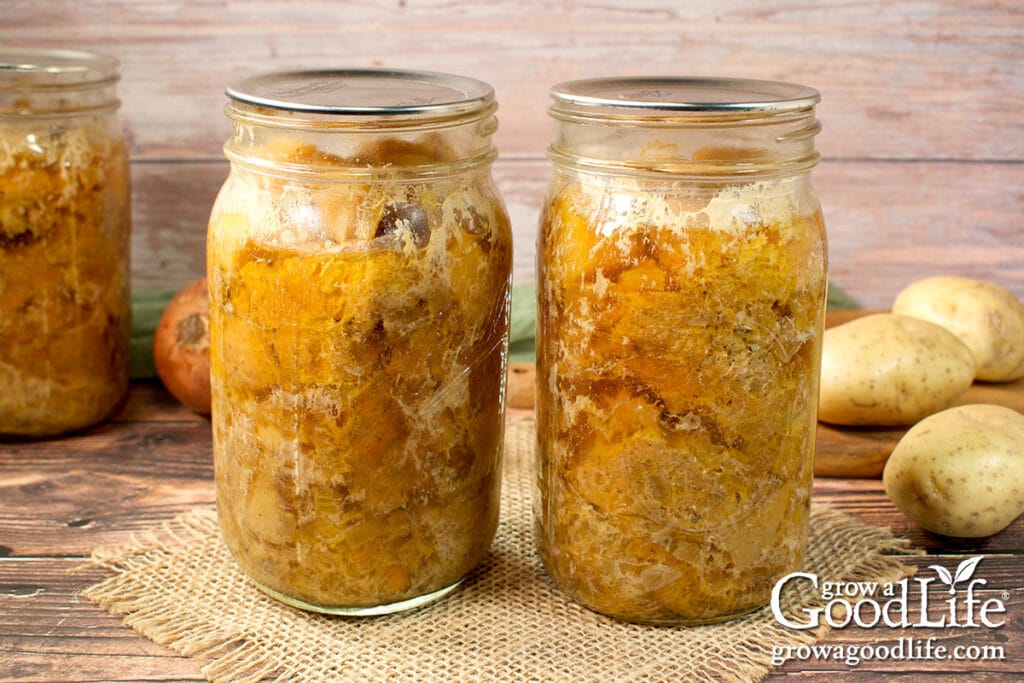
Heat and Serve
Your jars of chicken and gravy are fully cooked and just need to be reheated before serving.
To serve, open a jar, skim off any fat from the top, and pour the contents into a saucepan. Warm over medium-high heat for about 10 minutes.
This recipe has the consistency of a hearty soup right out of the jar. If you prefer a thicker gravy, you can easily thicken the broth with cornstarch. After emptying the jar, fill it with 1 cup of water. Add 2 tablespoons of cornstarch, cover it tightly, and shake to create a slurry. Then, add this slurry to the pot and heat it over medium-high heat for about 10 minutes to make the gravy.
Although it’s delicious as it is, I enjoy adding a jar of home-canned carrots to make a classic chicken stew. If you prefer shredded chicken, break up the chicken chunks as they heat. Season with salt and pepper to taste, ladle into bowls, and enjoy while hot.
Chicken and Gravy Dinner
Ingredients
- 4 cups chicken broth or stock
- 4 pounds boneless chicken cut into 2-inch chunks
- 2 cups finely chopped onions
- 2 cups finely chopped celery
- 2 cups peeled diced potatoes
- 1/2 cup dry white wine or substitute additional chicken broth
- 4 teaspoons poultry seasoning
- 2 teaspoons salt
- 1 teaspoons ground black pepper
- 2 tablespoons of white vinegar optional to wipe jar rims
Instructions
Prepare the Jars and Canner
- Place the jar rack into the pressure canner and fill it with water per your canner manufacturer’s instructions.
- Fill the clean jars halfway with hot water and place them on the rack in the canner.
- Cover, heat the canner to 140˚F for raw packing, and keep it warm.
Prepare the Ingredients:
- Add the chicken broth to a medium saucepan, bring to a boil over medium-high heat, and keep it hot.
- In a large prep bowl, mix the prepared chicken with the onion, celery, potatoes, wine, poultry seasoning, salt, and pepper.
Fill the Jars:
- Lay a dry kitchen towel on the counter. Use the jar lifter to remove one jar from the canner. Drain the water in a separate bowl or the sink, and place it on the towel. Keep the remaining jars in the canner so they stay warm.
- Use tongs to pack the chicken mixture tightly into the jar, leaving about an inch at the top. Then, add chicken broth to fill the jar to 1 inch headspace.
- Run the bubble popper through the jar to release trapped air, then adjust the headspace again with additional chicken stock if needed.
- Wipe the rim of the jar with a paper towel soaked in vinegar to remove any residue, center a lid on the jar, and screw on the band until fingertip tight.
- Place the jar back into the canner and repeat with the remaining jars.
Process in a Pressure Canner:
- Place the lid on the canner and lock it. Leave the vent open, adjust the heat to medium-high, and bring the canner to a boil.
- Once boiling, let the pressure canner vent steam for 10 minutes, place the pressure regulator on top of the air vent, and let the pressure rise.
- When the canner has reached the correct pressure (10 pounds for weighted gauge or 11 pounds for dial gauge pressure canner), set a timer and process pint jars for 75 minutes and quarts for 90 minutes at altitudes of less than 1,000 ft.
- If necessary, adjust the pressure for your altitude (see notes) and regulate the heat as needed to maintain a steady pressure.
- When the processing time is complete, turn off the heat and allow the canner to sit until the pressure drops to 0. Once the canner is depressurized, let it cool for an additional 10 minutes before removing the lid.
- Spread a dry towel on the counter, unlock the cover, and remove it by tilting the lid away from you so that steam does not burn your face.
- Allow the jars to adjust to the change in pressure for another 10 minutes. If they are still boiling vigorously, let them sit in the canner for another 5 minutes or until the boiling slows.
- Use the jar lifter to remove the jars from the canner and place them on the towel. Keep them upright, and don’t tighten bands or check the seals yet. Let the jars sit undisturbed for 12 to 24 hours to cool and seal.
- After 12 to 24 hours, check to be sure the jar lids have sealed by pushing on the center. The cover should not pop up. The jar failed to seal if the top flexes up and down. Refrigerate it and use it within a few days.
- Remove the screw-on bands and wash the jars in warm, soapy water to remove any residue. Then label, date, and store the jars in a cool, dark place. Use within 18 months for the best quality—yields 8 pints or 4 quart jars.
Notes
- Dial Gauge Pints and Quarts at altitudes of 2,001 – 4,000 ft. increase pressure to 12 pounds, 4,001 – 6,000 ft. is 13 pounds, and 6,001 – 8,000 ft. is 14 pounds.
- Weighted Gauge Pints and Quarts at altitudes of 1,001 ft. and above, increase pressure to 15 pounds.
Nutrition
You may also enjoy the following canning recipes:
40+ Meals in a Jar Pressure Canning Recipes
In this eBook, you will find 50 pressure canning recipes, including 44 meals, along with homemade stocks and bone broths. Recipes include soups, stews, chilis, beans, beef, pork, and poultry. Explore the world of preserving delicious home-cooked meals for all seasons.

Can carrots substitute potatoes and if so does the recipe change? Ty
Gloria, Yes, you may safely swap the potatoes for an equal amount of carrots.