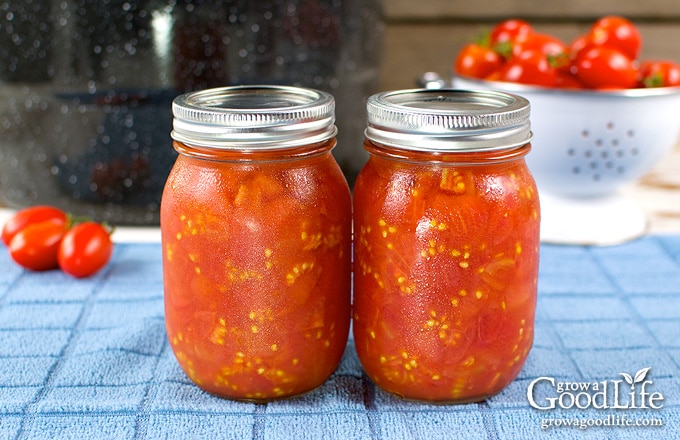
Canning Crushed Tomatoes
This post may contain affiliate links, which means that I may receive a commission if you make a purchase using these links. As an Amazon Associate I earn from qualifying purchases.
Canning crushed tomatoes is an easy way to preserve an abundance of ripe tomatoes quickly. Canned tomatoes are handy to use in chilies, soups, stews, and casseroles.

My goal each year is to grow enough tomatoes to preserve tomato sauce and salsa to last us a year. Since we have a short growing season, this means planting a lot of tomatoes in early summer. The fruit begin to ripen in August and continues until frost kills the plants in October.
If the weather is exceptionally nice, the plants can produce a bumper crop. This is when things can get tricky.
It is so easy to get overwhelmed when the tomato harvest comes in all at once. It is a busy time in the kitchen making and canning sauce and salsa before the next round of tomatoes are ready.
There is only a small window available once tomatoes are ripe. If it is clear that I won’t be able to keep up with the tomatoes in baskets piled all over the kitchen, my strategy switches to survival… to get the tomatoes preserved in jars before they spoil.

Steps for Canning Crushed Tomatoes
Canning your own crushed tomatoes is a quick way to preserve a bumper crop of ripe tomatoes. You can use the canned tomatoes in so many ways, including adding to chilies, soups, and casseroles. You can also substitute canned crushed tomatoes for fresh in this tomato sauce recipe and tomato salsa recipe.
Before you begin canning tomatoes or tomato sauce, make sure you’re familiar with the water bath canning process. This guide walks you through each step from start to finish: Water Bath Canning for Beginners.
I also put together a free printable Home Canning Checklist to help you stay organized during canning day. It includes prep reminders, safety notes, and space to record your batches. Download it here:
Grab your Free copy
Home Canning Checklists
This is a safe caning recipe from both the NCFHP website and the Ball Complete Book of Home Preserving. The full and printable recipe can be found at the bottom of this article, but these are the steps for canning crushed tomatoes.
The recipe below is for canning pint sized jars of crushed tomatoes in their own liquid using a water bath canner. If you would rather can in quart-sized jars, you will need about 22 pounds of tomatoes for a canner load of 7 quarts.
Step 1: Prepare the Canning Equipment
Gather your canning and kitchen equipment. You will need:
- Water bath canner and canning rack
- 9 pint jars (or 7 quarts)
- Lids and bands (new lids for each jar, bands can be reused)
- Canning tools: jar lifter, canning funnel, ladle, and bubble popper
- Kitchen scale
- Plus basic kitchen supplies such as a large stainless steel sauce pot, large bowl, towels, knife, large spoon, potato masher, and a cutting board.
Wash the canning jars, lids, and canning tools in warm, soapy water and rinse well. Inspect the jars carefully, and don’t use any that have cracks or chips, as these may break when heated.
Jars must be heated before filling to prevent breakage due to thermal shock. Place the jar rack into the water bath canner, set the jars upright in the canner, and add enough water to cover the jars. Bring the canner to a simmer (180˚F) for 10 minutes, and keep the jars hot until you are ready to fill them.
Follow the manufacturer’s directions for preparing the lids. Pre-heating lids is no longer necessary before using, but it is still safe to warm the lids if you want to. Just add them to the canner when you heat your jars.
Step 2: Prepare the Tomatoes
Weigh the tomatoes and wash well under clean, running water. You will need about 15 pounds of fresh tomatoes for a canner load of 9 pints, and 22 pounds for a canner load of 7 quarts.
To peel the tomatoes, bring a large saucepan of water to a boil and fill a large bowl with ice water. Dip your tomatoes into the boiling water until the skins crack and loosen – about 30-60 seconds. Check out this tutorial for more information: How to Peel Tomatoes.
Remove the tomatoes from the pot and place in the bowl of ice water to cool. Discard the water, peel, and core your tomatoes once they are cool enough to handle.

Step 3: Cook the Tomatoes
Quarter about a pound of the peeled tomatoes and place them into a large stainless steel saucepan. Heat the tomatoes over medium-high heat, and crush with a potato masher once they soften to release the juice.
Heating tomatoes quickly after cutting will help preserve the pectin in the fruit and prevent the canned tomatoes from separating in the jars.
Once the pot comes to a boil, cut the remaining tomatoes into quarters, and add these to the pot as your work. Stir frequently to prevent sticking.
There is no need to crush the additional tomatoes. They will soften with heating and stirring. Continue until all tomatoes are added, and then boil gently for 5 minutes.

Step 4: Can the Crushed Tomatoes
Lay a dry kitchen towel on the counter, and place the citric acid or lemon juice, canning salt (if using) nearby along with the measuring spoons.
Remove a hot jar from the canner, drain, and place on the towel. Keep the remaining jars in the canner, so they stay warm. Add the citric acid or lemon juice to each jar, salt (if using). Fill hot jars with the hot tomatoes leaving a 1/2-inch headspace at the top of the jar.
Run a bubble popper through the jar to release air bubbles. Wipe the rim with a damp towel to remove residue. Center a lid on the jar, place the band over the lid, and screw it on until fingertip tight. Place the jar back into the canner, and repeat with the rest of the jars.
Once the jars are in the canner, adjust the water level so it is covering the jars by two inches, bring the canner to a boil, and process the jars for the times indicated in the recipe below. Let the jars cool, test the seals, label and date the jars, and store in a cool, dark location for 12 to 18 months.
Canning crushed tomatoes is a quick way to preserve a bumper crop of ripe tomatoes. You can use the canned tomatoes in so many ways, including adding to chilies, soups, and casseroles. You can also substitute canned crushed tomatoes for fresh in this tomato sauce recipe and tomato salsa recipe.
Canning Crushed Tomatoes
Ingredients
- 15 pounds tomatoes (see notes for quarts)
- citric acid or bottled lemon juice
- canning salt optional for flavor
Instructions
Prepare the Canning Equipment:
- Wash your jars, lids, screw bands, and canning tools in hot soapy water. Rinse well to remove all suds. Set aside to air dry on a clean kitchen towel.
- Place the jar rack into water bath canner, place jars in the canner, and add water to cover. Bring the canner to a simmer (180˚F) for 10 minutes, and keep the jars hot until you are ready to fill them.
Prepare the Tomatoes:
- Wash your tomatoes in plain water.
- To peel the tomatoes, bring a large pot of water to a boil, and fill a large bowl with ice water.
- Dip your tomatoes into the boiling water until the skins crack and loosen – about 30-60 seconds. Remove the tomatoes from the pot and place in the bowl of ice water to cool. Peel and core your tomatoes once they are cool enough to handle.
- Quarter about a dozen of the peeled tomatoes and place them into a large stainless steel saucepan. Heat the tomatoes over medium-high heat, and crush with a potato masher once they soften.
- Once the pot comes to a boil, begin cutting the remaining tomatoes into quarters, and adding to the pot as your work. Stir frequently to prevent sticking. No need to crush these tomatoes. They will soften with heating and stirring. Continue until all tomatoes are added. Then boil gently 5 minutes.
Can the Tomatoes:
- Spread a kitchen towel on the counter. Use your jar lifter to remove a jar from canner, drain, and place on the towel. Keep the remaining jars in the canner so they stay hot.
- Add 1/4 teaspoon of citric acid or 1 tablespoon of bottled lemon juice to each pint sized jar. (Add 1/2-teaspoon citric acid or 2 tablespoons lemon juice to each quart jar.)
- Add up to 1/2 teaspoon of salt for pint jars (1 teaspoon of salt per quart), if desired for flavor.
- Use the canning funnel and ladle, and fill the warm jars with hot tomatoes leaving 1/2-inch headspace.
- Run the bubble popper through the jar to release air. Wipe the rim clean with a damp paper towel.
- Center a lid on the jar, and screw on the band until it is fingertip tight. Use the jar lifter to place the jar back into the canner, and repeat with the remaining jars.
- Once jars are all in canner, adjust the water level so it is at two inches above the jar tops.
- Cover the canner and bring to boil over high heat. Once water boils vigorously, process pint sized jars for 35 minutes (quart sized jars for 45 minutes) at altitudes of less than 1,000 ft. Adjust processing time for your altitude if necessary. (See notes)
- When processing time is complete, turn off heat, remove the cover by tilting lid away from you so that steam does not burn your face, and allow the canner to cool down and settle for 5 minutes.
- Spread a kitchen towel on the counter. Use a jar lifter to remove the jars one at a time from the canner. Keep the jars upright, and place them on the towel. Do not tighten ring bands or test the seals yet. Let the jars sit undisturbed for 12 to 24-hours to cool.
- After the jars have cooled for at least 12 hours, check to be sure lids have sealed by pushing on the center of the lid. The lid should not pop up. If the lid flexes up and down, it did not seal. Refrigerate the jar and use within a week.
- Remove the ring bands, wash, label, date the jars, and store the canned tomatoes in a cool, dark place between 50 to 70 degrees F for 12 to 18 months. Once the jar is open, refrigerate and use up within a week. Yields about 9 pint jars of crushed tomatoes.
Notes
- Pints at altitudes of 1,001 – 3,000 ft. is 40 minutes, 3,001 – 6,000 ft. is 45 minutes, and above 6,000 feet is 50 minutes.
- Quarts at altitudes of 1,001 – 3,000 ft. is 50 minutes, 3,001 – 6,000 ft. is 55 minutes, and above 6,000 feet is 60 minutes.
Nutrition
This recipe was originally published on October 8, 2017. Updated August 28, 2021: Removed the reference to canning diced tomatoes. There is no safe tested recipe for canning diced tomatoes. Confirmed with local extension office that testing failed because the density of the diced tomatoes is different than crushed. Canning crushed tomatoes is the only safe method using this recipe.
You May Also Like:

Also, given what the Ball recipe says, is there really any reason at all to weigh the tomatoes? Since you are adding the citric acid and salt right to the jar, couldn’t you just boil up a bunch of tomatoes and can however many pints/quarts if gives you….reheating the tomatoes if they have had to sit while one batch is water bath canning?
Jen, You’re absolutely right! The specific amount of tomatoes doesn’t matter as long as you add the correct amount of citric acid and salt to each jar. Feel free to can the quantity your tomatoes produce, and ensure you follow proper canning procedures for a safe and delicious result.
I am pretty sure I followed the recipe here which matches the recipe on the National center for Home Food preservation. I used 15 pounds of tomatoes and I ended up with 11 pints of tomatoes instead of 9. I also feel like it’s just basically a juicy and chunky sauce. Do you think I did everything right?
Jen, It sounds like you did everything right! Canning can sometimes yield varying results due to factors like the juiciness of the tomatoes. Having extra jars is a pleasant surprise, and as long as you followed the recipe and proper canning procedures, your tomatoes should be safe and delicious.
Can I use cherry tomatoes for this recipe?
Kansas, You can use cherry tomatoes for this recipe. Just keep in mind that you’ll need to peel them, which might be a bit time-consuming due to their smaller size. 🙂
I made these one day and they turned out perfect. I made more the very next day, but for some reason they floated, what causes that?
Pam, Your jars are safe to use as long as you followed the recipe and processed them for the correct amount of time. It’s normal for fruit float and separation to occur when canning tomatoes, and it doesn’t affect the safety of your jars as long as you followed the recipe.
Floating happens because of the natural air present in the tomatoes, and it can vary with each batch of fruit. Following the cooking instructions in the recipe helps release the air from the tomatoes.
Separation occurs when the tomato solids and liquid separate in the jar. This happens due to a natural enzyme that activates when tomatoes are cut or crushed. Heating the tomatoes immediately after cutting or crushing deactivates this enzyme. Gently shaking the jars after they have cooled for 24 hours can help bring the solids and liquid back together.
For more information, you can refer to this article from the ISU Extension Office: “Canned Tomatoes – Answers to Frequently Asked Questions.” It provides additional insights on canning tomatoes. If you have any further questions, feel free to ask!
Can you leave the skins on? When I made sauce, I blend the whole tomatoes in a vitamix and don’t have an issue with texture from leaving the skins on. It would take less time if I could skip that step and I have a LOT of tomatoes to process.
Laura, Yes, the skins need to be removed. The recipe was tested and deemed safe using peeled tomatoes. The skins could harbor bacteria or affect heat penetration. You can freeze the sauce if you want to include the peelings.
Thank you for all the helpful content! Why is it only useable for up to 18 months? I know of people who have used their canned vegetables years after initial processing.
Kimberly, Jars are safe to consume if they are canned using a safe, tested canning recipe. However, the quality of the canned food begins to degrade after about a year. It may lose color, nutrition, and texture. So it is recommended that you use up the jars within a year for the best quality.
In step 12 it says to remove the ring bands. I haven’t seen that in canning recipes before. I assumed the ring bands ensure the lids stayed tight after processing, etc., and that unscrewing them might loosen the lid. Why remove the ring bands?
Paul, Ball and NCHFP recommend that you remove the ring bands before storing them. If the bands are left on the jars while in storage, you may not know if there is a seal failure. Also, food residue can mold, corrode the rings, and possibly penetrate the seal. In addition, bands may rust, become difficult to remove, and not work properly again.
If you want to store the jars with the rings on, remove the bands, wash them in warm soapy water, and rinse and dry thoroughly. Wash the lid and threaded neck on each jar, and let dry. Screw on the clean bands loosely onto jars and store.
Could I use fresh lemon juice instead of bottled? Is there a difference?
Deb, Always use bottled lemon juice in canning recipes that call for it. Bottled lemon juice has been uniformly acidified so there is a consistent and known acid (pH) level that is needed for safe canning. There is no way to know the level of acid in fresh squeezed lemon juice.