How To Can Chicken Stock
This post may contain affiliate links, which means that I may receive a commission if you make a purchase using these links. As an Amazon Associate I earn from qualifying purchases.
Chicken stock is a must have pantry essential for many recipes, including soups, stews, gravies, and stir-fry. Skip the store bought cartons and make and can chicken stock instead.
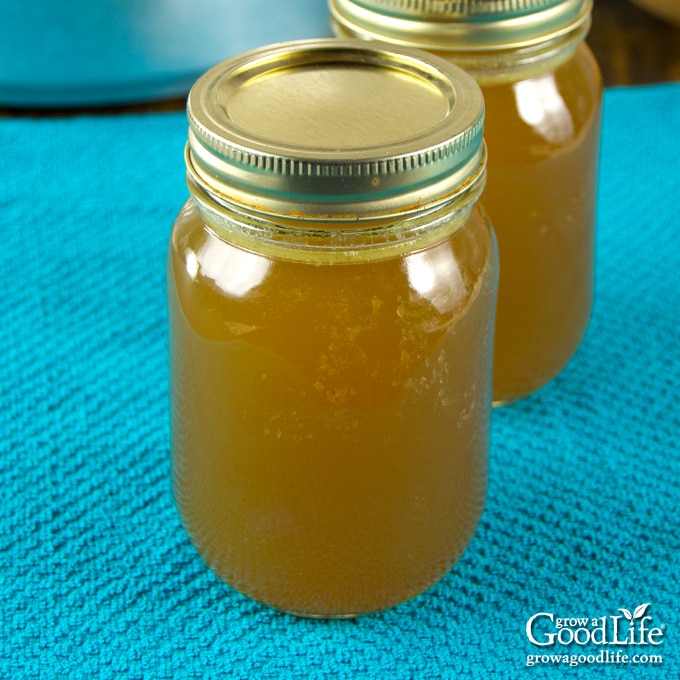
Benefits of Canning Homemade Chicken Stock
Making your own chicken stock is a great way to squeeze out extra flavor from a chicken carcass, bones, and vegetable scraps that may go to waste. Here are other reasons to consider making and canning stocks and broths:
- Better Flavor: When you make your own, you can use fresh, quality ingredients that can give stocks so much flavor. You can also adapt the herbs to your taste.
- Less Sodium: This salt-free canned chicken stock recipe is the perfect foundation for flavor creation. Many store bought stocks contain chemicals and lots of sodium that may make your dishes too salty. Salt isn’t necessary for preserving chicken stock. Since we typically use stock is an ingredient, you can add your salt to taste along with the other ingredients when you prepare your recipes.
- It Frees Up Freezer Space: Canning stock saves space in the freezer because pressure canning makes the stock shelf-stable. Simply store until you are ready to use it in your favorite recipes.
Understanding Chicken Stock vs Broth
While stock, broth, and bone broth can be all used in similar ways, there are some differences in how they are made:
- Stock is made by simmering roasted bones and vegetables for 4 hours or longer to extract flavor and collagen from the connective tissues. This results in a rich, flavorful stock, with a silky smooth texture due to the gelatin from the bones.
- Broth is the liquid made by simmering meat along with some aromatics for a brief time, less than 2 hours. Broths are a thinner liquid than stocks, and are often seasoned with salt to add flavor.
- Bone Broth is actually closer related to stock than broth. It is created by simmering bones with or without vegetables for 12 hours or longer. The long simmer breaks down the cartilage from the bones and tissues to develop a lot of collagen-rich gelatin in the broth.
Other than the minor differences in ingredients and cooking time, homemade chicken broth, and bone broth can also be preserved by pressure canning the same way as chicken stock.
Tips for Making Chicken Stock
Making stock is pretty straightforward, and you don’t really need a recipe. You simply simmer the bones, vegetables, and herbs in a large stock pot to extract the flavor and collagen into a flavorful stock. Here are some tips to help you make the perfect stock for your needs:
Save Bones and Vegetable Scraps in the Freezer
Save all the chicken bones from meals in freezer bags until you have enough accumulated to turn into a batch of chicken stock. You can save the bones from all parts of the bird, including wings, drumsticks, neck, thighs, breasts, and carcass from whole chickens.
Remove any usable meat from the bones and refrigerate for a later meal, and place the bones in a large freezer bag and store in the freezer until you are ready to make your stock. Including some meat, fat, skin, and cartilage with the bones will contribute to the flavor.
Additionally, save vegetable scraps to use in making stock. I keep a gallon sized freezer bag in the freezer and onion ends, trimmed celery, carrot pieces, parsley stems, and garlic ends. When the time comes to make stock, I just pull out handfuls of what I need for each recipe.
Roast the Ingredients
Roasting the bones will add a rich flavor to your stock. Roast your chicken bones and vegetables in the oven until they are nice and brown, and then simmer into a flavorful stock in the saucepot.
Allow for Plenty of Time
The longer the stock slowly simmers; the more flavor is extracted from the bones and aromatics. If you plan on a two-day process to make and can the chicken stock, you will have plenty of time to simmer the stock, and chill it overnight in the refrigerator. As the stock cools, the fat rises to the top, and can be easily removed before canning.
Want a Smaller Batch of Chicken Stock to Freeze?
If you don’t have enough bones to make a large batch, or you don’t want to fuss with canning, you can freeze chicken stock as well. The following article includes a basic chicken stock recipe, plus instructions for making stock using the stove, slow cooker, and Instant Pot pressure cooker: 3 Ways to Make Homemade Chicken Stock.
Steps for Making and Canning Chicken Stock
Meat stocks are low-acid foods that can only be canned safely using a pressure canner. A pressure canner heats the contents at a high temperature necessary to kill bacteria that can cause botulism. There are no safe options for canning stock or broth in a boiling water canner. If you don’t have a pressure canner, you can freeze the stock in freezer containers instead.
If you are new to canning or need a refresher, it may be helpful to review this article on Using Pressure Canners at the National Center for Home Food Preservation website, along with the instruction manual that came with your pressure canner. Make sure everything is clean and working properly. Double check that the air vent and steam vent pipe is clear.
This is a safe caning recipe adapted from the Ball Blue Book Guide to Preserving “Chicken Stock”. Instead of a whole chicken, this recipe uses chicken bones, plus vegetables, and herbs for more flavor. You will find the full, detailed recipe below, but below are the steps to making and canning chicken stock.
Plan on at least a two-day process to make and can chicken stock. On day one, you will make the stock and let it simmer on the stove. Then, you will remove the solids, and refrigerate it overnight so the fat separates and rises to the top for easy removal. Finally, you will skim off the fat, and can the stock on day two.
Step 1: Roast the Chicken Bones and Vegetables
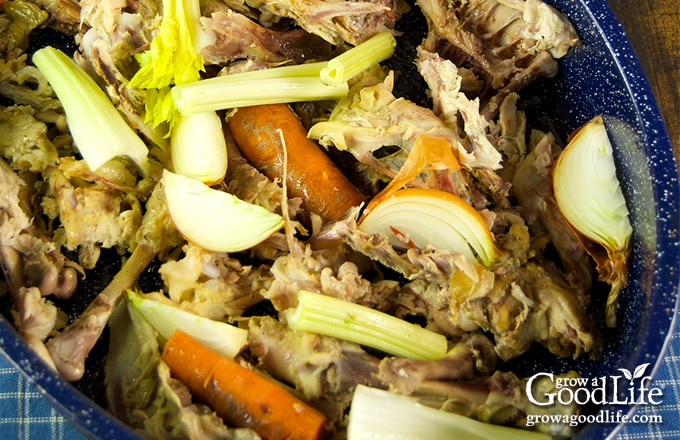
Place the bones into a large roasting pan. Layer your vegetable pieces on top and roast in a hot oven until the veggies are slightly charred and the bones are nice and brown. Remove the roasting pan, and place the bones and vegetables into a large stockpot.
Add a cup of the water to the hot roasting pan to deglaze the pan. As the water steams, scrape the pan with a wooden spoon to release the flavor infused brown bits stuck to the bottom of the pan. Add the flavorful liquid to your pot.
Step 2: Make the Stock
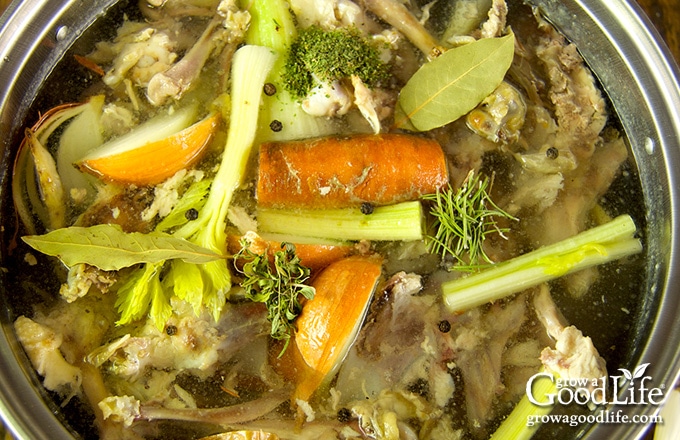
Add the remaining ingredients to the large pot and top with water. Some meat clinging to the bones is ok. You can also include fat and skin with the bones. These will add flavor to the stock as it cooks and the fat will be skimmed off before canning.
Bring the pot to a boil over medium-high heat. Reduce the heat to low and simmer for at least 4 hours and up to 24 hours.
While your chicken stock is simmering, it will release fat and impurities that will rise to the top as grey foam. The foam can affect the flavor of the stock if it isn’t removed. So skim it off every now and then as the stock slowly simmers.
Step 3: Strain and Chill to Separate the Fat
When the stock is done, remove the bones and vegetable pieces using tongs. Strain the stock through a fine-mesh sieve into another large stockpot or heatproof bowls. Discard the bones and solids. Let the chicken stock cool and refrigerate overnight. Once the stock cools in the refrigerator, the fat will rise to the top and can be easily removed.
Don’t let the stock cool at room temperature for more than 2 hours. To cool the stock quickly before refrigerating, place the container in an ice-water bath. Change the water as needed to keep it cold, and let the stock cool until it is lukewarm. Then dry the container and place in the refrigerator overnight.
Step 4: Prepare the Canning Equipment
The following day, gather your canning equipment, prepare the jars, set up the pressure canner, and organize your work area.
To can the chicken stock, you will need:
- Pressure canner with canning rack
- 8 pint sized canning jars, or 4 quart sized jars
- Canning lids and bands (new lids for each jar, bands can be reused)
- Canning tools: jar lifter, canning ladle, funnel, and bubble popper
- Plus basic kitchen supplies such as a large sauce pot and clean kitchen towels.
Wash the canning jars, lids, bands, and canning tools in hot soapy water, and rinse well. Set the lids and bands aside to air dry until you are ready to use them.
Place the pressure canner on the stove, and insert the canning rack. Add water per your pressure canner manufacturer’s instructions: Presto is 3 quarts, Mirro is 2 quarts, and All American is 2 to 3 inches. Fill the clean jars halfway with hot water, and then place them on the rack in the canner. Bring the canner to a simmer for 10 minutes (180˚F). Keep hot until you are ready to fill them.
Step 5: Reheat the Stock
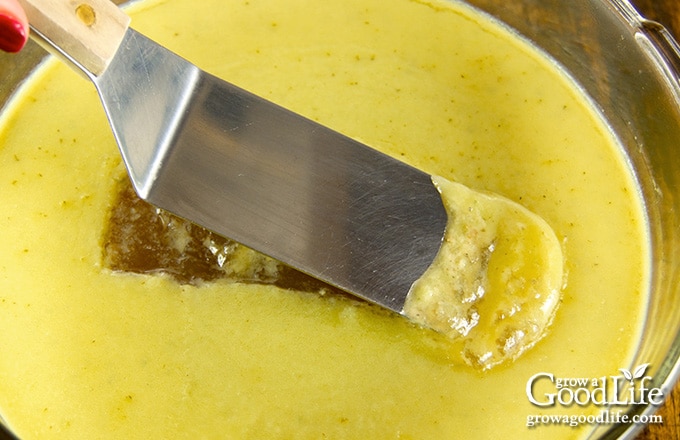
Remove the chicken stock from the refrigerator. Slide a thin, flat spatula across the top to separate and remove the fat layer. Eliminating the fat is beneficial for several reasons, your broth will be clearer, contain less fat, but also there are fewer chances of the thick fat interfering with the seal as the jar is processed.
Bring the chicken stock to a boil over medium-high heat, and then fill your jars.
Step 6: Can the Chicken Stock
Spread a dry kitchen towel on the counter. Use the jar lifter to remove a jar from the canner. Pour out the water (save it for washing dishes), and place the jar on the towel. Keep the remaining jars in the canner, so they stay hot.
Place the canning funnel on the jar, and use the canning ladle to fill the jar with hot broth. Leave a 1-inch headspace.
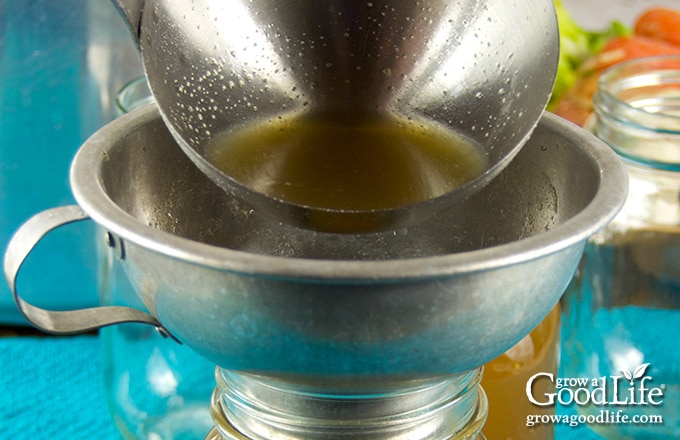
Run the bubble popper through the jar to release trapped air bubbles. Wipe the rim of the jar with a damp towel to remove any residue. Center a lid on the jar, place the band over the lid, and screw it on until fingertip tight. Immediately place the jar back into the canner, and repeat with the rest of the jars.
Bring the canner to a boil over medium-high heat. Follow the directions for your pressure canner and process the jars for the times indicated in the recipe below.
When the processing time is complete, turn off the heat and let the canner cool naturally, remove the jars, and let them cool completely. Date, label, and store in a cool location for 12 to 18 months.
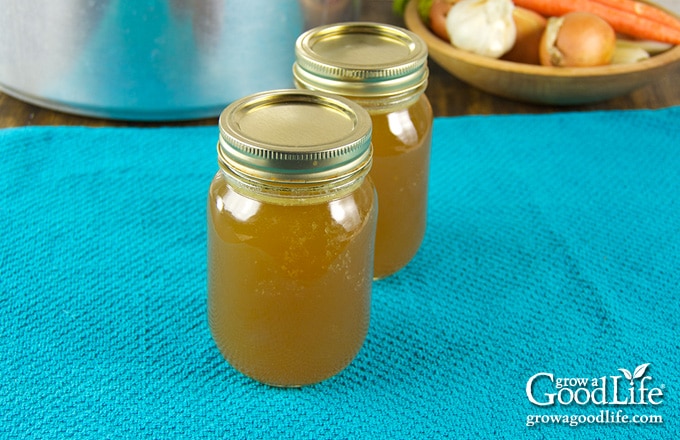
Use homemade chicken stock in any recipe that calls for stock or broth, such as chicken soup, chicken chili, and for making gravy. Use chicken stock instead of water to make rice, or as a braising liquid for poultry or vegetables.
Canning Chicken Stock
Ingredients
- 5 pounds chicken bones
- 2 large onions sliced into large pieces
- 2 medium carrots cut into 3 inch pieces
- 2 stalks celery cut into 3 inch pieces
- 3 cloves garlic crushed
- 2 bay leaves
- 1 teaspoons dried parsley (or 2-3 sprigs of fresh parsley)
- 1/2 teaspoon dried rosemary (or 1-2 sprigs of fresh rosemary)
- 8 whole peppercorns
- 5 quarts water
Instructions
To make the chicken stock:
- Preheat the oven to 425˚F. Place the chicken bones into a large roasting pan. Scatter the onions, carrots, celery, and garlic on top.
- Roast the bones and vegetables uncovered in a preheated oven until the vegetables are slightly charred and the bones are brown, about 35-45 minutes. Stir about halfway through to help brown evenly.
- Remove the roasting pan from the oven. Use tongs to transfer the bones and vegetables to a large stockpot.
- Add 1 cup of water to the hot roasting pan to deglaze the pan. As the water steams, scrape the pan with a wooden spoon to release the flavor infused brown bits stuck on the bottom of the pan. Add the liquid to your pot.
- To your stockpot, add bay leaves, herbs, peppercorns, and enough water to cover the bones by a couple of inches, about 5 quarts.
- Turn the heat to medium-high and bring the pot to a boil. Reduce the heat to low and simmer for at least 4 hours and up to 24 hours. Stir occasionally and skim off any foam.
- Remove the chicken bones and vegetables from the stock using tongs. Strain the stock through a fine-mesh sieve into a large heatproof container. Discard the solids. Let the chicken stock cool and refrigerate overnight.
- Once the stock cools in the refrigerator, the fat will rise to the top and can be skimmed off. You will can the chicken stock the following day.
To can chicken stock:
- The next day, prepare the canning equipment by washing the jars, lids, bands, and canning tools in hot soapy water and rinsing thoroughly. Set the lids and bands aside until you are ready to use them.
- Place the canning rack into the pressure canner, and fill with water per your pressure canner manufacturer's instructions: Presto is 3 quarts, Mirro is 2 quarts, and All American is 2 to 3 inches.
- Fill the jars halfway with hot water, and then place them on the rack in the canner. Bring the canner to a simmer for 10 minutes (180˚F). Keep hot until you are ready to fill them.
- Remove the chicken stock from the refrigerator and skim the solidified fat from the surface. Return the stock to a large saucepot and bring to a boil over medium-high heat.
- Spread a kitchen towel on the counter. Use your jar lifter to remove a jar from the canner. Pour out the water (save it for washing dishes), and place the jar on the towel. Keep the remaining jars in the canner, so they stay hot.
- Use the canning funnel and ladle and fill the jar with hot stock, leaving a 1-inch headspace at the top of the jar.
- Swirl the bubble popper through the jar and wipe the rim. Center a lid on the jar, place the band over the lid, and screw it on until fingertip tight.
- Use the jar lifter to place the jar back on the rack in the canner, and repeat with the rest of the jars until the canner is filled, or you run out of stock. If you have leftovers, store in the refrigerator or freeze for longer.
- Place the lid on the canner and lock it. Leave the vent open, adjust the heat to medium-high, and bring the canner to a boil. Allow the pressure canner to vent steam for 10 minutes, then place the pressure regulator on top of the air vent, and watch the pressure rise.
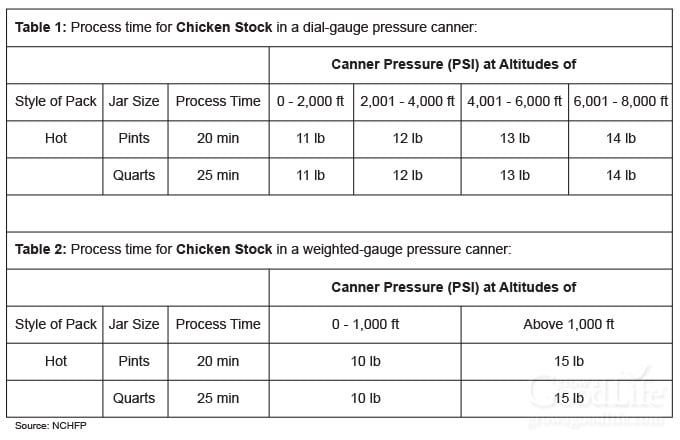
- Once the canner has reached the correct pressure (10 pounds for weighted gauge, and 11 pounds for dial gauge canners.), set a timer, and process pint jars for 20 minutes and quart jars for 25 minutes at altitudes of less than 1,000 ft.
- Adjust the heat as needed to maintain a steady pressure, and adjust altitude if necessary (see chart below).
- When processing time is complete, turn off the heat, and let the pressure canner cool down to 0 pressure on its own.
- Once the canner is depressurized, let the canner cool additional 10 minutes before removing the lid.
- When the canner has cooled down, spread a kitchen towel on the counter, unlock the cover, and remove it by tilting the lid away from you so that steam does not burn your face.
- Allow another 10 minutes for the jars to adjust to the change in pressure. If jars are still boiling, let them sit in the canner for another 5 minutes, or until the boiling stops.
- Use the jar lifter to lift jars carefully from canner and place on the towel. Keep the jars upright, and don't tighten bands or check the seals yet. Let the jars sit undisturbed for 12 to 24-hours to cool.
- After 12 to 24-hours, check to be sure jar lids have sealed by pushing on the center. The lid should not pop up. If the lid flexes up and down when the center is pressed, it did not seal. Refrigerate the jar and use up within a few days, or transfer to a freezer container and freeze for up to 6 months.
- Remove the ring bands, wash, label, date the jars, and store the jars in a cool, dark location (50 to 70 degrees F). Use within a year for the best quality. Yields about 8 pints or 4 quarts.
Notes
Nutrition
References and Further Reading
- Using Pressure Canners – National Center for Home Food Preservation
- Ball Blue Book Guide to Preserving
- USDA Complete Guide to Home Canning
You May Also Like
40+ Meals in a Jar Pressure Canning Recipes
In this eBook, you will find 50 pressure canning recipes, including 44 meals, along with homemade stocks and bone broths. Recipes include soups, stews, chilis, beans, beef, pork, and poultry. Explore the world of preserving delicious home-cooked meals for all seasons.


Getting ready to can stock now. My weighted gauge pressure canner is not depresurizing naturally, ended up taking weight off after 3 hours of cool down to release pressure. Any suggestions?
Rhonda, Wow, that is pretty strange! Did the pressure canner vent properly before you added the weight? Have you checked over the vents, air locks, to be sure they are clear and contain no trapped material or mineral deposits? I wouldn’t use it until you have solved the problem. Maybe you could reach out to the manufacturer of your pressure canner, or ask for advice at your local extension office.
i jar up hot broth and allow to seal then store in fridge for weeks. always seems perfect. am i taking a risk. i wouldnt trust storing outside fridge.
Eric, When pressure canned properly, chicken stock is safe to store without refrigerating. Yes, you are taking a risk by storing for weeks in the fridge. The refrigerator doesn’t stop bacteria from growing. Chicken stock can be safely refrigerated for 3-4 days. Other than pressure canning chicken stock, freezing is your best option longer storage. Source: USDA
Great idea to can the stock. I usually just leave it in the refrigerator, have to make it more often. I also add one turnip. 1 rutabaga.1 celery root and a daikon radish Soo good.
The root veggies must add a wonderful earthy flavor.