Toasted Almond Anise Biscotti Recipe
This post may contain affiliate links, which means that I may receive a commission if you make a purchase using these links. As an Amazon Associate I earn from qualifying purchases.
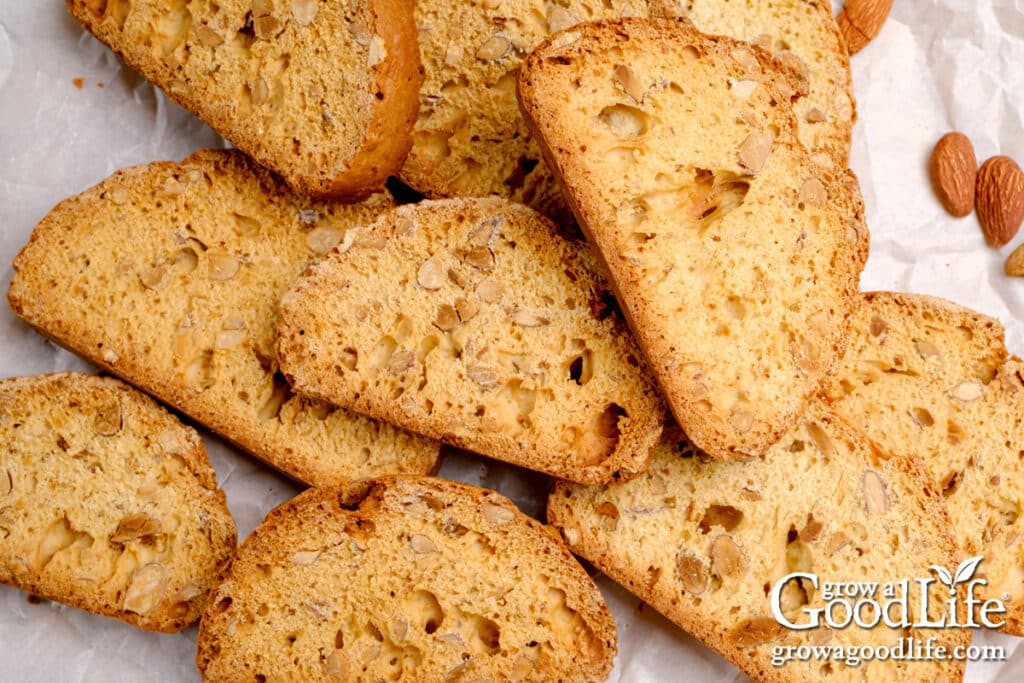
Try this toasted almond anise biscotti recipe. Classic Italian cookies with a crunchy bite. Easy to make, great for holiday cookie trays, and perfect for dipping in coffee.
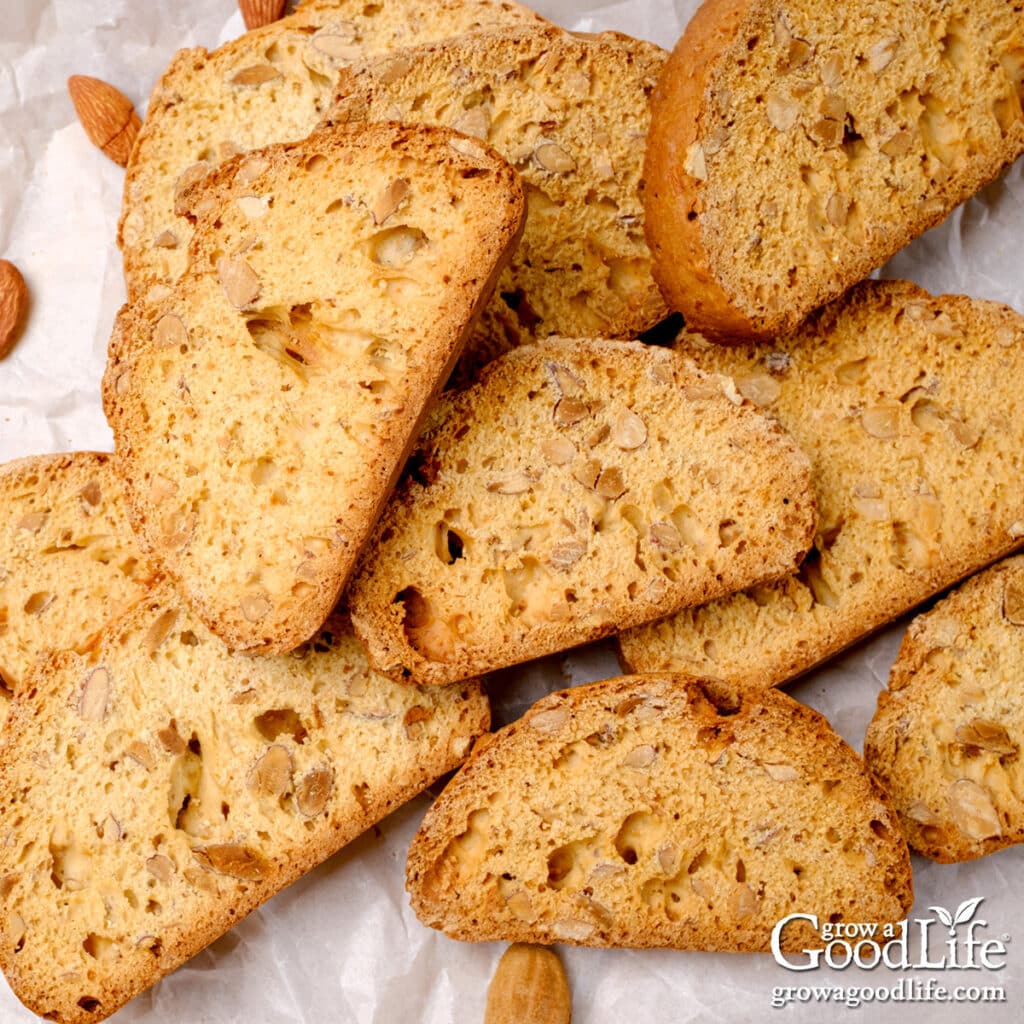
Growing up, the holidays were filled with the tantalizing aromas of my Grandmother and Auntie’s baking, particularly around Christmas. Unfortunately, none of these Italian recipes were written down. Now that they are gone, many of their delicious baked goods are only a memory. I have been on a quest to replicate some recipes that brought warm memories to our family, especially around the holidays.
This is a recipe I tinkered with for a while. As I proudly shared one of my early Italian anise biscotti batches with my father, his feedback caught me by surprise. He remarked that they were dry and hard.
I thought of biscotti as something to dip into coffee or tea, but he had another vision of the type he grew up with made by his mother, an Italian immigrant who came to the US with her family when she was only seven years old. He reminisced about the softer biscotti of his childhood.
Biscotti are baked twice, which may be where I went wrong when trying to reproduce their family recipe. I had captured the right flavoring, but the texture was not quite right since I baked them too long for the second baking.
Unlike the traditional firm versions in coffee shops, these biscotti are softer and can be eaten as a crunchy cookie without dipping into a beverage to soften. The longer you bake the biscotti the second time, the harder they are.
Steps for Making Almond Anise Biscotti
My Auntie’s biscotti are the inspiration for this Italian biscotti recipe with anise flavoring and toasted almonds. Unlike the smaller biscotti you find at coffee shops nowadays, Auntie’s biscotti were quite large. These delicious treats can be eaten as a crisp cookie, or if you prefer a firmer biscotti that’s perfect for dipping, you can bake them longer the second time around.
You can find the detailed recipe at the bottom of the post, but here are the steps to making my family’s recipe:
Step 1: Gather Your Ingredients
Here’s what you’ll need to make these traditional Italian biscotti:
- Almonds: Whole raw almonds are toasted to bring out a deep, nutty flavor, then lightly crushed for texture.
- All-purpose flour: The base of the dough, giving biscotti their sturdy, sliceable crumb.
- Baking powder: Helps the biscotti puff slightly so they’re not overly dense.
- Salt: Balances sweetness and enhances the almond and anise flavors.
- Eggs: Provide structure and help bind the dough.
- Sugar: Sweetens the biscotti and adds a touch of crispness when baked.
- Almond extract: Deepens the nutty flavor.
- Anise extract: Brings that classic Italian biscotti aroma and taste.
- Crushed anise seeds (optional): For a stronger, old-world anise flavor with a subtle crunch.
Step 2: Toast the Almonds
Toasting the almonds before adding them to the dough intensifies their nutty flavor and adds extra crunch to your biscotti.
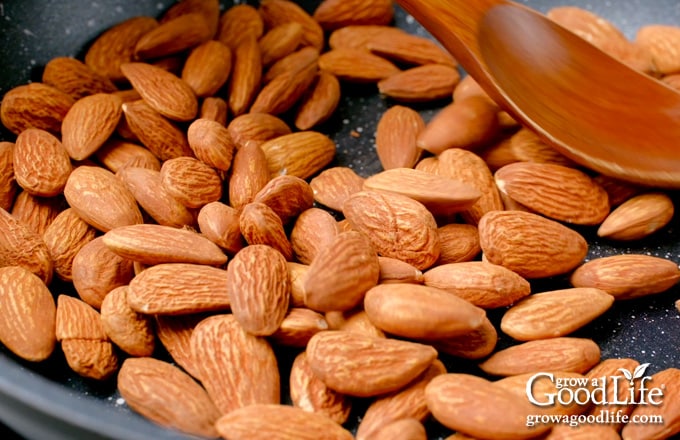
- How to toast: To toast your almonds, place them in a skillet over medium heat. Stir them frequently until they turn a fragrant and golden brown color. Toasting should take about 3 to 5 minutes.
- Watch closely: Nuts can go from perfectly golden to burnt in a matter of seconds. If some pieces darken faster than others, remove them right away.
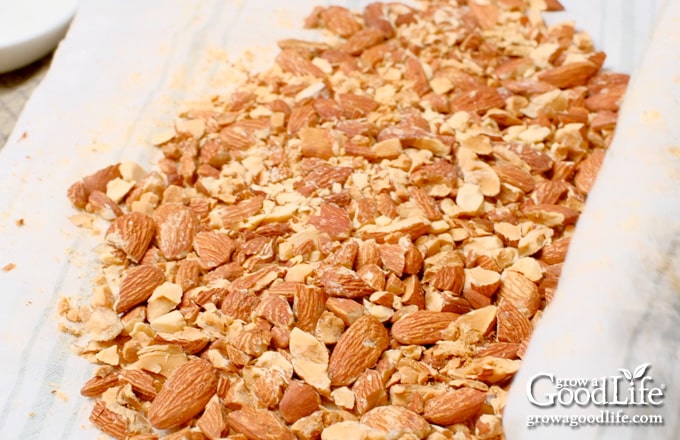
- Crush for texture: Once done, remove the almonds from the heat, and let them cool briefly. Then, wrap the toasted almonds in a kitchen towel and give them a gentle whack with a meat mallet or rolling pin. Crushing instead of chopping gives nice uneven pieces that add rustic texture to the biscotti.
Step 3: Mix the Dough
Before you begin, preheat the oven to 350˚F, line a baking sheet with parchment paper, and set it aside. Having everything ready makes the process smoother once the dough comes together.
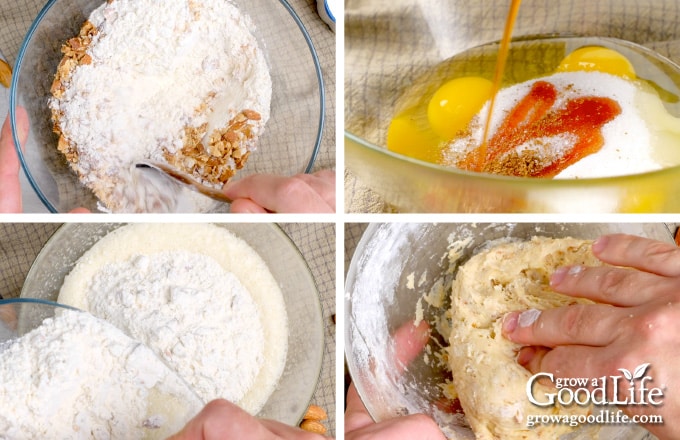
- Combine the dry ingredients: In a large bowl, stir together the crushed almonds, flour, baking powder, and salt. Set aside.
- Whip the wet ingredients: In the bowl of a stand mixer fitted with the paddle attachment, beat the eggs, sugar, almond extract, anise extract, and optional anise seeds on medium speed until the mixture is light and fluffy, about 5 minutes.
- Bring it all together: Add the flour mixture a little at a time. If the dough becomes too stiff for the mixer, finish stirring by hand with a wooden spoon. The dough will be sticky and firm, which is exactly what you want for biscotti.
Step 4: Shape the Dough
Once the dough is ready, it’s time to form it into a loaf that will become your biscotti.
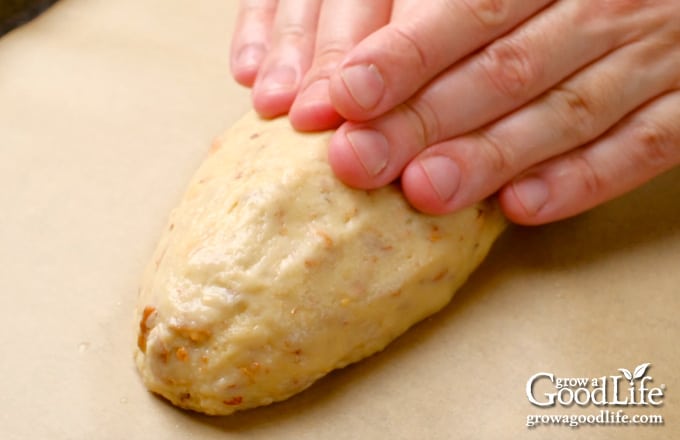
- Transfer to the pan: Scrape the sticky dough onto the center of your prepared baking sheet.
- Wet your hands: Biscotti dough is thick and tacky. Lightly wetting your hands keeps it from sticking and makes shaping easier.
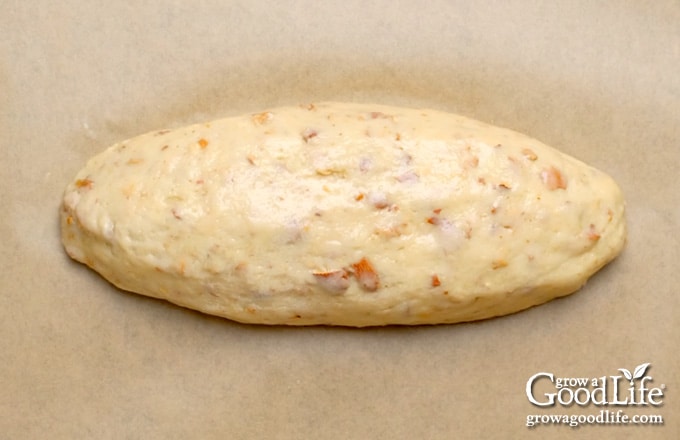
- Form the loaf: Pat the dough into a dome-shaped slab, about 4 inches wide by 12 inches long. Keeping the shape even ensures that the biscotti bake uniformly.
Don’t worry if it looks a little rustic. Biscotti are meant to have character, and the uneven edges will create those signature crisp slices.
Step 5: First Bake
The first bake sets the structure of the biscotti loaf so it can be sliced cleanly before the second bake.
- Bake the loaf: Place the shaped dough into the preheated 350˚F oven and bake for 50 to 60 minutes.
- Check for doneness: The loaf should be golden brown on top and feel firm when lightly pressed in the center. If it feels soft or leaves an indentation, give it a few more minutes.
- Cool slightly: Remove from the oven and let it rest until you can handle it comfortably without burning your hands, about 10 to 15 minutes.
- Lower the oven temperature: Reduce the oven to 300˚F to prepare for the second bake.
Step 6: Slice and Second Bake
The second bake is what transforms the loaf into the crisp biscotti we all know and love.
- Slice the loaf: Transfer the slightly cooled loaf to a cutting board. Using a serrated bread knife, slice into 1/2-inch thick pieces. A gentle sawing motion helps prevent crumbling.
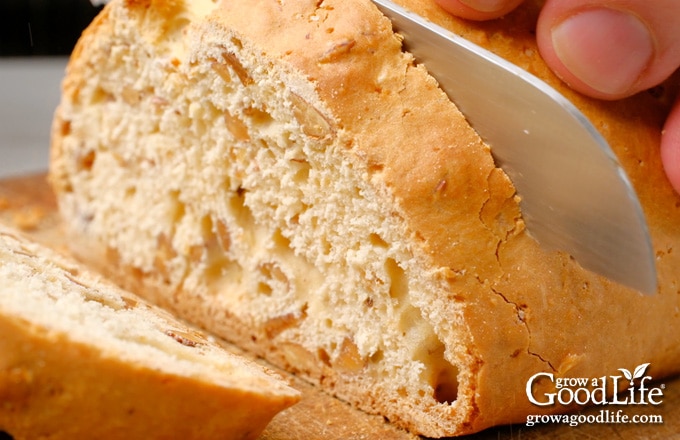
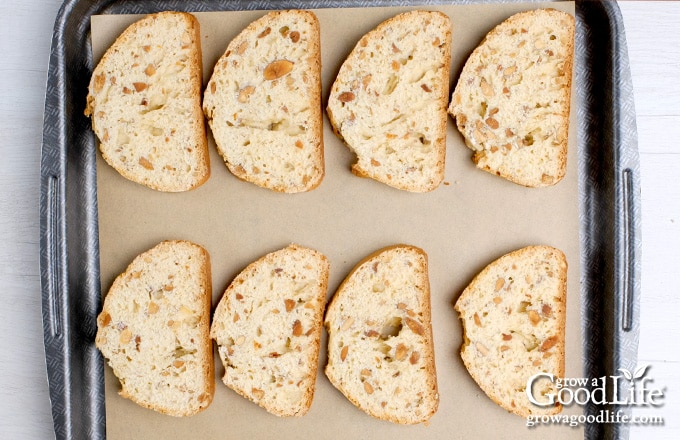
- Arrange on the pan: Place the slices cut side down on the baking sheet. This exposes more surface area for even crisping.
- Bake to your preference:
- For softer biscotti: Bake about 16 minutes total, flipping once halfway through (8 minutes per side).
- For classic crunchy biscotti: Bake up to 40 minutes total, flipping halfway (20 minutes per side). Longer baking makes them sturdy enough for dipping in coffee, tea, or even dessert wine.
- Cool completely: Transfer the biscotti to a wire rack to cool fully. They will continue to firm up as they cool.
Storage Tips
Keep your almond anise biscotti fresh and crisp with these simple storage tips:
- Cool completely before storing: Ensure the biscotti have cooled completely before storing. Placing warm biscotti in a sealed container can create condensation, making them lose their crispiness.
- Use an airtight container: A cookie tin with a tight-fitting lid is ideal. Glass or plastic containers with a good seal also work.
- Layer with parchment: If stacking biscotti in the container, place parchment or wax paper between the layers to prevent them from sticking together.
- Store in a cool, dry place: Keep the sealed biscotti container in a cool, dry place, away from direct sunlight. Exposure to heat and sunlight can affect the texture and taste.
- Freeze for longer storage: Biscotti freeze well. Store in an airtight container or freezer bag for up to 3 months. Thaw at room temperature before serving.
- Re-crisp if needed: If your biscotti lose some of their crunch over time, you can re-crisp them in the oven. Warm them in a 300˚F oven for a few minutes to restore crunch.

Flavor Variations
Once you’ve mastered this classic almond anise biscotti, try one of these tasty twists to make the recipe your own:
- Chocolate-Dipped Biscotti: After the biscotti cool completely, dip one end into melted dark or white chocolate. Let them set on parchment paper for a festive holiday touch.
- Cranberry-Orange Biscotti: Fold in 1/2 cup dried cranberries and add 1 teaspoon grated orange zest to the dough for a bright, seasonal flavor.
- Hazelnut or Pistachio Swap: Replace the almonds with toasted hazelnuts or pistachios for a different nutty twist.
- Extra Anise Flavor: Increase the anise seeds to 2 teaspoons if you love a bold licorice-like flavor.
- Almond-Chocolate Chip Biscotti: Stir 1/2 cup mini chocolate chips into the dough along with the toasted almonds.
Toasted Almond Anise Biscotti Recipe
Ingredients
- 1 cup almonds raw whole natural
- 2 1/2 cups all-purpose flour
- 1 teaspoon baking powder
- 1/2 teaspoon salt
- 3 large eggs
- 1 cup sugar
- 1 teaspoon almond extract
- 1 teaspoon anise extract
- 1 teaspoon crushed anise seeds (optional)
Instructions
- Preheat your oven to 350˚F and line a baking sheet with parchment paper.
Toast the Almonds
- Toast your almonds by placing them in a skillet over medium heat until they are fragrant and golden brown. Stir them frequently so they brown on all sides, and remove any that brown quicker than others. It should take about 3 to 5 minutes.
- Remove the toasted almonds from the heat, wrap them in a kitchen towel, and crush them with a meat mallet.
Mix the Dough
- Add the crushed almonds, flour, baking powder, and salt to a large bowl and stir to combine. Set aside.
- Using a stand mixer, beat the eggs, sugar, almond extract, anise extract, and optional anise seeds on medium speed until light and fluffy, about 5 minutes.
- Add the flour mixture a little at a time. If the mixer begins to strain, work the rest of the flour in with a wooden spoon or your hands. The dough will be firm and sticky.
Shape the Dough
- Gather the mixture into a log shape and place it in the center of the prepared baking sheet. Wet your hands and pat the dough into a 4 x 12-inch dome-shaped slab.
First Bake
- Bake in a preheated oven for 50 to 60 minutes or until brown and firm when you touch the top with your finger.
- Remove the biscotti from the oven and let it cool, and reduce your oven heat to 300˚F.
Slice and Second Bake
- Once the biscotti loaf is cool enough to handle, transfer it to a cutting board. Use a serrated knife and slice into 1/2-inch wide biscotti.
- Place slices cut side down on the baking sheets, and bake again until desired crispness, about 16 minutes for a softer biscotti and up to 40 minutes for a firmer biscotti that stands up to dunking. Flip halfway through for even baking.
- Let the biscotti cool completely on the baking sheets or a wire cooling rack. Store in an air tight container. Makes about 16 biscotti.
Notes
Nutrition
Enjoy Almond Anise Biscotti for the Holidays
These toasted almond anise biscotti bring the taste of tradition to your holiday table. Enjoy them plain with a cup of coffee or tea, or dip them into espresso for an afternoon treat.
They also make a thoughtful homemade gift. Stack a few in a clear bag, tie with ribbon, and add them to a Christmas cookie tray.
If you’re planning a holiday baking day, try some of my other favorite Christmas cookies too:
- Soft Molasses Cookies: Chewy, spiced classics that taste like Christmas.
- Italian Christmas Sprinkle Cookies: Tender glazed cookies topped with colorful sprinkles.
- Old Fashioned Gingersnaps: Crisp, spicy, and perfect for dunking.
- 30+ Homemade Food Gifts for Christmas: More ideas to share the season’s sweetness.
Bake up a batch of these biscotti and keep the tradition alive one crunchy, anise-scented bite at a time.
10 Cookie Mix in a Jar Recipes eBook
Homemade gifts are always appreciated because they come from the heart. Even if you are not crafty, you can give DIY gifts to your family and friends with these easy recipes for making cookie mix in a reusable jar.


Fantastic, authentic Italian biscotti. I may dip a few in chocolate but they are definitely wonderful as is.
Ok, first of all I don’t want them so hard they can’t be enjoyed w/out dunking, but hard enough to dunk. And secondly, I saw a recipe that bakes in loaf pans so as not to over-spread. Is it feasible to use this recipe in this manner? Thanx!
Rochelle, I haven’t used a loaf pan for this recipe, so I can’t advise how it will do. I don’t see why it wouldn’t work. Please let me know if you try it.
Amazing recipe. I tried making it today for the first time and the biscotti came out great
I’ve always wanted to try making biscotti! These look delicious!
May I use whole wheat flour instead of all purpose flour?
Many thanks……..Araucano.
Araucano, Yes, you can use whole wheat flour.
Hello and thanks for a healthy and authentic italian recipe.I’m planning to try it in the near future.
Close to the original that could be kept for months.Your website is much appreciated,Good luck.araucano.
Thanks for the recipe. I have not yet tested it because there is no OIL NOR BUTTER in it. Did you accidentally omit the oil these normally have in them? Please let me know assap. I know they are supposed to be hard dry cookies but I have yet to see a biscotti recipe devoid of either oil or butter.
Also, the COOKING TIME does not match the times listed in the directions. 50 mins plus either 16 mins or 40 mins would be either 66 mins or 90 mins, not 1 hour.
Thanks AGAIN for sharing this.
Courtney, The recipe is correct — no oil or butter. This recipe will result in a firm, dry biscotti that is suitable for dunking. This is a recipe that is very well tested. I use it often throughout the year. Thank you for letting me know about the cooking time, I did adjust and included the maximum time estimate.