Growing Herbs: 7 Herbs to Start from Seed
This post may contain affiliate links, which means that I may receive a commission if you make a purchase using these links. As an Amazon Associate I earn from qualifying purchases.
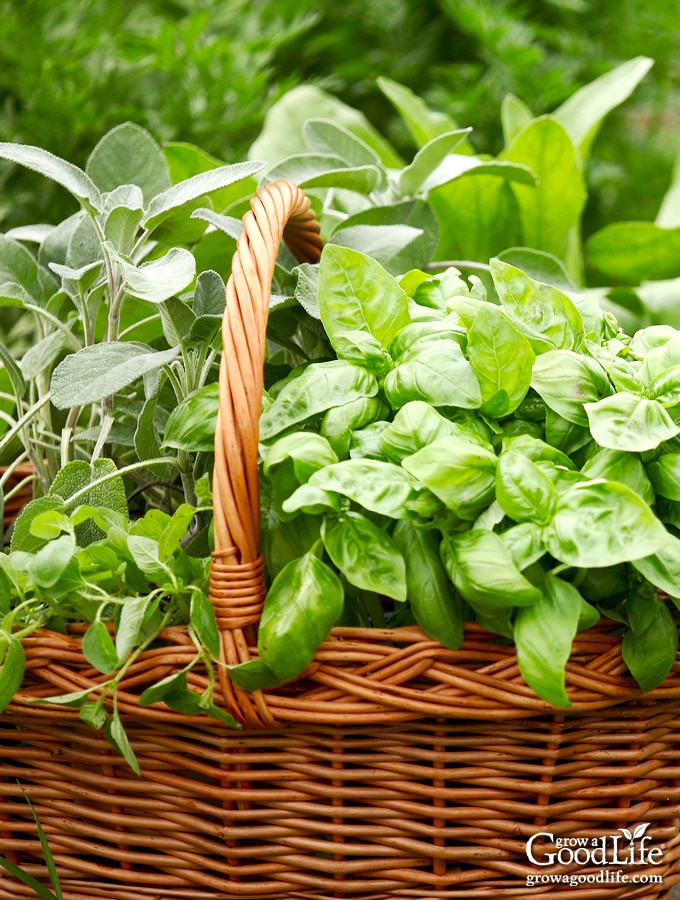
Herbs can be grown in an herb garden, vegetable garden, flowerbed, and even in containers. Here are seven easy herbs to start from seed, plus tips for growing herbs.
Fresh herbs add delightful flavor and fragrance to foods. You can’t get any fresher than snipping leaves and springs from your own homegrown plants right before meal preparation.
Growing herbs is easy because once the plants are established, they require very little maintenance and produce a generous supply for harvests as needed and enough to dry and fill your spice jars.
Tips for Growing Herbs from Seed
Growing herbs from seed takes time but the reward is worth the effort. Here are the basic steps for starting herb seeds indoors. You can find more detailed information in this article: 10 Steps to Starting Seedlings Indoors.
- Light: Herbs need plenty of light to grow into healthy plants. This simple DIY seed-starting rack with grow lights is perfect for starting herbs from seeds indoors.
- Containers: You can use seed-starting flats, peat pots, toilet paper rolls, newspaper pot, or any reused container with a few drainage holes poked into the bottom. Here are some ideas: 8 Recycled Seed Starting Containers for Gardening
- Seed starting mix: Fill your containers with pre-moistened seed starting mix to within 1/2-inch of the top of the container. Starting seeds in fresh seed starting mix will help you grow healthy seedlings because you are less likely to introduce pathogens that may cause disease in young plants.
- Sow seeds: Poke holes in the soil at the recommended depth, and drop 2 or 3 seeds into the holes. Cover the seeds with soil and mist the surface with water. Use a humidity dome to keep in moisture, and place the containers in a warm location.
- Water: Keep the soil moist but not soggy. Mist with water when the soil surface has dries out and cover with the humidity dome until the seeds germinate. When the seeds sprout, remove the humidity dome and place the trays under lights.
- Fertilize: Begin fertilizing the seedlings once true leaves sprout. Start with half-strength, organic liquid fertilizer such as fish fertilizer or worm casting tea. Follow the instructions on the label for best results.
- Thin the plants: If more than one seed sprouted per container, you will need to remove the extra plants so the seedling can grow strong and healthy. Choose the strongest plant in each container and remove the extras by snipping them at the soil level.
- Repot if needed: Transplant the herbs to larger pots once they outgrow their original containers. Once the herb plants outgrow their pots, you can transplant to larger containers.
- Harden off: Begin hardening off your herb seedlings before transplanting them into the garden to allow them to acclimate to outdoor conditions: How to Harden Off Your Seedlings Before Planting.
- Transplant: Once your herb seedlings are hardened off, they are ready to be moved to their permanent growing location in containers or the garden.
7 Easy Culinary Herbs to Start from Seed
Herbs are a great addition to the garden and can be grown in a designated herb plot, among your other vegetables, intermingled in your flowerbed, or even in containers. The blooms are also beautiful and attract butterflies and other beneficial insects to the garden.
Here are some of my favorite culinary herbs to grow year after year:
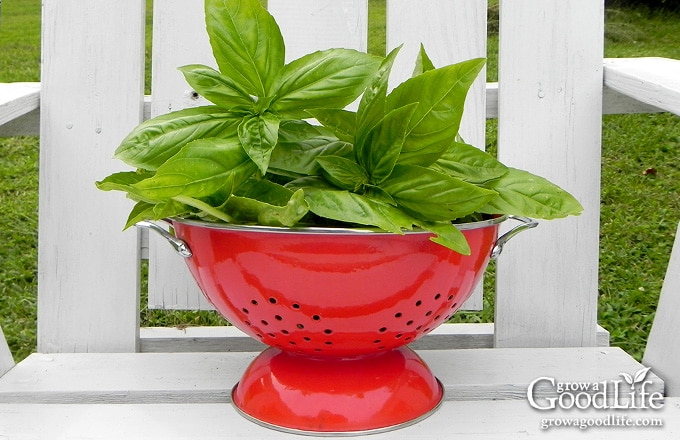
Basil
Italian Genovese Basil (Ocimum basilicum) is a tender annual herb that grows as an attractive bushy, upright plant with broad, smooth, shiny green leaves. Also called “Sweet Basil” as it has a sweet and delicate flavor that blends well with tomato dishes as well as pesto. If you like pesto, you will want to grow a large amount of basil so you have plenty to use fresh and preserve for later.
- Sun: At least 6 hours.
- Size: 24 inches tall, 10 inches wide.
- Days to Germinate: 5-10.
- How to Grow: Start seeds indoors 6-8 weeks before the last frost date for your area or sow outside after danger of frost has past. Cover seeds with 1/4-inch of soil and keep warm and moist. Basil is extremely sensitive to frost. Transplant hardened-off seedlings into the garden after all danger of frost have passed. Plant 12-18 inches apart.
- Soil: Basil prefers well-drained loamy soil rich in organic matter. Keep soil evenly moist making sure water reaches the roots.
- Harvest: The younger leaves have more flavor. Harvest by pinching off stems above a pair of leaves as needed. This will encourage the plant to branch out. Keep the plant producing by pinching off the flower heads as they form.
- Learn More: See How to Grow Basil for more growing information.
English Thyme
English Thyme (Thymus vulgaris) is a hearty perennial herb that grows as a woody shrub with small, oval, gray-green leaves on long, wiry stems. The savory flavor of Thyme complements most meats, including chicken, beef, pork, and game.
- Hardiness: Zones 4-9.
- Sun: At least 6 hours.
- Size: 6-12 inches tall and wide.
- Days to Germinate: 10-15.
- How to Grow: Start seeds indoors 8 weeks before average last frost date or sow outside 1 to 2 weeks after average last frost.
- Thyme has a reputation for being difficult to germinate but will succeed with these tips: Sprinkle a pinch of the small seeds on the soil surface and mist lightly. Thyme needs light to germinate so do not cover seeds. Keep surface moist by frequently misting the soil surface. Be patient, thyme takes a long time to sprout. Transplant hardened-off seedlings to the garden after all danger of frost is past. Plant 10-12 inches apart.
- Soil: Thyme prefers a sandy, dry soil. Thyme is not a heavy feeder, so soil should only receive a moderate amount of organic fertilizer at planting time. Thyme is relatively drought tolerant once established.
- Harvest: Cut foliage as needed leaving at least 3-inch (7.5 cm) stems to continue growing.
- Learn More: See How to Grow Thyme for more detailed growing information.
 is a hearty perennial herb that grows as a woody shrub with small, oval, gray-green leaves on long, wiry stems. The savory flavor of Thyme complements most meats, including chicken, beef, pork, and game.")
Greek Oregano
Greek Oregano (Origanum heracleoticum) is a hardy perennial that is easy to grow. Oregano is widely used in Italian and Greek food and complements many other dishes such as stews, grilled meats, pizza, salads, and soups.
- Hardiness: Zones 4-9
- Sun: At least 6 hours.
- Size: 24 inches tall and wide.
- Days to Germinate: 7-14.
- How to Grow: Start seeds 6-8 weeks before average last frost date or sow outside 2 to 4 weeks after average last frost. Sprinkle a pinch of the small seeds on the soil surface and mist lightly. Oregano seeds require some light to germinate so do not cover seeds. Keep surface moist by frequently misting the soil surface. Transplant hardened-off seedlings into the garden after all danger of frost have passed. Plant 18-22 inches apart.
- Soil: Oregano prefers a loamy soil that drains well. Water occasionally until plants become established after transplanting. Oregano should not be fertilized because it reduces the plant’s flavor. Oregano tends to spread both by rhizomes and self-sowing.
- Harvest: Once the plant reaches 6-inches; begin snipping leaves and stems as needed throughout the growing season. Clipping stems will allow the plant to bush out. Harvest before the plant blooms for the strongest flavor.
- Learn More: See How to Grow Oregano for more detailed growing information.
 is a hardy perennial that is easy to grow. Oregano is widely used in Italian and Greek food and complements many other dishes such as stews, grilled meats, pizza, salads, and soups.")
Sage
Sage (Salvia officinalis) is a shrubby perennial herb with woody stems, gray-green leaves, and blue to purplish flowers. It has a savory, slightly peppery flavor that compliments sausage, stuffing, pork, poultry, game, and vegetables.
- Hardiness: Zones 4-8.
- Sun: At least 6 hours.
- Size: 24 inches high, 36 inches wide.
- Days to Germinate: 10-20.
- How to Grow: Start seeds 4-6 weeks before average last frost date or sow outside 1 to 2 weeks after average last frost. Transplant hardened-off seedlings into the garden after all danger of frost is past. Plant 12-18 inches apart.
- Soil: Sage prefers well-drained, sandy or loamy soil. Water young plants regularly until they are fully-grown. Once established, sage is pretty drought tolerant.
- Harvest: Allow plants to become established the first year. Once established, pick leaves as needed. Sage has the strongest flavor before they bloom, but I harvest and enjoy all season.
- Learn More: See How to Grow Sage for detailed growing tips.
 is a shrubby perennial herb with woody stems, gray-green leaves, and blue to purplish flowers. It has a savory, slightly peppery flavor that compliments sausage, stuffing, pork, poultry, game, and vegetables.")
Chives
Chives (Allium schoenoprasum) are a hardy perennial herb that grows in spiky, grass like clumps. The mild onion flavored foliage compliments many dishes of different cuisines. The orb-shaped lavender blossoms that bloom in the summer are also edible and are attractive to beneficial insects.
- Hardiness: Zones 4-11.
- Sun: 4-6 hours.
- Size: 10-12 inches tall and wide.
- Days to Germinate: 10-20.
- How to Grow: Start seeds indoors 6 weeks before average last frost date or sow outside as soon as the ground can be worked. Transplant hardened-off seedlings to the garden after all danger of frost have passed. Chives grow in clumps, so there is no need for thinning.
- Soil: Chives grow best in rich, well-drained soil. Work in a slow-release fertilizer into the soil before planting. Water frequently when plants are young.
- Harvest: Allow new plants to become established for the first year by harvesting sparingly. Once the plant is 6 inches (15 cm) tall, select leaves from the outside of the clump and cut 2 inches (5 cm) from the soil. The plant will continue to grow. Trim back to 2-inches after blooms fade and the plant will produce fresh growth.
- Learn More: See How to Grow Chives for more growing information.
 are a hardy perennial herb that grows in spiky, grass like clumps. The mild onion flavored foliage compliments many dishes of different cuisines. The orb-shaped lavender blossoms that bloom in the summer are also edible and are attractive to beneficial insects.")
Parsley
Italian, Flat Leaf Parsley (Petroselinum crispum) is a biennial herb that is normally grown as an annual. It has a fresh flavor that complements and doesn’t overpower other flavors in a dish. Parsley pairs well with meats, salads, soups, and roasts.
- Sun: At least 6 hours.
- Size: 12-18 inches tall and wide.
- Days to Germinate: 14-28.
- How to Grow: Start seeds indoors 6-8 weeks before the last frost date in your area or sow outside after danger of frost is past. Parsley takes a long time to sprout. To help speed up germination, soak seeds in warm water for up to 24-hours before planting. Cover seeds with 1/8-inch of soil and keep moist. Transplant hardened-off seedlings into the garden after all danger of frost is past. Plant 8 inches apart. Once established, parsley can withstand a light fall frost.
- Soil: Parsley prefers well-drained loamy soil rich in organic matter. Water young plants regularly until they are fully-grown. Water regularly and do not allow the plants to dry out completely.
- Harvest: Snip outer stalks from the base of the plant and trim off leaves as needed. Freeze stalks and use in making stalks and broths.
- Learn More: See How to Grow Parsley for more growing and preserving tips.
 is a biennial herb that is normally grown as an annual. It has a fresh flavor that complements and doesn’t overpower other flavors in a dish. Parsley pairs well with meats, salads, soups, and roasts.")
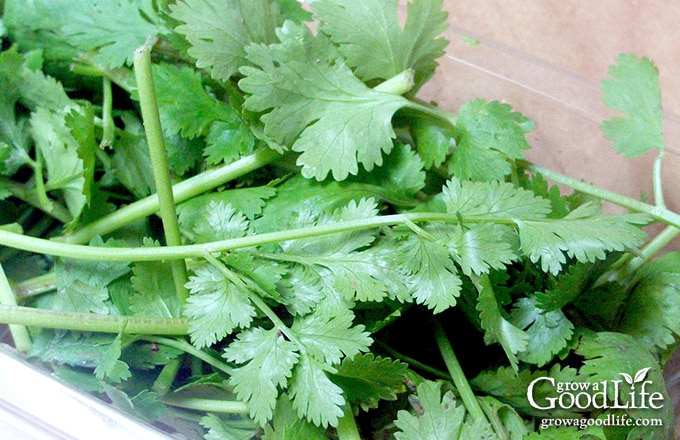
Cilantro
Cilantro/Coriander (Coriandrum sativum) is a cool season annual herb that grows and matures quickly. The leaves are called cilantro, and the seeds are called coriander. The leaves pair well with Mexican, Asian, and Indian foods while the crushed seeds adds a mild earthy lemony flavor when added to curries, soups, and stews.
- Sun: At least 6 hours.
- Size: 12-24 inches tall.
- Days to Germinate: 10-15.
- How To Grow: Cilantro doesn’t respond well to transplanting and root disturbance will cause the plant to bolt or go to seed. Use soil blocks or direct sow seeds outdoors two weeks before average last frost date. Cover seeds with 1⁄2-inch of soil, keep moist, and thin to 4 inches apart once seedlings reach 2-inches high. Cilantro prefers to grow during cooler spring and fall seasons. It will mature quickly, often within 4-weeks or faster if the weather turns warm. Succession sowing every 3 weeks will keep a steady supply growing. Cilantro frequently self sows. Allow seeds to mature for Coriander and let a few drop for new plants.
- Soil: Cilantro prefers well-drained loamy soil rich in organic matter. Water young plants frequently until mature. Water regularly as needed and do not allow the plants to dry out completely, or they will go to seed prematurely.
- Harvest: Once the plants are 4-inches high, snip fresh leaves from the outer edges allowing the center of the plant to continue to produce. After cilantro flowers, coriander seeds can be harvested green and frozen or allowed to dry and turn brown. Store coriander seeds whole in an airtight container. Crush when ready to use to release its flavors.
- Learn More: See How to Grow Cilantro (Coriander) for more tips.
Helpful Tips for Growing Herbs
Harvesting herbs: Pick herbs in the early morning when aromatic oil concentrations are highest for the greatest flavor. How to Harvest and Preserve Herbs for Storage.
No yard or garden? No problem! Most herbs can grow in pots and containers that can be located on a deck, patio, or driveway. Potted herbs can be brought inside when the weather turns cool (see Herbs that Thrive Inside All Winter).
—
These culinary herbs are only a small representation of varieties of herbs that can be added to your garden. There are so many herbs to explore and grow for food, tea, medicine, and to use in making bath and beauty products.
You May Also Like:
- 13 Culinary Herbs That Grow in Partial Shade
- 5 Herbs that Thrive Inside
- Troubleshooting Seed Starting Problems
- How to Grow Food Indoors

I love your articles so much. very helpful. I have lots of herbs growing but the one that grows like crazy is the Sage and I don’t really have much use for it. I would like to know what you use it in.
Carole, I’m glad to hear you find the articles helpful! Sage is indeed a prolific herb. It’s great for adding a savory, earthy flavor to dishes. You can use it in various recipes such as roasted vegetables, soups, stews, pasta dishes, and even in stuffing for poultry. It pairs particularly well with ingredients like butter, garlic, lemon, and thyme. Experimenting with different recipes can help you discover new ways to enjoy your abundance of sage!
This was exactly what I was looking for! Thank you for the simple & to the point instructions 🙂
Lyia, I am so glad you found this helpful!
Great ideas! I have had bad luck with chive seeds the last 3 years. I finally gave up and bought a plant last year and it grew just fine! Thanks for the tips! ~Lisa
I’m trying to get some lavender to grow right now… Not had the best time with herbs from seeds, but I’m not giving up!
Lavender is a tough one to grow from seed. I am coaxing four seedlings under lights right now, but I hope to propagate through cuttings for future plants.