Vegetable Garden Layout: How to Plan and Map Your Beds
This post may contain affiliate links, which means that I may receive a commission if you make a purchase using these links. As an Amazon Associate I earn from qualifying purchases.
Plan your vegetable garden layout step by step! Learn how to map your beds, organize crops, and make the most of your space for a productive growing season.
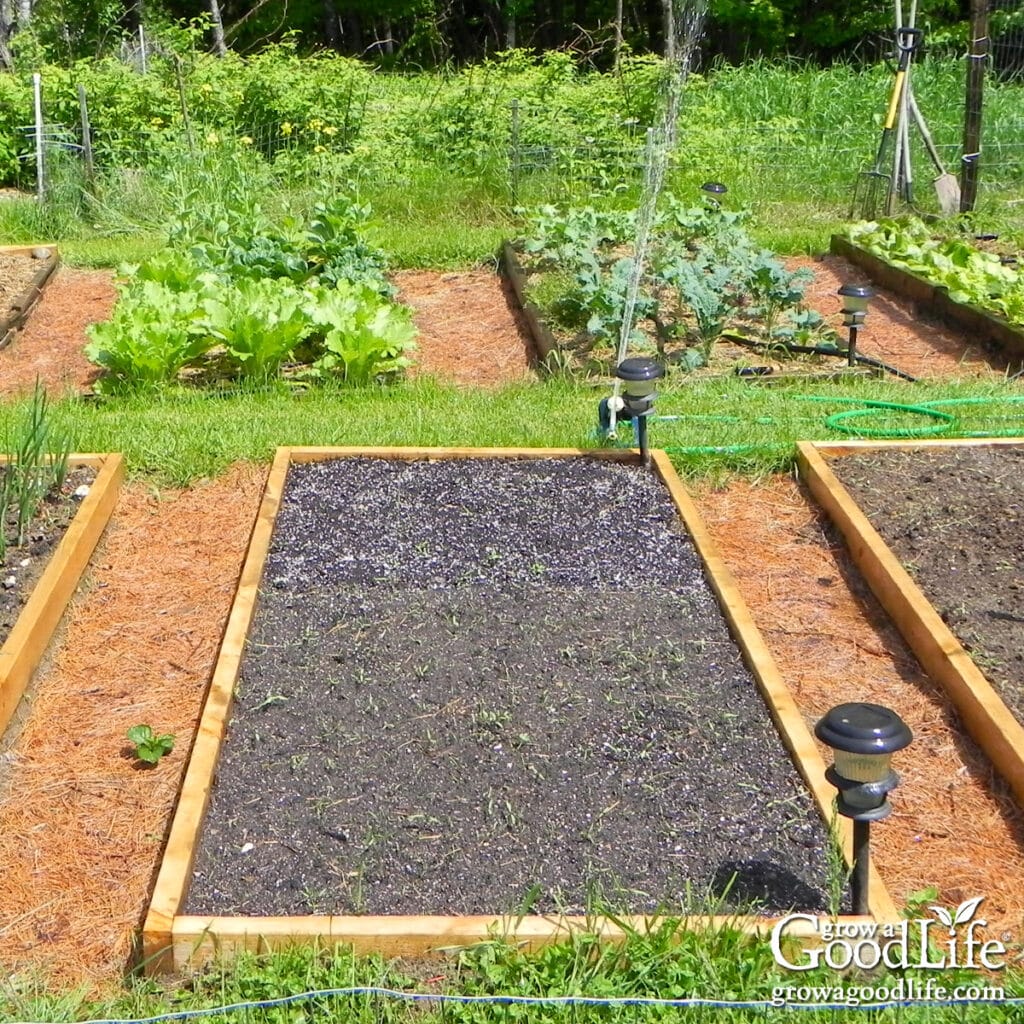
When snow still blankets the ground and the seed catalogs begin to arrive, it’s the perfect time to dream about your garden. Before long, you’ll be digging, planting, and watching the first green shoots appear.
Mapping your vegetable garden early helps you start the season organized and confident. A simple plan shows how everything will fit, where each crop will grow, and how to keep your beds producing from spring through fall.
In this guide, we’ll walk through how to plan your vegetable garden layout step by step, from sketching your beds and organizing crops by family to rotating plantings for healthy, abundant harvests.
Why Mapping Your Vegetable Garden Matters
Before the planting begins, taking time to map out your vegetable garden gives you a clear picture of what’s ahead. A simple sketch helps you see how much space you have, where each crop will grow best, and how the beds can stay productive from spring through fall.
Mapping your garden also makes it easier to plan for crop rotation, companion planting, and succession sowing. By noting where you plant each family of vegetables, you can reduce pest and disease issues and keep your soil healthy from one season to the next.
Another major benefit of mapping your garden early is knowing exactly how many plants you’ll need. When you can see each bed laid out on paper, you’ll have a clear count of how many tomato, pepper, or cabbage seedlings to start indoors and how much seed to order. This makes your seed-starting schedule far more efficient and prevents the common problem of growing too many (or too few) transplants.
Finally, a garden map helps you stay organized when it’s time to sow seeds and transplant seedlings. Instead of guessing where things should go, you’ll have a plan that fits your space and supports your goals.
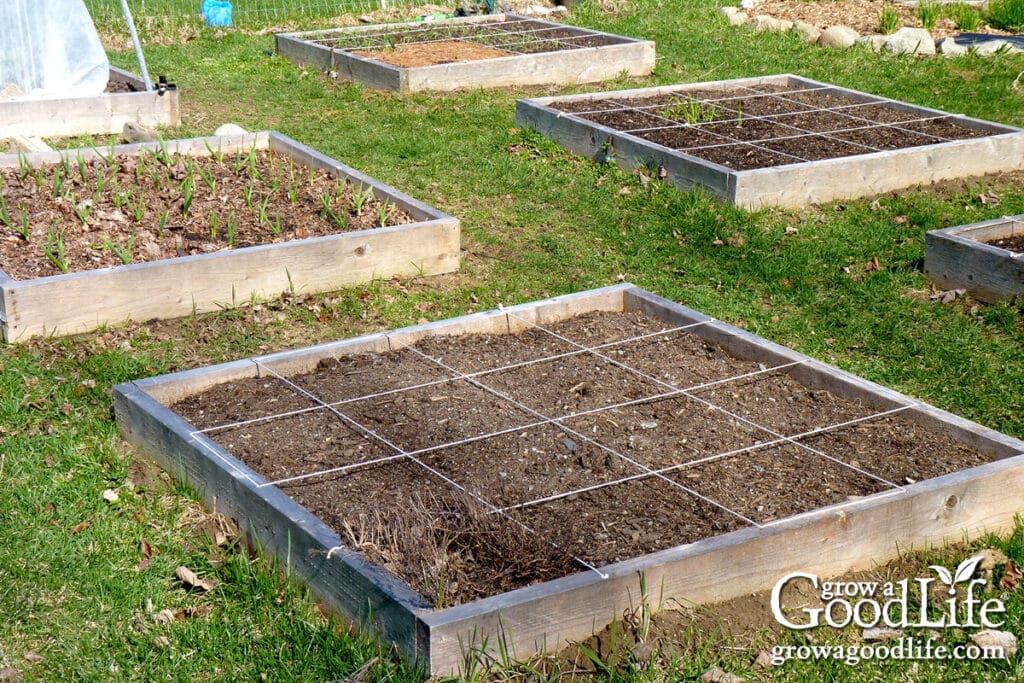
Plan Strategically Before You Map
Now that you understand why mapping your garden is so valuable, it’s time to think through the details that will shape your layout. A little forethought now saves frustration later.
Consider how plant spacing, crop rotation, and vertical growing will affect your design. Thinking through these basics before you start sketching helps ensure every bed is efficient, productive, and easy to manage once the season begins.
Plant Spacing and Airflow
Give each plant the space it needs to thrive. Crowded plants compete for nutrients, water, and airflow, often resulting in smaller harvests and more pest and disease problems.
When sketching your garden map, check the spacing guidelines on your seed packets or transplants. Proper spacing keeps your plants strong, makes weeding and watering easier, and helps you visualize how many seedlings to start for each bed.
Rotate Crop Families Each Year
Rotating crops between garden beds each year helps prevent soil-borne diseases and nutrient depletion. Vegetables from the same plant family utilize similar nutrients and are often susceptible to the same pests. Planting different crop families from year to year helps avoid depleting the soil and prevents crop-specific pests and diseases from building up from one season to the next.
Rotate plant families from one bed to another each season to balance nutrients and interrupt pest and disease cycles. In my garden, I focus on five vegetable plant families for rotation planning purposes:
- Allium Family: Chives, garlic, leeks, onions, shallots
- Solanaceae Family: Tomatoes, potatoes, peppers, eggplant, tomatillos
- Brassica Family: Broccoli, cabbage, cauliflower, collards, kale, kohlrabi, mustard greens, radish, rutabaga, turnip, spinach
- Cucurbit Family: Cucumbers, gourds, melons, pumpkins, squash
- Legume Family: Beans and peas
Keep a record of where each family grows this season so that you can shift them next year. This simple habit improves soil fertility and supports healthier plants.
Learn more: Benefits of Crop Rotation for Your Vegetable Garden
Grow Vertical on the North Side
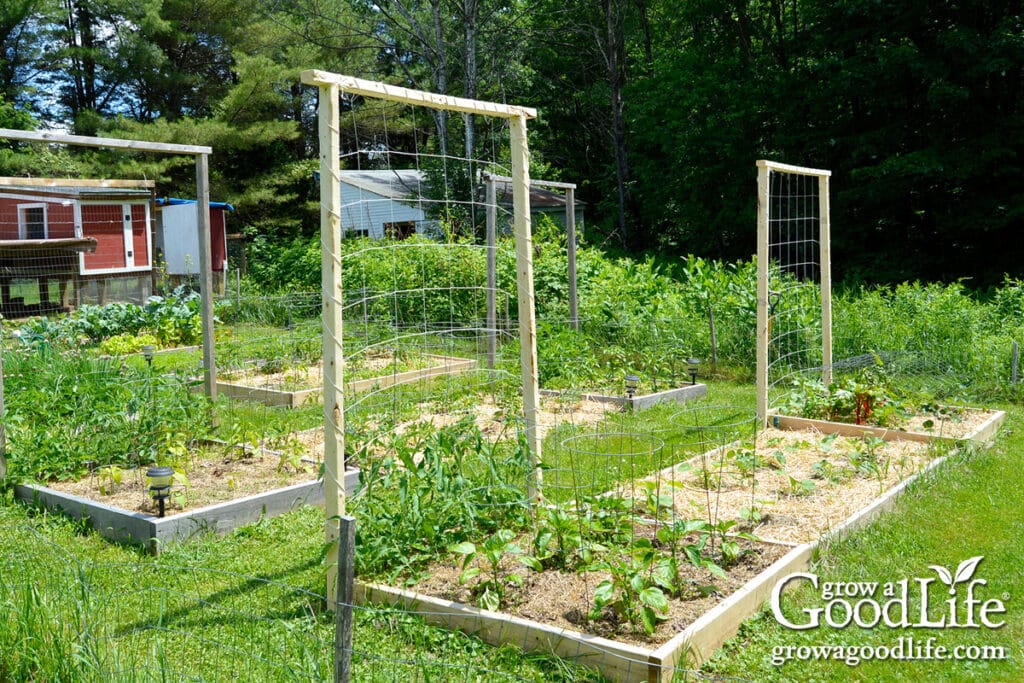
Climbing plants and tall crops, such as peas, pole beans, and indeterminate tomatoes, can easily shade out smaller plants if placed in the wrong spot. Grow them along the north side of your beds so they capture full sunlight without blocking shorter crops.
Plan where trellises, cages, or supports will go on your garden map before planting. This helps you avoid crowding and ensures good airflow around vining crops. Here are a few ideas that work well in most home gardens:
- Trellis panels or cattle panels: Great for peas, pole beans, and cucumbers. They’re sturdy, reusable, and allow for easy harvesting on both sides.
- Tomato cages or stake-and-string systems: Keep indeterminate tomatoes upright and off the ground to improve airflow and reduce disease.
- A-frame trellises: Perfect for small gardens where you can grow crops on both sides and plant shade-tolerant greens beneath.
- Netting or twine: Ideal for lighter climbers, such as peas or small cucumbers.
Learn more: 9 Creative DIY Trellis Ideas
Succession Planting to Keep Beds Productive
A garden map helps you plan successions so your beds stay full all season long. Bush beans or carrots can follow quick crops like lettuce and spinach, and then be replanted again with cool-season greens in the fall.
Succession planting doesn’t have to be complicated. A few ideas to get you started:
- Leafy greens: Sow small patches every two to three weeks for continuous harvests.
- Root crops: Replant carrots, beets, and radishes as soon as earlier rows are cleared.
- Legumes: Follow nitrogen-hungry crops like corn or squash with bush beans or peas to help replenish the soil naturally.
Even in my Maine Zone 5 garden, I can grow three crops in the same garden space if I schedule carefully. First, I plant quick-growing crops like spinach, lettuce, and various other greens during the spring. Once the warmer weather arrives and the spring greens are harvested, I remove the plants and sow bush beans. After the bush beans have finished producing, I then plant a fall crop of spinach, lettuce, and other cool-season crops.
Learn more: Succession Planting Tips to Maximize Your Harvest
Use Your Winter Storage and Pantry Inventory
Reviewing what’s left in your pantry or freezer helps guide your garden plans for the coming year.
At the end of winter, I inventory what is left in storage and decide if I need to increase or decrease the number of plants grown to provide us with enough preserved food until the following year’s garden begins to produce.
For example, if we ran out of tomato sauce early, I would devote space to grow more tomato plants. If we still have plenty of pickles, I will plant fewer cucumbers.
Your garden map isn’t just about spacing; it’s about growing the right amount of food for your household. Over time, these notes become a helpful reference for balancing fresh eating and food storage.
Learn more: 9 Crops to Grow for Winter Food Storage
Once you’ve thought through spacing, rotation, and how your crops will share the garden through the season, it’s time to bring your ideas to life on paper. A simple sketch or garden diagram will help you visualize the layout, plan your plantings, and see exactly how everything fits together before the first seed goes in the ground.
Now, let’s walk through how to map your vegetable garden step by step.
How to Plan Your Vegetable Garden Layout (Step by Step)
Before you begin sketching your layout, take a few minutes to review your list of crops and think through your priorities. Each garden is unique, and the way you arrange your beds will depend on what you like to grow and how you plan to use your harvest.
Start with a blank garden diagram and your list of vegetables. Decide roughly how many plants of each crop you’ll grow, then check the seed packets for spacing and sunlight requirements. This helps you estimate the amount of space each crop will need.
I like to begin with the vegetables that matter most to our pantry. The ones that feed us through the year. For example, we rely heavily on canned tomato sauce, salsa, and frozen tomatoes for soups and stews. So tomatoes, peppers, onions, and garlic always take top priority in my layout. Once those are placed, I move on to crops that need trellises or extra space, then fill in with short-season spring crops and successions for later plantings.
Step 1: Sketch Your Garden Beds to Scale
Start by creating a simple map of your garden space. You don’t need fancy software; just a sheet of paper or a graph paper grid will do.
Draw your raised beds or rows to scale so you can accurately estimate the amount of growing area you actually have. If you prefer digital tools, several free online garden planners are available, allowing you to drag and drop crops into place.
Include any permanent features such as fences, sheds, pathways, compost bins, or water spigots so you can plan access paths and avoid shaded or compacted areas.
Label each bed with its length and width, and leave room between them for walking and weeding.
Be sure to mark which direction is north on your sketch. Sunlight direction matters more than most gardeners realize. Taller plants like tomatoes, pole beans, or sunflowers should go along the north edge of the bed so they don’t cast shade over shorter crops. Smaller, low-growing vegetables such as lettuce or carrots can be placed in the southern or front areas where they’ll get the most light.
If you’re gardening on a slope, note the contour or elevation lines on your sketch as well. Water runs downhill, and knowing the direction of your slope helps you position beds across the grade to slow erosion and encourage even moisture.
Take your time with this step. It’s the foundation for a well-organized garden that’s both productive and easy to maintain.
Step 2: Plot Your Priority Crops First
Once your garden sketch is ready, begin filling it in with your most important crops that feed your family often or that you preserve for the winter. These are the backbone of your garden and deserve the best placement for sunlight, airflow, and easy access.
Think about the vegetables you rely on most in your kitchen. For us, that means tomatoes for sauce, peppers for salsa, onions, and garlic. These crops need full sun and room to spread, so I always give them priority space first. Once those are set, everything else can fit around them.
If your goal is fresh eating, place high-turnover crops like lettuce, radishes, and herbs near paths for quick harvesting. If you grow for preserving, give your canning or storage crops the prime real estate where soil stays consistently rich and well-drained.
Also consider harvest timing as you plan. Early crops like peas, spinach, and lettuce can occupy spaces that later warm-season crops will fill. For example, you can plant spring greens in the same bed where you’ll later grow peppers or bush beans.
Take note of how much space each crop requires and sketch it in using the spacing from your seed packets. Grouping similar plants together (such as all your tomatoes in one bed and all your onions in another) makes watering, fertilizing, and rotating crops much easier in future seasons.
If you’re unsure which vegetables to prioritize, review your garden goals and meal habits.
Step 3: Add Trellised and Vertical Crops to Your Layout
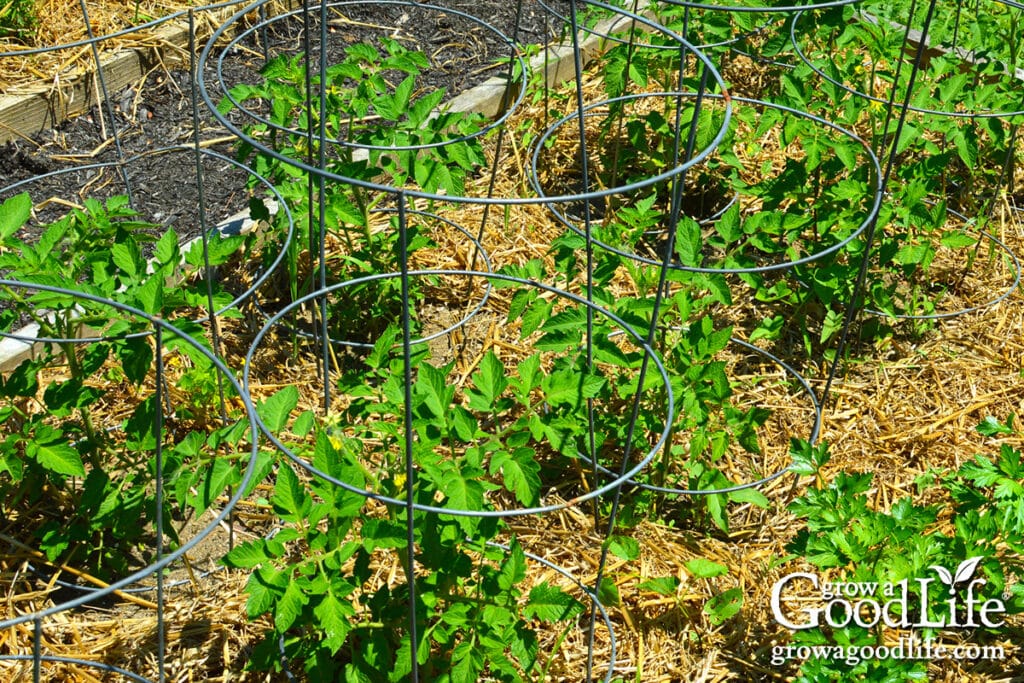
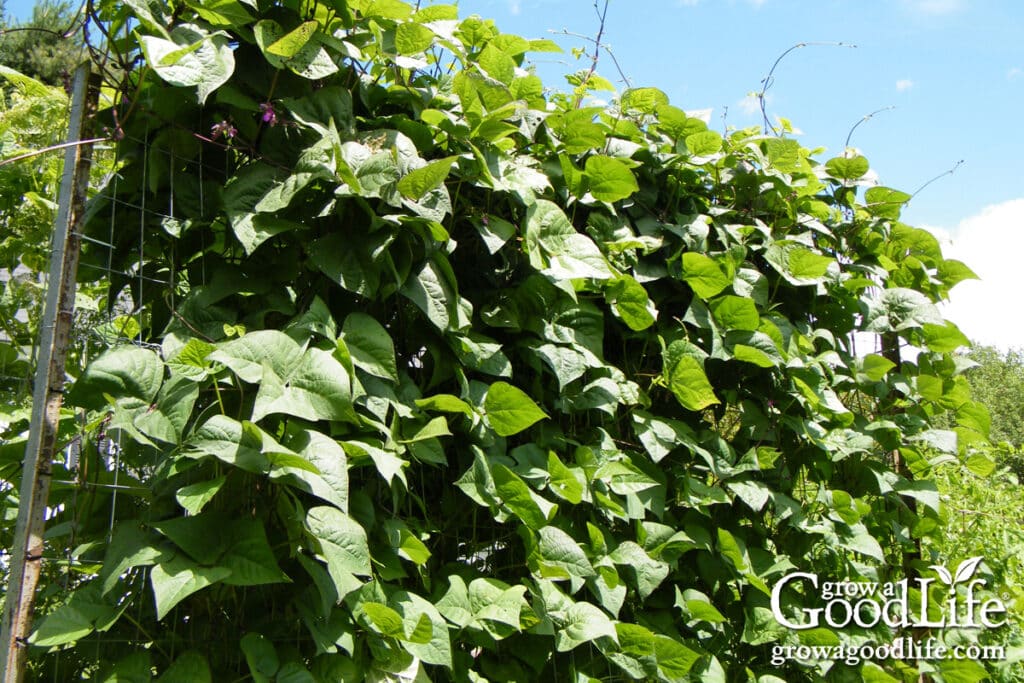
Next, place the crops that need supports or trellises to grow upright. Position tall crops, such as peas, pole beans, and indeterminate tomatoes, along the north side of your beds so they won’t cast shade over shorter plants. If your garden has a different sun direction, adjust the placement so everything still gets full light for most of the day.
Sketch in where your supports will go, such as trellis panels, cages, stakes, or string lines, so that you can plan ahead for installation.
Consider how vertical crops interact with nearby plants. Beans and peas can create a bit of shade, which is handy for heat-sensitive greens in summer. On the other hand, large-leafed vines like cucumbers and squash should have space so their foliage doesn’t overwhelm smaller neighbors.
If you plan to grow multiple vertical crops, consider succession timing as well. Peas will finish by midsummer, freeing up trellises for late-season beans or cucumbers.
Mapping out your supports now ensures your garden is organized and your plants can climb right where they belong.
Step 4: Give Vining Crops Room to Spread
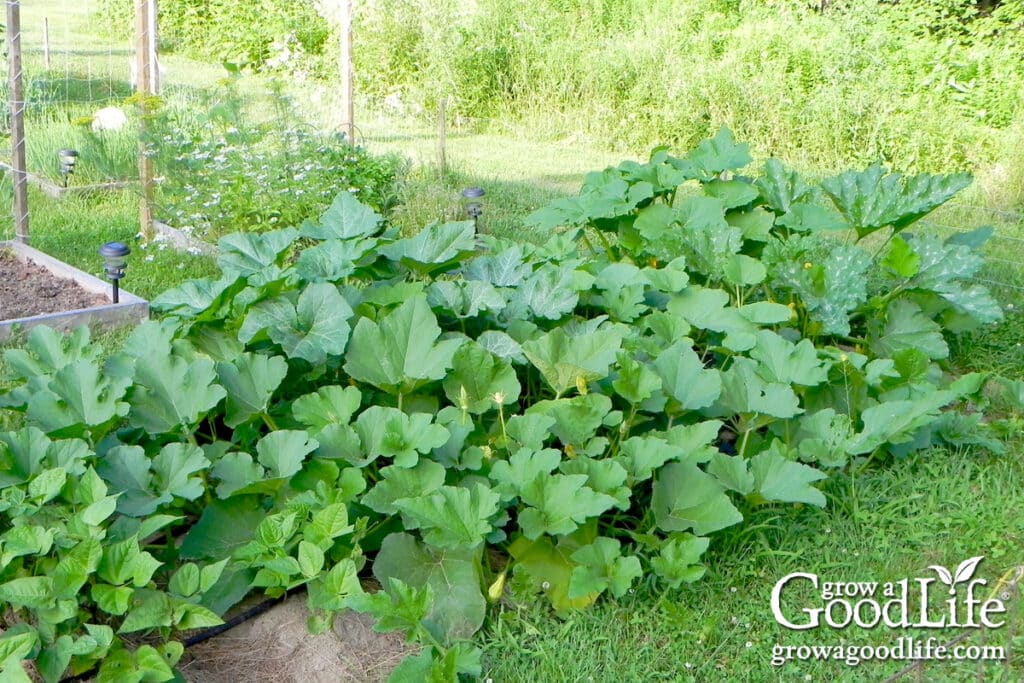
Vining crops like squash, pumpkins, and melons need plenty of room to spread out. Their long, rambling vines can quickly overtake smaller plants if you don’t plan ahead. When mapping your layout, think about where these crops can sprawl freely without crowding others.
One of the simplest strategies is to plant them along the outer edges of your garden beds. This way, the vines can trail out into the paths or lawn instead of smothering nearby vegetables. I often let winter squash and pumpkins ramble into unused corners or over the compost bin area, places where their big leaves help suppress weeds and make use of open ground.
If you prefer a neater look or have limited space, you can train vines upward on sturdy supports. A strong trellis, cattle panel arch, or A-frame is perfect for smaller-fruited varieties like cucumbers or mini pumpkins. For heavier fruits, like larger squash or melons, use soft cloth slings or mesh produce bags to cradle the fruit as it matures.
Be sure to allow space for airflow around these plants. Good air circulation helps prevent powdery mildew, which can be a common problem with dense foliage. Water at the base of the plant early in the day to keep leaves dry and healthy.
When planning successions, remember that vining crops are long-season growers. Once they’re established, they’ll occupy that space until fall, so it’s best to place them where they won’t interfere with your quick-turnover beds.
Mapping out room for these big growers keeps your garden balanced and saves you from battling a tangle of vines later in the season.
Step 5: Fill Empty Spaces with Quick Crops and Successions
Once your main crops are placed, look for the open pockets of space between or in front of slower-growing vegetables. These spots are perfect for quick, early crops that can be harvested before your summer plants fill out.
Start the season with fast-growing spring vegetables like spinach, lettuce, arugula, radishes, and baby turnips. These crops mature quickly in cool weather and are often ready to harvest within four to six weeks. As the days warm and those greens begin to bolt, pull them out and replace them with heat-loving plants such as bush beans, carrots, or basil.
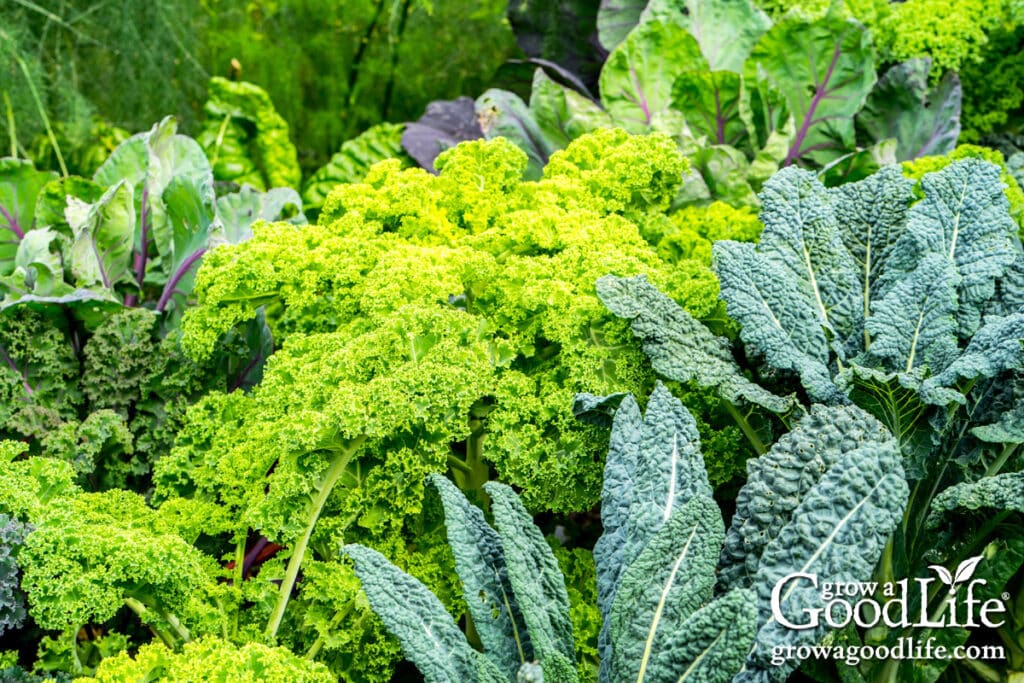
Think of your garden as a living calendar; each bed can host multiple crops in a single year if you plan the timing. After summer harvests, plant cool-season vegetables again in late summer or early fall. Crops like kale, Swiss chard, beets, and carrots thrive as the weather cools and keep producing well into autumn.
As you fill spaces, tuck in herbs and flowers wherever there’s room. Basil, dill, cilantro, and parsley thrive among vegetables and can help repel pests or attract pollinators.
Companion flowers such as calendula, nasturtium, and marigolds add beauty while supporting beneficial insects.
Just be careful not to overcrowd. Plants need space for airflow and root growth to stay healthy. It’s better to have a few thriving crops than too many struggling ones.
When you approach your garden this way, every square foot works a little harder for you, and you’ll enjoy a steady harvest from the first greens of spring to the last kale leaves in fall.
Step 6: Review and Save Your Garden Map for Next Year
Before putting your plan into action, take a moment to review it with fresh eyes. Make sure your crops have the space, sunlight, and airflow they need. Double-check the mature size of plants.
Think about sun exposure as well. If you garden in raised beds, the angle of the sun changes through the season. Taller plants like tomatoes or trellised beans should still be positioned so they don’t cast shade over shorter crops as summer progresses.
Once you’re happy with the layout, keep your garden design in a safe place with your other garden notes. A saved plan becomes an invaluable reference for next year’s planning and crop rotation. You’ll know exactly where each family of plants grew, which varieties thrived, and which spots could use improvement.
A few ways to keep your maps organized:
- Notebook or binder: Print or sketch your layout and add seasonal notes on weather, yields, and pest problems.
- Digital copies: Snap a photo of your finished map and store it in a garden planning folder on your computer or cloud drive.
- End-of-season updates: Jot quick observations right on your map, such as “Too crowded here” or “Great spot for peppers!” These small notes make a big difference later.
Over time, these records build a personalized gardening guide tailored to your soil, climate, and preferences. Each season, you’ll learn a little more about what works, and your plans will become easier and more productive.
Related Reading: How to Keep a Gardening Journal
Vegetable Garden Layout Ideas for Raised Beds
Simple examples help you visualize spacing and crop flow. Tweak these to match your family’s favorites.
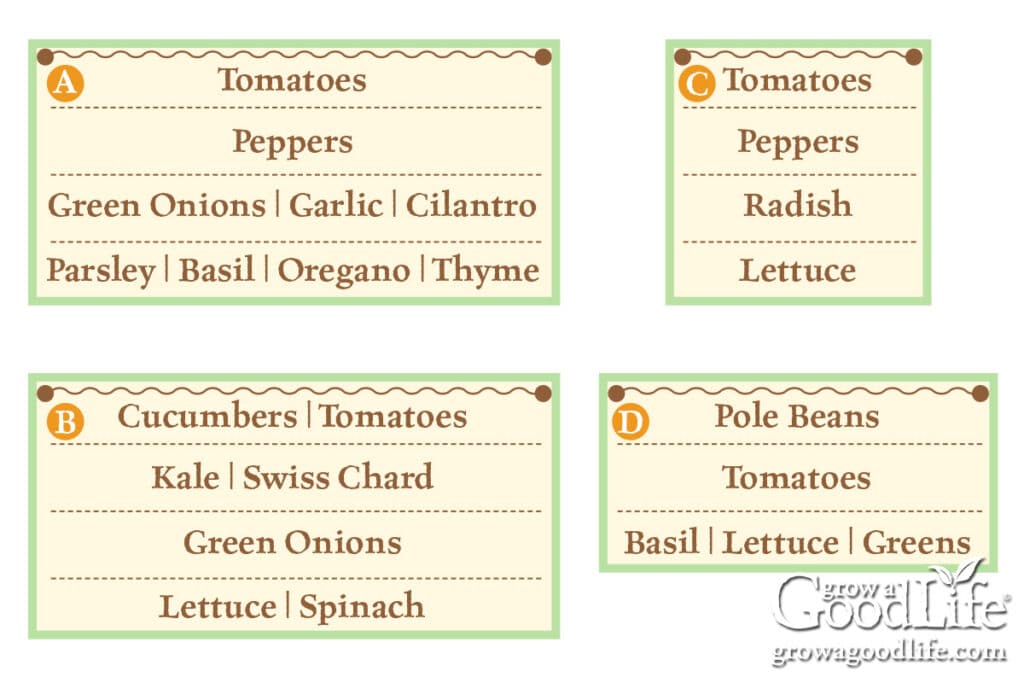
A) 8 x 4 foot Raised Bed Vegetable Garden Layout (Sauce and Salsa)
- Back, trellis line: 6 indeterminate paste tomatoes evenly spaced.
- Middle rows: 4 sweet peppers and 4 hot peppers.
- Front rows: Alternating green onions, garlic, cilantro, parsley, basil, oregano, and thyme.
- Succession idea: Succession plant cilantro and green onions for a continuous harvest.
B) 8 x 4 foot Raised Bed Vegetable Garden Layout (Salad and Snacking)
- Back, trellis line: 2 vining cucumbers and 3 indeterminate cherry tomatoes evenly spaced.
- Middle rows: 2 kale, 4 Swiss chard, and green onions.
- Front rows: Cut-and-come-again lettuce and spinach.
- Succession idea: Resow greens every 2 to 3 weeks to keep the salad bowl full.
C) 4 × 4 foot Vegetable Garden Layout (Square-Foot Style)
- Back, trellis line: 3 indeterminate paste tomatoes evenly spaced.
- Middle row: 4 peppers.
- Front rows: Alternating radish and leaf lettuce for quick harvests.
- Succession idea: Sow bush beans once the radishes and lettuce have finished.
D) 6 x 3 foot Small Backyard Layout (Vertical Focus)
- Back, trellis line: Pole beans evenly spaced.
- Middle row: 2 determinate tomatoes with tomato cages.
- Front row: Basil, lettuce, and other greens.
- Succession idea: Keep resowing the front rows with quick greens.
Frequently Asked Questions About Planning a Vegetable Garden
As you plan your vegetable garden layout, a few common questions tend to come up, especially if you’re mapping your beds for the first time. Here are some quick answers to help you make confident decisions and avoid a few beginner mistakes along the way.
What is the best layout for a vegetable garden? The best design is the one that fits your sun, soil, and goals. Start with a simple sketch, give plants proper spacing, place tall trellised crops on the north side, and plan successions so that beds continue to produce.
How should I plan a raised bed vegetable garden layout? Sketch bed dimensions to scale, plot priority crops first, add trellised crops along the north edge, give vining plants room to sprawl, then fill remaining space with quick crops and successions. Save your map for rotation next year.
How many plants fit in a 4×8 raised bed? It depends on spacing, as a rough guide: 4 indeterminate tomatoes along a trellis, or 6 to 8 determinate tomatoes, or two cucumber vines plus several rows of greens, or a mix of 2 peppers, 4 tomatoes, herbs, and edge onions. Always check your seed packet spacing.
Should garden rows run north to south or east to west? East to west with a trellis on the north end usually provides more even light.
How do I avoid overcrowding in raised beds? Follow packet spacing, thin seedlings as needed, and prune when appropriate. Leave small access paths in larger beds to avoid compressing planting space during harvesting.
Final Thoughts: Dream, Plan, and Grow
Mapping your vegetable garden isn’t just about lines on paper, it’s about creating a vision for the growing season ahead. With a thoughtful layout, you’ll know exactly where every seed and seedling will go, how much to plant, and how to keep your garden productive from spring through fall.
A well-planned map saves time, reduces stress, and helps your garden thrive year after year. It also becomes a valuable record of your progress. You will be able to note what worked well, what didn’t, and how your garden evolves with each new season.
As you fine-tune your layout, remember to leave space for flexibility. Every year brings its own surprises, such as a bumper crop of tomatoes, a new favorite variety of beans, or a few unexpected volunteer plants that appear in unusual places. That’s all part of gardening.
So pour another cup of tea, spread out your seed packets, and let your mind wander to warmer days. While the garden rests beneath its blanket of snow, you can dream of rows of green shoots pushing through the soil, tomato vines climbing their trellises, and baskets filled with fresh harvests. Planning now, while the world outside is quiet, gives you something to look forward to.
As you move from winter garden dreaming to sketching your layout, here are the next steps in the Planning Your Vegetable Garden series:
- How to Choose Vegetables for Your Garden
- Tips for Buying Seeds for Your Vegetable Garden
- How to Make a Seed Starting and Planting Schedule
- 10 Steps to Starting Seedlings Indoors
This article was originally published on February 2, 2015. It has been updated with additional details, tips, and examples to help you map and plan your vegetable garden beds more effectively.
Good planning is key to a successful vegetable garden
Whether you are new to growing your own food or have been growing a vegetable garden for years, you will benefit from some planning each year. You will find everything you need to organize and plan your vegetable garden in my PDF eBook, Grow a Good Life Guide to Planning Your Vegetable Garden.


This post had a lot of good ideas for any gardener. I have been working on learning more about single subjects. Right now I’m focused on composting do’s and don’ts. I’ve never done composting before. I’ve also started a garden journal to keep track of information. Looking forward to seeing more of your posts.
Thank you, Lori. One thing I have learned about making compost is not to overcomplicate the process. Even if you don’t do anything to your bin but add random composting material, it will eventually break down and turn into compost. Unfortunately, I don’t have an article yet on making compost, but you may like to explore this article on Building Healthy Garden Soil.
I’m a mainer, COME HELP ME!! Lol kidding, not kidding.
Thanks for this!
It does seem overwhelming in spring even for the seasoned gardener. I’m still getting the garden in and this heat and humidity is making it challenging. You’ll be fine. 🙂
This has been extremely helpful! We moved last year and our first garden here didn’t do very well. This year, I’m following your guide to set up my garden beds and plants. Thank you!!
Janelle, I am so happy this helps. I hope you enjoy an abundant harvest this year.
Thank you for this comprehensive article on how to map out beds. I have struggled year to year to maximize the space I have and this has helped me so much! I am also in zone 5 and this is exactly what I needed to plan my garden!
Natalie, I am so glad this was helpful to you. It makes it so easy at planting time.
What computer program do you use to map out your gardens? Right now I sketch but I’d like to find a program where things are measured and spaced to scale. Any suggestions?
Jaclyn, If you do a search, you will discover that there are a number of online garden planning tools. I can’t advise you because I haven’t tried any of them for myself. I just use a simple spreadsheet program.
You can use any type of spreadsheet software such as Microsoft Excel or Google Sheets to design your garden. Just set it up as a grid, measure, and lay out your garden beds. Here is a great tutorial: http://everchanginggarden.ca/draw-your-own-garden-plan-without-expensive-garden-design-software/
Google also has a freestyle drawing program, called Google Drawings that looks as easy to use as sketching it out on paper. Once you have a template, you can use it to map out your garden beds for years to come.
Do you include the lettuce family in the with brassica family?
Where do you include roots such as beets and carrots?
Nancy, I just work in lettuce, beets, and carrots where there is room.
What kind of wood do you use for garden beds?
Untreated pine and hemlock. Hemlock lasts much longer.