Spiced Apple Jelly Recipe (No Added Pectin)
This post may contain affiliate links, which means that I may receive a commission if you make a purchase using these links. As an Amazon Associate I earn from qualifying purchases.
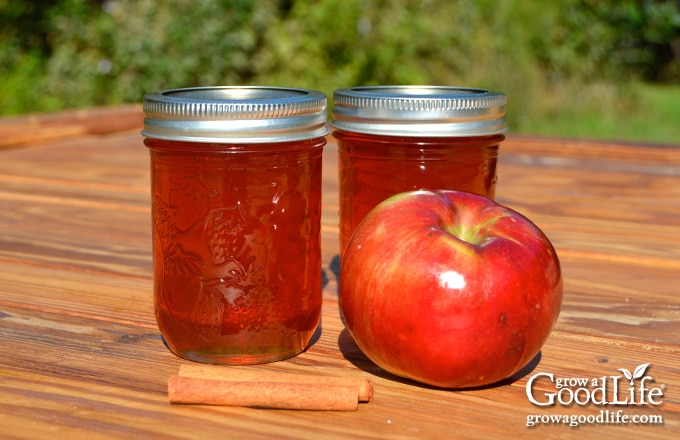
This spiced apple jelly recipe livens up the plain apple flavor with some traditional pairings, including lemon juice, cinnamon, nutmeg and cloves.
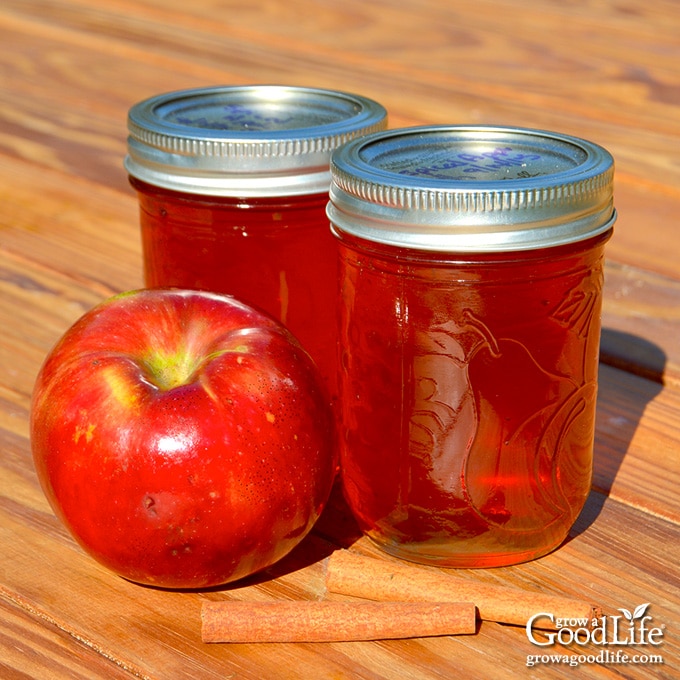
After tasting the tart and sweet flavor combination of crab apple jelly, the jelly I made from regular apples tasted bland to me. The abundance of this year’s apple harvest allowed for a little experimenting with additional flavors and spices.
The unrefined, rich taste of pure cane sugar combines well with the spices turning a bland jelly into one that wakes up the taste buds when slathered on homemade biscuits or toast. We really enjoy this spiced apple jelly and I hope you will too.
Tips for Making Jelly without Added Pectin
Jellies are made by heating fruit juice with sugar, and require the right combination of fruit, pectin, acid, and sugar to form a gel.
Pectin is what causes the liquid to thicken and form a gel. Without it, your jams and jellies will remain watery. Apples contain enough natural pectin to gel with only added sugar.
Here are tips for making jelly without added pectin:
Don’t double the batch
Follow the recipe, and work in small batches when making apple jelly. Since you are counting on the natural pectin found in the fruit, you don’t want to overheat the mixture.
If you double the recipe, it will take longer to heat to the proper temperature. Too much heat will destroy the pectin, and it will break down and fail to gel.
Choose fresh organic apples
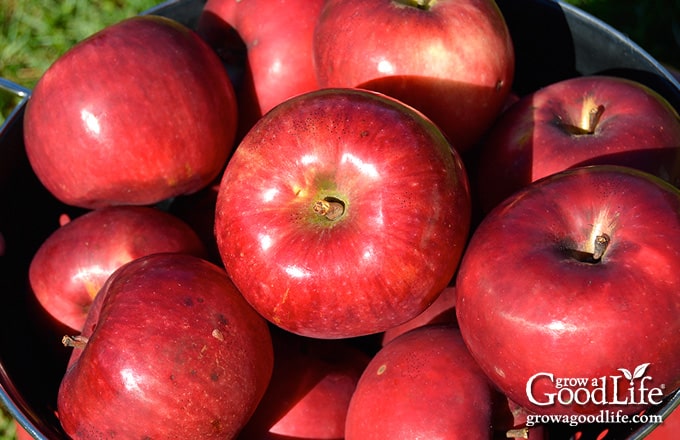
The best apples for making apple jelly are freshly picked fall apples. Fruit that is slightly under ripe contains more natural pectin and acid, so try to mix about three quarters ripe and one quarter under ripe fruit. Use organic apples that have not been sprayed with chemicals that penetrate the skin.
The pectin that turns the apple juice into jelly is concentrated in the apple’s skin and core. Apples found out of season have been in storage for a while, which may affect the amount of pectin in the fruit.
Do not use commercially canned or frozen fruit juice with this recipe. There isn’t enough natural pectin in fruit juices to gel.
Allow yourself plenty of time
Try to plan ahead when extracting juice from fruit and consider dividing the process over two days to allow time for the juice to strain completely. This is even more important with apple jelly because you want to extract as much of the natural pectin from the apples as you can so your jelly thickens up properly.
Don’t have a water bath canner?
If you don’t want to pull out a canner, you can use a large sauce pot to process the jars. Use a pot that will hold 6 half-pint sized jars, and tall enough to cover the tops of the jars by a few inches of water, plus two inches of space to prevent boiling water from splashing out of the pot. Place a rack in the bottom to elevate the jars up away from direct heat, and allow the water to circulate around the jars as they are processed.
How to test for jelly stage
If you are new to making jelly, the NCHFP website has a nice description of how to tell when the jelly point has been reached: Testing Jelly without Added Pectin:
- Temperature Test: Use a candy thermometer to monitor the temperature of the jelly. Jelly stage is when the temperature of the boiled juice is 220 degrees F. (Adjust for altitude if necessary. For each 1,000 feet of altitude above sea level, subtract 2 degrees F.)
- Spoon or Sheet Test: Plunge a cool metal spoon into the boiling jelly mixture and lift the spoon out sideways so the liquid drips across the surface. The jelly stage is reached once the liquid forms two drops that flow together into a sheet that hangs off the edge of the spoon.
- Freezer Test: Place several plates in the freezer before you begin making your jelly. To check for jelly stage, place a spoonful of hot jelly onto the cold plate and let it rest for 30 seconds. Tip the plate to one side. Jelly stage is reached when the mixture gels on the cool plate and doesn’t run down the plate when tipped.
Cooking time will vary with each batch because the natural pectin level is different in each apple. I use all three testing methods but rely on the freezer plate method for the final check.
How to Make Apple Jelly
To make jelly, we are going to extract the juice and natural pectin from the apples, combine it with sugar, and cook it to evaporate moisture and form a thick spreadable jelly.
The jelly will then be preserved into shelf-stable jars in a boiling water bath canner. If you are new to canning or haven’t canned in a while, it may be helpful to review this article on water bath canning at the National Center for Home Food Preservation website.
A more detailed and printable recipe can be found at the bottom of this article, but these are the illustrated steps for making spiced apple jelly.
Step 1: Extract the apple juice
Wash the apples with plain water and chop them up into small pieces skins, cores and all. These will be strained out after cooking. You will need about 3 pounds of prepared fruit.
Extract the apple juice by combining the prepared fruit in a large saucepan with enough water so that the fruit is covered. Add the spices, and stir to combine. Bring the mixture to a boil, and then lower the heat and simmer until the juices are released.
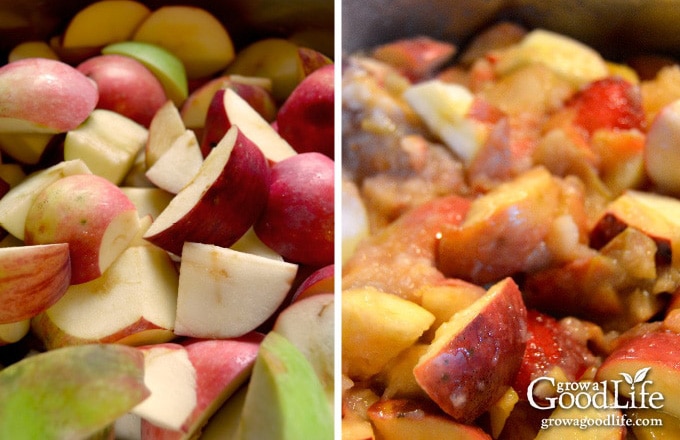
Mash the apples with a potato masher and continue simmering over low heat until the apples are soft. Strain the cooked apples through a damp jelly bag or double layers of cheesecloth in a colander.
Allow the apple juice drip out for several hours, or overnight. Don’t squeeze the jelly bag if you want a clear jelly. When the jelly is finished straining, compost the solids.
Step 2: Prepare the Canning Equipment
Gather your canning equipment, prepare the jars, set up the canner, and organize your work area.
You will need:
- Water bath canner or large pot with a rack
- 6 half-pint canning jars
- Lids and bands (new lids for each jar, bands can be reused)
- Canning tools: jar lifter, canning ladle, funnel, and bubble popper
- Jelly strainer
- Candy thermometer
- Kitchen scale
- Plus basic kitchen supplies such as a large pot, towels, potato masher, measuring cup, knife, and a cutting board.
Wash your jars, lids, bands, and canning tools in warm, soapy water. Rinse well, and set the lids, bands, and tools aside to air dry until you are ready to use them. Check the jars for nicks and cracks. Eliminate any jars that are damaged as these will break in the canner.
Jars must be heated before filling to prevent breakage due to thermal shock. Place the jar rack into the water bath canner, set the jars upright in the canner, and add water to cover the jars. Bring the canner to a simmer (180˚F) for 10 minutes, and keep the jars hot until you are ready to fill them.
Step 3: Make the Jelly
Place several plates in the freezer before you begin making your jelly. These will be used to test the jelly.
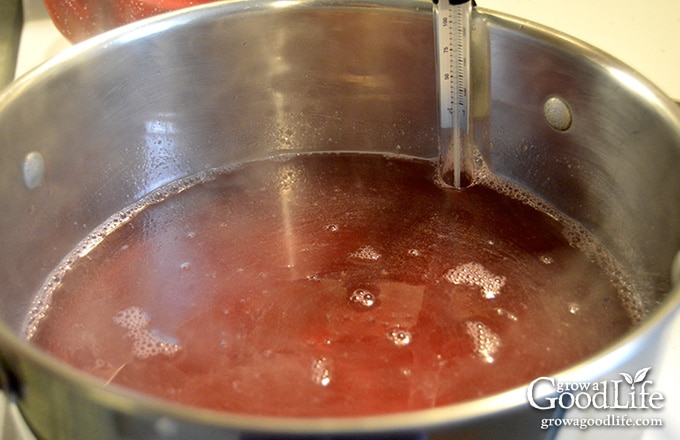
Attach the candy thermometer to a large saucepan, and pour 4 cups of apple juice into the pan. Add the sugar, lemon juice, and stir to dissolve. Bring juice to a boil over medium-high heat, stirring constantly, until jelly stage. Skim off any foam that forms.
Jelly stage is achieved once the temperature reaches 220 degrees F, when the liquid forms a sheet that hangs off the edge of the spoon, and when the mixture gels on a cool plate and doesn’t run when tipped.
Step 4: Can the Jelly
Spread a kitchen towel on the counter. Use the jar lifter to remove a hot jar from the canner, drain, and place on the towel. Keep the remaining jars in the canner, so they stay warm.
Place the canning funnel on the jar, and ladle hot jelly into the jar while leaving 1/4-inch headspace. Run the bubble popper through the jar to release any trapped air bubbles.
Wipe the rim with a damp towel to remove any residue. Center a lid on the jar, place the band over the lid, and screw it on until fingertip tight. Place the jar back into the canner, and repeat with the rest of the jars.
Adjust the water level so it is covering the jars by several inches, bring the pot to a boil, and process the jars for the times indicated in the recipe below. Let the jars cool, test the seals, label and date the jars, and store in a cool, dark location.
Spiced Apple Jelly Recipe (No Added Pectin)
Ingredients
- 3 pounds apples
- 3 cups water
- 3 cups sugar
- 2 tablespoons bottled lemon juice
- 1 teaspoon ground cinnamon or 2 whole sticks broken into pieces
- 1/2 teaspoon ground nutmeg
- 1/4 teaspoon ground cloves
Instructions
Extract the Apple Juice:
- Wash the apples with plain water, remove any bad spots, and roughly chop into pieces.
- Add the prepared fruit to a large saucepan, and cover with water, about 3 cups. Add the spices and stir to combine.
- Bring to a boil over medium-high heat then reduce to a simmer over low heat. Simmer until the skins are soft and the juices are released.
- Gently mash the apples with a potato masher and continue simmering over low heat for 30 minutes, stirring occasionally. Simmer low and slow because excess heat can destroy the natural pectin.
- Strain the juice through a damp jelly bag or double layers of cheesecloth. Allow the apples to strain for several hours, or overnight. If you want clear jelly, do not squeeze the bag. Discard solids.
Prepare the Canning Equipment:
- Wash your jars, lids, screw bands, and canning tools in hot soapy water. Rinse thoroughly to remove all suds. Set aside to air dry on a clean kitchen towel.
- Place the jar rack into water bath canner, place jars in the canner, and add water to cover.
- Bring the canner to a simmer (180˚F) for 10 minutes, and keep the jars warm until you are ready to fill them.
Make the Jelly:
- Measure out 4 cups of the apple juice and pour into a saucepan. Add the sugar and lemon juice and stir to dissolve.
- Bring to a boil over medium-high heat, stirring constantly, until jelly stage.
- Jelly stage is achieved once the temperature reaches 220˚F, when the liquid forms a sheet that hangs off the edge of the spoon, and when the mixture gels on a cool plate and doesn't run when tipped.
Can the Jelly:
- Spread a kitchen towel on the counter. Use your jar lifter to remove one jar from the canner, drain, and place on the towel. Keep the remaining jars in the canner so they stay warm.
- Use your canning ladle and funnel and add the hot jelly to the warm jar leaving 1/4-inch headspace. Swirl your bubble popper through the jars to release air bubbles. Wipe the rim of each jar with a damp towel.
- Center a lid on the jar, and screw on the band until it is fingertip tight. Use the jar lifter to place the jar back into the canner, and repeat with the remaining jars. Try to leave some space in between the jars.
- Once all the jars are in canner, adjust the water level to two inches above the jar tops.
- Cover the canner and bring to boil over high heat. Once water boils vigorously, continue boiling for 10 minutes at altitudes of less than 6,000 ft. (adjust processing time for your altitude if necessary – see notes below).
- When processing time is complete, turn off heat and allow the canner to cool down and settle for about 5 minutes.
- Spread a kitchen towel on the counter, and remove the cover by tilting lid away from you so that steam does not burn your face.
- Use the jar lifter to lift jars carefully from canner and place on the towel. Keep the jars upright, and don't tighten bands or check the seals yet. Let the jars sit undisturbed for 12 to 24-hours to cool.
- After the jars have cooled for at least 12 hours, check to be sure jar lids have sealed by pushing on the center of the lid. The lid should not pop up. If the lid flexes up and down, it did not seal. Refrigerate the jar and use up within a few weeks.
- Remove the screw on bands and wash the jars. Label, date, and store your jars in a cool, dark place. Use within 12 to 18 months. Refrigerate the jelly once opened and consume within 3 weeks. Yields about 6 half-pint jars.
Notes
Nutrition
This recipe was originally published November 2, 2015. It has been updated with additional information and new photos.
Resources and Further Reading:
- Testing Jelly without Added Pectin – NCHFP
- Troubleshooting Jam and Jelly Problems – NC State Extension
You May Also Like:
- Low-Sugar Cherry Jam
- Chokecherry Jelly Recipe
- Maple Vanilla Peach Jam
- Concord Grape Jelly
- Other Ways to Preserve Apples
40+ Meals in a Jar Pressure Canning Recipes
In this eBook, you will find 50 pressure canning recipes, including 44 meals, along with homemade stocks and bone broths. Recipes include soups, stews, chilis, beans, beef, pork, and poultry. Explore the world of preserving delicious home-cooked meals for all seasons.

This is my favorite jelly! I’ve never made it myself, but going to give it a try this weekend. When draining/straining overnight, do you do this at room temp? Or in fridge? Thanks!
Stephanie, I’m glad to hear you love this jelly! When draining or straining overnight, it’s generally best to do it in the fridge. This helps maintain the quality and safety of the jelly during the process. Enjoy making it this weekend!
I followed this recipe exactly and got 1.5 cups of juice. I was using small, homegrown apples so I don’t know if that made a difference? How much commercial apple juice can I add before I have to add more pectin? Can I just top it off to 2 cups and do a half batch or will that mess things up?
Hello Aspen! It’s indeed a bit puzzling that you ended up with only 1.5 cups of juice when following the recipe closely. The recipe’s proportions of 3 pounds of apples and 3 cups of water should generally yield more juice. This could be due to overcooking or needing to allow more time for straining. To get the desired amount of liquid, simmer over low heat and strain for several hours or overnight to extract the juice. Adding commercial apple juice might not work well due to pectin concerns. However, the worst that could happen is you’ll end up with apple syrup instead of jelly, which is still delicious when drizzled on pancakes or yogurt.
I think it is also because I used tiny apples with a low liquid ratio and I didn’t add enough water. I ended up doing a half batch by topping up with a little commercial apple juice and it was DELICIOUS. So I did it again and added more water so that it actually covered the apples and got more than enough juice. Seriously delicious. Thank you for the response. This is a great recipe.
Aspen, Oh good! I’m happy to hear that your jelly turned out delicious!
My jelly came out beautifully, followed the recipe as is but did require a bit more water to cover the apples. I will save this recipe for future years….thanks!
Maureen
Wow.. This brings me back to my Memere making crabapple jelly. I followed the recipe but added 2 star anise to mine as I love that flavor with the cinnamon. This tasted AMAZING and I got 5 small jars of apple jelly out of it. I AM THRILLED! Thank you for your easy step by step directions from start to finish! I’ll never buy store bought apple jelly again!
Ugh, I’ve made this before no problem. However I was making it again without looking the recipe and totally forgot to add the spices to the apples. The juice is now drained…can I add the spices to the liquid?
Rosemary, Yes, add the spices to the apple juice along with the sugar and lemon juice.
I followed this recipe exactly but I didn’t get 4 cups of juice.. can I add store bought apple juice to bring it up to 4 cups?
Patricia, Did you use 3 cups of water to simmer the apples? If so, you should have ended up with plenty of juice. If you used less than 3 cups of water, you could add more water or apple juice to get 4 cups of liquid. Also, boiling the apples instead of simmering them may have evaporated the liquid. Unfortunately, commercial juices don’t contain pectin, so using straight apple juice from the bottle won’t form a gel unless you add pectin.
Did I get it right that seeds stay and get cooked, too? Most will probably be intact, but a some will be cut in half while choppin up the apples. This is still safe in reguard to amygdalin, correct?
Anne, The amount contained in the seeds isn’t enough to cause poisoning.
I messed up and added the sugar & lemon juice when I added the spices. Will it still jell after I let it sit to drain the juice or is it completely ruined?
Pam, It should be ok. The sugar and juice will drain out with the juice.
I didn’t realize my old candy thermometer froze at 212 and I think I overshot 220 by a lot. All the jars are liquid. Can I salvage them by adding pectin and recanning?
Kevin, Oh, that is too bad! As you suspected, overheating the juice destroys the natural pectin. All is not lost, though. You can remake the jelly using regular boxed pectin. Just follow the instructions on the box of whichever brand you purchase. In the meantime, the jars are safe to store at room temperature since they were canned properly.
I just tried this recipe and it turned out beautifully with apples I recently picked.
Can I safely make this same recipe with pears? And can I safely make this with less sugar?
Heather, You cannot reduce the sugar in this recipe, nor can pears be substituted with the same results. To form a gel, the mixture has to have a certain balance of water, sugar, pectin, and acid. This no pectin apple jelly recipe works because apples contain a lot of natural pectin and are acidic. Once the apples are juiced, combined with sugar, and heated, it turns into jelly.
Pears require additional pectin to form a gel. Try this Pear Jelly recipe from my friend, Ashley, at Practical Self Reliance.
Can I add a little bit of pectin to ensure it gels? If so, liquid or powder?
Kimberly, I am sure you can, but follow the instructions on the pectin container instead of this recipe.