Growing New Zealand Spinach
This post may contain affiliate links, which means that I may receive a commission if you make a purchase using these links. As an Amazon Associate I earn from qualifying purchases.
Growing New Zealand spinach is a rewarding experience. The plants are easy to care for and provide a bounty of healthy greens all summer. Learn how to grow NZ spinach with these tips.

In spite of the name, New Zealand Spinach isn’t really spinach at all but tastes similar and can be cooked in recipes the same way. Also, unlike spinach, it is a heat-loving plant that is frost sensitive. So when the spring spinach bolts, and before fall spinach is planted, New Zealand spinach can fill the void and grow all summer long.
About New Zealand Spinach
New Zealand Spinach (Tetragonia tetragonioides), also known as NZ spinach, Cook’s cabbage, or tetragon, is a leafy plant that grows native to New Zealand, Australia, Argentina, and Japan. Captain Cook discovered the plant and used it to help his crew prevent scurvy. Sir Joseph Banks introduced the seeds to England in 1772, and it became a popular summer vegetable.
The high vitamin A, B1, B2, and C content of New Zealand spinach makes it a nutritious vegetable to include in your garden. In addition, cooking reduces the amount of oxalate content in these leafy greens making them easier to digest for those who are sensitive.
Growing New Zealand Spinach
When I first tried growing New Zealand spinach, there wasn’t a lot of information to be found in gardening books or online. I was given seeds and told that it was spinach that I could plant for summer harvests. That’s all I knew.
After doing some research, I discovered that New Zealand Spinach isn’t really spinach at all but tastes similar and can be cooked the same way. The seeds are rather difficult to germinate. In fact, from my research, they seem only to have a 40% germination rate.
I tried soaking for 24 hours before planting but had the best luck scarifying the seeds by gently running an emery board across the surface and placing them on a damp paper towel in a sealed container.
Even then, I almost gave up on them because it took so long for the seeds to sprout. But, once a few did finally sprout, I transplanted them to soil blocks and grew them under lights.
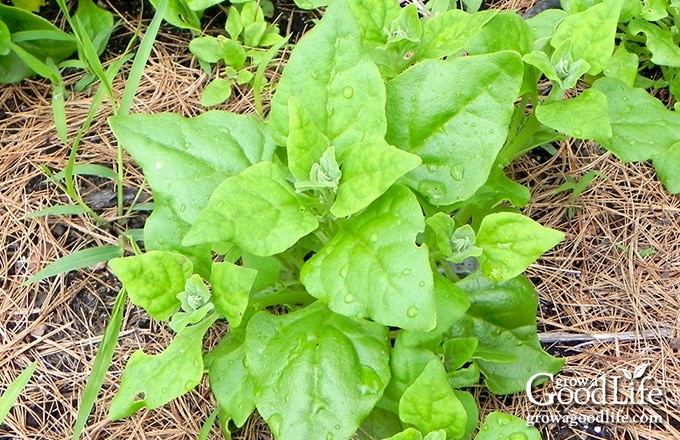
The New Zealand Spinach was hardened off and transplanted into the garden once all danger of frost was over at the same time as my other heat lovers, such as tomatoes and peppers. Most of the plants looked pretty pathetic, and I didn’t think they would survive.
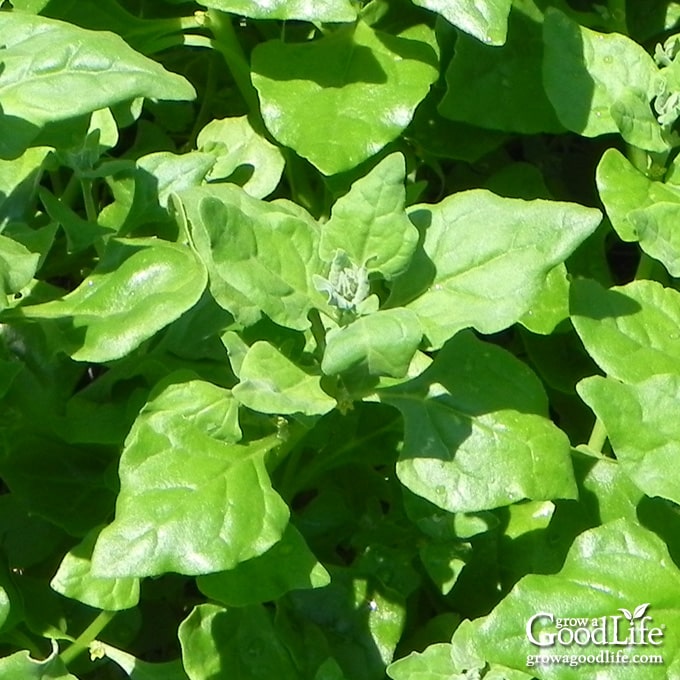
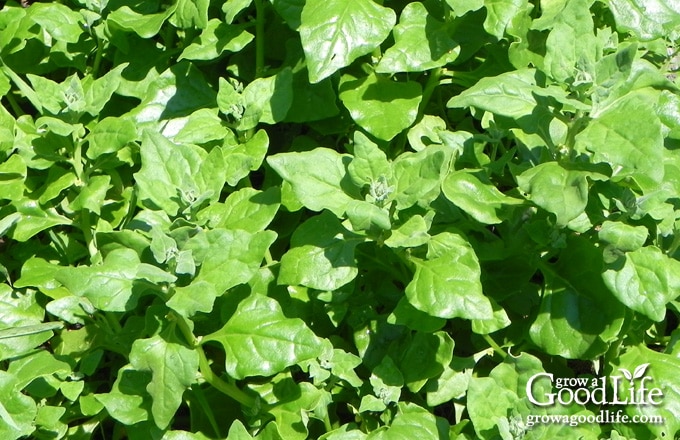
However, once they became established and summer heat hit, the plants began to grow and spread out, forming a lovely dense mat of growth. The more they are harvested, the bushier they grow.
Most surprisingly, there was very little insect damage to the leaves. The earwigs, flea beetles, and slugs munching in other parts of my garden left the New Zealand Spinach alone and almost blemish-free.

Tips for Growing New Zealand Spinach
New Zealand spinach is easy to grow and flourishes when given the right conditions. While it tolerates a wide range of soil conditions, the plants prefer a rich, well-draining sandy soil with a pH around 6.8 to 7.0.
The plants thrive in full sun but will tolerate part sun or light shade. While somewhat drought-tolerant, the flavor is best with consistent moisture. New Zealand spinach seeds are available at most online seed companies. Here are more tips for growing New Zealand spinach:
When to Grow
New Zealand Spinach is a warm-season crop that is frost sensitive. It grows as a perennial in warmer climates in zones 8 to 11 and as an annual in cooler areas. Therefore, plan on growing New Zealand spinach with your summer crops. Plant after all danger of frost is past, and once the soil has drained and warms to at least 50˚F.
You can start seeds indoors under lights 4-weeks before your expected last frost date and transplant hardened-off seedlings to the garden, or you can direct sow seeds in early spring after the danger of heavy frost is past.
You can find your estimated last frost date by contacting your local extension office or entering your zip code here at PlantMaps.com.
How to Prepare the Soil
Select an area that receives 6 or more hours of direct sun each day. Then, prepare the garden bed by removing weeds and cleaning up any leftover plant debris. Add several inches of finished compost, and work it in the native soil about 6 to 8 inches deep. Water the bed very well the day before you sow seeds or transplant seedlings.
How to Scarify Seeds
Seed scarification is the process of breaking down the seed coat to allow water to penetrate. One way to do this is by scratching the protective outer layer of the seed. You can use sandpaper or a nail file to scrape away a portion on the hard shell.
Scratch a smooth part of the seed so you don’t damage the spot where the roots will emerge. Rub the seed back and forth along sandpaper a few times, just enough to score through the outer coat.
Follow up by soaking the seeds in water 24 hours before planting. Soaking is also a way to scarify seeds. The water softens the seed coat, penetrates the shell, and triggers the seeds to sprout. In addition, water will infiltrate quicker after scratching the seeds.
Starting Seeds Indoors Under Lights
After prepping your seeds, fill your containers with damp seed starting mix to within 1/2 inch of the top of the container. Sow seeds about 1/2 inch deep, mist the soil surface with water, and cover the containers with a humidity dome to retain moisture. Place the seedling trays in a warm location or use a seedling heat mat. The seeds should sprout within 14 to 21 days.
Once the seeds sprout, remove the tray from heat and place the seedlings under grow lights. Position the lights so they are about 2-inches above the tray.
Like beets and Swiss chard, the seeds are actually fruits containing a cluster of several seeds, so you may have numerous seedlings sprouting from the same seed pod. You’ll need to thin these so the strongest plant can survive.
Transplanting Seedlings
The seedlings are ready to be transplanted when they are over 2-inches inches tall, once the soil warms, and after all danger of heavy frost is past. I like to wait about 2 to 3 weeks after my last frost date to be on the safe side.
Harden off your seedlings before transplanting. The hardening-off period helps your plants adapt to the sun, wind, and chilly nights they will experience in the garden.
In addition to properly hardening off your seedlings, choose an overcast day with no wind in the late afternoon or evening to transplant. This will help prevent transplant shock by giving your plants time to adjust without the additional challenge of the sun.
Dig your holes about 12 inches apart. Carefully remove the seedlings from the container, place them in the holes, and gently firm the soil around the plants. Water well after planting, and keep the soil damp until the plants become established.
Direct Sowing Seeds in the Garden
New Zealand spinach seeds can be directly sowed outdoors in the garden in early spring, about 2 weeks after your last frost date, and once the soil temperature is above 50˚F. Stratify your seeds and prepare the growing beds ahead of time as described above.
Direct sow seeds 1/2 inch deep and spaced about 6-inches apart. Cover with soil, firm in gently, and water in well. Keep the soil evenly moist until the seeds sprout and the plants become established. Be patient. The seeds can take anywhere from 2 to 3 weeks to spout. When the plants reach 2 inches in height, thin the seedlings until they are 12-inches apart.
How to Care for the Plants
Once the plants are established, New Zealand spinach is easy to grow and requires very little care. Here are some tips to keep your plants healthy and thriving.
Water as Needed
New Zealand spinach is somewhat drought tolerant but will produce healthier growth, and the leaves will have better flavor if provided with adequate moisture. Maintain soil that is consistently moist but not soggy. On average, New Zealand spinach will thrive with 1 inch of water per week, either naturally by rain or hand watering.
Use your finger to check the soil moisture once a week. If the soil is dry several inches deep, give your plants a good watering with drip irrigation, a soaker hose, or water by hand to deliver water to the base of the plants. Water in the morning, and avoid splashing the leaves to prevent fungal diseases.
Mulch the Soil
A layer of mulch on the soil surface will help hold in moisture and keep the weeds from sprouting and competing with your plants. Add several inches of shredded leaves, straw, or pine straw around your plants, keeping it a few inches from the stems. Learn How Organic Mulch Helps Your Garden.

Keep Up with the Weeds
Weed frequently, especially when the plants are young. Removing weeds from damp soil is much easier; the roots will slide right easier without disturbing the plants. As the plants mature, their vines will form a dense mat of foliage, shading the soil and helping prevent weed seeds from sprouting. Tips for Controlling Weeds in the Garden.
Fertilizing
You are off to a good start if you worked in finished compost when you prepared the garden beds for planting. However, New Zealand spinach is a heavy feeder and will benefit from an additional dose of nitrogen part way through the growing season.
New Zealand spinach will not bolt from heat like other greens. Instead, a lack of nitrogen will cause the plant to flower and set seeds. Once the plants bloom, the flavor of the foliage will turn bitter.
You can prevent bolting by fertilizing the plants with an organic nitrogen fertilizer part way through the growing season. Nitrogen will help produce healthy green growth. Side dress the plants with composted chicken or poultry manure, or use an organic nitrogen fertilizer such as blood meal or feather meal.
Troubleshooting Growing Problems
Many pests don’t bother New Zealand spinach, but a few you may face are aphids, flea beetles, leaf miners, slugs, and snails.
Most are not a big problem and won’t kill the plant, but they may ruin some of the foliage. If you do see signs of damage, remove affected leaves. Use row covers to prevent the pests from finding your plants.
Fungal diseases, such as downy mildew, powdery mildew, and white rust, can infect your plants in humid conditions, with wet foliage and a lack of air circulation.
To help prevent fungal diseases, be sure to grow your plants in full sunlight and trim them frequently, so they are not overcrowded. Mulch and water close to the base of the plant to reduce the risk of wet foliage. Finally, prune any foliage that has mildew on it and destroy it.
How and When to Harvest
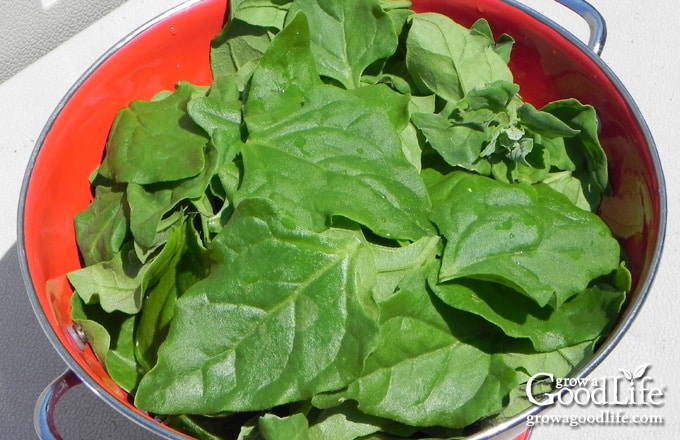
New Zealand spinach is ready to harvest in about 60 days. Harvest by snipping 5-inch tips from the plants and gathering just the tops and youngest leaves. The plants will branch off and continue to grow more foliage for a later harvest.

Rinse well under clean running water, let the leaves dry, wrap in a paper towel, and place in a zipper bag. Store in the refrigerator crisper drawer for up to 7 days.
Enjoy New Zealand spinach in the same way you would use spinach. When cooked, it tastes like spinach. My favorite way of eating it is sautéed in olive oil with fresh garlic. We have also enjoyed it wilted on pizza and blanched and added to pasta.
—
Growing New Zealand spinach is a great way to enjoy healthy greens this summer. The plants are easy to grow and are resistant to most pests and diseases. In addition, they are drought tolerant and can grow in various climates, making them a perfect choice for gardeners in all regions. So if you’re looking for a nutritious and delicious addition to your garden, be sure to try growing New Zealand spinach!
You May Also Like:
Good planning is key to a successful vegetable garden
Whether you are new to growing your own food or have been growing a vegetable garden for years, you will benefit from some planning each year. You will find everything you need to organize and plan your vegetable garden in my PDF eBook, Grow a Good Life Guide to Planning Your Vegetable Garden.


I’m from nz and love this spinach it grows commonly in very rugged coastal areas all over but cultivated in a vege garden the leaves are much bigger and infinitely better. This is one of the most salt and coastal hardy plants I know of where 120kmh winds happen several times a year. Reading an old gardening book I read that it also contains an unusual b vitamin.
Thanks for this wonderful website
Jason, I have read that New Zealand Spinach can be a bit invasive in certain areas, but isn’t it wonderful to have a great food source to forage for?
I planted NZ spinach last year. It survived the winter just fine in a big pot on the deck, even through freezing (not just frosty) temps (Puget Sound, zone 8). I’ve been harvesting it sporadically all spring. I thought it was a true perennial and that I would get to enjoy it for years to come. Now I wish I hadn’t let it go to seed. I was just going to ask you what to expect next. Do you think if I cut off the flower stalks and keep it watered I might get some more leaves out of it, or is it probably done? Thanks for the heads up on the germination issue. I don’t remember it being a problem last year, direct sown into the pot in the summer sometime, bit if I try some again it will be good to know.
Mary, It is probably done. Once a plant begins to flower, it usually changes the way the foliage tastes. However, you can collect the seeds and plant more.
I grew NZ Spinach last summer in Mississippi (zone 8a). I thought this winter’s freezing temperatures would have killed the plants, but alas! they are hung on for dear life and are now beginning to sprout leaves again! So, my question is: do I cut last year’s growth back or just leave it alone? My garden center, which I purchased it from last year, didn’t have much advice since last year was their first time growing it as well. Thanks for any advice!
Hi Emily, Wow, New Zealand spinach seems pretty resilient to survive through winter. Mine always dies back after frost. I would try cutting it back and see what happens. I hope you get a nice crop this year.
This is my first year trying New Zealand spinach. I started them indoors and have yet to taste any as our spring is still a bit slow to find steady temperatures. I am curious now to see if I will like it. I was swayed to give it a try because I like to eat salads with lots of spinach during the summer months but can’t grow spinach when I want to eat it the most.
I will definitely be trying this one in the future. It’s great that you gave us the heads up on the seed germination issues – especially when you are trying a new veg, it can be very frustrating trying to figure out if germination issues are due to bad seed, something you did, or just the nature of that variety.
Margaret, I can be really impatient when it comes to seeds. Pre sprouting helps because I can see the sprout before it emerges from the soil.
I planted 9 seeds outdoors in a dishpan full o soil. (CA central coast). I planted it 6/15 & 5 seeds came up in 8 days. Each “seed” that I planted was really a dried-out, irregularly shaped thingey . One thingey sprouted 4 plants & the others fewer plants. The old packet I got them from said “sell by 2018.” Didn’t specify botanical name– just repeated New Zealand Spinach in Spanish. It cost 50 cents, was marked American Seed Co.
I grew it last year and like it a lot, growing it again this year, I soaked the seeds in water and placed the cup on top of a seed heating mat, after days (don’t remember how many days) then planted the seeds in a cup, they all sprouted without difficulty.
Few days ago I found some tiny seedlings at the spot where I grew NZ spinach last year, wonder the plant reseeds itself, it’s too tiny to ID now, will find out later when the true leaves comes out.
Mac, New Zealand Spinach does self sow. I was thrilled to find a patch growing in an unexpected location last year. Unfortunately, the deer found it before I could harvest it (sigh).
I used to grow New Zealand spinach, but did not really care for them so gave up.
Norma, We like New Zealand Spinach, so that makes it worth the effort to start a few seeds. I like how it thrives in the heat of summer and doesn’t get munched on like other plants.
Wow! We got the same seeds from MTG, but we had no success. You’ve taken great care of them. It’s great to see the payoff you’re enjoying now.
My mother used to grow that in her garden. But I’ve never tried it. I don’t remember liking it as a kid. I did love spinach, but not that. But my tastes have changed a lot and I ought to try it again someday.