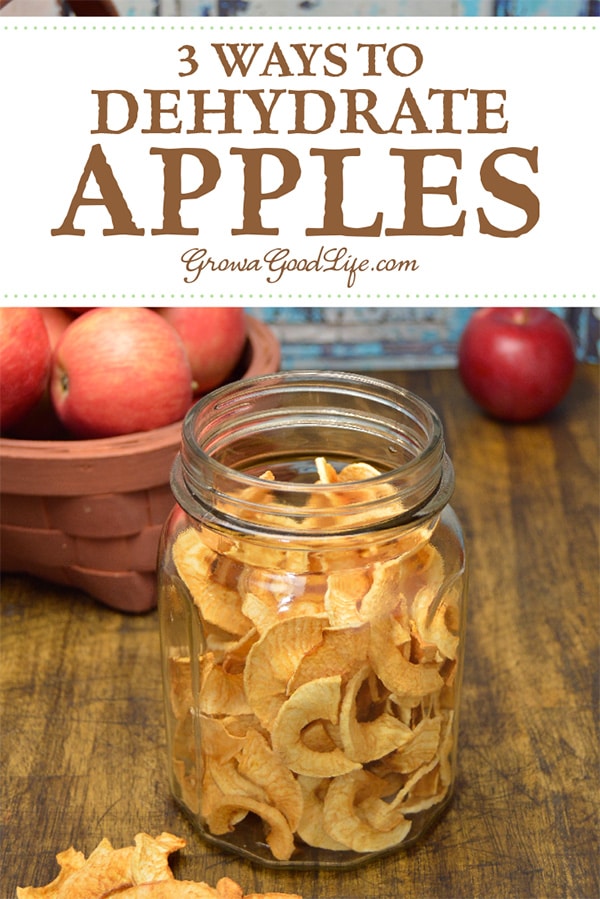
3 Ways to Dehydrate Apples for Food Storage
This post may contain affiliate links, which means that I may receive a commission if you make a purchase using these links. As an Amazon Associate I earn from qualifying purchases.
Drying apples is a great way to preserve the fresh fall harvest. Here are three ways to dehydrate apples for winter food storage, including air-drying, oven drying, and using a food dehydrator.
While fall apple picking is a fun activity for family and friends, it may be overwhelming when you come home with so many apples. Most apples can last several months when stored in a cool location, such as a root cellar or basement. In addition, you can dehydrate apples to enjoy through the long winter months.
Dehydrating apples is a great way to preserve the harvest. Dried apples can be used in so many ways, including crumbled on morning oatmeal, re-hydrated for baked goods, and as a sweet snack right out of the jar.
Tips for Dehydrating Apples
Selecting apples for drying
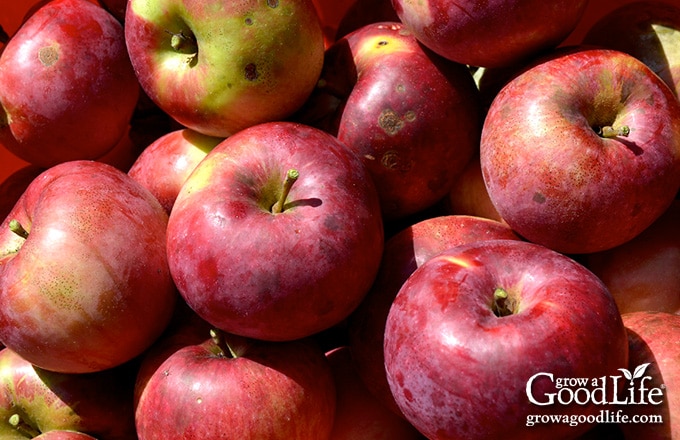
There are so many varieties of apples grown across the country that it makes it difficult to narrow down the best apples for drying. Pretty much any apple can be dehydrated. The flavor of fruit intensifies when you dehydrate it. If you choose apples that are extremely sweet or tart, be ready for a boost of this flavor when dried.
- Tart flavored apples have a low sugar content, sharp flavor, and hold their shape well when dehydrated. I prefer using tart apples for dried apple snacks. Varieties like Granny Smith, Macintosh, Gala, and Cortland are great choices.
- Sweet flavored apples have a higher natural sugar content, sweet flavor, and are usually juicy. They tend to shrink up a bit when dried, but can taste like candy. These are perfect for adding a bit of sweetness when crumbled into oatmeal, yogurt, or snacking. Varieties similar to Honeycrisp, Gala, Golden Delicious, and Red Delicious are great choices for sweet flavored apples.
Most apples ripen in fall, and this is the time you will find the freshest, locally grown apples harvested at peak. However, even apples that have been in cold storage are good candidates for drying. Don’t be afraid to experiment, and you may discover a few favorites.
To peel or not to peel your apples?
Apples can be dried with the peeling or without.
Think about how you will use the dried apples. Dehydrated apples for snacking can keep the peelings for extra color, fiber, and texture. You may want to peel the apples if you are going to rehydrate the dried apples for baking or making into dried applesauce.
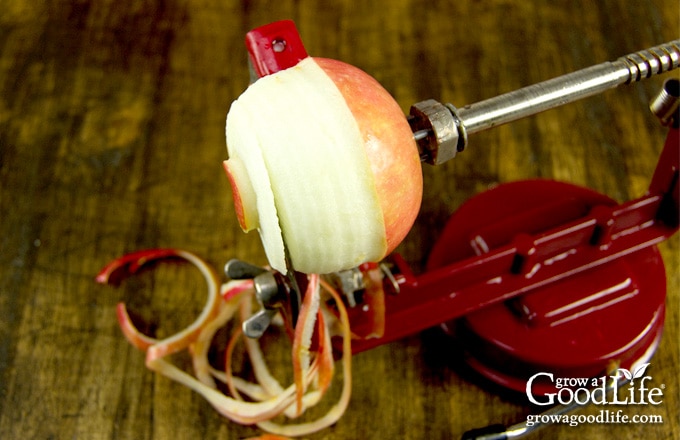
My favorite tool for preparing a lot of apples is an apple prep tool that peels, slices, and cores apples.
Pre-treating apples before dehydrating
Apples begin to turn brown when the cut flesh meets air. This is called oxidation. When apples are cut or bruised, it triggers an enzyme that turns the flesh brown. Over time, the cut apple will get darker and begin to soften as the flesh reacts to oxygen.
Dipping the apple slices in a pre-treatment liquid slows the browning process and also acts as an antimicrobial agent against E. coli bacteria.
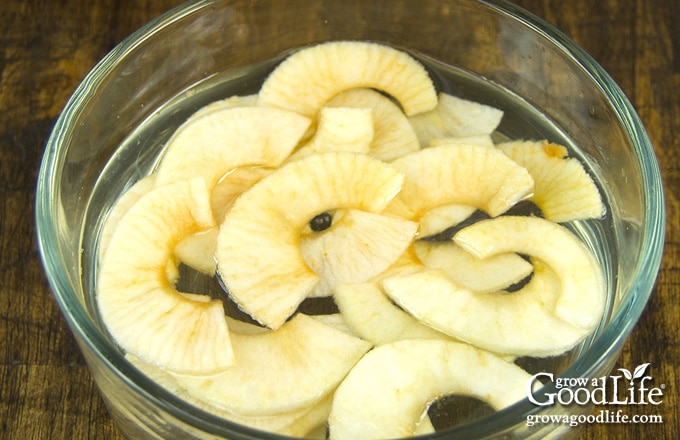
Soak freshly cut slices for 10 minutes in a pre-treatment solution of choice:
- Dip in citric acid water: Combine 1/2 teaspoon of powdered citric acid with 2 cups water. Stir until the citric acid is dissolved. Add your sliced apples and soak for about 10 minutes. Remove the apples, rinse with clean water, pat dry with a kitchen towel, and place on your drying screens.
- Treat with lemon water: Mix 1 cup of bottled lemon juice with 1 cup of cold water. Add your sliced apples and soak for 10 minutes. Remove the apples and place on your drying screens.
3 Ways to Dehydrate Apples
Drying or dehydrating apples is a method of food preservation that removes most of the moisture from the fruit. This makes the apples shelf stable, and they can be stored long-term in airtight containers in a cool, dark location.
There are several ways to dry apples. By far, the easiest way is using a food dehydrator, but you can also try air-drying and using your oven to dehydrate apples.
Stringing Apples to Air Dry
The pioneers didn’t use any fancy equipment to dry apples. Instead, they hung apple slices on strings or sticks near the kitchen fireplace or cook stove and let them dry naturally.
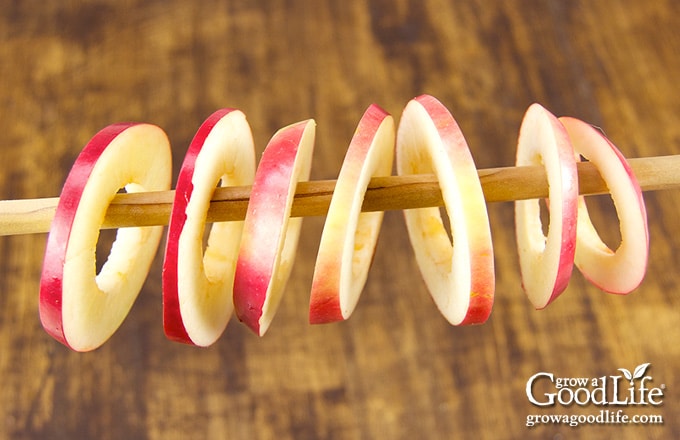
To air dry apples, thread the prepared apples slices on strings or dowels leaving space in between each slice so they are not touching. Hang horizontally near a wood stove or fireplace. Depending on the environment, it may take several days for the apples to dry.
Oven Dry Apple Slices
Another way to dry apples is to use your oven. Preheat the oven to 150˚F or the lowest setting.
Place your prepared apple slices on cooling racks on top of baking sheets. This will let air circulate around the apples. Place the baking sheets into the oven. Crack open the oven door about 2-inches so moisture can escape.
Oven dry your apples until done, about 2-3 hours. The time will vary depending on the thickness of your slices, moisture level in your apples, and humidity in the air. Begin checking after 1 hour. Flip the apple slices over and remove slices that are done.
Dehydrate Apples with a Food Dehydrator
My preferred way to dry apples is using a food dehydrator. A food dehydrator is a great tool for preserving the harvest. It dries food by moving warm air through drying trays.
A stackable food dehydrator is great for small batches. Consider investing in one of the Excalibur dehydrators for dehydrating larger batches of produce and herbs for your food storage.
Steps to Dehydrate Apples Using a Food Dehydrator
Step 1: Gather your ingredients and equipment
- Apples
- powdered citric acid or bottled lemon juice
- Food dehydrator
- Apple peeler corer slicer (optional)
- Basic kitchen tools such as a knife, cutting board, a large bowl, and kitchen towels
Step 2: Mix the pre-treatment solution
- Citric acid water: In a large bowl, combine 1/2 teaspoon of powdered citric acid with 2 cups water. Stir until the citric acid is dissolved.
- Lemon water: Mix 1 cup of bottled lemon juice with 1 cup of cold water in a large bowl.
Step 3: Prepare the apples
Wash your apples under clean running water and place on a kitchen towel to air dry.
Peel the apples, if desired. Trim off bruises and damaged areas. Cut apples crossways into 1/4-inch slices. Remove the seeds and cores.
Drop the apple slices into the pre-treatment liquid and soak for 10 minutes.
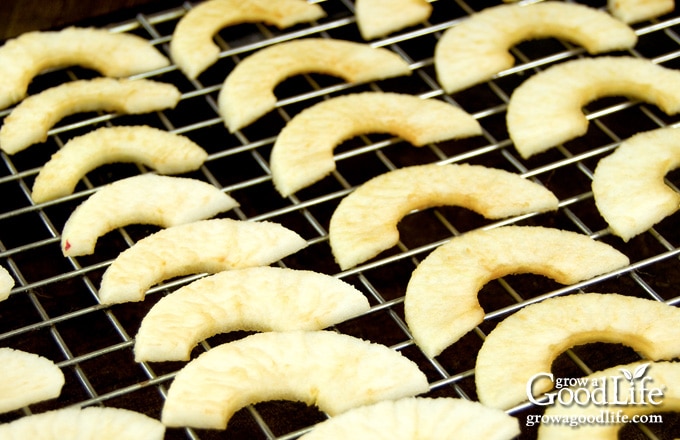
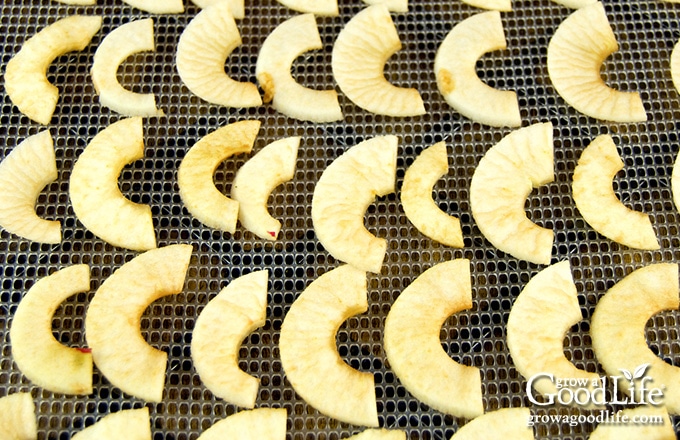
Step 3: Arrange the apple slices on drying trays
Remove the apples from the pre-treatment solution and place on your drying screens in a single layer.
Step 4: Dry the apples
Start your dehydrator at 145˚F to evaporate the moisture on the surface of the fruit from the pre-treatment solution. Run the dehydrator for about an hour at this temperature.
Reduce the temperature to 135˚F to finish drying the apple slices. Dehydrate the apples until they feel leathery and show no signs of moisture.
Step 5: Test for dryness
Dehydrated apples are finished drying when they feel rubbery and dry to the touch. To test, fold the dried apple slice in half. It will not stick together if it is dried properly. If the apples do stick when folded, dry the apples a little longer.
Another way to test is to tear the apple slice in half and look for moisture. The apple is not dry enough if you can see beads of moisture along the tear.
If you like your dehydrated apples crunchy like a chip, dry them until they snap when you bend them.
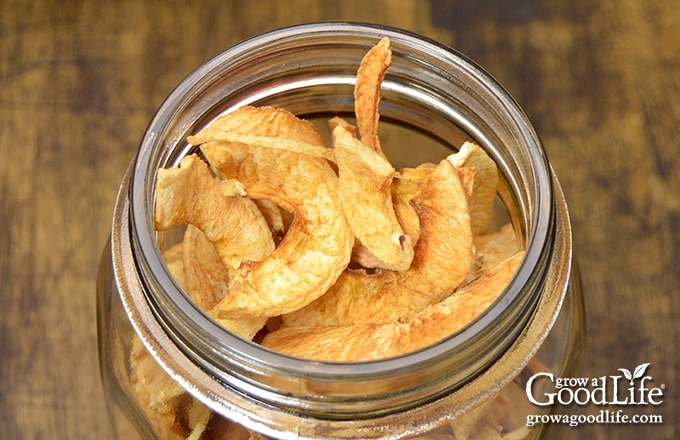
Step 6: Store the dehydrated apples
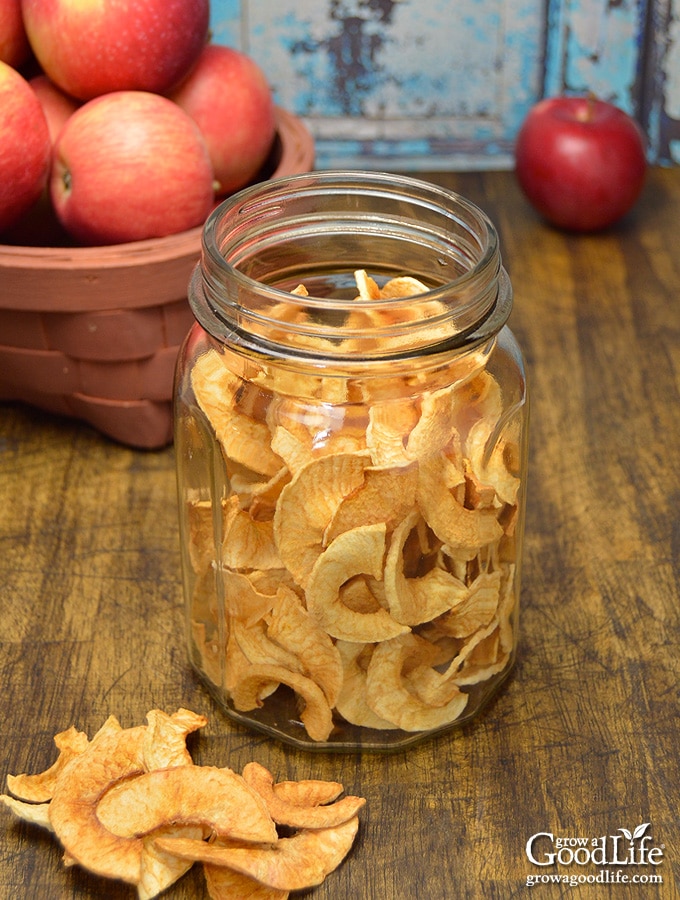
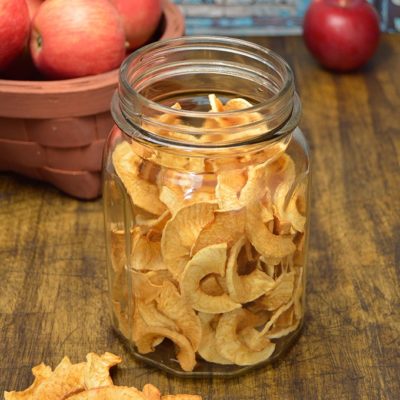
Allow the dehydrated apple slices to cool for 30 minutes, and then package into airtight containers, jars, or bags. Label, date, and store in a dark location.
I like to store dried apples in small jars because each time you open the jar you introduce moisture to the dehydrated apple pieces. Too much moisture may cause mold.
6 pounds of apples will shrink down to about 1 pound of dried apples depending on the type of apple and moisture content. You’ll need about 4 pint size jars.
Keep an eye on the dehydrated apples for about a week. Shake them in their jars to distribute any residual moisture evenly throughout the apple pieces. If you see any condensation on the sides of the containers, return the apples to the dehydrator and dry longer.
Properly dried apples should keep for about 6 months sealed in airtight containers and stored in a cool, dry place. You can also freeze for longer storage, up to a year.
How to Rehydrate Dried Apples
Reconstitute dried apples and use them in your favorite recipes, including breads, pies, and strudels, or purée the rehydrated apples with a potato masher for dried applesauce.
To rehydrate dried apples, simple soak them in hot liquid. Use about 1 cup of liquid for every 1 cup of dried apples. Heat apple juice or water in a pot until it boils. Turn off the heat, and add the apple pieces to the pot. Let the apples soak until rehydrated, about an hour. Once the apples are rehydrated, substitute them for fresh and proceed with your recipe.
Dehydrate Apples with a Food Dehydrator
Ingredients
- citric acid powder or bottled lemon juice
- water
- 6 pounds apples
Instructions
Mix the pre-treatment solution of choice:
- Citric acid water: In a large bowl, combine 1/2 teaspoon of powdered citric acid with 2 cups water. Stir until the citric acid is dissolved.
- Lemon water: Mix 1 cup of bottled lemon juice with 1 cup of cold water in a large bowl.
Prepare the apples:
- Wash your apples under clean running water and place on a kitchen towel to air dry.
- Peel the apples, if desired. Trim off bruises and damaged areas. Cut apples crossways into 1/4-inch slices. Remove the seeds and cores.Remove the apples from the pre-treatment solution and place on your drying screens in a single layer.
- Drop the apple slices into the pre-treatment liquid and soak for 10 minutes.
Dehydrate the apples:
- Turn on the dehydrator and set the temperature to 145˚F to evaporate the moisture on the surface of the fruit. Dry at this temperature for about one hour.
- Reduce the temperature to 135˚F and finish dehydrating the apples until done, about 6-12 hours depending on the moisture level in the apples. Dehydrated apples are finished drying when they feel leathery and dry to the touch.
Test the apples for dryness:
- Remove several apple slices from the dehydrator and let them cool for about 10 minutes.
- Fold the dried apple slice in half. It will not stick together if it is dried properly. If it does stick, dry the apples a little longer.
- Another way to test is to tear the apple slice in half and look for moisture. The apple is not dry enough if you can see beads of moisture along the tear.
- If you like your dehydrated apples crunchy like a chip, dry them until they snap when you bend them.
Store the dehydrated apples:
- Allow the dehydrated apple slices to cool for 30 minutes, and then package into airtight containers, jars, or bags. Label, date, and store in a dark location.
- Yield: 6 pounds of apples will shrink down to about 1 pound of dried apples depending on the type of apple and moisture content. Store in pint size jars.
- Keep an eye on the dehydrated apples for about a week. Shake them in their jars to distribute any residual moisture evenly throughout the apple pieces. If you see any condensation on the sides of the containers, return the apples to the dehydrator and dry longer.
- Properly dried apples should keep for about 6 months sealed in airtight containers and stored in a cool, dry place. You can also freeze for longer storage, up to a year.
Nutrition
Other Ways to Preserve Apples:
Good planning is key to a successful vegetable garden
Whether you are new to growing your own food or have been growing a vegetable garden for years, you will benefit from some planning each year. You will find everything you need to organize and plan your vegetable garden in my PDF eBook, Grow a Good Life Guide to Planning Your Vegetable Garden.

Love the recipe, Very good step by step info!!! I used my apple peeler, slicer and I decided to keep the peels to dehydrate, sprinkled cinnamon on it. Let’s see how good they are ❤️
I forgot to take them out of the dehydrator and went to bed! They sat out, dried, for 18 hours. Do I need to re-dehydrate them? Will they still be safe to eat?
Carrie, I do this all the time. Just dry for a few additional hours to remove any moisture the apples may have absorbed.
Can I store my dehydrated apple slices in regular jars, not Mason jars? I have tons of screw top Old El Paso salsa jars.
Rita, Sure, any clean jar with a tight seal will be ok.
Thank you for sharing!
Along with apple slices, I would really love to dry some apple cores for crafting. I’m just unsure as to how to do it correctly. I would think that you would use, relatively, the same process you would for the slices, but truly have no idea!! I certainly don’t want brown, rotten, apple cores hanging in my kitchen!
Theresa, I have never tried drying apple cores, but you could experiment with one or two to figure out the timing.
I used lemon juice for my pretreatment. Is there anything I can use it for afterwards? I hate to see it go to waste.
Karen, You could reuse the lemon juice in homemade kitchen cleaner. I found this one.
I soak my apple slices in a mixture of lemon juice and water, then afterward I add sugar to the lemon juice mixture and drink it as lemonade. It’s delicious — apple-flavored lemonade! I suppose you could also just dilute it with more water and drink it as lemon water (without the added sugar).
Hi,
Would it be possible to place the apple slices on cooling racks and then inside a solar cooker and let the sun do the work? I live in Africa and electricity is very expensive so using a solar cooker if possible would be very helpful
Lola, Yes, this would be a great way to dry apples.
Great tips! Now if only my apple trees would hurry up and grow so that I could harvest more than a handful of apples!
Oh, but I bet the few apples tasted amazing!