Canning Dried Beans
This post may contain affiliate links, which means that I may receive a commission if you make a purchase using these links. As an Amazon Associate I earn from qualifying purchases.
Pressure canning dried beans is a frugal way to add to your food storage. Reduce the sodium and chemicals found in commercially canned beans by canning your own.

Beans are an inexpensive source of protein, and a great source of fiber, iron, vitamin B and C, and calcium. Having jars of beans in the pantry makes it so much easier to include them in daily meals.
When comparing dried beans to commercially canned beans, you will find that dried beans are less expensive, can be prepared using less sodium, and you won’t have to deal with that metallic taste.
According to The Bean Institute, purchasing dry beans is about one-third the cost of cans. Canned beans also contain almost 100 times more sodium than dried beans according to NutritionFacts. Draining and rinsing the beans will reduce the sodium, but you are also draining away lots of flavor. Plus there is the issue of the chemicals in lining of the cans.
When you home can your own dried beans, you will not only save money, but you can also control the sodium. Salt is optional as a flavoring and is not required for safe canning. I like to can beans without salt, and then add salt to taste when preparing the recipe. You can also include the flavorful bean liquid in your recipes without adding sodium or unwanted chemicals or off flavors.
Tips for Canning Beans
Dried beans do take time to soak, pre-cook, and can, but preparing them all at once in large batches makes it easy to and have your own home canned beans in storage for those quick meals. Here are some tips for canning beans:
Why can dried beans?
While dried beans do last a long time in storage, they should be used within a year after purchase. If the beans are too old, they may remain hard after soaking and take much longer to cook. Canning beans can double their shelf life.
I can’t tell you how many times I have stocked up on bags of dried beans only to have them stay in the back of my cabinet because I failed to plan ahead to soak and cook them. That’s why I like preparing a full canner load several times a year. Having an assortment of beans ready to go is a huge time saver.
Use a pressure canner
Dried beans can only be home canned safely using a pressure canner. A pressure canner heats the contents at a temperature that is hot enough to kill bacteria to eliminate the risk of food borne illness.
If you don’t have a pressure canner, consider cooking and freezing instead. This article shows you how to cook dried beans on the stove, slow cooker, and Instant Pot pressure cooker: 3 Ways to Cook Dried Beans
Do you have to soak dry beans before canning?
Yes, you need to soak to rehydrate the beans before canning. You may find other options around the web, but these are not tested and may be unsafe. Beans need to be rehydrated in order to reach the proper temperature. If the texture is different, the heat may not penetrate properly and fail to kill all the bacteria that can cause food borne illness. There is no tested safe option for raw pack or canning dried beans without soaking and pre-cooking first.
Types of dried beans
Any type of dried beans can be used in this canning recipe, including black beans, chickpeas, great northern beans, kidney beans, navy beans, pinto beans, lima beans, and others.
Since canning dried beans is all about making it convenient for meal prep, think about how you use beans in your recipes, and plan your jars accordingly. The processing time is the same for all dried beans, so you can combine different types of beans in the same jar, or include jars of different varieties in the same canner load. Some examples:
- If you use several types of beans for soups or chili, combine these into quart jars. I like the convenience of canning a mix of pinto, black, and kidney beans in quart jars to make our favorite slow cooker chili.
- Quarts of great northern and pinto beans come in handy for this white bean chicken chili recipe.
- Pint size jars of black, pinto, or cannellini beans are plenty for us to use when making tacos, mashing into refried beans, or blending into bean dip.
How much will you need?
Since the processing time for canning dried beans is long, consider aiming for a full canner load so you don’t waste resources. A 16-quart pressure canner holds 9 pints, or 7 quarts.
This recipe is for pints, but if you often find yourself grabbing two cans of beans to make a recipe, consider canning in quarts instead. You will need about 3 1/4 pounds of dried beans to fill 9 pint sized jars, and about 5 pounds of dried beans to fill 7 quart sized jars.
Steps to Canning Beans
Before you begin, you may find it helpful to review this article on Using Pressure Canners for Beginners. In addition, read through the instruction manual that came with your pressure canner to be sure you understand how it works. Make sure everything is clean and working properly.
I also offer a free printable Home Canning Checklist to help keep everything organized while you prepare and process your jars. Download it here:
Grab your Free copy
Home Canning Checklists
This is a safe caning recipe from the USDA Complete Book of Home Canning book, NCFHP website, and the Ball Blue Book Guide to Preserving (Beans or Peas – Dried). You will find the full recipe below, but here are the steps to canning beans:
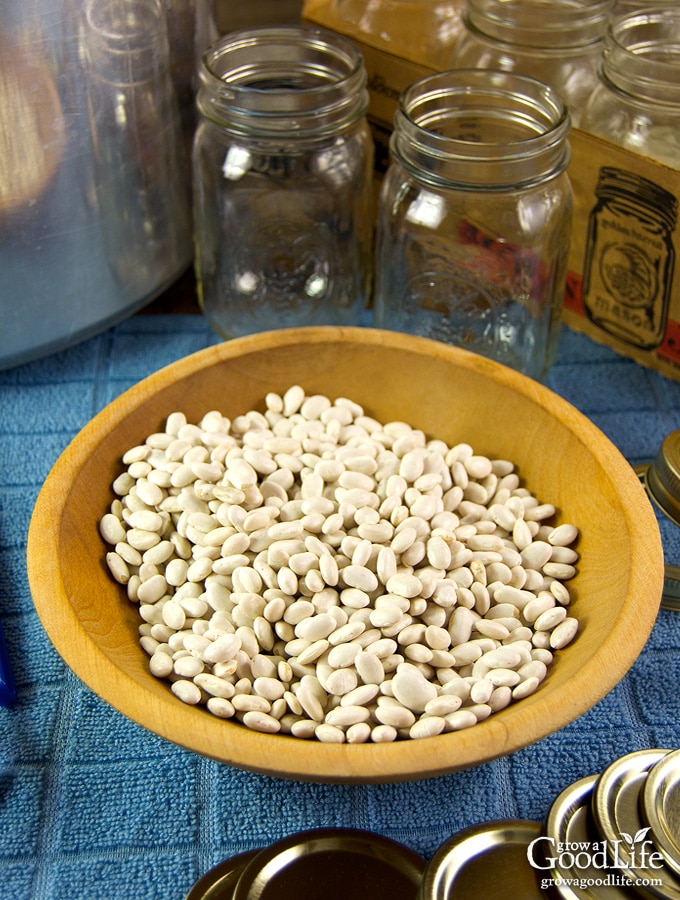
Step 1: Prepare the Beans
Sort through the dry beans and pick out any damaged beans, sticks, and stones. Rinse the beans well and rehydrate the beans using one of the following methods:
- Soak Beans Overnight: Add the beans to a large sauce pan and fill with enough water to cover the beans by about 2-inches. Cover the pot and soak the beans in a cool place for at least 12-hours or all night. Go ahead and place the pot into the refrigerator if the weather is warm.
- Quick Soak Dried Beans: If you are pressed for time, you can use the quick soak method. Bring a large pot of water to boil over high heat, add the dried beans to the boiling water, and boil for 2 minutes. Remove the pot from the heat and let the beans soak for 1 hour.
With either method, once the beans are rehydrated, drain through a strainer, and rinse well under clean running water. Rinse out the large pot and add the beans back into the pot. Fill the pot with fresh water to cover about 2-inches above the soaked beans. Bring the pot to a boil over high heat and cook for 30 minutes.

Step 2: Prepare the Canning Equipment
While the beans are boiling, gather your canning gear, prepare the jars, set up the canner, and organize your work area.
You will need the following equipment:
- Pressure canner with canning rack
- 9 pint sized canning jars, or 7 quart sized jars
- Canning lids and bands (new lids for each jar, bands can be reused)
- Canning tools: jar lifter, canning ladle, funnel, and bubble popper
- Plus basic kitchen supplies such as a slotted spoon and clean kitchen towels.
Wash the canning jars, lids, bands, and canning tools in hot soapy water, and rinse well. Set the lids and bands aside until you are ready to use them.
Place the jar rack into the pressure canner, and set the canner on the stove. Add water per the manufacturer’s instructions. For example: Presto is 3 quarts, Mirro is 2 quarts, and All American is 2 to 3 inches.
Fill the jars halfway with hot water, and then place them on the rack in the canner. Bring the canner to a simmer for 10 minutes (180˚F). Don’t boil, but keep hot until you are ready to fill them.
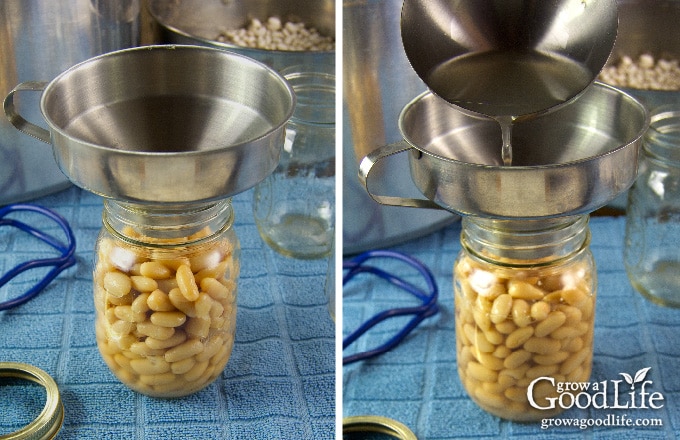
Step 3: Fill the Jars
Spread a kitchen towel on the counter. Use the jar lifter to remove a jar from the canner. Pour out the water (discard or save it for washing dishes), and place the jar on the towel. Keep the remaining jars in the canner, so they stay hot.
Place the canning funnel on the jar. Use a slotted spoon to remove the beans from the pot, and pack the jar leaving about a 2 inch head space. The beans will continue to absorb liquid as they are processed and this will give them room to expand.
If you are using canning salt, add up to 1/2 teaspoon per pint jar, and up to 1 teaspoon salt per quart jar. Ladle the hot cooking water into the jar over the beans and maintain 1 inch head space. Remove air bubbles with the bubble popper, and wipe the rim with a damp towel.
Center a lid on the jar, place the band over the lid, and screw it on until fingertip tight. Immediately place the jar back into the rack in the canner, and repeat with the rest of the jars.
Step 4: Process the Jars
Place the lid on, and lock it. Bring the canner to a boil over medium-high heat. Follow the directions for your pressure canner and process the jars for the times indicated in the recipe below.
When the processing time is complete, turn off the heat and let the canner depressurize naturally, remove the jars, and let them cool completely. Date, label, and store in a cool location for 12 to 18 months.

Canning Dried Beans
Ingredients
- 3 1/4 pounds Great Northern dried beans dried beans of choice (see notes)
- canning salt or pickling salt optional
Instructions
Prepare the Beans:
- Sort through the dry beans and pick out any damaged beans, sticks, and stones. Rinse the beans well and rehydrate the beans using one of the following methods:
- Soak Beans Overnight: Add the beans to a large pot and fill with enough water to cover the beans by about 2-inches. Cover the pot, place it in the refrigerator, and soak the beans for 12 to 18 hours.
- Quick Soak Dried Beans: Bring a large pot of water to boil over high heat, add the dried beans, and boil for 2 minutes. Remove the pot from the heat and let the beans soak for 1 hour.
- After soaking, drain the beans and rinse well. Rinse the pot and add the beans back into the pot. Fill the pot with fresh water to cover about 2-inches above the soaked beans.
- Bring the pot to a boil over high heat, and boil the beans for 30 minutes.
Prepare the Canning Equipment:
- Wash the jars, lids, and rings in hot soapy water and rinse thoroughly. Set the lids and rings aside until you are ready to use them.
- Place the jar rack into the pressure canner, and fill with water per your pressure canner manufacturer's instructions: Presto is 3 quarts, Mirro is 2 quarts, and All American is 2 to 3 inches.
- Fill the jars halfway with hot water, and then place them on the rack in the canner. Bring the canner to a simmer for 10 minutes (180˚F). Keep hot until you are ready to fill them.
Can the Beans:
- Spread a kitchen towel on the counter. Use the jar lifter to remove a jar from the canner. Pour out the water (save it for washing dishes), and place the jar on the towel. Keep the remaining jars in the canner, so they stay hot.
- Place the canning funnel on the jar. Use a slotted spoon to remove the beans from the pot, and fill the jar leaving about a 2 inch headspace.
- If you are using canning salt, add up to 1/2 teaspoon per pint jar, and up to 1 teaspoon of salt per quart jar.
- Ladle hot cooking liquid into the jar over the beans and maintain a 1-inch headspace. Remove air bubbles with the bubble popper, and wipe the rim with a damp towel.
- Center a lid on the jar, place the band over the lid, and screw it on until fingertip tight. Use the jar lifter, and place the jar back on the rack in the canner. Repeat with the rest of the jars until the canner is filled, or you run out of beans.
- Close the pressure canner and secure the lid. Leave the vent open, adjust the heat to medium-high, and bring the canner to a boil. Allow the pressure canner to vent for 10 minutes, then place weight on the vent.
- Once the canner has reached the correct pressure (10 pounds for weighted gauge canner, and 11 pounds for dial gauge canners.), set a timer, and process pints for 75 minutes, and quarts for 90 minutes at altitudes of less than 1,000 ft. Adjust for your altitude if necessary (see table below).
- Adjust the heat as needed to maintain a steady pressure. When processing time is complete, turn off heat, and allow pressure canner to cool down to 0 pressure.
- Once the canner is depressurized, let the canner cool 10 minutes before removing the lid.
- When the canner is cooled down, spread a kitchen towel on the counter, unlock cover, and remove it by tilting lid away from you so that steam does not burn your face. Allow another 10 minutes to adjust to the change in pressure.
- Use a jar lifter to lift jars carefully from canner and place on the towel. Keep the jars upright, and don't tighten bands or check the seals yet. Let sit undisturbed for 12 to 24-hours to cool.
- After 12 to 24-hours, check to be sure jar lids have sealed by pushing on the center. The lid should not pop up. If the lid flexes up and down when the center is pressed, it did not seal. Refrigerate the jar and use up within a few days.
- Remove the ring bands, wash, label, date the jars, and store in a cool, dark location (50 to 70 degrees F). Use within a year for the best quality. Yields 9 pints or 7 quarts.
Notes
- 1,001–2,000 ft. — 11 pounds
- 2,001–4,000 ft. — 12 pounds
- 4,001–6,000 ft. — 13 pounds
- 6,001–8,000 ft. — 14 pounds
- 1,001 ft. and above — 15 pounds
Nutrition
Resources and further learning:
- Safe Canning Resources: Trusted Guides for Home Food Preservation
- Evaluating Canning Recipes: How to Tell if a Canning Recipe is Safe
- Safe Tweaks for Pressure Canning Vegetables
You May Also Like:

Why must you use “canning salt” rather than sea salt? Is it a preference thing or will a person get sick if they don’t use a specific kind?
Tonna, Sea salt can be used as a canning salt substitute because it contains no additives.
What causes canned beans to taste bitter?
Linda, I have never had home canned beans taste bitter, but I did a Google search and discovered that it is an issue for some. I don’t know what causes bitterness in canned beans, but you can add a little sugar (brown sugar, maple syrup, molasses) to cut the bitter notes.
Just found your site. Your instructions are very good and clear. One question, I read on another site (can’t find it now) that if you didn’t want your beans to be mushy to not pre-soak but be sure to process according to the recipe. What are your thoughts on this? I don’t want mushy beans as we would use them as soup beans.
Thanks.
Patti, There are many articles on the internet about skipping the soaking step when preparing dried beans, but these are not tested and may be unsafe. Beans need to be rehydrated in order to reach the proper temperature. If the texture is different, the heat may not penetrate properly and fail to kill all the bacteria that can cause food borne illness. There is no tested safe option for raw pack or canning dried beans without soaking and pre-cooking first. You can learn more here: Canning Dried Beans: Why it Matters How they Go in the Jar.
Nancy, A pressure canner is required to can dried beans safely. You can freeze the beans instead.
Great idea, canned some Pinto Bean over the 4th of July weekend since, not traveling, Plan on Canning Northern and some others as well. Found this site by mistake and ran with the Idea Thanks
If beans are mostly cooked can you can them and can you cut the time back
Trudy, I know, it seems like a long time, but cutting back the processing time will compromise the safety of the canned beans. Canning recipes are tested for safety to prevent food born illness. You can learn more about why safe canning recipes are important here at the MSU Extension website: Thinking of using your own canning recipe? Think again.
Instead of pressure canning dried beans, you could freeze them. Check out this article, 3 Ways to Cook Dried Beans from Scratch from our sister site.
Thank you for sharing this step-by-step guide in canning dried beans. I’ll be sharing this with my mom. She’ll find this really helpful!
Question, how do the beans not turn to mush when they are processed for such a long time after being pre soaked and everything?
Joy, Yes, sometimes the beans do end up a bit soft. However, this is the only safe way to can dried beans. You can read more here from the National Center for Home Food Preservation: Canning Dry Beans: It Matters How They Go in the Jar.
If your beans turn out soft when canned, consider using them in recipes where they are pureed, such as this Roasted Garlic White Bean Dip or Refried Beans. Or you can skip canning altogether and cook and freeze dried beans instead.
Thank you so much for sharing this knowledge. I have a lot of dried beans in my food storage however I find I am to lazy and just end up buying canned beans at the store. I was able to can a bunch of them in one day! They taste way better than store bought and I love that I control the salt!
Harmony, Thanks for your comment! I love canning dried beans without salt and then flavoring it to taste when cooking.
This is such a good idea! I never thought about canning beans, but we use dried beans all the time. And sometimes, there just isn’t the time to cook dry beans. I think I need to make a bunch of pints of black beans asap!