Beef Stroganoff Canning Recipe
This post may contain affiliate links, which means that I may receive a commission if you make a purchase using these links. As an Amazon Associate I earn from qualifying purchases.
Savor the deliciousness of beef stroganoff with our easy canning recipe. This meal in a jar is ready to heat and eat, providing a tasty, hassle-free dinner option straight from your pantry.
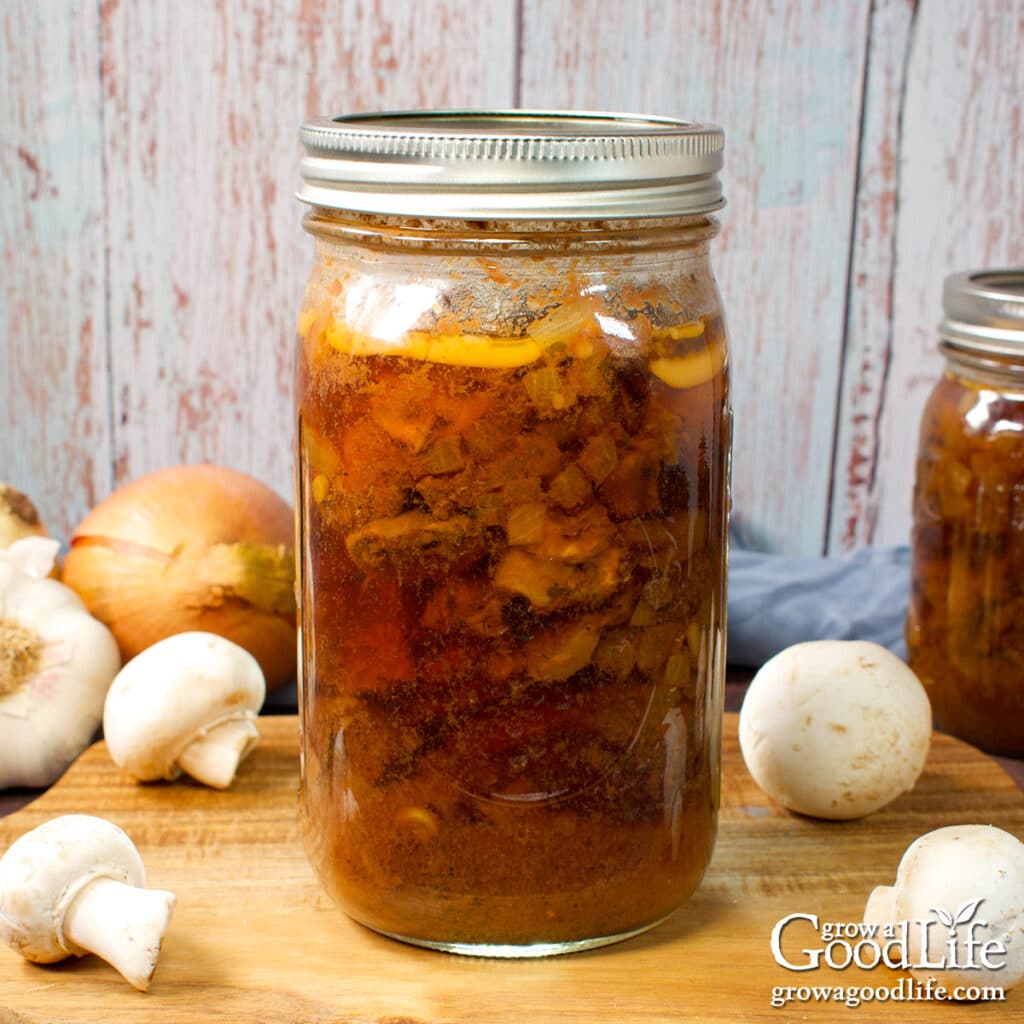
Beef stroganoff is a beloved classic that brings warmth and comfort to the dinner table with its rich flavors and tender chunks of beef. Traditionally made with sautéed beef, mushrooms, and a flavorful sauce, this dish is perfect for cozy meals. But what if you could enjoy this hearty favorite anytime, without the hassle of last-minute preparation?
In this blog post, I’ll be sharing a convenient and delicious beef stroganoff canning recipe. By canning this meal in a jar, you can have a homemade dinner ready to go in your pantry. It’s perfect for busy weeknights or when you crave a comforting meal.
This is a great canning recipe that is both easy to preserve and easy to serve. This post will walk you through the steps of preparing, canning, and serving this flavorful dish, with options for both a traditional and a creamy version.
About the Ingredients
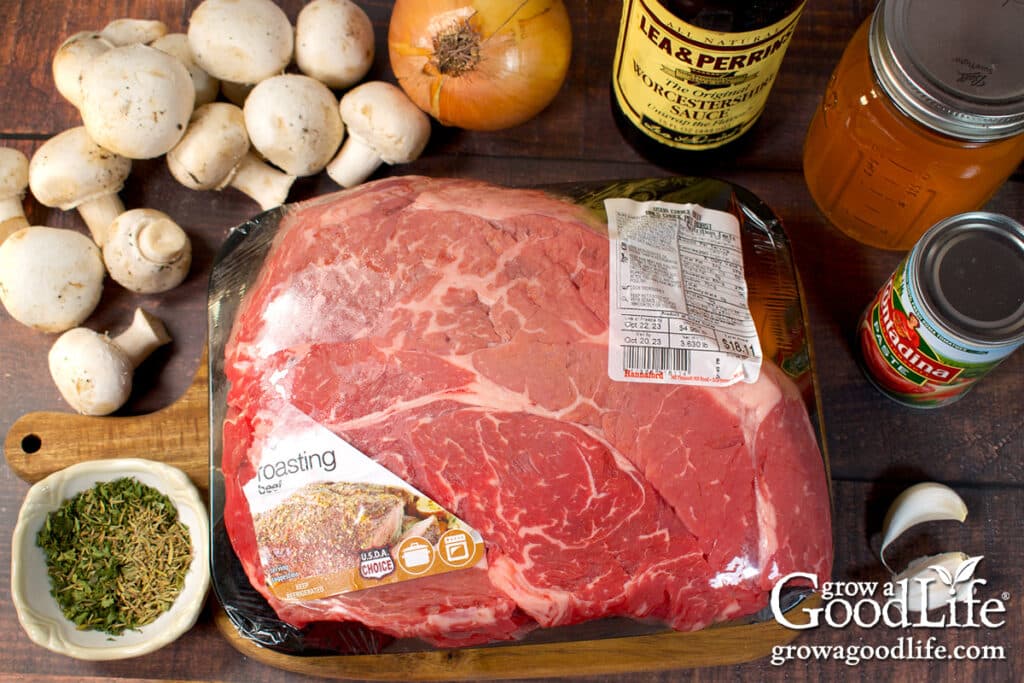
To create a rich and flavorful beef stroganoff that can be safely pressure canned, you’ll need the following ingredients:
Beef Broth or Stock
For the base of your stroganoff, you can use either homemade or store-bought beef broth or beef stock. If you opt for homemade, consider simmering roasted beef bones with vegetables like onions, carrots, and celery. This process not only extracts the maximum flavor but also ensures a wholesome, additive-free broth. I suggest preparing a day in advance and refrigerating it overnight. This allows the fat to solidify on the surface, making it easy to skim off before reheating. To make your own beef stock, check out this recipe for Canning Beef Stock and skip the canning part.
For convenience, store-bought options are also acceptable. When choosing a commercial broth or stock, go for organic and low-sodium varieties with minimal additives. If the broth you select is particularly high in sodium, you can omit additional salt and adjust the seasoning to taste when serving.
You’ll need approximately 4 cups or 2 quarts of beef broth for this recipe. If you find yourself a little short, you can top off the broth with water to reach the desired quantity.
Beef
Choosing the right cut of beef will achieve tender, flavorful results. Unlike lean cuts, which can become tough during the prolonged cooking process, fattier cuts with plenty of marbling and connective tissue will break down beautifully when pressure canned, resulting in a melt-in-your-mouth texture. You’ll need about 4 pounds of boneless beef.
Ideal beef cuts for this recipe include chuck (such as chuck shoulder and chuck roast), bottom round roast, rump roast, eye round roast, top round, round tip roast, and pot roast.
Mushrooms
Mushrooms are a classic ingredient in beef stroganoff, adding a rich, earthy flavor and a satisfying texture. You can use either baby bella (also known as cremini) mushrooms or white button mushrooms:
- Baby Bella Mushrooms: These mushrooms have a deeper, more robust flavor compared to white button mushrooms. Their firmer texture holds up well in cooking, making them an excellent choice for this dish.
- White Button Mushrooms: With a milder flavor, white button mushrooms are a great option if you prefer a subtler mushroom taste. They also have a tender texture that complements the beef and other ingredients.
You will need approximately 8 ounces of fresh mushrooms to yield 2 cups of sliced mushrooms.
Onions and Garlic
Onions and garlic form the aromatic base of the dish. You can use any bulb onion—yellow, white, or red—depending on your preference. For this recipe, 2 medium-sized onions, finely chopped, will give you about 2 cups. Choose onions that are firm and free from blemishes.
For garlic, opt for fresh bulbs with firm, plump cloves. The fresher the garlic, the more robust the flavor will be.
Additional Flavorings
To round out the flavors in your beef stroganoff, you’ll also need the following ingredients:
- Tomato Paste: Adds a subtle tang and richness.
- Worcestershire Sauce: Provides a savory depth with its umami qualities.
- Dried Herbs: Thyme, parsley, and bay leaves infuse an earthy flavor.
- Salt and Ground Black Pepper: Seasonings that can be adjusted to taste.
These ingredients combine to create a well-rounded, savory profile that perfectly complements the tender beef and rich broth, making for a delicious meal in a jar that’s easy to preserve and enjoy anytime.
Steps for Canning Beef Stroganoff
This canning recipe is the Beef Stroganoff recipe from the Simple One-Jar Meals section in The All New Ball Book of Canning and Preserving.
Before you get started, it may be helpful to review the information on pressure canning at the National Center for Home Food Preservation website, along with the instructions for your pressure canner.
The full recipe can be found at the bottom of this article, but here are the detailed steps for preparing and canning beef stroganoff.
Step 1: Gather and Prepare Your Canning and Kitchen Gear
Here’s what you’ll need:
- Pressure Canner with a canning rack
- Canning Jars: Use 4 quart-sized jars or 8 pint-sized jars, depending on your portion preference.
- Canning Lids and Bands: Use new lids for each jar, but you can reuse the bands.
- Canning Tools: A jar lifter, canning funnel, and bubble popper are essential.
- Basic Kitchen Equipment: Include a kitchen scale, a sharp knife, two cutting boards (one for meat and one for veggies), a large prep bowl, measuring cups and spoons, tongs, a ladle, a kitchen timer, and plenty of clean kitchen towels.
Thoroughly wash your jars, lids, bands, and all tools in hot, soapy water, then rinse them well. Lay the lids and tools on clean kitchen towels to dry until you’re ready to use them.
Next, place the jar rack in the pressure canner and set it on a large burner on your stove. Measure and add water according to your pressure canner’s instructions: 3 quarts for Presto, 2 quarts for Mirro, or 2 to 3 inches deep for All American canners.
Fill the jars halfway with water and place them upright in the canner. Since this recipe uses the raw pack method, warm the canner and jars to about 140°F. Cover the canner and heat on low for at least 10 minutes, keeping both the canner and jars warm while you prepare the ingredients.
Step 2: Prepare the Ingredients
Prep is easy with this raw-pack recipe. You’ll combine the ingredients in a large bowl, pack them into warm jars, and cover with hot beef stock. Then, the jars are processed in a pressure canner, preserving and cooking the beef stroganoff.
Beef: Start by trimming any excess fat from the meat. Cut the beef into 2-inch cubes and place them in a large prep bowl.
Mushrooms: Rinse the mushrooms under cool running water, then slice them. Measure out 2 cups of sliced mushrooms and add them to the bowl.
Onions: Peel and dice enough onions to get 2 cups, then add them to the bowl.
Garlic: Peel and slice the garlic, then add it to the bowl.
Add the Rest of the Ingredients: Measure and add the tomato paste, Worcestershire sauce, dried thyme, dried parsley, salt, and pepper to the bowl. Set the bay leaves aside for now. We will add these to the jars as we fill them.
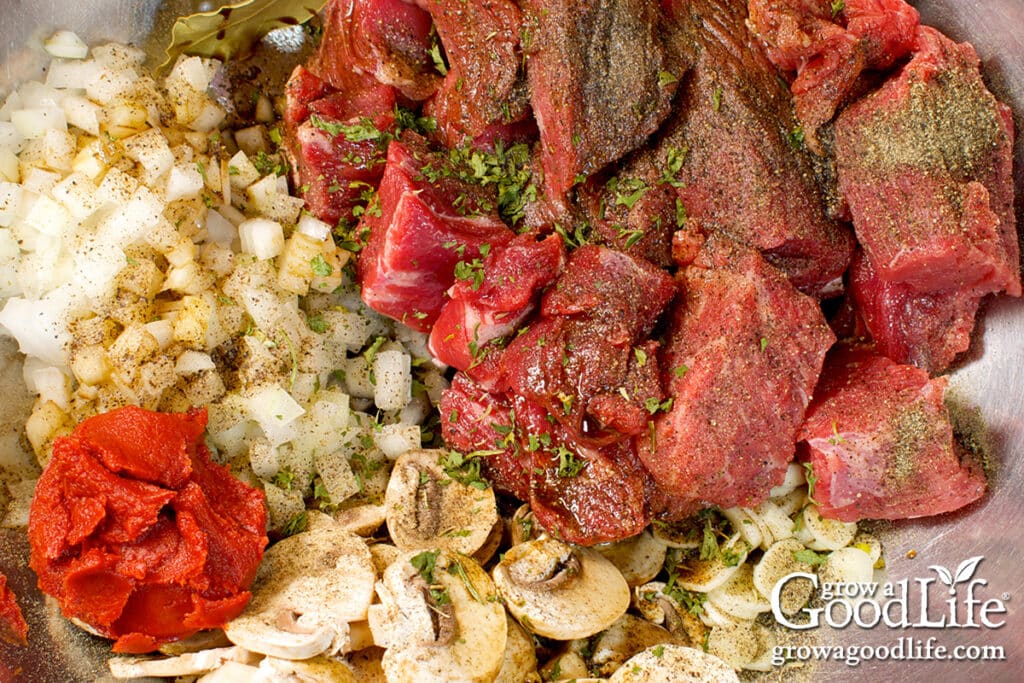
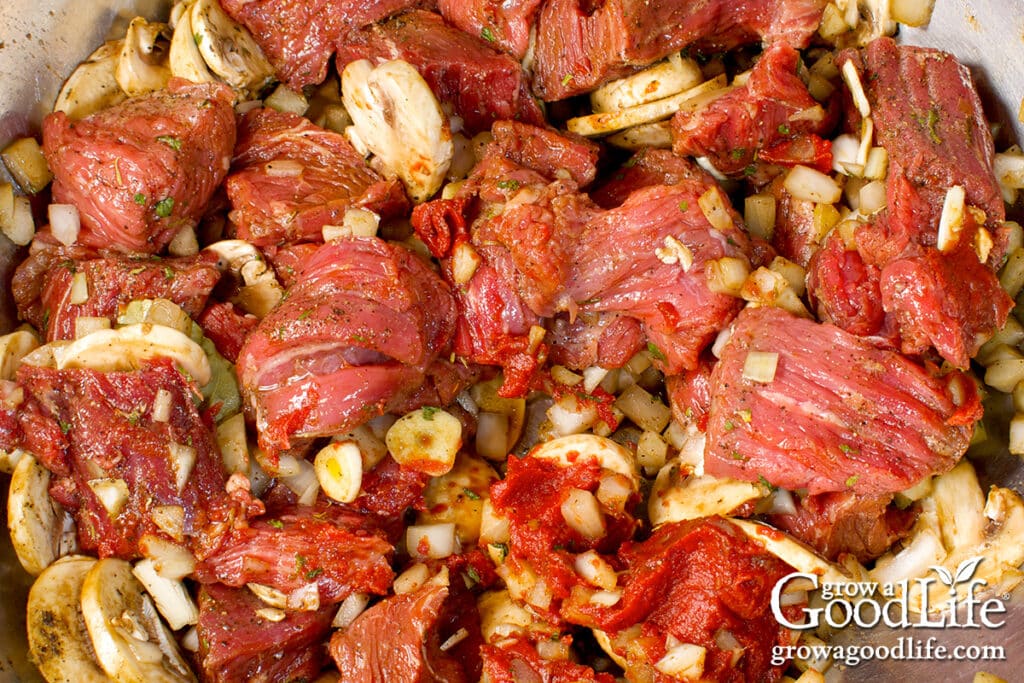
Mix Well: Mix all the ingredients thoroughly until well combined, then roughly divide the mixture into four equal sized sections to make it easier to fill the jars evenly.
Heat the Beef Stock: Pour the beef stock or beef broth into a medium saucepan, bring it to a boil, and keep it hot.
Step 3: Fill the Jars
Prepare your work area by laying a dry kitchen towel on the counter and arranging your canning lids, rings, tongs, bubble popper, and ladle nearby. Dampen a clean paper towel with a little vinegar to clean the rims of the jars before sealing. Then follow the steps to fill one jar at a time:
Remove a Warm Jar: Use the jar lifter to remove a warm jar from the canner. Drain the water from the jar into a separate bowl or the sink, and place the empty jar on the towel. Keep the remaining jars in the canner to stay warm.
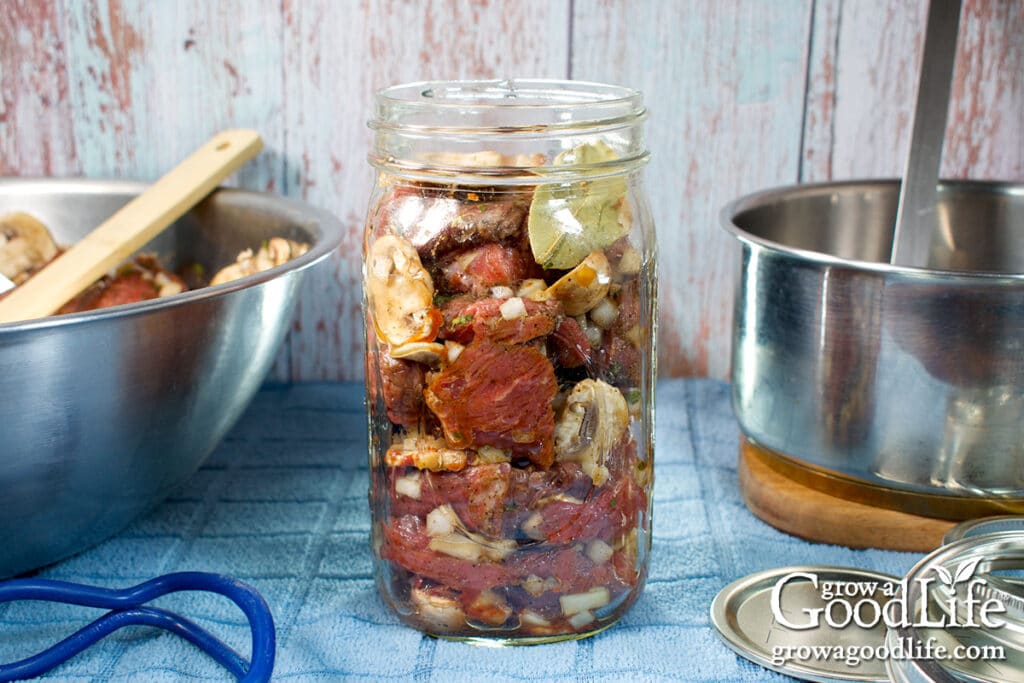
Fill the Jar: Use tongs to pack the beef mixture firmly into the jar, leaving about 1-inch at the top. Add one dried bay leaf, then ladle hot broth over the mixture, leaving a 1-inch headspace.
Remove Air Bubbles: Use the bubble popper to release any trapped air in the jar, then recheck the headspace and add more broth if needed to maintain a 1-inch headspace.
Clean the Rim: Wipe the rim of the jar with the vinegar-dampened paper towel to remove any residue. Place a lid on the jar, center it, and screw on the band until it is just fingertip-tight.
Return Jar to Canner: Use the jar lifter to return the filled jar to the canner. Repeat these steps with the remaining jars.
Step 4: Process in a Pressure Canner
Follow your pressure canner manufacturer’s instructions for sealing the lid, venting, and heating. Process the jars for the time specified in the recipe below.
After the processing time is complete, turn off the heat and let the pressure return to zero naturally. Once the pressure has dropped, carefully remove the jars and place them upright on a dry towel. It’s important to keep the jars upright to prevent food from spilling into the sealing area, which could prevent a proper seal.
Do not touch the rings or test the seals at this point. Allow the jars to cool undisturbed for 12 to 24 hours. This cooling period is crucial for the jars to seal properly.
After the jars have cooled completely, test the seals. If any jars didn’t seal properly, refrigerate them and use the contents within a few days
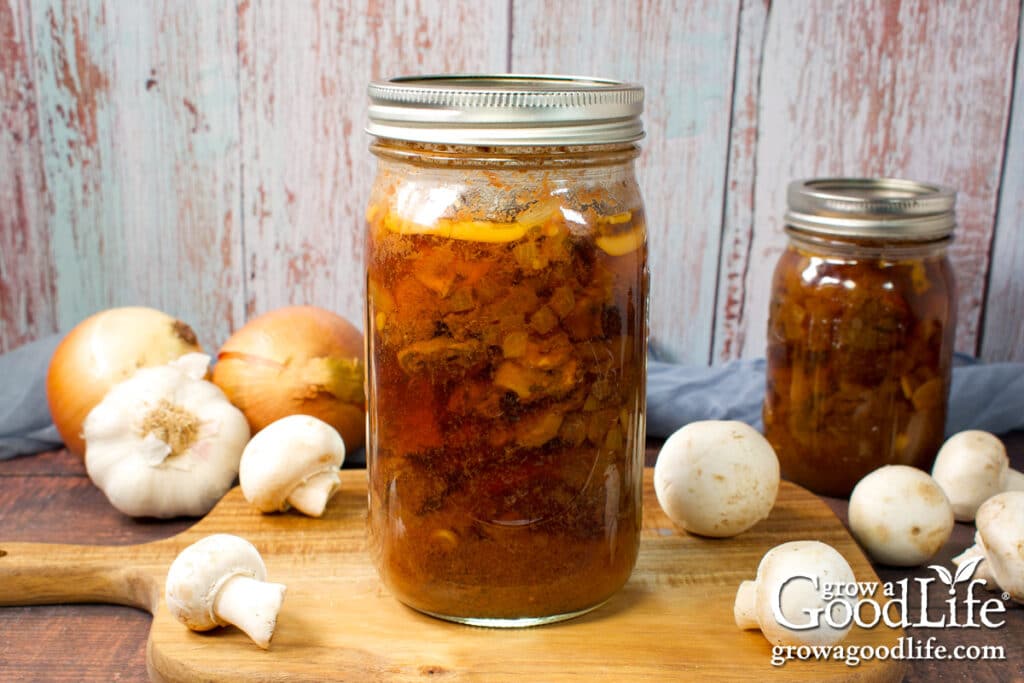
Before storing, remove the rings and wash the jars thoroughly with soapy water to remove any residue. Label and date the jars, then store them in a cool, dark place. For the best flavor, enjoy the beef stroganoff within 18 months.
Heat and Serve
Your jars of beef stroganoff are fully cooked and only need to be heated before enjoying.
When you are ready to serve, open the jar and skim off any fat that may have risen to the top. Then, pour the contents into a saucepan.
To thicken the sauce: Fill the empty jar with 1 cup of water, add 2 tablespoons of cornstarch, cover, and shake well to create a slurry. Pour the slurry into the saucepan and warm over medium-high heat, stirring occasionally, until the sauce thickens and becomes bubbly, about 10 minutes.
For a creamier sauce: After the sauce has thickened, remove the pan from the heat. Stir in 1/2 to 1 cup of sour cream, depending on your preference for creaminess. Mix well until the sour cream is fully incorporated and the sauce is smooth. Return the saucepan to low heat, if needed, to gently simmer without boiling.
Season with dijon mustard, additional salt and pepper if necessary, and garnish with fresh herbs. Serve over egg noodles, mashed potatoes, rice, or even a bed of sautéed spinach for a deliciously creamy meal.
Beef Stroganoff Canning Recipe
Ingredients
- 4 pounds boneless beef chuck trimmed and cut into 2-inch chunks
- 2 cups sliced mushrooms
- 2 cups chopped onions
- 4 cloves garlic sliced
- 1/2 cup tomato paste
- 2 tablespoons Worcestershire sauce
- 2 teaspoons dried thyme
- 2 teaspoons dried parsley
- 2 teaspoons salt
- 1 teaspoon ground black pepper
- 4 cups beef stock or broth
- 4 dried bay leaves 1 per quart or ½ per pint
- 2 tablespoons vinegar optional to wipe jar rims
Instructions
Prepare the Jars and Canner:
- Place the jar rack into the pressure canner and fill it with the amount of water per your canner manufacturer’s instructions (Presto = 3 quarts, Mirro = 2 quarts, and All American = 2 to 3 inches).
- Fill the clean jars halfway with hot water and place them on the rack in the canner.
- Heat the canner to just 140°F for raw packing and keep it warm.
Prepare the Ingredients:
- Mix the beef, mushrooms, onions, garlic, tomato paste, Worcestershire sauce, thyme, parsley, salt, and pepper in a large prep bowl. Roughly divide the mixture into equal portions to make it easier to fill the jars evenly.
- Add the beef stock to a medium saucepan, bring to a boil over medium-high heat, and keep it hot.
Fill the Jars:
- Lay a dry kitchen towel on the counter. Use the jar lifter to remove one jar from the canner. Drain the water in a separate bowl or the sink, and place it on the towel. Keep the remaining jars in the canner so they stay warm.
- Use tongs to pack the beef mixture tightly into the jar, leaving about an inch at the top. Add 1 bay leaf per quart or ½ bay leaf per pint. Then, add broth to fill the jar to 1 inch headspace.
- Run the bubble popper through the jar to release trapped air, then adjust the headspace again with additional stock if needed.
- Wipe the rim of the jar with a paper towel soaked in vinegar to remove any residue, center a lid on the jar, and screw on the band until fingertip tight.
- Place the jar back into the canner and repeat with the remaining jars.
Process in a Pressure Canner:
- Place the lid on the canner and lock it. Leave the vent open, adjust the heat to medium-high, and bring the canner to a boil.
- Once boiling, let the pressure canner vent steam for 10 minutes, place the pressure regulator on top of the air vent, and let the pressure rise.
- When the canner has reached the correct pressure (10 pounds for weighted gauge or 11 pounds for dial gauge pressure canner), set a timer and process pint jars for 75 minutes and quarts for 90 minutes at altitudes of less than 1,000 ft.
- If necessary, adjust the pressure for your altitude (see notes) and regulate the heat as needed to maintain a steady pressure.
- When the processing time is complete, turn off the heat and allow the canner to sit until the pressure drops to 0. Once the canner is depressurized, let it cool for an additional 10 minutes before removing the lid.
- Spread a dry towel on the counter, unlock the cover, and remove it by tilting the lid away from you so that steam does not burn your face.
- Allow the jars to adjust to the change in pressure for another 10 minutes. If they are still boiling aggressively, let them sit in the canner for another 5 minutes or until the boiling slows.
- Use the jar lifter to remove the jars from the canner and place them on the towel. Keep them upright, and don’t tighten bands or check the seals yet. Let the jars sit undisturbed for 12 to 24 hours to cool and seal.
- After 12 to 24 hours, check to be sure the jar lids have sealed by pushing on the center. The cover should not pop up. The jar failed to seal if the top flexes up and down. Refrigerate it and use it within a few days.
- Remove the screw-on bands and wash the jars in warm, soapy water to remove any residue. Then label, date, and store the jars in a cool, dark place. Use within 18 months for the best quality—yields 8 pints or 4 quart jars.
Notes
- Dial Gauge Pints and Quarts at altitudes of 2,001 – 4,000 ft. increase pressure to 12 pounds, 4,001 – 6,000 ft. is 13 pounds, and 6,001 – 8,000 ft. is 14 pounds.
- Weighted Gauge Pints and Quarts at altitudes of 1,001 ft. and above, increase pressure to 15 pounds.
Nutrition
Looking for more meal-in-a-jar canning recipes? You might enjoy trying out these savory options:
40+ Meals in a Jar Pressure Canning Recipes
In this eBook, you will find 50 pressure canning recipes, including 44 meals, along with homemade stocks and bone broths. Recipes include soups, stews, chilis, beans, beef, pork, and poultry. Explore the world of preserving delicious home-cooked meals for all seasons.

