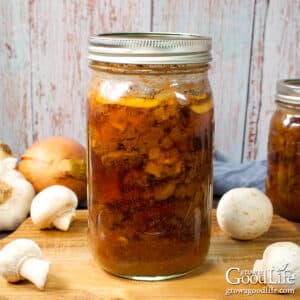
Beef Stroganoff Canning Recipe
Savor the deliciousness of beef stroganoff with our easy canning recipe. This meal in a jar is ready to heat and eat, providing a tasty, hassle-free dinner option straight from your pantry.
Ingredients
- 4 pounds boneless beef chuck trimmed and cut into 2-inch chunks
- 2 cups sliced mushrooms
- 2 cups chopped onions
- 4 cloves garlic sliced
- 1/2 cup tomato paste
- 2 tablespoons Worcestershire sauce
- 2 teaspoons dried thyme
- 2 teaspoons dried parsley
- 2 teaspoons salt
- 1 teaspoon ground black pepper
- 4 cups beef stock or broth
- 4 dried bay leaves 1 per quart or ½ per pint
- 2 tablespoons vinegar optional to wipe jar rims
Instructions
Prepare the Jars and Canner:
- Place the jar rack into the pressure canner and fill it with the amount of water per your canner manufacturer's instructions (Presto = 3 quarts, Mirro = 2 quarts, and All American = 2 to 3 inches).
- Fill the clean jars halfway with hot water and place them on the rack in the canner.
- Heat the canner to just 140°F for raw packing and keep it warm.
Prepare the Ingredients:
- Mix the beef, mushrooms, onions, garlic, tomato paste, Worcestershire sauce, thyme, parsley, salt, and pepper in a large prep bowl. Roughly divide the mixture into equal portions to make it easier to fill the jars evenly.
- Add the beef stock to a medium saucepan, bring to a boil over medium-high heat, and keep it hot.
Fill the Jars:
- Lay a dry kitchen towel on the counter. Use the jar lifter to remove one jar from the canner. Drain the water in a separate bowl or the sink, and place it on the towel. Keep the remaining jars in the canner so they stay warm.
- Use tongs to pack the beef mixture tightly into the jar, leaving about an inch at the top. Add 1 bay leaf per quart or ½ bay leaf per pint. Then, add broth to fill the jar to 1 inch headspace.
- Run the bubble popper through the jar to release trapped air, then adjust the headspace again with additional stock if needed.
- Wipe the rim of the jar with a paper towel soaked in vinegar to remove any residue, center a lid on the jar, and screw on the band until fingertip tight.
- Place the jar back into the canner and repeat with the remaining jars.
Process in a Pressure Canner:
- Place the lid on the canner and lock it. Leave the vent open, adjust the heat to medium-high, and bring the canner to a boil.
- Once boiling, let the pressure canner vent steam for 10 minutes, place the pressure regulator on top of the air vent, and let the pressure rise.
- When the canner has reached the correct pressure (10 pounds for weighted gauge or 11 pounds for dial gauge pressure canner), set a timer and process pint jars for 75 minutes and quarts for 90 minutes at altitudes of less than 1,000 ft.
- If necessary, adjust the pressure for your altitude (see notes) and regulate the heat as needed to maintain a steady pressure.
- When the processing time is complete, turn off the heat and allow the canner to sit until the pressure drops to 0. Once the canner is depressurized, let it cool for an additional 10 minutes before removing the lid.
- Spread a dry towel on the counter, unlock the cover, and remove it by tilting the lid away from you so that steam does not burn your face.
- Allow the jars to adjust to the change in pressure for another 10 minutes. If they are still boiling aggressively, let them sit in the canner for another 5 minutes or until the boiling slows.
- Use the jar lifter to remove the jars from the canner and place them on the towel. Keep them upright, and don't tighten bands or check the seals yet. Let the jars sit undisturbed for 12 to 24 hours to cool and seal.
- After 12 to 24 hours, check to be sure the jar lids have sealed by pushing on the center. The cover should not pop up. The jar failed to seal if the top flexes up and down. Refrigerate it and use it within a few days.
- Remove the screw-on bands and wash the jars in warm, soapy water to remove any residue. Then label, date, and store the jars in a cool, dark place. Use within 18 months for the best quality—yields 8 pints or 4 quart jars.
Notes
This is a tested, safe canning recipe from The All New Ball Book of Canning and Preserving. Changing the recipe may make the product unsafe for canning.
All times are at altitudes of less than 1,000 feet. Make the following adjustments for altitudes greater than 1,000 feet:
Dial-Gauge Canners:
- 1,001–2,000 ft. — 11 pounds
- 2,001–4,000 ft. — 12 pounds
- 4,001–6,000 ft. — 13 pounds
- 6,001–8,000 ft. — 14 pounds
- 1,001 ft. and above — 15 pounds
Nutrition
Serving: 1cupCalories: 175kcalCarbohydrates: 25gProtein: 12gFat: 3gSaturated Fat: 1gCholesterol: 22mg
Tried this recipe?Let us know how it was!