Sweet and Sour Zucchini Pickles
This post may contain affiliate links, which means that I may receive a commission if you make a purchase using these links. As an Amazon Associate I earn from qualifying purchases.
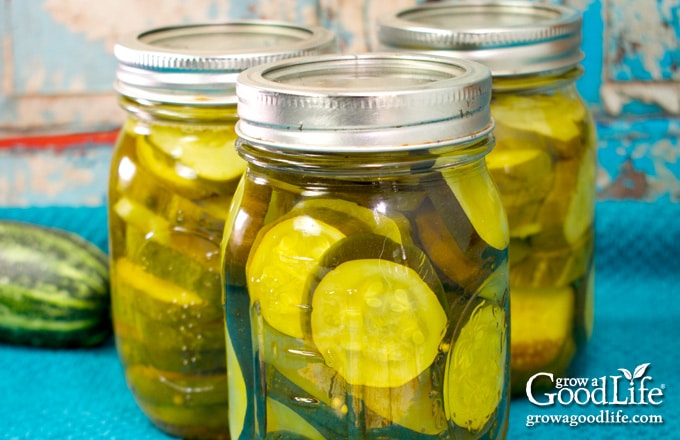
Overwhelmed with zucchini? You can preserve that big harvest of zucchini with this easy, sweet and sour zucchini pickles recipe that tastes like bread-and-butter pickles.
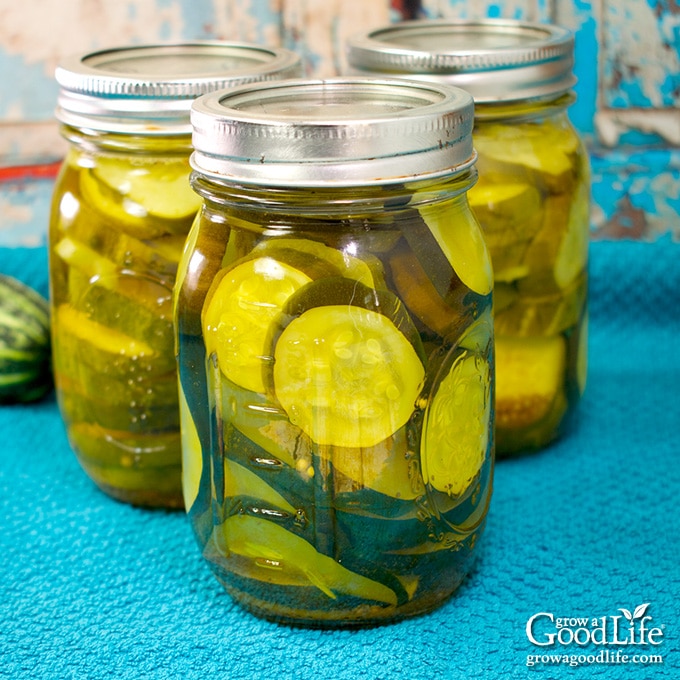
The zucchini is a summer vegetable that grows quickly and abundantly in nearly every backyard garden. The prolific fruit will likely be plentiful enough to share with neighbors and friends, but have you considered what else you can do with the excess harvest?
Pickling is a great way to preserve summer zucchini from the garden! These sweet and sour zucchini pickles are perfect on burgers and sandwiches, tossed in salads, and paired with cheese as part of a charcuterie board. They are also delicious snacked right out of the jar.
Tips for Canning Zucchini Pickles
It’s that time of year again when gardens and farmers’ markets are overflowing with zucchini. Turning that abundance into home-canned zucchini pickles is a great way to use them.
If you prefer tart and dill-flavored pickles, you can follow this Dill Pickled Zucchini recipe instead. Or you can make both! While you are at it, also check out this Zucchini Relish recipe, which is a perfect way to use up those extra large zucchini that got away from you in the garden.
But if you prefer the taste of bread and butter pickles, try this sweet and sour zucchini pickles recipe, adapted from the Zucchini Bread and Butter Pickles recipe in the Ball Blue Book Guide to Preserving. Follow these tips to make your zucchini pickles extra tasty:
Use Young Zucchini
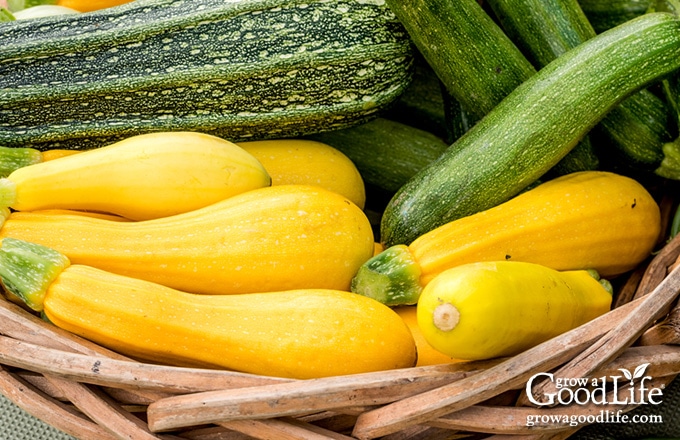
You can pickle any type of summer squash with this recipe. The original Ball recipe recommends using 14 to 16 small zucchini, which weighs about 4 to 6 pounds zucchini. However, you can also substitute an equal amount of other summer squash varieties, such as yellow summer squash, pattypan, tromboncino, and zephyr.
When choosing summer squash for pickling, opt for firm, slender, and young fruit. Look for ones that are approximately 2 inches in diameter and 8 inches in length. Avoid preserving zucchini with insect damage, blemishes, soft spots, and wrinkled skin.
For the best quality, harvest the zucchini just before canning. However, if you need to gather zucchini over a period of time to accumulate enough for a full batch, store the unwashed zucchini in the refrigerator’s crisper drawer for up to 3 days. This will help maintain their freshness until you are ready to begin the pickling process.
Type of Onions
You can use any type of bulb onion you have available, whether it’s yellow, white, or red. Pickling them makes them taste great, and even the strongest-tasting onions become milder in flavor when pickled.
Use Pickling Salt
It is important to use pickling salt, which is also known as canning salt, instead of table salt. Table salt contains iodine and anti-caking agents that can darken pickles, affect the flavor, and cause residue in your jars.
Type of Vinegar
Use commercial vinegar with at least 5% acidity for pickling. The most common types used for canning are apple cider and white vinegar.
- Apple cider vinegar is made from fermented apples, adding a slightly sweet apple flavor to pickled foods.
- White vinegar is clear vinegar made by distilling corn and rye. The flavor is sharper than apple cider vinegar. Choose an organic brand to avoid genetically modified corn.
Additional Variations
When it comes to canning recipes, it’s crucial to adhere to a tested recipe to maintain the correct proportions of vegetables, vinegar, and salt, ensuring the safe preservation of your pickles. However, there are some modifications for this recipe that you can safely make to add a personal touch:
- Explore different dried spices: Consider experimenting with your preferred pickling spice mix or incorporating coriander seeds and crushed red pepper flakes.
- Intensify the mustard flavor: If you enjoy a stronger mustard taste in your pickles, you can enhance it by adding up to a tablespoon of dried mustard powder to the brine. Initially, the original recipe included this ingredient, but we omitted it as it tends to overpower the pickles.
- Include peppers: The original recipe suggests adding two medium sweet green peppers, seeded and diced. Feel free to incorporate peppers into your pickle mixture as well.
Now, let’s delve into the step-by-step instructions for crafting your own pickles and preserving them in shelf-stable jars using a water bath canner.
Steps to Making Zucchini Pickles
If you are new to canning or haven’t canned in a while, it may be helpful to review this article on water bath canning at the National Center for Home Food Preservation website.
While a more detailed and printable recipe can be found at the end of the article, let’s go through the general steps for preparing and canning zucchini pickles:
Step 1: Gather Your Canning Gear
You will need the following:
- Water bath canner with canning rack
- 6 pint sized canning jars
- Lids and bands (new lids for each jar, bands can be reused)
- Canning tools: jar lifter, canning ladle, funnel, and bubble popper
- Plus basic kitchen supplies such as a large sauce pot, large bowl, colander, small pot, kitchen towels, knife, and a cutting board.
Step 2: Prepare the Zucchini and Onions
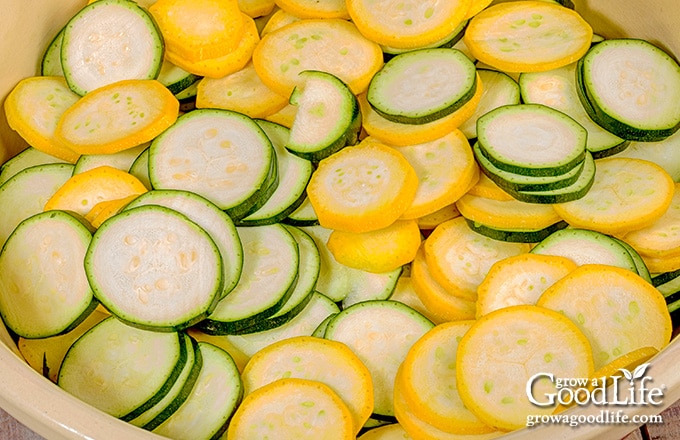
Begin by thoroughly washing the zucchini to eliminate any residue or soil. Trim off and discard a slice from both ends of the zucchini, then cut the zucchini into 1/4-inch slices and transfer them to a large bowl.
Peel the onions and thinly slice them. Measure the required amount and add them to the bowl with the zucchini.
Sprinkle the salt over the vegetables in the bowl and toss them gently to combine. Cover the mixture with crushed ice or ice cubes, then add cold water until the vegetables are submerged.
Allow the bowl to sit for at least 2 hours, or let it soak for up to 24 hours for even better results. If you soak the vegetables for longer than 2 hours, place the bowl in the refrigerator and remember to replenish the ice frequently as it melts.
Step 3: Prepare Your Canning Equipment
Start by washing your jars, lids, bands, and canning tools using warm, soapy water. Rinse them thoroughly and set aside the lids, bands, and tools to air dry until you are ready to use them.
Position your water bath canner on a large burner of your stove. Insert the canning rack into the bottom of the canner. Then, carefully place the jars in an upright position on the rack.
Fill the canner with water, ensuring that the water level is sufficient to cover the jars completely. Add water to fill the pot and cover the jars. Gradually heat the canner until the water reaches a simmer. Allow the canner to maintain this simmering temperature for at least 10 minutes. Keep the jars in the canner during this time to ensure they are heated and ready to be filled.
Bring the canner to a simmer, approximately 180˚F (82˚C), maintain a simmer for at least 10 minutes and keep the jars warm until you are ready to fill them.
Step 4: Make the Pickles
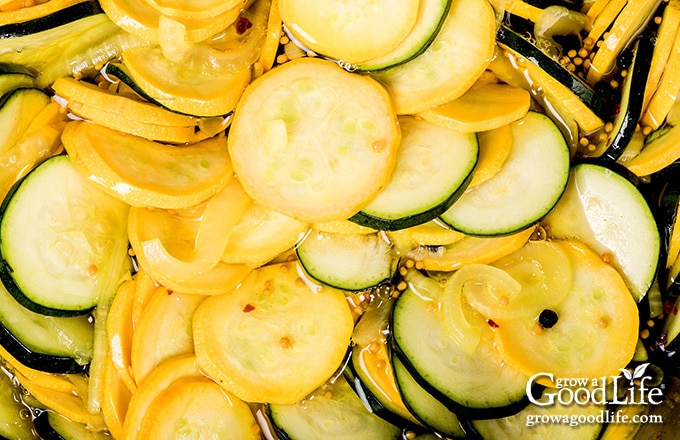
Combine vinegar, sugar, mustard seed, turmeric, celery seed, and black peppercorns in a large saucepan. Bring the mixture to a boil over medium-high heat.
While the brine is heating up, drain the zucchini and onions and rinse them well with cold water to remove excess salt.
When the brine reaches a boil, add the drained zucchini and onions to the pot. Return the mixture to a boil, stir to combine, and ensure all the vegetables are submerged in the brine.
Once the pot starts to boil, reduce the heat to a simmer, and cook for 10 minutes. Keep warm as you fill your jars.
Step 5: Fill the Jars
Lay a kitchen towel on the counter. Use the jar lifter to remove a hot jar from the canner, drain it, and place it on the towel. Keep the remaining jars in the canner so they stay warm.
Place the canning funnel on the jar, and pack the zucchini and onions into the jar. Using your ladle, pour hot pickling brine over the vegetables to fill the jar while leaving 1/4-inch headspace.
Run the bubble popper through the jar to release any trapped air bubbles. Make sure all the pickles are submerged in the liquid. Remove any that stick out, and adjust the headspace again if needed.
Wipe the rim with a damp towel to remove residue. Center a lid on the jar, place the band over it, and screw it on until fingertip tight. Place the jar back into the canner, and repeat with the rest of the jars.
Step 6: Process the Jars in the Water Bath Canner
Once all the filled jars are in the canner, adjust the water level to cover the jars by approximately 2 inches.
Set the heat to high and bring the canner to a full rolling boil. Once the water reaches a vigorous boil, start a timer and process the jars according to the time indicated in the recipe below.
After the processing time is complete, turn off the heat. Allow the jars to settle in the canner for about 5 minutes, then lift the cover away so the steam doesn’t hit your face.
Carefully remove the processed jars from the canner using a jar lifter and place them on a dry kitchen towel. Keep the jars upright and refrain from touching the lids or tightening the bands at this stage.
It is important to allow the jars to cool undisturbed for 12 to 24 hours. The seals will form during this time, ensuring the jars are properly canned.
After the cooling period, test the seals by gently pressing down on the center of each lid. If the lid does not flex or pop, the seal is secure. Wash the jars, label them, and store the zucchini pickles in a cool, dark location.
For optimal flavor development, allow the pickles to sit about 4 weeks before opening. This allows the flavors to develop fully and improves the overall taste of the pickles. Refrigerate the jar once opened and use it within a month.
Sweet and Sour Zucchini Pickles
Ingredients
- 5 pounds small zucchini or summer squash sliced (about 14 to 16)
- 1 cup sliced onions about 8 small onions
- 1/3 cup canning salt or pickling salt
- 2 quarts crushed ice or ice cubes and water
- 3 cups apple cider vinegar or white vinegar, 5% acidity
- 2 cups sugar
- 2 tablespoons yellow mustard seed
- 1 teaspoon ground turmeric
- 1 teaspoon celery seed
- 1 teaspoon black peppercorn
Instructions
Prepare the Ingredients:
- Add the sliced zucchini and onions in a large bowl.
- Sprinkle salt over the vegetables and toss to combine. Cover with crushed ice or ice cubes and water and soak for 2 to 24 hours. If soaking longer than 2 hours, place the bowl in the refrigerator and replenish the ice frequently as it melts.
Prepare the Canning Equipment:
- Wash your jars, lids, screw bands, and canning tools in hot soapy water. Rinse thoroughly to remove all suds. Set aside to air dry on a clean kitchen towel.
- Place the jar rack into the water bath canner, place jars in the canner, and add water to cover. Bring the canner to a simmer (180˚F) for 10 minutes, and keep hot.
Make the Pickles:
- Drain the zucchini and onions and rinse well to remove the extra salt.
- Make the pickling brine by combining the vinegar, sugar, mustard seed, turmeric, celery seed, and peppercorns in a large pot. Bring it to a boil over high heat.
- Once the brine boils, add the drained zucchini and onion slices to the pot and return to boil. Reduce heat and simmer (180˚F) for 10 minutes.
- Fill the Jars:
- Spread a kitchen towel on the counter. Use the jar lifter to remove a hot jar from the canner, drain it, and place it on the towel. Keep the remaining jars in the canner so they stay warm.
- Use your canning funnel and ladle to pack the hot zucchini and onions loosely into the jar. Ladle the hot pickling liquid over the vegetables, leaving a 1/4-inch headspace.
- Run the bubble popper through the jar to release any trapped air bubbles. Make sure all the pickles are submerged under the brine. Remove any that stick out, and adjust the headspace again if needed.
- Wipe the rim to remove any residue, center a lid on the jar, and screw on a band until it is fingertip tight. Use your jar lifter to place the jar back into the canner, and repeat with the remaining jars.
Process the Jars in the Water Bath Canner:
- Once all the filled jars are in the canner, adjust the water level so it is 2 inches above the jar tops.
- Cover the canner and bring it to a boil over high heat. Once the water boils vigorously, set a timer, and continue boiling for 10 minutes at altitudes of less than 1,000 feet. Adjust processing time for your altitude if necessary (See Note).
- When the processing time is complete, turn off the heat, remove the cover, and let the canner cool down and settle for about 5 minutes.
- Spread a dry kitchen towel on the counter. Remove the cover by tilting the lid away so that steam does not burn your face.
- Use the jar lifter to remove the jars from the canner and place them on the towel. Keep the jars upright, and don't tighten bands or check the seals yet. Let the jars sit undisturbed for 12 to 24 hours to cool and seal.
- After 12 to 24 hours, check to be sure the jar lids have sealed by pushing on the center of the lid. The lid should not pop up. If the lid flexes up and down, it did not seal. Place the jar in the fridge and use up within a month.
- Remove the screw-on bands and wash the jars. Label, date, and store the jars in a cool, dark location. Allow at least 4 weeks for the pickles to develop their flavor. Use home-canned jars within 12 to 18 months for the best quality. The recipe yields about 5 to 6 pint jars.
Notes
Nutrition
This recipe was originally published September 7, 2013. It has been reviewed and updated with additional information and new photos.
You May Also Like:
Good planning is key to a successful vegetable garden
Whether you are new to growing your own food or have been growing a vegetable garden for years, you will benefit from some planning each year. You will find everything you need to organize and plan your vegetable garden in my PDF eBook, Grow a Good Life Guide to Planning Your Vegetable Garden.


How many pints does this recipe make, it looks like a wonderful recipe? Thank You!
Jacqueline, The recipe yields about 5 to 6 pint jars.
Rachel,
I haven’t made the recipe yet because of the sugar content. Can the amount of sugar be reduced? If so, by how much?
Thank you, Christine
Hi Christine! Yes, you can reduce the amount of sugar in the recipe if you prefer. The sugar is primarily used for flavor and to balance the tanginess of the vinegar. You can try reducing the sugar by about 25% to start and adjust according to your taste preferences. Keep in mind that reducing the sugar may alter the overall taste and texture of the pickles slightly. Feel free to experiment and find the right balance that suits your liking.