Giardiniera Pickled Vegetables Canning Recipe
This post may contain affiliate links, which means that I may receive a commission if you make a purchase using these links. As an Amazon Associate I earn from qualifying purchases.
This giardiniera recipe is a great way to preserve your summer bounty of fresh veggies. The perfect blend of spices and vinegar gives these Italian pickled vegetables a zesty flavor that will tantalize your taste buds.
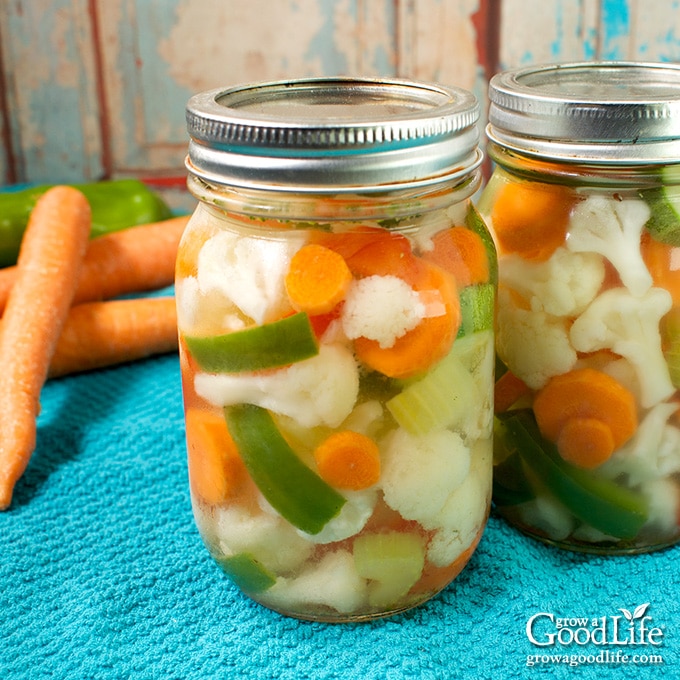
If you like pickled vegetables, you’ll love this easy pickled Italian vegetables canning recipe. It uses a mixture of vegetables, including cauliflower, carrots, celery, onions, and peppers, that are all pickled in a vinegar and spice solution. The result is a deliciously tangy treat you can enjoy all year.
Giardiniera can be used in many ways, including as a side dish to winter meals, as part of an antipasto spread, chopped and added to salads, as a condiment for sandwiches, burgers, and even snacked right out of the jar. You can also use the vinegar brine for salad dressings and marinades and to add zing to roasted vegetables.
And the best part is that giardiniera is so simple to make and preserve at home using fresh garden vegetables. Follow the directions below, and you’ll enjoy these delicious pickled veggies in no time.
What is Giardiniera?
Giardiniera is an Italian pickled vegetable medley made with cauliflower, peppers, celery, carrots, onions, and zucchini. It is typically served as an appetizer on an antipasto platter or with salads.
While traditional Italian pickled vegetables are mild, Chicago-style giardiniera has evolved as a bold Italian-American style relish made popular by Chicago sandwich shops to serve with their classic beef sandwiches.
It is a spicier and more flavorful version similar to the traditional giardiniera. However, the vegetables are cut into smaller pieces and flavored with additional spices and olive oil. This mix sometimes includes green olives too.
While each sandwich shop has its version of giardiniera, it generally comes in your choice of mild or hot. The hot mix uses Serrano or sport peppers to kick up the heat, and it is sometimes simply referred to as “hot peppers” when ordering an Italian beef sandwich.
Additionally, this pickled vegetable mix is sometimes called jardinière in French. This may come from the French word jardin, meaning “garden,” or from the phrase “à la jardinière,” which describes arranging vegetables on a platter around the main dish, such as roast beef, chicken, or fish for serving.
Whatever you call it, this pickled mixed vegetables recipe is a delicious way to preserve the garden bounty and enjoy all winter.
About the Ingredients
This traditional giardiniera is made with cauliflower, peppers, onions, carrots, and zucchini. The vegetables are preserved in a mildly flavored vinegar brine and processed in a water bath canner for shelf-stable jars that you can store in the pantry.
As with any pickled vegetable, choose fresh vegetables that are of good quality for the best results:
- Cauliflower: When selecting fresh cauliflower to pickle, look for heads that are white or creamy white with compact, tightly closed florets. The leaves should be green and healthy looking, and the stem should be firm. Avoid heads that are soft to the touch and have brown spots or signs of yellowing.
- Onions: You can use any bulb onion, including red, white, or yellow. Choose firm bulbs that smell fresh and have dry, papery skin. Avoid soft onions that show mold or bruising, and have a strong odor.
- Peppers: When selecting fresh peppers, choose brightly colored fruit that is firm and smells sweet and fragrant. Avoid peppers that have bruises, blemishes, or are soft to the touch. I like using a mix of green, yellow, and red bell peppers for color, or you can swap the bell peppers for an equal amount of another type of pepper.
- Celery: Use fresh celery with bright green leaves and firm stalks. Avoid celery that is limp, discolored, or has brown spots.
- Carrots: When selecting fresh carrots, look for ones that are brightly colored and have a firm texture. Avoid carrots that are limp, bruised, or have any other signs of damage.
- Zucchini: Choose a small zucchini less than two inches in diameter with minimal seeds. You can safely exchange the zucchini with another summer squash variety or even a cucumber.
- Vinegar: You can use apple cider vinegar, white vinegar, red wine vinegar, white wine vinegar, or a combination of any commercial vinegar with at least 5% acidity.
- Pickling Spices: The brine in this recipe is infused with bay leaves, black peppercorn, and garlic to add a mild flavor to the pickled vegetables. However, this is where you can get creative by mixing and matching dried herbs and spices to add more flavors. Check out this article for ideas: Homemade Pickling Spice Recipe.
Chicago-Style Giardiniera
Here are a few safe tweaks you can make to this recipe for more of a Chicago-style giardiniera:
- Pickling Spices: Add the following additional dried pickling spices to the spice bag to infuse more flavor in the brine: 1/2 teaspoon yellow mustard seeds, 1/2 teaspoon coriander seeds, 1/2 teaspoon red pepper flakes, 1/4 teaspoon dried oregano, 1/8 teaspoon celery seeds, and 1/8 teaspoon fennel seeds.
- Add Heat: For hot giardiniera, replace some bell peppers with hot peppers, such as Serrano, jalapeño, or any type of hot Italian peppers, such as pepperoncini or Hungarian wax peppers.
- Build More Flavors After Opening: Green olives and oil are not safe for home canning, but you can add these after opening the jar. First, drain the vegetables, and chop them into 1/4-inch pieces. Then, place in a bowl, add olives and drizzle with olive oil to your liking. Toss to coat, place back in the jar, and refrigerate overnight to let the flavors mingle. The container will need to be stored in the fridge for safety.
Steps for Canning Italian Pickled Vegetables
This tested canning recipe is from the Ball Complete Book of Home Preserving for Jardinière pickled vegetables. Safe changes include:
- Exchanging bell peppers for an equal amount of another type of pepper.
- Swapping the white vinegar for another commercial vinegar with at least 5% acidity.
- Using additional dried herbs and dried spices.
- You can decrease the sugar and salt, but it will change the flavor and texture of the pickled vegetables.
If you make any changes other than what is listed above, refrigerate the jars, as they may not be safe for home canning and storing at room temperature.
Before you begin, reviewing this documennt on water bath canning at the National Center for Home Food Preservation website may be helpful: Using How Water Bath Canners.
The full recipe is below, but here is a step-by-step overview of how to make and home-can Italian pickled vegetables, also known as Giardiniera.
Step 1: Gather your Kitchen and Canning Equipment
You’ll need:
- Water bath canner and canning rack
- 5 pint-sized canning jars
- Canning lids and ring bands (new lids for each jar, bands can be reused)
- Canning tools: jar lifter, canning ladle, funnel, and bubble popper
- Rubber gloves if you are using hot peppers
- Spice bag, cheesecloth, or coffee filter
- Plus basic kitchen supplies such as a large stainless steel pot, large prep bowls, measuring cups, vegetable peeler, knife, cutting board, slotted spoon, and clean kitchen towels.
Step 2: Prepare the Vegetables
Prepare the vegetables one at a time according to the recipe so you can portion each accurately.
Cauliflower
You’ll need 2 cups of florets, which is about 1/2 head of cauliflower. Start by trimming off the leaves and the bottom of the stem. Cut the cauliflower in half, and then cut one half again. Trim out the core, and use your hands to break off the individual florets. Cut larger pieces in half, so they are all around the same size.
Use a measuring cup and measure 2 cups of small cauliflower florets. Rinse well under clean running water and add these to your prep bowl.
Soak the pieces in salted water if you need to remove worms and insects. Combine 4 teaspoons of canning or pickling salt with one gallon of water. Add the florets and soak for 30 minutes while you prepare the other ingredients. Drain and rinse very well before using.
Onions
You’ll need about one medium onion to get 1 cup of sliced onions. Use a sharp knife to cut the ends off the onions and slice them in half. Peel off the papery skins and discard them. Cut the onions lengthwise from root to stem into 1/4-inch slices. Measure and add 1 cup of sliced onions to the bowl.
Celery
Pull off 3 stalks of celery and rinse them very well under clean running water. Trim the tops and white section off of the bottom of each stalk. Cut into 1/2 inch slices and add to the bowl.
Carrots
Wash the carrots under clean running water, remove the skins with a vegetable peeler, and then rinse again before cutting. Cut into 1/2 inch slices and add to the prep bowl.
Zucchini
Rinse the zucchini to remove any residue and soil. Trim and discard a 1/4-inch slice from the end of the fruit. The blossom end contains an enzyme that can cause soft pickles, so it is important to remove this. Slice into 1/4-inch rounds and add them to the large prep bowl.
Peppers
The recipe calls for up to 4 large bell peppers seeded and cut into 1/4-inch strips. You can use any variety of sweet or hot peppers. Just keep the proportion of peppers the same. For example, one large bell pepper equals 1 cup of chopped peppers when cut into 1/4 inch x 3-inch strips. So you will need up to 4 cups of chopped peppers for this recipe.
Wash your peppers well under running water. Wear gloves when handling hot peppers and avoid contact with your skin and eyes. Remove the stems, cut the peppers in half, and remove the seeds.
Cut the peppers into 1/4-inch strips or rounds if you are using hot chilies, and set aside. Keep the prepared peppers separate from the other vegetables for now. We will add them at the end, so they don’t over-cook before filling the jars.
Step 3: Prepare the Canning Equipment
Wash the jars, lids, bands, and canning tools in warm, soapy water. Rinse well, and set the lids, bands, and tools aside to air dry until you are ready to use them.
Place your water bath canner on a large burner of your stove. Insert the canning rack into the bottom. Place the jars upright in the canner and add water to cover. Bring the canner to a simmer (180˚F) for 10 minutes, and keep the jars hot until you are ready to fill them.
Step 4: Make the Pickles
Add the bay leaves, black peppercorns, and sliced garlic to a spice bag or coffee filter and tie with thread or kitchen string.
Add the vinegar, water, sugar, salt, and spice bag to a large stockpot. Bring the pot to a boil over medium-high heat while stirring to dissolve the sugar. Then reduce the heat and simmer (180˚F) for 5 to 10 minutes to allow the spices to infuse into the liquid.
Add the cauliflower, onions, celery, carrots, and zucchini to the pot, and return the pot to a boil. Once the pot boils, turn off the heat, and add the peppers. Stir to combine, and remove and discard the spice bag.
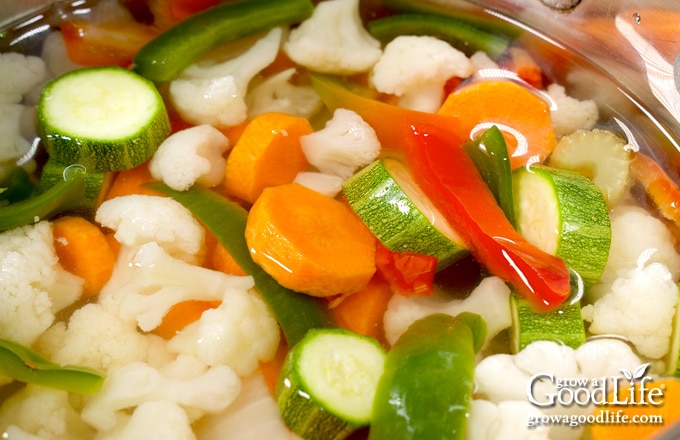
Step 5: Can the Gairdiniere
Spread a dry kitchen towel on the counter. Remove a hot jar from the canner using the jar lifter, drain it and place it on the towel. Keep the remaining jars in the canner so they stay warm.
Place the canning funnel on the jar. If you are using Pickle Crisp, add 1/8 teaspoon to the jar.
Use a slotted spoon to fill the jar with the mixed vegetables, and then ladle hot pickling liquid over them, leaving 1/2-inch headspace at the top of the jar.
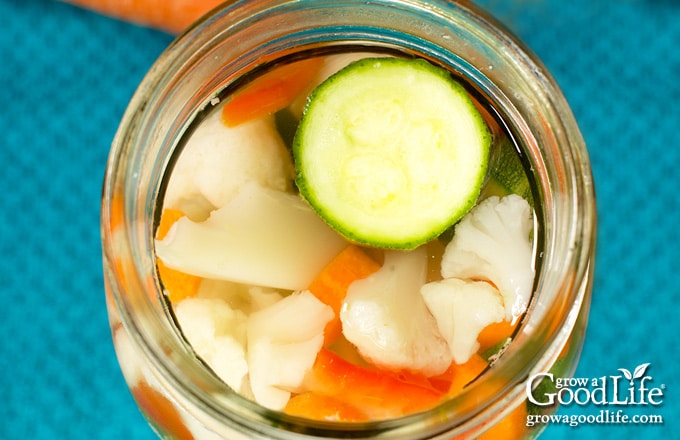
Run the bubble popper through the jar to release any trapped air bubbles. Ensure all the vegetables are submerged beneath the liquid and adjust the headspace if needed.
Wipe the rim with a damp towel to remove residue. Center a lid on the jar, add the band, and screw it on until fingertip tight. Place the filled jar back into the canner, and repeat with the rest of the jars.
Adjust the water level to cover the tops of the jars by two inches. Add the cover, bring the canner to a boil, and process the jars in a boiling-water canner for the times indicated in the recipe below.
Once processing time is complete, turn off the heat, remove the jars, and let them cool undisturbed for 12 to 24 hours. After cooling for at least 12 hours, test the seals. Refrigerate any that did not seal.
Wash the jars with warm soapy water, dry, label, and date them, and store them in a cool, dark location for 12 to 18 months. Wait several weeks for the pickles to develop their flavor before opening a jar. The recipe makes about 5 pint jars of mixed Italian pickled vegetables.
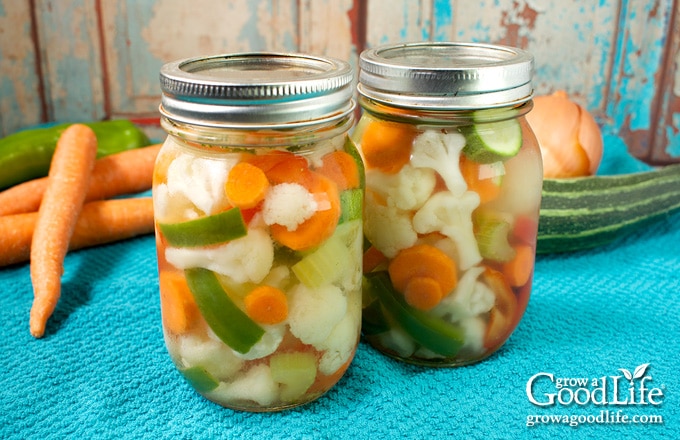
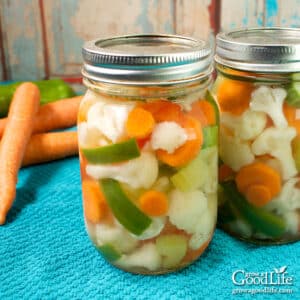
Giardiniera Pickled Vegetables Canning Recipe
Ingredients
Vegetables:
- 2 cups small cauliflower florets
- 1 cup sliced onions
- 3 stalks celery cut into 1/2-inch slices
- 2 medium carrots peeled and cut into 1/2 inch slices
- 1 small zucchini or yellow squash cut into 1/4-inch slices
- 4 large sweet bell peppers seeded and cut into 1/4-inch strips
Pickling Brine:
- 3 dried bay leaves
- 6 black peppercorns
- 3 cloves garlic sliced thin
- 4 cups white vinegar 5% acetic acid
- 2 cups water
- 2 cups granulated sugar
- 1 tablespoon canning salt
- pickle crisp 1/8 teaspoon per jar (optional for crisper vegetables)
Instructions
Prepare the Vegetables:
- Rinse the vegetables well under clean running water and prepare as described above.
- Combine the cauliflower, celery, carrots, and zucchini in a large prep bowl, and set aside. Keep the peppers separate from the other vegetables and set them aside.
Prepare the Canning Equipment:
- Wash your jars, lids, screw bands, and canning tools in hot soapy water. Rinse thoroughly to remove all suds. Set aside to air dry on a clean kitchen towel.
- Place the jar rack into the water bath canner, place jars in the canner, and add water to cover. Bring the canner to a simmer (180˚F) for 10 minutes, and keep the jars hot.
Make the Pickles:
- Add the bay leaves, black peppercorns, and sliced garlic to a spice bag or coffee filter and tie with thread or kitchen string.
- Add the vinegar, water, sugar, salt, and spice bag to a large stockpot. Bring the pot to a boil over medium-high heat. Stir to dissolve the sugar, then reduce the heat and simmer (180˚F) for 5 to 10 minutes to let the spices infuse into the liquid.
- Add the cauliflower, onions, celery, carrots, and zucchini to the pot, and return it to a boil.
- Once the pot boils, turn off the heat and add the peppers. Stir to combine, and remove and discard the spice bag.
Can the Gairdiniere:
- Spread a kitchen towel on the counter. Use your jar lifter to remove a warm jar from the canner, drain the water, and place it on the towel.
- If you are using Pickle Crisp, add 1/8 teaspoon to the jar.
- Use a slotted spoon to remove the vegetables from the brine and fill the jar. Leave 1/2-inch headspace at the top of the jar.
- Ladle the hot brine over the vegetables and fill the jar while maintaining a 1/2-inch headspace.
- Run the bubble popper through the jar to release air. Ensure that the liquid covers all the vegetables. Remove any that stick out, and adjust the headspace again if needed.
- Wipe the rim with a clean damp paper towel to remove residue. Center a lid on the jar, add the band, and screw it on until fingertip tight. Place the jar back into your canner, and repeat with the rest of the jars.
- Once the filled jars are in the canner, adjust the water level to be 2-inches above the tops of the jars.
- Place the cover on the canner, and bring it to a boil over high heat. Once the water boils vigorously, set a timer, and continue boiling for 10 minutes at altitudes less than 6,000 feet. Adjust processing time for your altitude if necessary (See Notes).
- When the processing time is complete, turn off the heat, remove the cover, and let the canner cool down and settle for about 5 minutes.
- Spread a dry kitchen towel on the counter, and use the jar lifter to remove the jars from the canner and place them on the towel. Keep the jars upright, and don’t tighten bands or check the seals yet. Let the jars sit undisturbed for 12 to 24 hours to cool.
- After 12 to 24 hours, check that the lids have sealed by pushing on the center. The cover should not pop up. If the top flexes up and down, the lid failed to seal. Refrigerate and use up within 3 months.
- Remove the screw-on bands and wash the jars. Label, date, and store your jars in a cool, dark place for 12 to 18 months. Allow several weeks for the flavor to develop before opening a jar. Once the jar is open, store it in the refrigerator for up to 3 months. The recipe makes about 5 pint jars.
Notes
Nutrition
Making homemade giardiniera is simple to do at home using fresh garden vegetables. Just follow the canning recipe, and enjoy these delicious Italian pickled veggies with all your winter meals.
You May Also Like:
- Candied Jalapeños Canning Recipe
- Pickled Garlic Canning Recipe
- Bread and Butter Pickles Canning Recipe
40+ Meals in a Jar Pressure Canning Recipes
In this eBook, you will find 50 pressure canning recipes, including 44 meals, along with homemade stocks and bone broths. Recipes include soups, stews, chilis, beans, beef, pork, and poultry. Explore the world of preserving delicious home-cooked meals for all seasons.

Do you have to use that much sugar I don’t want them to be sweet ?
Diane, you may safely reduce the sugar.
Easy and delicious even just after 2 days. I didn’t use a spice bag: added the spices to the brine.
Made half batch and used a large Mason jar. Keeping it in the fridge, so didn’t process it.
I’m really happy with the results and plan to make it again!
Thanks!
Debbie, Thank you so much for trying out the recipe! I’m delighted to hear that you enjoyed it and that the spices worked well directly in the brine. Making a half batch and using a large Mason jar is a great idea for refrigerator storage.