Homemade Concord Grape Juice
This post may contain affiliate links, which means that I may receive a commission if you make a purchase using these links. As an Amazon Associate I earn from qualifying purchases.
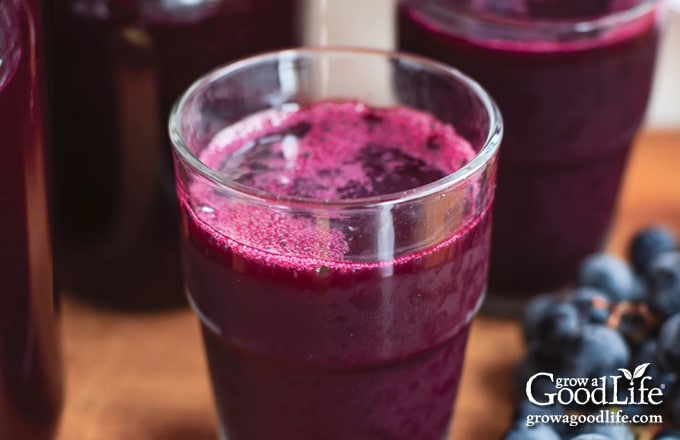
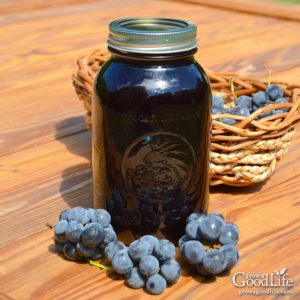
Concord grapes have a distinct flavor and dark purple color. Learn how to make and preserve your own Concord grape juice at home! You control the additives and sugars.
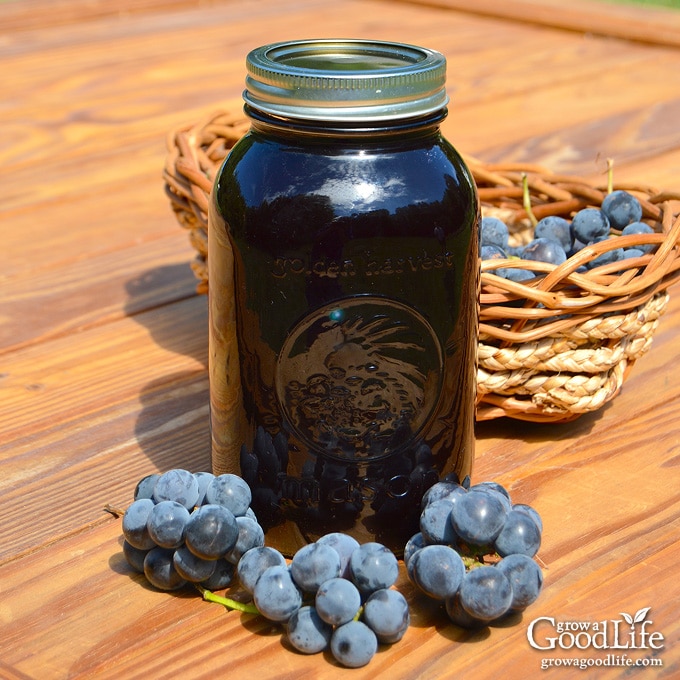
When we purchased our home, I was thrilled to discover grape vines growing along the edge of the property. The vines were extremely overgrown and extended themselves up into the pine trees. I could see fruit hanging from the top branches, but there was no way to reach it. I searched the foliage at the bottom and found a few small clumps of grapes, and identified the variety as Concord grapes.
Concord grapes are a hearty grape variety developed from native New England grape species by Ephraim Wales Bull in 1849 at his farm in Concord, Massachusetts. This grape variety was perfected to thrive and grow in the cold climate of New England. Concord Grapes are commonly used to make grape juice, grape jelly, and flavor candy and soft drinks.
Concord grapes are filled with antioxidants, flavonoids, and nutrients, including potassium, vitamin K, and manganese. Studies show that grape juice made from Concord grapes may help boost immunity, maintain a healthy cardiovascular system, and aid in slowing the development of age-related cognitive decline.
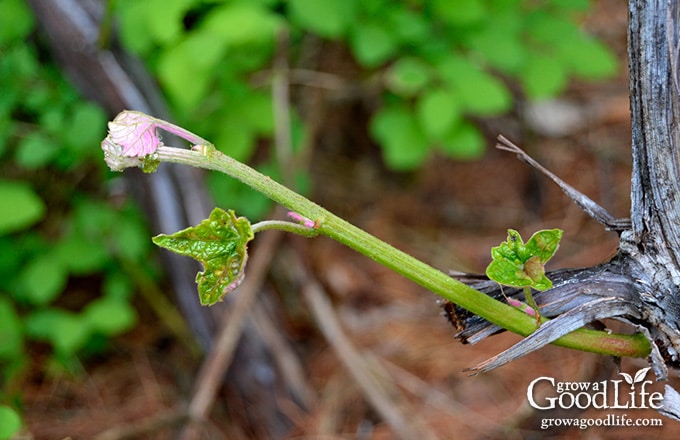
I learned from the neighbors that the original owner and builder of our home planted the grape vines, along with other fruit trees and bushes on the property. They are estimated to be 35 to 40 years old. The vines were neglected for at least 15 years before we purchased the property.
Luckily, my husband knew how to care for the overgrown grape vines because his family had Concord grape vines when he was a child. Over a two-year period, he worked through the tangles and gave the vines an all over heavy pruning to get them back into shape. The long vines needed to be unraveled and pulled from the trees limbs above.
Fruit is born on the previous year’s growth, so we had to wait patiently a few years to see the results. Our first harvest yielded about 8 pounds of grapes that were made into jelly. Most of which was given away to friends and family.
We look forward to the grape harvest each year and use it to make juice, jelly, and wine. Concord grapes are taste tested before picking to be sure they are at the peak sweetness and are usually ready to harvest in September through October.
Tips for Making Homemade Grape Juice
This grape juice recipe uses Concord grapes, but feel free to try it with other grape varieties. Grape juice can be used to make jelly, or enjoyed as a drink. If the flavor is too strong, dilute with water when serving. Here are tips for a making and preserving grape juice:
Plan ahead and allow plenty of time
Try to plan ahead when extracting juice from fruit and even consider divided the process over a few days to allow extra time for the juice to strain and the sediment to settle completely.
Concord grapes have a lot of sediment and can form tartrate crystals. Allowing the juice to rest overnight in the refrigerator will let the residue separate from the juice and settle on the bottom of the container.
Harvest grapes at their peak flavor
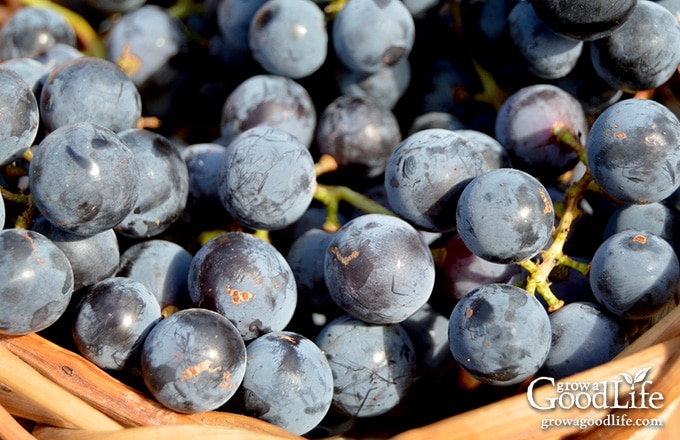
Three ways to tell if grapes are ripe are color, size, and flavor. The best way to tell if the grapes are ripe is by tasting them and checking the seed color. Grapes will not ripen off the vine, so it is important to harvest grapes at their best flavor for juice.
Concord grapes turn from a green to a deep purple when ripe. Mature fruit is filled out, and slightly soft when squeezed. As the fruit ripens, it will become sweet and the seeds will change from green to brown.
How to extract juice from grapes
Juice is extracted from the grapes by heating to break down the fruit so it releases the liquid. Then the juice is strained from the solids by letting it drip through a jelly bag or layers of cheesecloth. Here are ways to juice grapes using common kitchen equipment:
- Simmer Grapes on the Stove: You can simmer the grapes with water in a large pot until soft, and strain with a jelly bag or double layers of cheesecloth to separate the juice from the solids.
- Use a Pressure Cooker: An electric multi-functional pressure cooker (such as Instant Pot) is a fast way to cook the grapes. You will need to do several batches. Place about 6 to 7 pounds of the prepared grapes, and 1/4 cup of water into the pressure cooker. Cover and set it to Pressure Cook for 5 minutes. Let the pressure release naturally after the cooking cycle is complete. Open the lid, stir the grapes, and strain to separate the solids from the juice.
- Use a Steam Juicer: If you preserve a lot of juice or fruit jelly, you may want to consider investing in a steam juicer to speed up the process. A steam juicer is a stacked multi-pot unit. The fruit is put into the top pot, which is stacked over a collection pan. This is placed over a bottom pot of water, and placed on the stove. As the water boils, steam rises, and the fruit releases the juice. The juice drips through the perforated holes into the collector pan. If you are using a steam juicer, follow the manufacturer’s directions to extract the juice.
How to get a clear juice
A cloudy grape juice just has tiny bits of pectin and solids suspended in the liquid. Store bought juice goes through a process that screens out particles before bottling. Here are tips for achieving a grape juice like you find in the grocery store:
- Let the juice drip naturally from the cooked fruit for at least 2 hours or overnight in the refrigerator.
- Don’t squeeze the jelly bag. Squeezing will force pulp through and will make your juice cloudy.
- Let the sediment settle. Cover and refrigerate the juice overnight to let the sediment sink to the bottom. During this time, tartaric acid crystals will form, and sink to the bottom along with any sediment.
Warning: Concord grape juice stains
Make sure to wear clothing and use dishtowels that you don’t mind getting stained. Additionally, try not to splatter any juice and wipe up drips immediately to prevent stains.
How to Make Grape Juice
Grape juice is made by simmering the grapes with water to extract the liquid from the fruit, and then straining it to remove the solids. The juice is then heated, sweetened to taste, poured into jars, and processed in a water bath canner to make it shelf stable.
If you are new to home canning or haven’t canned in a while, it may be helpful to review this article on water bath canning at the National Center for Home Food Preservation website.
This grape juice recipe can be found in the So Easy to Preserve, USDA Complete Guide to Home Canning, and Ball Blue Book Guide to Preserving. The full, printable recipe can be found at the bottom of this article, but these are the general steps for making and canning grape juice:
Step 1: Gather the Kitchen Gear:
Equipment needed to make and can grape juice:
- Water Bath Canner with a canning rack
- 7 quart sized canning jars
- Canning lids and bands (new lids for each jar, bands can be reused)
- Kitchen scale
- Jelly bag or cheesecloth
- Candy thermometer, or instant read thermometer
- Canning tools: jar lifter, canning ladle, and funnel
- Plus basic kitchen supplies such as a large sauce pot, large bowl, large spoon, potato masher, and kitchen towels (that you don’t mind getting stained)
Step 2: Extract the Juice from the Grapes
Harvest fresh grapes at peak sweetness. Pluck the grapes from the stems, and rinse well in plain water to remove bugs, dust, and debris.
Extract the juice by combining the grapes and water in a large saucepan. Bring to a simmer (180˚F). Gently mash the fruit with a potato masher to release their juices and continue simmering over low heat for 15 minutes, stirring occasionally.
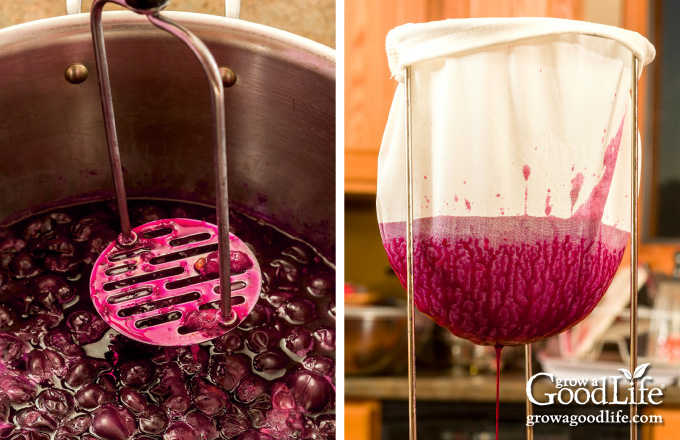
Strain the juice through a damp jelly bag or double layers of cheesecloth. Let the fruit strain for several hours. Discard the solids. Refrigerate grape juice for 24 to 48 hours to allow the sediment to settle to the bottom. This will help eliminate crystals in your juice.
Step 3: Prepare the Canning Equipment
This recipe is for quart sized jars, but you can use half-pints for kid sized servings, pints, or even half-gallon jars to can your grape juice. All are processed for the same amount of time no matter what size jar you use at altitudes of less than 1,000 feet.
Wash your jars, lids, bands, and canning tools in warm, soapy water. Rinse well, and set aside until you are ready to use them.
Jars must be heated before filling to prevent breakage due to thermal shock. Place the jar rack into the water bath canner, set the jars upright on the rack, and add water to fill the pot covering the jars. Bring the canner to a simmer (180˚F) for 10 minutes, and keep the jars hot until you are ready to fill them.
Follow the manufacturer’s directions for preparing the lids. Pre-heating lids is no longer necessary before using, but it is still safe to simmer (180°F) the lids if you want to. Just place lids in the canner while you heat your jars.
Step 4: Can the Grape Juice
Carefully remove the grape juice from the refrigerator without disturbing the sediment. Gently pour off clear liquid and discard sediment. Strain through a paper coffee filter if a clearer juice is desired.
Add the strained grape juice to a large saucepot. Taste the juice and add sugar if you want your juice sweetened. Start with 1/4 cup and add more if desired.
Attach the candy thermometer to the pot, and heat the juice to 190˚F over medium-high heat. Do not boil, but adjust the heat to keep the juice at 190˚F for at least 5 minutes, and then fill your jars.
Spread a towel on the counter. Use the jar lifter to remove a jar from the canner, drain, and place on the towel. Keep the remaining jars in the canner so they stay hot.
With the canning funnel and ladle, add jelly to the jar leaving 1/4-inch headspace. Wipe the rim with a damp towel to remove any residue. Center a lid on the jar, place the band over the lid, and screw it on until fingertip tight. Place the jar back into the canner, and repeat with the rest of the jars.
Once all the jars are in canner, adjust the water level to two inches above the jar tops. Bring the canner to a boil, and process the jars for the times indicated in the recipe below.
Let the jars cool completely. Remove the bands and wash the jars well with warm soapy water to remove any residue. Label, date, and store in a cool, dark location, between 50 to 70 degrees F. Use within 12 to 18 months for the best flavor.
Homemade Concord Grape Juice
Ingredients
- 26 pounds Concord grapes washed and stemmed
- 1 cup water
- sugar optional for flavor
Instructions
Extract the Juice
- Extract the grape juice by combining grapes and water in a saucepan over low heat. Heat and simmer slowly until skins are soft, and the juices are released.
- Gently mash the grapes with a potato masher and simmer over low heat for 15 minutes, stirring occasionally.
- Strain the pulp through a damp jelly bag, or a double layer of cheesecloth. Discard solids.
- Refrigerate grape juice for 24 to 48 hours to allow the sediment to settle to the bottom.
Prepare the Canning Equipment
- Wash your jars, lids, and canning tools in hot soapy water. Rinse thoroughly to remove all suds. Set aside to air dry on a clean kitchen towel.
- Place the jar rack into water bath canner, set the jars on the rack, and add water to cover the jars. Bring the canner to a simmer (180˚F) for 10 minutes, and keep the jars hot until you are ready to fill them.
Can the Grape Juice
- Carefully remove the grape juice from the refrigerator without disturbing the sediment. Gently pour off the clear liquid, and discard the sediment.
- Add the strained grape juice to a large saucepot. Taste the juice and add sugar if you want your juice sweetened. Start with 1/4 cup and add more if desired.
- Attach the candy thermometer to the pot, and heat the juice to 190˚F over medium-high heat. Do not boil, but adjust the heat to keep the juice at 190˚F for at least 5 minutes, and then fill your jars.
- Spread a dry towel on the counter. Use your jar lifter to remove a jar from the canner, drain, and place on the towel. Keep the remaining jars in the canner so they stay hot.
- Use your canning funnel and ladle to add the hot juice to the warm jar leaving 1/4-inch headspace. Wipe the rim of the jar with a damp towel.
- Center a lid on the jar, and screw on the band until it is fingertip tight. Use the jar lifter to place the jar back into the canner, and repeat with the remaining jars.
- Once all the jars are in canner, adjust the water level to two inches above the jar tops.
- Cover the canner and bring to boil over high heat. Once water boils vigorously, continue boiling for 10 minutes at altitudes of less than 1,000 ft. Adjust processing time for your altitude if necessary. (See notes below).
- When processing time is complete, turn off the heat, remove the cover, and allow the canner to cool down and settle for about 5 minutes.
- Lay a dry towel on the counter. Use a jar lifter to remove the jars one at a time from the canner. Keep the jars upright, and place them on the towel a few inches apart. Do not tighten ring bands or test the seals yet. Let the jars sit undisturbed for 12 to 24-hours to cool.
- After the jars cool for at least 12 hours, check to be sure jar lids have sealed by pushing on the center of the lid. The lid should not pop up. If the lid flexes up and down, it did not seal. Refrigerate the jar and use up within a week.
- Remove the screw on bands and wash the jars. Label and date the jars. Store your jars in a cool, dark place and use within 12 to 18 months. Refrigerate your juice once the jar is opened and consume within a week. Yields 7 quart jars.
Notes
Nutrition
Resources and Further Reading:
- “The History of the Concord Grape.” Concord Grape Association. Concord Grape Association. http://www.concordgrape.org/bodyhistory.html. Retrieved October 12, 2014.
- “Immune System Health.” Grape Science Center. 2011. http://www.grapescience.com/concord-grapes-and-health. Retrieved October 9, 2014.
- O’Byrne DJ, Devaraj S, Grundy SM, Jialal I. “Comparison of the antioxidant effects of Concord grape juice flavonoids alpha-tocopherol on markers of oxidative stress in healthy adults.” American Journal of Clinical Nutrition. 2002. http://www.ncbi.nlm.nih.gov/pubmed/12450905. Retrieved October 2, 2014.
- Devore EE, Kang JH, Breteler MM, Grodstein F. “Dietary intakes of berries and flavonoids in relation to cognitive decline.” American Neurological Association. July 2012. http://www.ncbi.nlm.nih.gov/pubmed/22535616
You May Also Like:
- Low Sugar Concord Grape Jelly
- Crabapple Jelly with No Added Pectin
- Chokecherry Jelly
- Low Sugar Sweet Cherry Jam
Good planning is key to a successful vegetable garden
Whether you are new to growing your own food or have been growing a vegetable garden for years, you will benefit from some planning each year. You will find everything you need to organize and plan your vegetable garden in my PDF eBook, Grow a Good Life Guide to Planning Your Vegetable Garden.


I freeze concord grapes and turn them into delicious pies in the winter.
Janice, Oh wow! I never thought of making pie with Concord grapes. It sounds delicious.
Thank you for sharing your post at the HomeAcre hop!
I love grape juice! I remember my mom making it. We planted a few grape plants, but they didn’t thrive.
yum! We do a similar thing with the wild Mustang grapes that grow where we live. BUT, they need sugar. It’s wonderful that your husband worked so hard on getting the vines healthy again. Thanks for sharing with us at Simple Lives Thursday; hope to see you again this week.
What a blessing to have Concord grapes on your property! Thank you for sharing this recipe on the Art of Home-Making Mondays! It looks delicious 🙂
Yum! Concord grapes are my favorite! I want to grow them one of these days. 🙂 Thanks for sharing at the Homestead Blog Hop! Hope to see you there again this week. 🙂
How great is that to have the old grapevines that are still producing wonderfully! Well – after your patience in trimming, etc. My mom makes grape juice by canning the grapes in the jar and then straining when they want to drink the juice. Either way – it is very good!
Jendi, The Concord grape vines are really easy to care for. We just have to trim them back every other year and they keep on going. They are amazing.
Jendi, I read about the same method of making grape juice. I want to give it a try next year because it seems to be a lot less work 🙂
i just discovered the steamer juicer and wish i’d known about it before my first batch of grape juice. makes all of this so much easier. it doesn’t can… .it just separates clear juice from the grapes.
Your article brings back memories of my childhood. I grew up with my Mom making homemade grape jelly and jam from Concord grapes vines that grew on our farm. We loved to eat the grapes right off the vine too. Thanks for sharing the health benefits and linking up to Real Food Fridays. Pinned & twitted.
Marla, Thanks for sharing warm memories of you mother making jelly and jam from the vines on your farm. We love grabbing a few grapes and eating fresh from the vine too.
This is such a great tutorial! I’ve been wanting to start growing some grapes at our place – I will keep this for when I have some! Thank you! (Visiting from #foodiefridays) 🙂
Kristen, It doesn’t take long for a grape vine to produce fruit. I hope you take the plunge and reap the rewards.
Yum! I love grape juice. My mom made some this year. So delicious!
We love it too and never have enough.
I love concord grape juice. I used to have a vine at my last house, but I hated processing it so much (too many spiders lived in those grapes) that I quit. BTW I tried not heating the lids one time during canning after the recommendation changed. Half the lids didn’t seal. So now I heat them again, but I just put them in a bowl and pour hot water over them about a minute before use. And I still heat my jars because I think they are less likely to break when the boiling jam/juice/whatever gets poured into them.
Daphne, I am lucky that I don’t have spiders in my vines (shutter). I don’t know why Jarden changed the rules. I still think that warming the lids helps the seal and placing hot foods into a cold jar could cause the glass to shatter. I will continue to heat my lids and boil my jars. It certainly can’t hurt.
Our version of Ball in Canada is Bernardin canning jars. Their recent method changes only involve the actual jar sterilization. Their new recommendation still involves heating both the jars and the lids – jars are placed in a pot with just barely simmering water & lids in heated in hot (but not boiling) water. To me, these recommendations make much more sense than not heating either the jar or the lid for the very reasons you just stated.
Margaret, Bernardin’s updated method makes more sense to me too.