Turkey Stock Recipe Plus Canning Instructions
This post may contain affiliate links, which means that I may receive a commission if you make a purchase using these links. As an Amazon Associate I earn from qualifying purchases.
Make use of the whole Thanksgiving turkey by turning the bones into a delicious rich turkey stock that is perfect for gravy, soup, or stew. Learn how to make turkey stock to store in your freezer, or pressure can it for shelf-stable jars.
So many people throw away the leftover turkey carcass after the Thanksgiving or holiday meal. This is such a tragedy because they are missing out. Those turkey bones are filled with nutrients and lots of flavor.
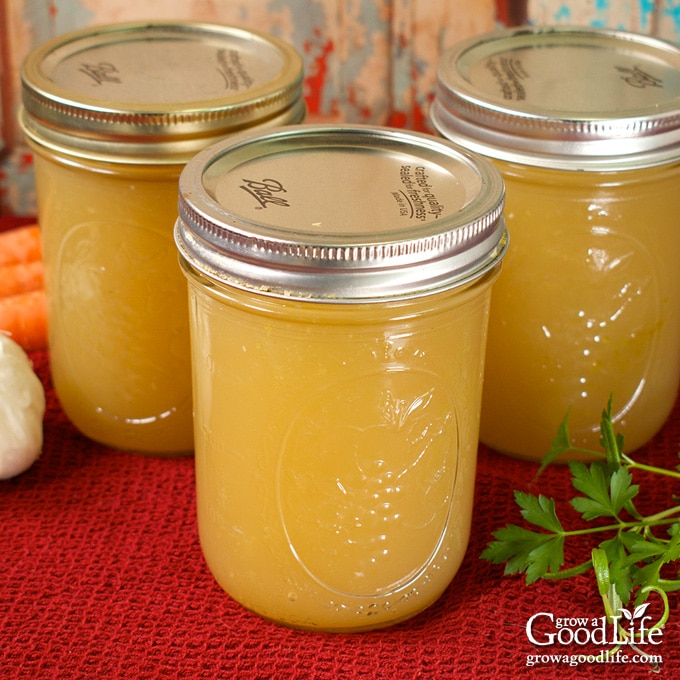
We don’t waste much in this household. Throughout the year, I save all my vegetable trimmings in zipper bags in the freezer. Tossed into these bags are the ends of garlic, pieces of onion, small carrots, celery greens and stalks, and broccoli stems. I use these vegetables to add flavor to our homemade stocks and broths.
During winter, I often have a pot of stock simmering on the wood stove that heats our home. I like to keep plenty of chicken, beef, vegetable, and turkey stock on hand for winter soups and stews. Once you start making your own homemade stocks, you will find that they taste so much better than store bought. You have full control over the ingredients and can eliminate the extra additives and sodium found in store-bought stocks.
How to Make Turkey Stock
Making stock is not difficult. It just takes a little time, and you will be rewarded with a tasty stock that you can stash in your freezer, or pressure can to use in your favorite recipes.
Stocks and broths are made by combining leftover bones with vegetables, herbs, spices, and simmered slowly to extract lots of flavor.
The key to making a deep flavored stock is to start with a roasted turkey. After removing the meat, use the leftover turkey carcass to make turkey stock. Roast the bones and vegetables in the oven, add everything into the stockpot, fill with water, and simmer slowly into a tasty stock. This will result in a rich flavored, savory turkey broth with a nice depth of flavor.
Steps to Making and Canning Turkey Stock
Plan on at least a two-day process to make and preserve turkey stock. First, the stock is made and allowed to simmer on the stove for hours to infuse flavor and extract gelatin from the bones. Then, the stock is strained and refrigerated overnight so the fat separates and rises to the top for easy removal. Finally, can the stock on day two.
You will need to use a pressure canner to can turkey stock. There are no safe options for canning stock or broth in a boiling water canner. If you don’t have a pressure canner, you can freeze the stock in freezer containers or freezer bags instead. I have included tips below.
If you are new to canning or need a refresher, it may be helpful to review this article on pressure canning at the National Center for Home Food Preservation website. This is a safe caning recipe from both the NCFHP website and the Ball Blue Book Guide to Preserving. You will find the full, detailed recipe below, but here are the steps to making and canning turkey stock.
Step 1: Separate the Meat from the Bones
After roasting your turkey, let it cool briefly until you can handle the meat without burning your hands, about 30 to 45 minutes.
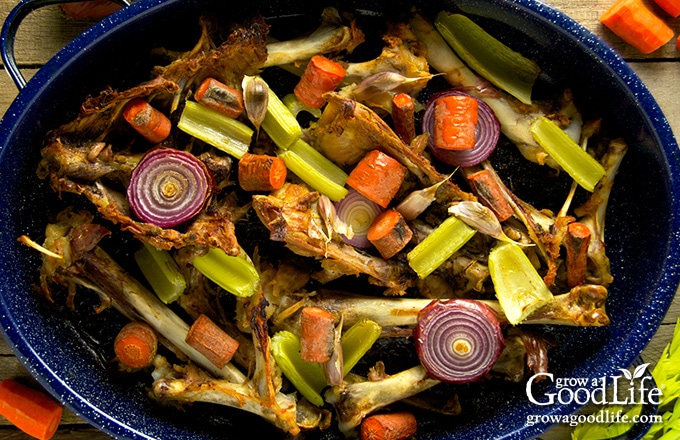
Remove all the usable turkey meat from the carcass and refrigerate it. Break apart the bones, and layer in a large roasting pan. I like to use the cover of my turkey roaster since it is already dirty. Scatter the chopped vegetables on top of the bones.
Add the drippings, vegetables, skin, fat, and the rest of the remains from the bottom of the roasting pan to a large stockpot.
Step 2: Make the Stock
Roast the bones and vegetables in the oven until the bones brown. Use tongs to transfer the bones and roasted vegetables to the large stockpot.
Add 1 cup of water to the hot roasting pan to deglaze the pan. As the water steams, scrape the pan with a wooden spoon to release the flavor infused brown bits stuck to the bottom of the pan. Pour the liquid into the pot.
Add the herbs, black peppercorns, remaining water, and simmer on low for at least 2 hours to extract flavor from the bones.
Step 3: Strain and Chill to Separate the Fat
Let the stock cool, remove the larger bones, and strain the stock through a fine-mesh sieve into a large container. Discard the bones and solids. Let the stock cool, and then refrigerate overnight. Once the stock cools in the refrigerator, the fat will rise to the top.
Don’t let the stock cool at room temperature for more than 2 hours. To cool the stock quickly before refrigerating, place the container in an ice-water bath. Change the water as needed to keep it cold, and let the stock cool until it is lukewarm. Then dry the container and place in the refrigerator overnight.
Step 4: Prepare the Canning Gear
The next day, gather your canning equipment, prepare the jars, set up the pressure canner, and organize your work area.
To can the turkey stock, you will need:
- Pressure canner with canning rack
- 8 pint sized canning jars, or 4 quart sized jars
- Canning lids and bands (new lids for each jar, bands can be reused)
- Canning tools: jar lifter, canning ladle, funnel, and bubble popper
- Plus basic kitchen supplies such as a large sauce pot and clean kitchen towels.
Wash the canning jars, lids, bands, and canning tools in hot soapy water, and rinse well. Set the lids and bands aside to air dry until you are ready to use them.
Place the pressure canner on the stove, and insert the canning rack. Add water per your pressure canner manufacturer’s instructions: Presto is 3 quarts, Mirro is 2 quarts, and All American is 2 to 3 inches.
Fill the jars about halfway with hot water, and then place them on the rack in the canner. Bring the canner to a simmer for 10 minutes (180˚F). Keep warm until you are ready to fill them.
Step 5: Prepare the Stock
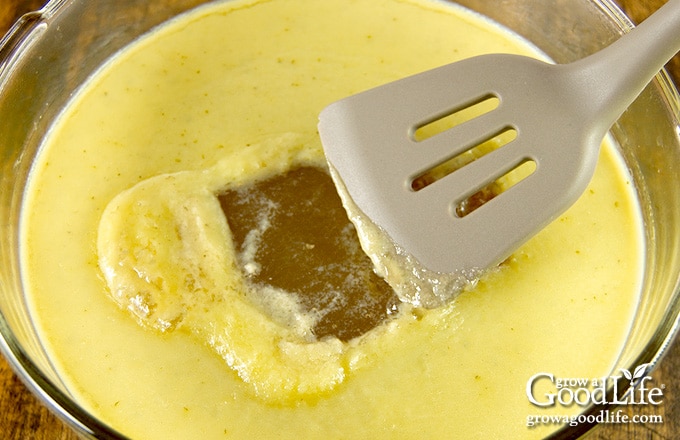
Remove the stock from the refrigerator. Slide a thin, flat spatula across the chilled stock to remove the fat layer. Removing the fat is beneficial for several reasons, not only will your broth be clearer and contain less fat, but there will be a reduced chance of the thick fat interfering with the seal as the jar is processed in the canner.
Add the stock to a large stockpot. Bring the pot to a boil over medium-high heat.
Step 6: Can the Turkey Stock
Lay a dry towel on the counter. Use your jar lifter to remove a jar from the canner. Pour out the water (save it for washing dishes), and place the jar on the towel. Keep the remaining jars in the canner, so they stay hot.
Place the canning funnel on the jar, and fill the jar with hot stock with the canning ladle. Leave a 1-inch headspace.
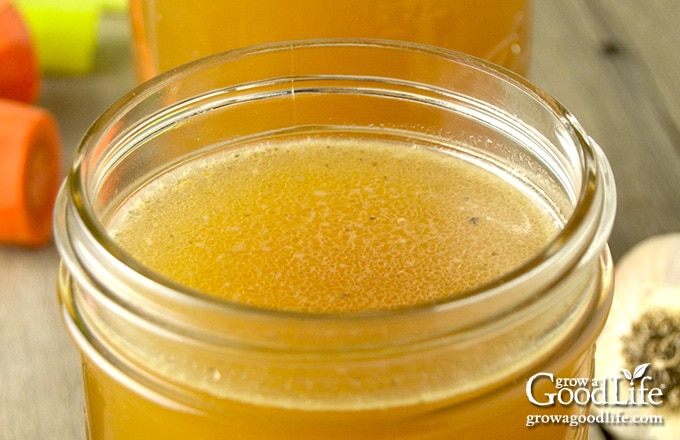
Run the bubble popper through the jar to release trapped air bubbles. Wipe the rim of the jar with a damp towel to remove any residue. Center a lid on the jar, place the band over the lid, and screw it on until fingertip tight. Immediately place the jar back into the canner, and repeat with the rest of the jars.
Bring the canner to a boil over medium-high heat. Follow the directions for your pressure canner and process the jars for the times indicated in the recipe below.
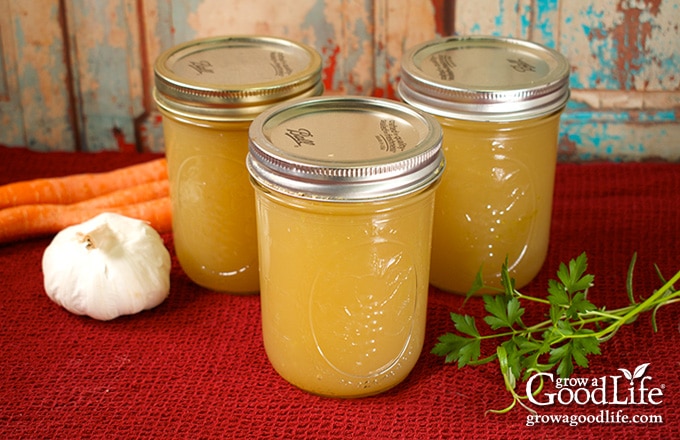
When the processing time is complete, turn off the heat and let the canner cool naturally, remove the jars, and let them cool completely. Date, label, and store in a cool location for 12 to 18 months.
How to Freeze Turkey Stock
Think about how you will use your turkey stock, and divide it up into usable portion sizes before freezing. If your primary use is for making soups, use larger containers. If you only need a small portion for cooking, consider freezing in muffin tins or ice cube trays first, and then popping them out and storing in freezer bags. Later, you can grab cubes as you need for meal prep.
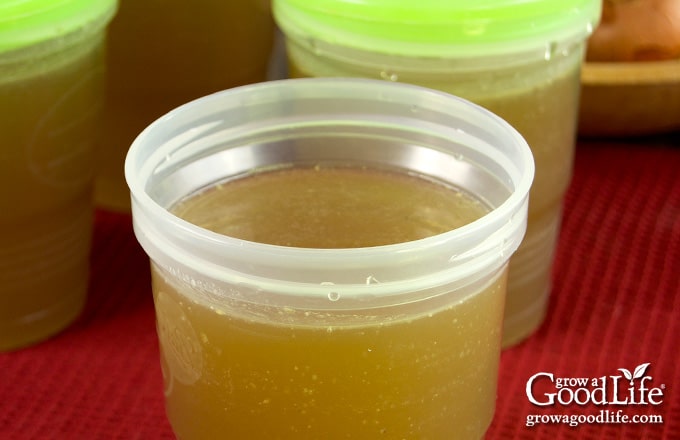
To freeze the turkey stock, make the stock as described in the recipe, chill in the refrigerator overnight so the fat can separate, scrape off the fat the following day, and divide into the freezer containers of your choice. Don’t be alarmed if the stock has turned into jelly in the refrigerator. It’s completely natural, and is caused by the collagen in the bones. The stock will turn back into liquid when heated.
- Storage Containers: Stocks can be frozen in freezer storage containers. Divide the cooled stock into each container, and leave at least a 1-inch headspace to allow for the liquid to expand. Date, label, and stack the containers in the freezer for up to a year.
- Zip-top Freezer Bags: I like freezing stock in quart sized freezer bags because they take up less room in the freezer. Date and label the bags, and let the marker dry briefly before filling. Fill the bags with about 3 to 4 cups of stock, squeeze out the air, and seal. Lay the freezer bags flat on a baking sheet. You should be able to stack 3 or 4 on top of each other before it gets wobbly. Place the baking sheet in the freezer until frozen solid. Once the bags are frozen, they can be stored upright in trays. Use within 12 months for the best flavor.
- Ice Cube Trays: A silicone ice cube tray is handy for dividing the turkey stock into cubes and freezing. Fill the tray with the stock, and place into the freezer until frozen. Once frozen, pop the cubes out and store in a freezer bag for up to a year.
Ways to Use Turkey Stock
This homemade turkey stock is the backbone to turkey gravy, turkey stuffing, and as leftover turkey noodle soup. Use turkey stock instead of water to add extra flavor when making rice, or cooking almost anything in your Instant Pot. You can also use turkey stock in your recipes the same way you would chicken stock, such as in sauces, poaching, and braising vegetables.
Need a Quick Turkey Stock for the Holiday Meal?
Make turkey stock ahead of time and freeze it. Grab a package of turkey legs or turkey wings from the grocery store. Swap out the turkey for the bones, combine with vegetable scraps, poultry bones, herbs, and simmer it into a delicious homemade stock to add lots of turkey flavor to stuffing and making gravy.
Turkey Stock Recipe with Canning Instructions
Ingredients
- 1 turkey carcass (or substitute 2-3 turkey legs)
- 2 medium carrots roughly chopped
- 2 celery ribs roughly chopped
- 1 medium onion roughly chopped
- 2 cloves garlic crushed
- 2 bay leaves
- 2 teaspoons dried thyme (or 3-4 sprigs fresh thyme)
- 1 teaspoon dried parsley (or 2-3 sprigs of fresh parsley)
- 1/2 teaspoon dried rosemary (or 1-2 sprigs of fresh rosemary)
- 10 whole black peppercorns
- 4 quarts water or enough to cover
Instructions
To Make the Turkey Stock:
- Preheat the oven to 425˚F.
- Strip off all the usable meat from the carcass and refrigerate for later. Separate the wings, thighs, and legs from the carcass and use kitchen shears to cut the carcass into smaller pieces. Layer the bones in a large roasting pan.
- Add the carrots, celery, onion, and garlic to the pan. Roast in the preheated oven until the bones are brown, about 35 to 45 minutes. Toss about halfway through so everything browns evenly.
- Remove the pan from the oven and transfer the bones and vegetables to a large stockpot.
- Add 1 cup of water to the hot roasting pan to deglaze the pan. As the water steams, scrape the pan with a wooden spoon to release the flavor infused brown bits stuck to the bottom of the pan.
- Pour the liquid to the pot, add the bay leaves, parsley, rosemary, black peppercorns, and fill your pot with enough water to cover the bones by a couple of inches. Turn the heat to medium-high and bring the stock to a boil.
- Once the pot boils, reduce the heat to low and simmer the stock until flavorful, 2 to 12 hours. Stir occasionally and skim off any foam.
- Remove the larger bones from the stock using tongs. Strain the stock through a fine-mesh strainer into a large container. Discard the bones and solids. Let the stock cool for up to 2 hours, and then refrigerate overnight.
To Can the Turkey Stock:
- The following day, prepare your canning equipment by washing the jars, lids, bands, and canning tools in hot soapy water and rinsing thoroughly. Set the lids and bands aside until you are ready to use them.
- Place the jar rack into the pressure canner, and fill with water per your pressure canner manufacturer's instructions: Presto is 3 quarts, Mirro is 2 quarts, and All American is 2 to 3 inches.
- Fill the jars halfway with hot water, and then place them on the rack in the canner. Bring the canner to a simmer for 10 minutes (180˚F). Keep hot until you are ready to fill them.
- Remove the stock from the refrigerator and skim off the fat that has risen to the top. Return the stock to a large sauce pot and bring to a boil over medium-high heat.
- Spread a kitchen towel on the counter. Use your jar lifter to remove a jar from the canner. Pour out the water (save it for washing dishes), and place the jar on the towel. Keep the remaining jars in the canner, so they stay hot.
- Use the canning funnel and ladle and fill the jar with hot stock, leaving a 1-inch headspace at the top of the jar.
- Remove air bubbles with the bubble popper and wipe the rim. Center a lid on the jar, place the band over the lid, and screw it on until fingertip tight.
- Use your jar lifter to place the jar back on the rack in the canner, and repeat with the rest of the jars until the canner is filled, or you run out of stock. If you have leftovers, store in the refrigerator or freeze for longer.
- Place the lid on the canner and lock it. Leave the vent open, adjust the heat to medium-high, and bring the canner to a boil. Allow the pressure canner to vent steam for 10 minutes, then add the pressure weight.
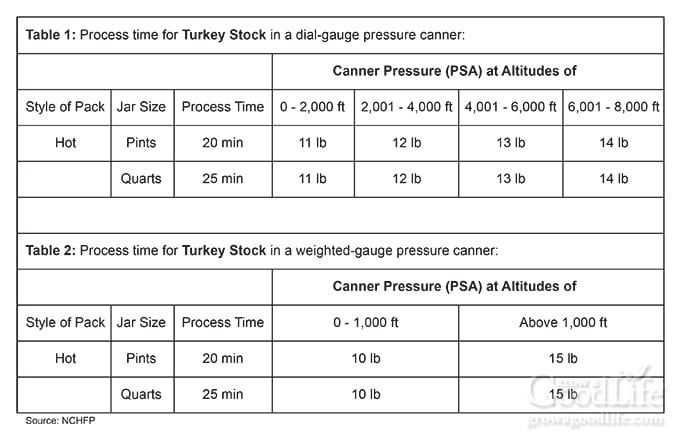
- Once the canner has reached the correct pressure (10 pounds for weighted gauge, and 11 pounds for dial gauge canners.), set a timer, and process pint jars for 20 minutes and quart jars for 25 minutes at altitudes of less than 1,000 ft.
- Adjust the heat as needed to maintain a steady pressure, and adjust altitude if necessary (see chart below).
- When processing time is complete, turn off the heat, and let the pressure canner cool down to 0 pressure on its own.
- Once the canner is depressurized, let the canner cool additional 10 minutes before removing the lid.
- When the canner has cooled down, spread a kitchen towel on the counter, unlock the cover, and remove it by tilting the lid away from you so that steam does not burn your face.
- Allow another 10 minutes for the jars to adjust to the change in pressure. If jars are still boiling, let them sit in the canner for another 5 minutes, or until the boiling stops.
- Use the jar lifter to lift jars carefully from canner and place on the towel. Keep the jars upright, and don't tighten bands or check the seals yet. Let the jars sit undisturbed for 12 to 24-hours to cool.
- After 12 to 24-hours, check to be sure jar lids have sealed by pushing on the center. The lid should not pop up. If the lid flexes up and down when the center is pressed, it did not seal. Refrigerate the jar and use up within a few days, or transfer to a freezer container and freeze for up to 6 months.
- Remove the ring bands, wash, label, date the jars, and store the jars in a cool, dark location (50 to 70 degrees F). Use within a year for the best quality. Yields about 8 pints or 4 quarts.
Notes
Nutrition
This article was originally published on November 22, 2016. It has been updated with more information, canning instructions, and new photos.
You May Also Like:
Good planning is key to a successful vegetable garden
Whether you are new to growing your own food or have been growing a vegetable garden for years, you will benefit from some planning each year. You will find everything you need to organize and plan your vegetable garden in my PDF eBook, Grow a Good Life Guide to Planning Your Vegetable Garden.


Beginner here.
“Slide a thin, flat spatula across the chilled stock to remove the fat layer.
And then what?
I’ve searched through several recipes now and if the fat is completely useless and I am to throw it out, why can’t literally no one include a short sentence stating this? I know there are people who will read this rolling their eyes saying “well duh!”, but how is a beginner to know this?
Decades ago people used fats and lard to cook with so I’m just wondering if tossing out the fat layer from stocks is wasteful or if the only use for it might be for homemade bird suet?
Any help would be greatly appreciated 🙂
Bethany, The important part is to remove the fat before canning to help reduce the amount of fat and help prevent it from interfering with the jars sealing properly. I discard the fat, but you can do whatever you want. I am sure there are plenty of uses you can research on the internet.
Didn’t have any celery so substituted 2 T. celery seed. Worked out great. Wonderful recipe 😉
Made your recipe yesterday and after placing in the fridge overnight it has turned into a jelly.consistency. Will I just need to place this back on the stove and add more water before making my soup?
Janette, The jelly consistency is a good thing. It shows that you have lots of collegen in your stock. When you are ready to make soup, scrape off the fat layer on top and add the stock to a saucepan. Add a bit of water if you wish, but the gel will melt as the stock is heated.
That’s good: you need to remove fat off top. Discard
Add pure water to your broth 1-2 cups. I use pink humor-salt.
Great job!
What happens if you don’t remove all the meat and instead leave some meat on the bones to make along with the stock?
Anita, You don’t have to remove all the meat. Including some meat will only add flavor to your stock.
Can you freeze the turkey broth in mason glass jars?
Tina, Yes, you can freeze the stock in mason jars. Be sure to seek out the Ball/Kerr wide-mouth jars with straight sides that say they are freezer safe. You’ll need to leave at least a 1-inch headspace to allow for expanding.
i have never made turkey broth and i ever so glad i tied this recipe the soup is the best i have made in the 40 plus years of making turkey soup!!! this is now my forever recipe. thank you
I really want to try this, but I don’t understand when you add the 4-6 quarts of water. In the oven? In the stickpot? Please respond soon. Thank you.
Priscilla, Add the 4 quarts of water, or enough to cover in step 6 under “To Make the Turkey Stock.”
Hi Can I freeze carrot , parsnip, sweet peelings etc to make a stew or soup
Jane, Yes, you can 🙂