Low Sugar Raspberry Jam Recipe
This post may contain affiliate links, which means that I may receive a commission if you make a purchase using these links. As an Amazon Associate I earn from qualifying purchases.
This low sugar raspberry jam recipe for canning uses Pomona’s Pectin so you can make a flavorful jam with less sugar and a reliable set. Includes step-by-step instructions.

Preserve the vibrant flavor of fresh raspberries with this low sugar raspberry jam recipe. Made with Pomona’s Universal Pectin, this canning recipe creates a beautifully set jam with far less sugar than traditional versions, so the natural sweet-tart taste of raspberries really shines.
Unlike standard pectin that requires large amounts of sugar to gel properly, Pomona’s uses a calcium-based system. This allows you to reduce the sugar while still achieving a reliable set and a bright, fresh flavor.
We started our raspberry patch with just a handful of bare-root canes over 15 years ago, and now it produces more berries than we can eat fresh. We freeze some for later, and the rest becomes this favorite homemade jam. It’s rich, vibrant, and not overly sweet. Just the way raspberry jam should taste.
In this guide, you’ll learn how to safely make and can low sugar raspberry jam, along with tips for adjusting sweetness, using frozen berries, and even making a seedless version.

Why This Low Sugar Raspberry Jam Recipe Works
Traditional raspberry jam recipes rely on large amounts of sugar to help the pectin set properly. If you try to reduce the sugar in those recipes, the jam often won’t gel as expected.
This low-sugar jam recipe works because it uses Pomona’s Universal Pectin, which is activated by calcium instead of sugar. This allows you to use less sugar while still creating a properly set, spreadable jam.
With this method, you can:
- Use less sugar without sacrificing texture.
- Adjust the sweetness to your taste.
- Let the natural raspberry flavor shine.
- Safely preserve the jam using a water bath canner.
This homemade raspberry jam recipe is adapted from Preserving with Pomona’s Pectin and follows tested guidelines for safe home canning when prepared as written.
About the Ingredients
Before you begin, it helps to understand how each ingredient works in this low sugar raspberry jam. From selecting ripe fruit to choosing the right sweetener, each component plays a role in creating a flavorful, properly set jam.

Raspberries
Fresh, ripe raspberries will give you the best flavor. Look for berries that are plump, deeply colored, and free from mold or damage. The sweetness and ripeness of the fruit will directly affect the taste of your finished jam.
You can use red, black, golden, or purple raspberries for this recipe. Each variety offers a slightly different flavor, but all work well for jam making.
Frozen raspberries can also be used. Measure them while still frozen, then thaw them in the refrigerator overnight and include any liquid released.
Pomona’s Universal Pectin
This recipe uses Pomona’s Universal Pectin, which is different from traditional boxed pectin like Sure-Jell.
Instead of relying on sugar to form a gel, Pomona’s uses a calcium-based system. This allows you to make jam with less sugar while still achieving a reliable set.
Because of this, you have more flexibility with sweetness, allowing you to create a jam that highlights the natural flavor of the raspberries rather than overwhelming it with sugar.
Sweeteners
One of the benefits of using Pomona’s pectin is the flexibility it provides with sweeteners. This recipe uses 1 cup of sugar for a balanced flavor, but you can adjust the sweetness to suit your taste.
- Use up to 2 cups of sugar for a sweeter jam.
- Substitute 1/2 to 1 cup of mild honey for a honey-sweetened version.
- Try other liquid sweeteners, such as maple syrup or agave, for a different flavor.
After adding the pectin, taste the mixture and adjust the sweetness if needed. If you add more sweetener, return the jam to a boil and stir until fully dissolved.
Lemon Juice
Lemon juice is optional in this recipe, but recommended. It brightens the flavor and helps preserve the vibrant color of the jam.
You can use either fresh or bottled lemon juice. For additional flavor, a small amount of lemon zest can also be added.
How to Make Raspberry Jam
If you’re new to canning or need a refresher, see my step-by-step Water Bath Canning for Beginners guide to learn the process from start to finish.
For extra help staying organized on canning day, download my free Home Canning Checklist. It includes a simple checklist, safety notes, and space to record your batches.
Grab your Free copy
Home Canning Checklists
You’ll find the full printable recipe at the end of this post, but below are the step-by-step instructions for making and safely canning raspberry jam
Step 1: Gather Your Kitchen Gear
Before you begin, take a moment to gather the following essential items:
- A water bath canner with a canning rack
- 5 half-pint canning jars
- Canning lids and bands (lids should be new, while bands can be reused)
- Canning tools: jar lifter, funnel, and bubble popper
- Canning ladle
- A small clear jar with a lid for the calcium water mixture
- Basic kitchen supplies: a large pot (6 to 8 quarts), prep bowls, colander, measuring cups and spoons, a potato masher, a large spoon, and plenty of clean kitchen towels.
Step 2: Prepare the Canning Equipment
Wash jars, lids, screw bands, and canning tools thoroughly with warm, soapy water. Check over the jars carefully and remove any cracked, scratched, or nicks in the rims. Rinse everything well and set aside to dry.
Place the water bath canner on a large burner of your stove. Add the canning rack to the bottom, then arrange the clean jars upright on the rack.
Fill the pot with water so that the jars are fully submerged. Heat the canner to a simmer at around 180˚F (82˚C), and warm the jars for at least 10 minutes. Keep the jars warm until you’re ready to fill them.
Step 3: Prepare the Ingredients
Inside the package of Pomona’s pectin, you will find two envelopes containing pectin and calcium powder. Follow the steps below to mix the sweetener with sugar, make the calcium water, and prepare the raspberries:
Mix the Pectin and Sweetener
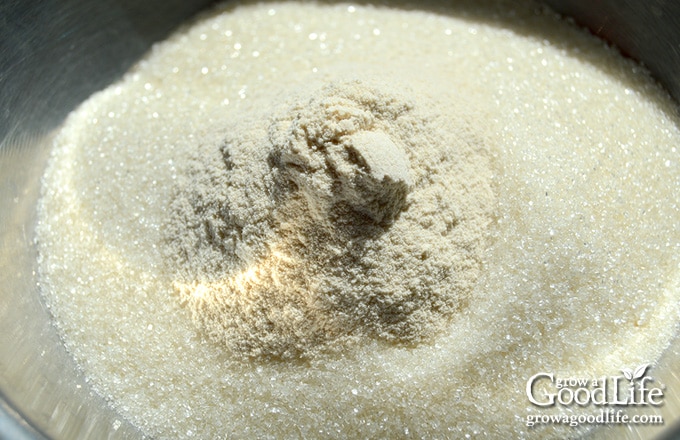
To prepare the pectin, add the sugar, or preferred sweetener, to a small bowl. Measure 2 teaspoons of the pectin powder, add it to the sugar, and stir well to ensure it is evenly distributed and thoroughly mixed with the sweetener. Reserve the remaining pectin for future recipes.
Make the Calcium Water
Add 1/2 cup of water to a clean jar with a secure lid. Then, add 1/2 teaspoon of calcium powder to the jar. Secure the cover tightly on the jar and shake it vigorously.
You will only need 2 teaspoons of calcium water for this recipe. Store the remaining calcium water in the fridge for future use in making other jams and jellies. Be sure to label the jar for easy identification.
Prepare the Raspberries
Remove any stems and rinse the raspberries under clean running water. Use a potato masher or a fork to gently crush the raspberries to release their juices. You can leave some berries partially intact for a chunkier texture or mash them thoroughly for a smoother consistency. Measure 4 cups of the mashed raspberries.
For a Seedless Raspberry Jam:
To make raspberry jam without seeds, you can strain the fruit to remove the seeds. First, place the raspberries in a saucepan and heat over low while crushing them using a potato masher or a fork until they become a pulpy consistency.
Then, pour the crushed raspberries into a fine-mesh sieve or a strainer set over a bowl. Use the back of a spoon to press the pulp against the sieve, extracting the pulp and juice while leaving the seeds behind. Continue pressing and scraping until you’ve extracted as much liquid as possible, and only the seeds remain in the sieve. Next, measure 4 cups of the seedless raspberry pulp for this recipe.
Step 4: Make the Jam
In a medium saucepan, combine 4 cups of mashed raspberries, along with lemon juice (if using), and 2 teaspoons of calcium water. Mix well, and bring the mixture to a boil over medium-high heat.
Once the mixture is boiling, add the sugar/pectin mixture to the pot. Stir vigorously until the sugar and pectin are completely dissolved. Continue stirring until the jam returns to a full boil, which usually takes about 1 to 2 minutes.
As soon as the jam reaches a full boil, remove the saucepan from the heat to prevent overcooking, skim off any foam, and fill your warm jars with hot jam.
Step 5: Fill the Jars
Prepare your workspace by spreading a dry kitchen towel on the counter. With the help of a jar lifter, carefully remove a jar from the canner, allowing the hot water to drain back into the pot. Place the jar on the towel. Keep the other jars in the canner to stay warm.
Fill the jar with raspberry jam using a canning funnel and ladle, leaving approximately 1/4-inch of headspace at the top. This space allows for proper expansion during the canning process.
Run a bubble popper through the jar to release any trapped air bubbles. Take a damp towel and wipe the rim of the jar, ensuring it is clean and free from any residue. A clean rim promotes a secure seal between the lid and the jar.
Center a lid on top of the jar, ensuring it sits flat and aligned. Place a band over the cover and tighten it firmly until it is fingertip-tight. Avoid over tightening, as it may block the escape of air during canning.
Return the filled jar to the canner and repeat the same process with the remaining jars, filling them one by one.
Step 6: Process the Jars in the Water Bath Canner
Once all the jars are filled and back in the canner, adjust the water level to cover them by at least 2 inches.
Bring the canner to a full rolling boil over high heat. Once the canner reaches a vigorous boil, start the timer and process the jars for the recommended processing time specified in the recipe. Maintain a steady boil throughout the processing time to ensure proper heat distribution.
Step 7: Cool and Store
After the processing time is complete, turn off the heat and allow the jars to settle. Then, carefully remove the jars from the canner using the jar lifter and place them on a kitchen towel or cooling rack.
Keep the jars upright and avoid touching the lids or tightening the bands. Remember, it takes time for the jars to seal completely. Allow the jars to cool undisturbed for 12 to 24 hours, allowing the sealing process to take place.

Ways to Enjoy Raspberry Jam
Raspberry jam is versatile and can be used in various delicious ways. Here are some suggestions:
- Breakfast Topping: Spread raspberry jam on toast, biscuits, bagels, or English muffins for a delicious breakfast or snack.
- Yogurt Parfait: Layer raspberry jam with yogurt and granola to create a flavorful and healthy parfait.
- PB&J Sandwich: Use raspberry jam as the “J” in a classic peanut butter and jelly sandwich for a tasty twist.
- Swirl in Oatmeal: Add a dollop of raspberry jam to your bowl of oatmeal and swirl it in for a sweet and fruity flavor.
- Gift Idea: If you want to gift raspberry jam, you can package it in a decorative jar with a ribbon or personalized label. Consider pairing it with freshly baked scones, a loaf of homemade bread, or a gift basket of breakfast items. Presenting the jam as part of a breakfast or brunch-themed gift is a thoughtful and delicious gesture.
Frequently Asked Questions About Low Sugar Raspberry Jam
These are some of the most common questions about making and canning low sugar raspberry jam.
Low Sugar Raspberry Jam Recipe
Ingredients
- 8 cups whole raspberries
- 1 package Pomona's Universal Pectin
- 1 cup sugar
- 1/2 cup water
- 2 tablespoons lemon juice optional for flavor, freshly squeezed or bottled juice.
Instructions
Prepare the Canning Equipment:
- Thoroughly wash the canning tools, jars, and lids with hot soapy water. Rinse well and allow them to air dry on a clean kitchen towel.
- Place the jar rack in the water bath canner, arrange the jars on the rack, and add enough water to cover the jars.
- Bring the canner to a simmer (180˚F) over medium heat, warm the jars for at least 10 minutes, and then keep them warm until you are ready to fill them.
Prepare the Ingredients:
- Rinse the raspberries under cool running water, removing any stems. Mash the berries and measure 4 cups of mashed raspberries. Set aside.
- In a small bowl, combine the sugar (or honey) and 2 teaspoons of Pomona’s pectin powder. Mix well and set aside.
- Prepare your calcium water by combining 1/2 teaspoon calcium powder (from the small packet in the Pomona’s pectin box) with 1/2 cup water in a jar with a lid. Shake well to mix.
Make the Raspberry Jam:
- In a medium pot, combine the mashed raspberries, 2 teaspoons of the prepared calcium water, and lemon juice if using.
- Place the pot over medium-high heat and bring the mixture to a boil. Once it boils, add the sugar/pectin mixture and stir well to dissolve.
- Continue stirring until the jam returns to a full boil, about 1 to 2 minutes. Then, remove the pot from the heat, skim off any foam, and fill your warm jars with hot jam.
Fill the Jars:
- Spread a kitchen towel on the counter. Using a jar lifter, carefully remove a jar from the canner, allowing the water to drain back into the canner. Place the jar on the towel.
- Use a canning ladle and funnel to fill the jar with jam, leaving 1/4-inch headspace at the top.
- Run a bubble popper through the jar to release any air bubbles, then wipe the rim with a clean, damp towel to remove any sticky residue.
- Add the lid and screw the band on until it is fingertip tight.
- Place the filled jar back into the canner, and repeat this process with each jar.
Process the Jam in a Water Bath Canner:
- Once all the filled jars are in the canner, adjust the water level so it is at least 2 inches above the jar tops.
- Cover the canner and bring it to a vigorous boil over high heat. Once it boils vigorously, set a timer and process in a boiling-water canner for 10 minutes for altitudes below 1,000 feet. Adjust processing time according to your altitude if needed (See notes).
Cool and Store:
- After the processing time is complete, turn off the heat and allow the canner to cool down for about 5 minutes.
- Spread a dry kitchen towel on your work surface. Carefully remove the cover by tilting it away to avoid steam burns.
- Use the jar lifter to remove the jars from the canner and place them on the towel. Keep the jars upright, and don’t tighten bands or check the seals yet. Let sit undisturbed for 12 to 24 hours to cool.
- Check the jar lids after 12 to 24 hours to ensure they have sealed properly. Press the center of each lid; it should not pop up or flex.
- Refrigerate any jars that didn’t seal properly and consume their contents within 2 weeks.
- Remove the screw-on bands, wash the jars, and label them with the date and contents. Store the sealed jars in a cool, dark place.
- For optimal flavor, use the jam within 12 to 18 months. Once opened, refrigerate and consume within 2 weeks.
- Yield: About 4 to 5 half-pint jars of jam.
Notes
Nutrition
Enjoy the Bright Flavor of Homemade Raspberry Jam
This low sugar raspberry jam is a simple way to preserve the fresh, vibrant flavor of raspberries without overwhelming sweetness. Using Pomona’s Universal Pectin makes it possible to create a beautifully set, shelf-stable jam while keeping the ingredients flexible and the flavor true to the fruit.
Whether you spread it on toast, swirl it into yogurt, or tuck a jar into a gift basket, this homemade jam is a delicious reminder of raspberry season.
If your kitchen is full of berries, there are plenty of other ways to preserve the harvest. Try freezing raspberries for later, or explore more small-batch jams and jellies to enjoy throughout the year.
With a little time now, you can fill your pantry with jars that capture the taste of summer to enjoy long after the season has passed.
