How to Grow Peas
This post may contain affiliate links, which means that I may receive a commission if you make a purchase using these links. As an Amazon Associate I earn from qualifying purchases.
Want to learn how to grow peas in your garden? Here are tips to get you started, from selecting the right variety and planting at the right time to harvesting your first crop. Learn how to grow peas with our complete growing guide.
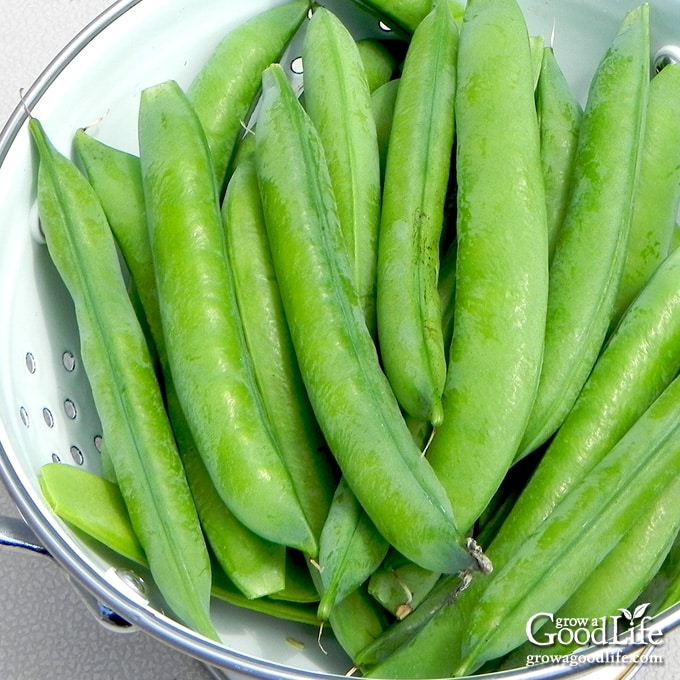
Peas are a delicious and nutritious addition to any vegetable garden, and growing your own is a fun and rewarding experience that can yield a bountiful harvest. Peas are easy to grow and have a short growing season so that you can enjoy the harvest quickly.
One of my favorite things to do is to pick a handful of pea pods and snack on them as I walk through the vegetable garden. Peas harvested fresh off the vine taste so much better than the ones found in the grocery store.
Peas come in many varieties, including shelling peas, snap peas, and snow peas. They can be eaten raw or cooked in a wide range of dishes, from salads and soups to stir-fries and pasta. Peas are also an excellent source of protein, fiber, and other essential nutrients, making them a healthy addition to any diet.
About Peas
Peas (Pisum sativum) are a cool-season crop that belongs to the legume family, which includes beans, and is grown for their edible pods or seeds. They are typically planted in early spring and can be harvested in late spring or early summer, depending on the variety and climate.
Peas have a long and fascinating history and have been a staple food crop in many cultures for centuries. Peas are believed to have originated in the Mediterranean and Near East regions, where they have been cultivated for thousands of years. The earliest evidence of pea cultivation dates back to around 7,000 to 8,000 years ago in what is now present-day Turkey, Syria, and Jordan.
In ancient Rome, peas were considered a luxury food and were often served at banquets and feasts. In the Middle Ages, peas were a common ingredient in stews and soups and were also used to make a popular dish called Pease Pudding. From there, peas were introduced to other parts of the world, including Europe, Asia, and eventually the Americas. In modern times, peas are grown and consumed worldwide, prized for their nutritional value, versatility, and delicious taste.
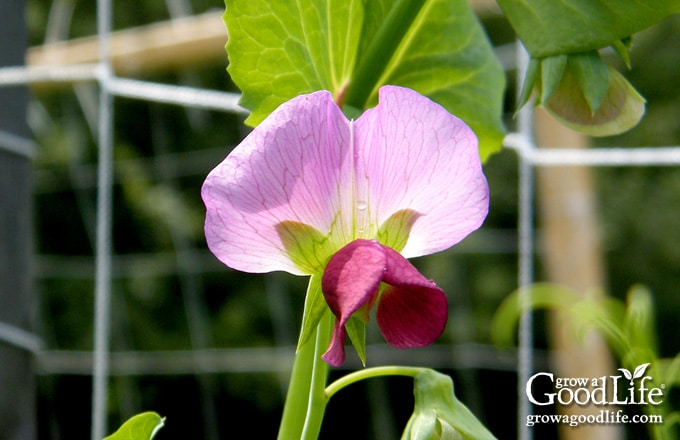
Types of Peas to Consider Growing
There are three main types of peas: shelling peas (also called garden peas), which are harvested for their mature seeds; snap peas, which are harvested when the pods are still tender and can be eaten whole; and snow peas, which are also harvested when the pods are still tender but are flat and edible.
Shelling Peas
Shelling peas, also known as English peas, garden peas, and sweet peas are the most common type of pea. They are harvested when the pods mature and the peas inside fully develop. The pods are then removed, and the peas inside are eaten either fresh or cooked.
Shelling pea varieties include: Green Arrow Shelling Peas, Laxton’s Progress #9 Shelling Peas, and Wando Shelling Peas.
Snap Peas
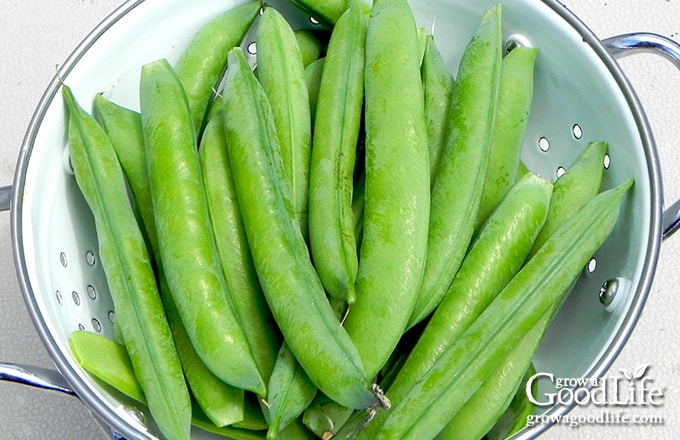
Snap peas, also known as sugar snap peas, are a newer variety of peas that are harvested when the pods are still young and tender. The entire pod, including the peas inside, can be eaten raw or cooked.
Types of snap peas include: Cascadia Snap Peas, Sugar Ann Snap Peas, Sugar Magnolia Snap Peas, and Sweet Gem Snap Peas.
Snow Peas
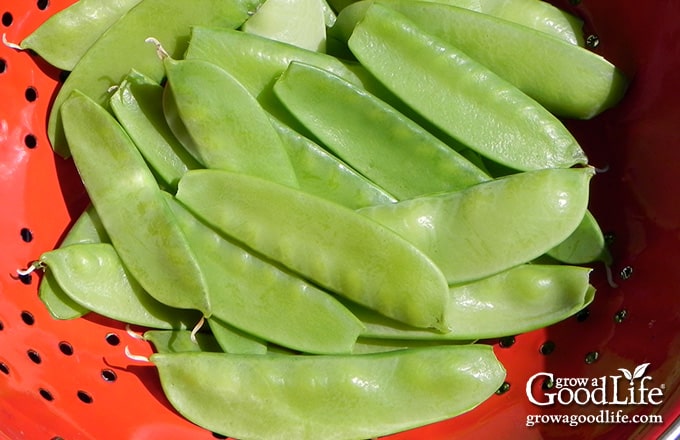
Snow peas, also known as Chinese pea pods, are harvested when the pods are flat, and the peas inside are still small and undeveloped. Like snap peas, the entire pod can be eaten raw or cooked. This is my favorite type to grow for eating fresh and stir-fried recipes.
Some snow pea varieties include: Avalanche Snow Pea, Blizzard Snow Pea, and Oregon Sugar Pod II Snow Pea.
All three types of peas can be grown in similar conditions. However, they have slightly different uses and taste profiles. For example, shelling peas have a sweeter taste and are typically cooked before being eaten, while snap and snow peas are milder in flavor and are often eaten raw in salads or as a snack.
Tips for Growing Peas
Peas are relatively easy to grow and can be a great addition to a vegetable garden. They can produce a bountiful harvest of delicious, nutritious peas with the right growing conditions. Here are tips for growing peas.
When to Grow Peas
Peas thrive in cooler temperatures and can withstand light frosts, making them an ideal crop for the spring and fall growing seasons. With this in mind, when planting in spring, sow your pea seeds early enough, so they have time to grow and mature before the weather becomes too warm.
Here in the north, planting peas around St. Patrick’s Day is common wisdom, but sometimes my snow-covered garden delays this. I have learned that sowing too early in wet and cold soil will only delay sprouting and may cause the seeds to rot.
Instead, direct sow peas in early spring as soon as the ground has warmed and the soil can be worked. This is typically done 2 to 4 weeks before your last expected frost date. Learn How to Develop a Seed Starting and Planting Schedule.
Peas can be planted in the fall for a winter crop in areas with mild winters. This is typically done in late summer or early fall, depending on the first frost date in your area.
The timing for sowing peas for a fall crop will depend on the climate and the specific variety of peas being grown. Look for types labeled as suitable for fall or winter harvests, and consider choosing shorter-season varieties to ensure that your peas have enough time to mature before the weather turns cold.
Generally, peas for a fall crop should be sown in mid to late summer, around 8 to 10 weeks before the first expected frost in your area. This will give the peas enough time to mature before the weather gets too cold.
How to Prepare the Growing Bed
Peas will do best in a full sun location, so choose a spot that receives at least 6 hours of sunlight daily. However, in warmer climates, peas may benefit from shade during the hottest day.
Peas grow best in well-drained soil that is rich in organic matter. A pH range of 6.0 to 7.5 is ideal. The soil should be loose and friable to allow for good root development. Peas will not do well in heavy clay soils that tend to stay wet.
Prepare the garden bed as soon as the ground can be worked by clearing the bed of any weeds or leftover plant debris. Next, enrich the soil by adding about 2 inches of well-aged compost and working it into a depth of 6 to 8 inches.
If the weather has been dry, watering the bed well the day before planting is especially important to ensure the soil is moist.
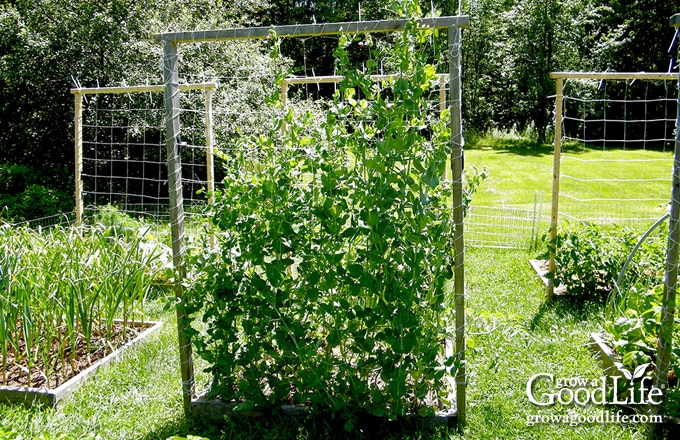
Peas are climbers and will do best if given a trellis, fence, or another vertical support system. Set up your poles or trellis supports before planting to avoid damaging the roots and ensure optimal growth.
By preparing the garden bed properly, you can give your pea seeds the best environment to sprout quickly and grow into healthy plants.
How to Direct Sow Seeds
The optimum soil temperature for pea germination is between 40 to 70˚F. If the soil is below 40˚F, the seeds will take longer to germinate and may rot before sprouting. However, if the soil temperature is too high, germination stops.
After preparing your garden bed:
- Poke holes about 1 to 2 inches deep and about 3 inches apart.
- Drop a seed in each hole and cover it with soil.
- If you are planting in rows, space the rows about 18 to 24 inches apart. For square-foot gardens, plant 8 peas per square.
- Water the soil gently after planting to remove air pockets and ensure good seed-to-soil contact.
- Keep the soil evenly moist until the seeds germinate, in approximately 7 to 14 days.
Should you soak pea seeds before planting?
Soaking pea seeds before planting is not necessary, but it can help speed up the germination process and lead to more even and consistent germination. When you soak pea seeds, you are essentially jump-starting the germination process by softening the seed coat and allowing moisture to penetrate more easily.
To soak pea seeds, simply place them in a container of water and let them soak for up to 24 hours before planting. Once the seeds have soaked, drain off the excess water and plant them as described above.
While soaking can be beneficial, it’s not essential, and there is a risk of over-soaking, which can cause the seeds to rot. If you choose to soak your pea seeds, monitor them carefully and plant them promptly after soaking to avoid any issues.
How to Care for the Plants
Once the seeds sprout and the pea seedlings begin to grow, you can help the vines climb up a trellis by gently guiding their curly tendrils to the support, and then they will grab on all by themselves. Once they’ve got a good grip, they’ll start climbing on their own. Here are additional tips for caring for the plants:
Watering
Pea plants need consistent moisture to thrive, especially during flowering and pod formation. Water deeply once or twice a week, depending on the weather and soil conditions. Avoid overhead watering, as this can promote fungal diseases. Water at the base of the plants instead.
Mulching
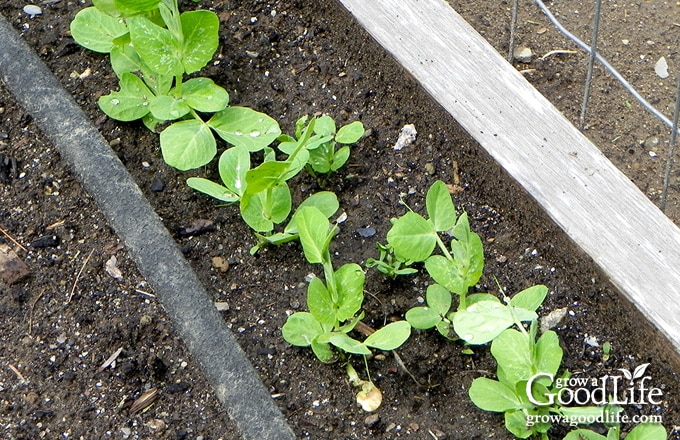
Mulch the pea plants to help retain moisture in the soil, keep the ground cool, and keep weeds down. Leave about 2 inches of bare ground around each seedling so you don’t smother the plants. Use a natural mulch like straw, grass clippings, or shredded leaves. You can learn more about using organic mulch in this article: How Organic Mulch Helps Your Garden.
Fertilizing
If you added finished compost at planting time, your peas are off to a good start. Peas are not heavy feeders, but if your soil is low in nutrients, your peas will benefit from additional fertilizer at planting time. Use a low-nitrogen organic fertilizer, such as Espoma Garden Tone, or side dress with additional compost when the plants bloom.
Weeding
Weed around your pea plants carefully by hand, so you don’t damage the roots. Instead, try pulling weeds after a good watering or rain. The moist soil will help the roots slide right out of the ground. You can learn more about natural weed control in the following article: Tips for Controlling Weeds in the Garden.
Pruning
Pea plants do not need much pruning, but you can remove the tips of the plants once they reach the top of the support structure. This will encourage the plants to branch out and produce more pods. The tender pea shoots are edible and can be added to soups or salads.
Dealing with Pests and Diseases
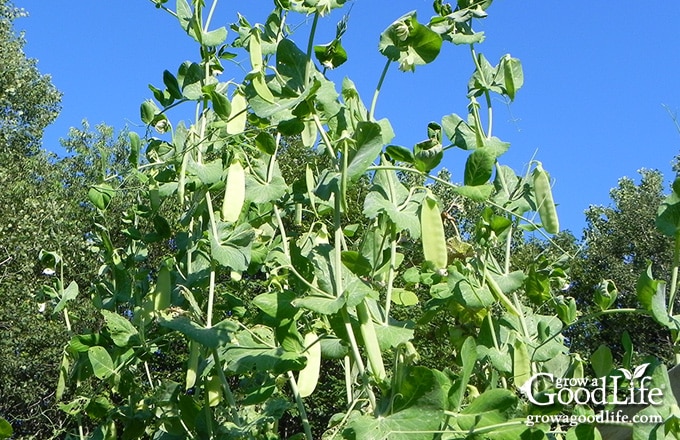
Peas are generally considered to be relatively pest and disease-resistant, but there are a few problems to be aware of. Here are some of the most common pests and diseases that can affect peas and some organic management ways to deal with them:
- Aphids: These small, green insects can be found on the stems and leaves of pea plants. They suck sap from the plant, which can cause stunted growth and yellowing leaves. To manage aphids, spray the plants with a strong stream of water to knock them off, or use an insecticidal soap or neem oil.
- Powdery mildew: This fungal disease can cause a white, powdery coating on the leaves and stems of pea plants. It can be caused by humid conditions and poor air circulation. To manage powdery mildew, prune affected leaves and stems and ensure good air circulation by properly spacing plants and pruning out dense foliage.
- Pea weevils: These small beetles can damage pea seeds and cause poor germination. To manage weevils, use crop rotation to avoid planting peas in the same spot every year and use insect netting to exclude the adults.
- Root rot: This fungal disease can cause yellowing and wilting of the leaves, as well as stunted growth and poor yield. It is often caused by overwatering or poorly drained soil. To manage root rot, ensure good drainage, and avoid overwatering. Adding compost or other organic matter to the soil can also help improve drainage.
- Cutworms: These caterpillars can cut off the stems of young pea plants at ground level, causing them to die. To manage cutworms, place a collar made of cardboard or paper around the base of the plant to prevent the caterpillars from reaching it.
Overall, the best way to manage pests and diseases is to practice good cultural practices, such as crop rotation, proper watering, and spacing of plants, and to encourage beneficial insects and other predators that can help control pests naturally.
Tips for Growing Peas in Containers
Growing peas in pots is a great option for gardeners who don’t have much space or want to grow peas on a balcony or patio. Here are some tips for growing peas in containers:
- Choose the right container: Peas need a container at least 10 to 12 inches deep and wide enough to accommodate the root system. You can use plastic, ceramic, or terra cotta pots as long as they have drainage holes in the bottom.
- Use the right soil: Use a high-quality potting mix rich in organic matter and good drainage.
- Planting: Plant peas in early spring, just like you would in the ground. Sow the seeds about 1 inch deep, and space them 2 to 3 inches apart.
- Watering: Peas in containers need more frequent watering than those in the ground. Keep the soil evenly moist but not soggy. Check the soil moisture regularly and water when the top inch of the soil feels dry.
- Supporting: Peas grown in containers need support just like those grown in the ground. Provide a trellis, stake, or other support structure for the plants to climb. You can also use a teepee made from bamboo poles or other materials. If you are tight on space, consider growing dwarf varieties that grow only around 2 feet tall.
- Fertilizing: Peas in containers may need regular fertilization since the potting mix’s nutrients can be depleted quickly. Use a slow-release, low-nitrogen organic fertilizer, such as Espoma Garden Tone, or side dress with additional compost when the plants bloom.
By following these tips for growing peas in containers, you can enjoy a successful harvest of fresh, delicious peas even if you don’t have a traditional garden space. You can learn more about growing crops in pots in this article: How to Grow Vegetables in Containers.
When and How to Harvest
Peas should be harvested at the right time to ensure the best flavor and texture. The timing will depend on the variety and the type of peas you are growing. Most varieties will be ready to harvest in 40 to 60 days. Go ahead and pick the pods as they grow and eat them so you will know the pod’s taste and texture throughout the growing stage.
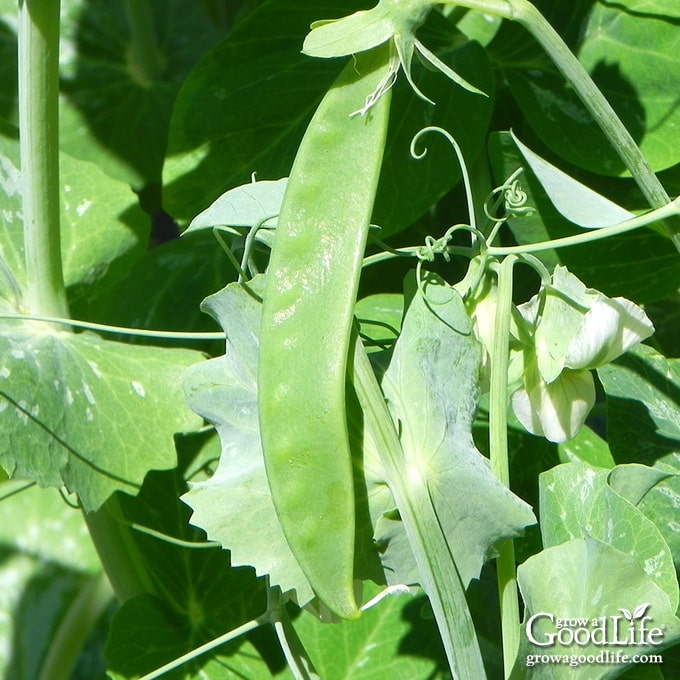
Harvest snow peas when the pods are flat, and the peas inside are undeveloped. Pick snap peas when the seeds are small and tender. Shelling peas should be harvested when the pods are full and plump.
Once the pods begin maturing, pea plants will continue to produce new pods as long as the weather is cool and the plants are healthy. Harvest pods every few days to keep the plants producing. If you don’t harvest regularly, the plants will focus on developing the seeds rather than growing more pods.
To harvest, hold the stem of the pea pod with one hand and gently pull the pod off the plant with the other hand. Be careful not to damage the plant or the neighboring pods. You can also use scissors or pruning shears if the pods are difficult to remove.
Peas should be eaten as soon as possible after harvesting for the best flavor and nutrition. If you have more than you can eat at once, store them in the refrigerator for up to a week. Place the pods in a plastic bag with a damp paper towel to help retain moisture, and keep them in the refrigerator crisper drawer.
To shell peas: Start by snapping off the stem end, then use your fingers to gently pry open the seam of the pod and use your thumb to push the peas out from one end to the other. Continue shelling peas until you have the desired amount. You can then rinse the peas in cold water to remove any debris or dirt.
Ways to Preserve Peas
If you have an abundance of fresh peas, you may want to preserve them for later use. Here are some methods for preserving peas:
Freezing Peas
Freezing is the easiest way to preserve peas. Select fresh, bright green, healthy pods. Wash them well under clean running water. Keep snap and snow peas whole and hull shelling peas.
Then, blanch the peas in boiling water for 1 to 2 minutes and immediately transfer them to an ice water bath to stop the cooking process. Once cooled, drain the peas, let them air dry, and transfer them to freezer bags or containers and freeze. Remove as much air as possible from the bags or containers before sealing them. Frozen peas can be stored for up to 6 months.
Canning Peas
If you have a lot of shelled peas to preserve, pressure canning is another way to preserve them. You will need about 2 1/4 pounds of fresh-shelled peas per pint-sized jar. Follow a tested recipe for pressure canning peas to ensure safety and quality, such as this NCHFP recipe: Canning Shelled Peas.
—
Growing peas is a rewarding and fun activity that can give you a bountiful harvest of delicious and nutritious peas. Whether you’re a seasoned gardener or just starting, planting, caring for, and harvesting peas can be a fulfilling experience.
I hope by following the steps outlined in this article, you can learn how to grow peas successfully in your own vegetable garden. From choosing the right variety of peas to planting peas at the right time, with a bit of know-how, you can enjoy a rich harvest of snow peas, snap peas, and shelling peas. So why not give it a try and grow your own peas today?
Good planning is key to a successful vegetable garden
Whether you are new to growing your own food or have been growing a vegetable garden for years, you will benefit from some planning each year. You will find everything you need to organize and plan your vegetable garden in my PDF eBook, Grow a Good Life Guide to Planning Your Vegetable Garden.

